My goodness, I apologize for showing up here in the evening. I got side-walloped this morning and had to take care of a little furnace problem. Brrrrr.
In any case, with Christmas a mere two weeks from Wednesday, and with other Wonderful Things to address here on Needle ‘n Thread in that short time, we need to push ahead on the Christmas Mitten so that we finish on time. I didn’t want to delay this post another day, or we’d collide with Wednesday!
Brace yourselves! This is a long one. Tons of photos, lots to read – we’re finishing the Christmas Mitten today, so there’s a lot to cover!
Ok, let’s get on with it!
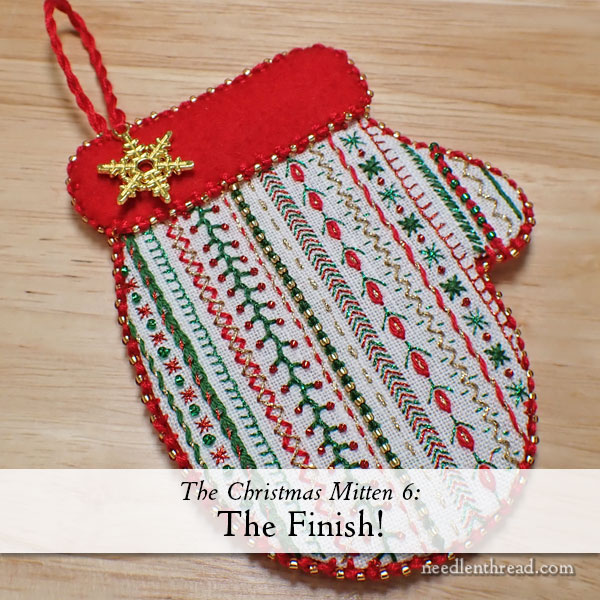
In this installment of The Christmas Mitten, we are picking up from part 5, where we cut and prepared all the pieces, so that we can start construction work.
At this point, then, you have all the pieces cut out: the embroidered linen, the two pieces of felt, the interfacing, and you’ve made the hanging cord.
If you’re just joining in with us, you can find all the stitch-along lessons for this project available here, in the Christmas Mitten Project Index. If you’d like a materials kit to make your own mitten, it’s available here.
If you’re a member of the Needle ‘n Thread Community on Patreon, you’ve already received all of this information in a handy-dandy printable PDF format, for easy downloading, saving, and printing.
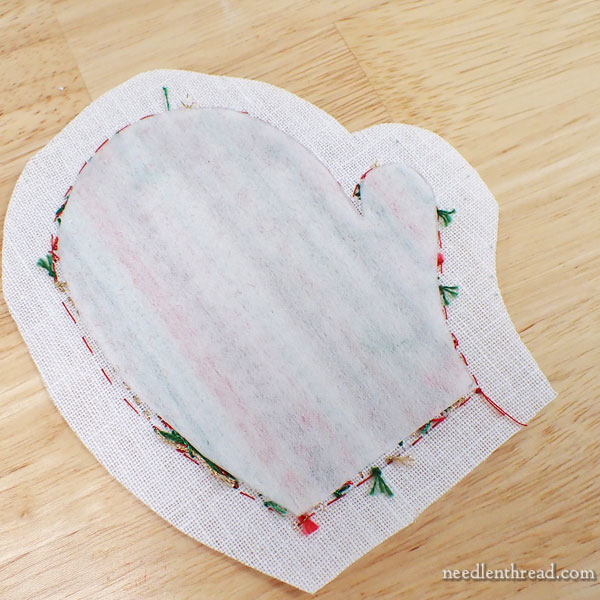
We’re going to start by basting the interfacing to the back of the embroidered linen.
The interfacing, which is cut from Pattern A, should fit right over the back of the embroidered area on the linen. You might see just a hair of embroidery around it, because we cut the interfacing just a tiny bit smaller than A, all around.
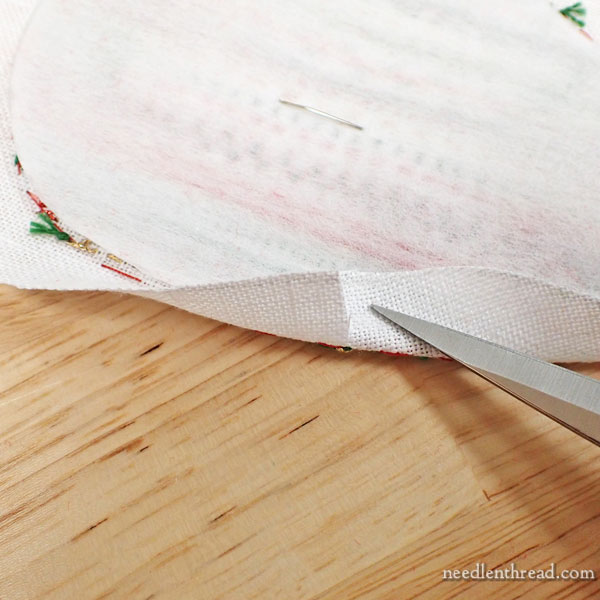
Prepare a piece of sewing thread and needle. Knot the end of the thread.
You’ll use this to baste the folded-over linen seam allowance onto the interfacing.
Carefully finger press the linen seam allowance over onto the interfacing. Go slowly, in small increments, and snip the linen to facilitate a smooth fold.
This means that you’ll make a cut into the linen, perpendicular to the design’s edge and towards the design edge. This cut should not reach the design edge. Stop within at least 1/8″ of the stitching. These snips will help you turn a nice, smooth edge.
The more curve there is, the closer together your snips into the linen will be. So, on the thumb, the snips will be closer together. On the straight side of the hand and on the round part of the hand, these snips won’t be as close.
It is important to take this slowly and to make the snips as you need them, after you’ve finger pressed and you’ve seen where you need to fold the edge in more to get a smooth edge. If you can’t fold a smooth edge, that’s where you need a snip.
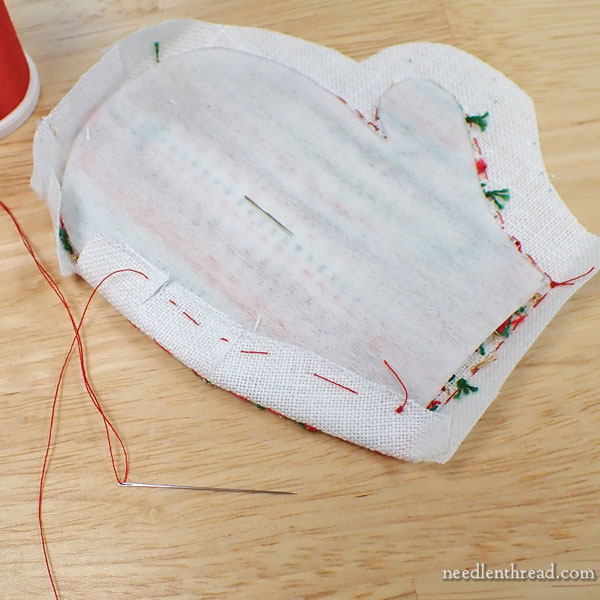
As you go, you’ll be basting the folded-down linen onto the interfacing. To do this, just scoop up a little bit of the interfacing and linen with each running stitch (basting stitch).
For this, you don’t want to go through to the front of the embroidery. You won’t be removing these basting stitches.
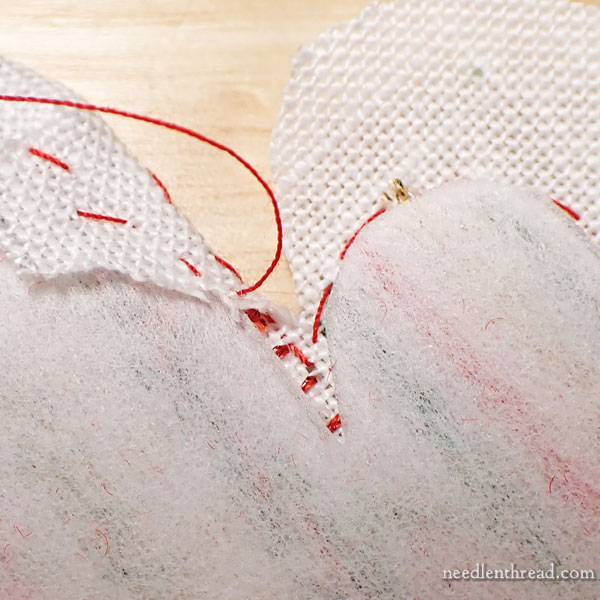
The trickiest part is when you get to the split between the thumb and the hand on the mitten.
Here, you won’t be finger pressing the linen over. You’ll trim the linen to a little more than 1/8″ around the design. When you do the edge stitching, you’ll be stitch over this to secure it and cover it up.
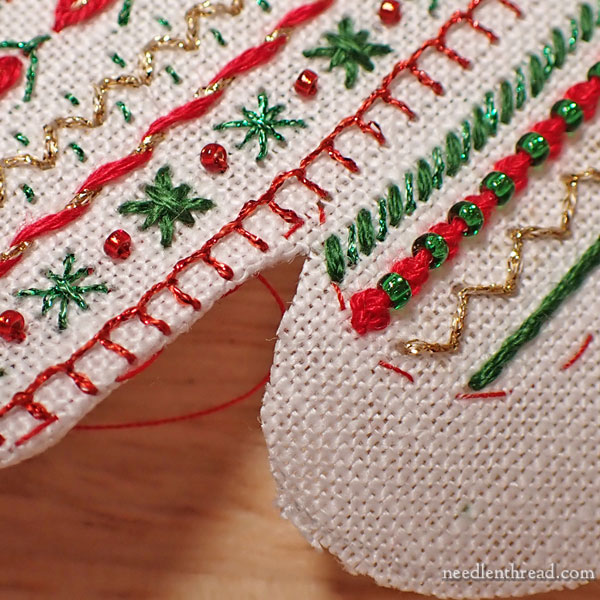
You can see the configuration of the trimming in that crevice in the photo above. Notice that it blends right back out with the 1/2″ seam allowance.
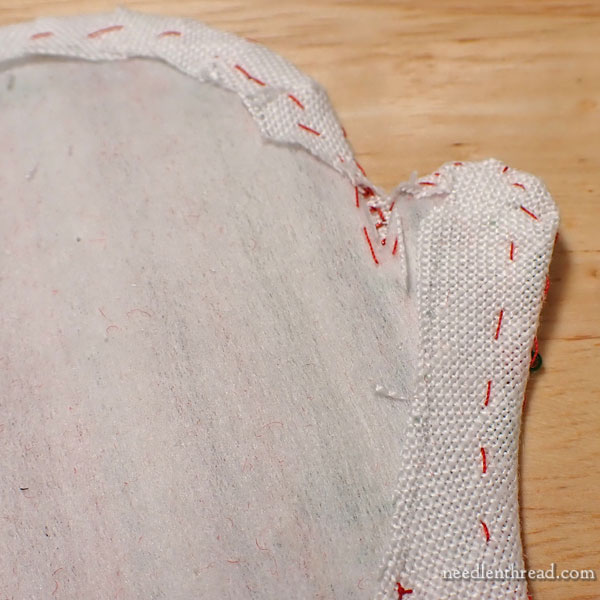
Finger press and fold down and baste as much as you can in that crevice, but the closer you are to the crevice, the less you’ll be able to fold the linen. Don’t worry about that – again, we’ll be covering that with the edge stitching and that will secure the area.
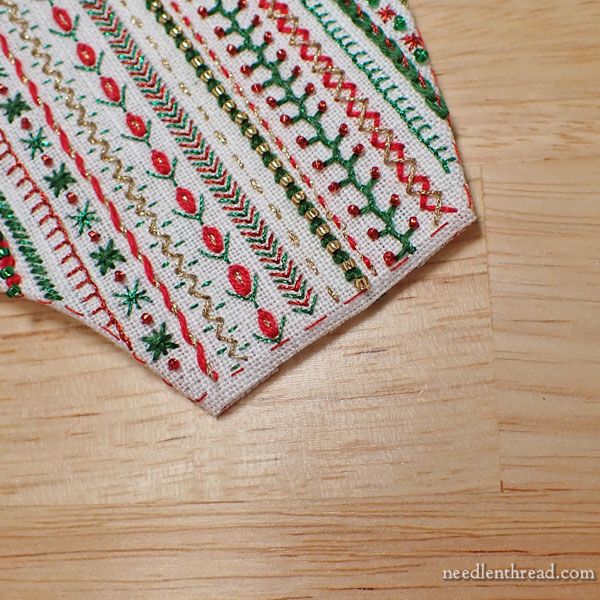
When you get to the bottom straight edge of the embroidered linen across the “cuff” area of the mitten (shown above), trim this down to about 1/8 – 3/16″. You won’t be turning this onto the interfacing. It will be covered by the felt cuff.
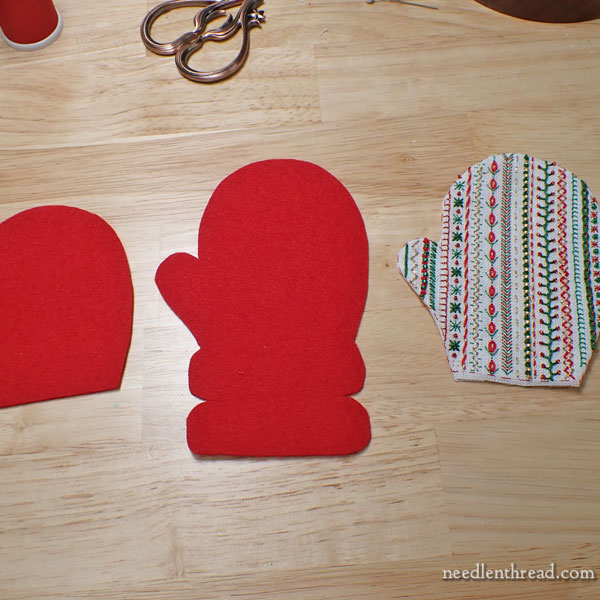
Now you have the linen piece prepared, with the interfacing sewn to the back and the edges turned smoothly. You have two pieces of cut felt, and you have your hanging cord.
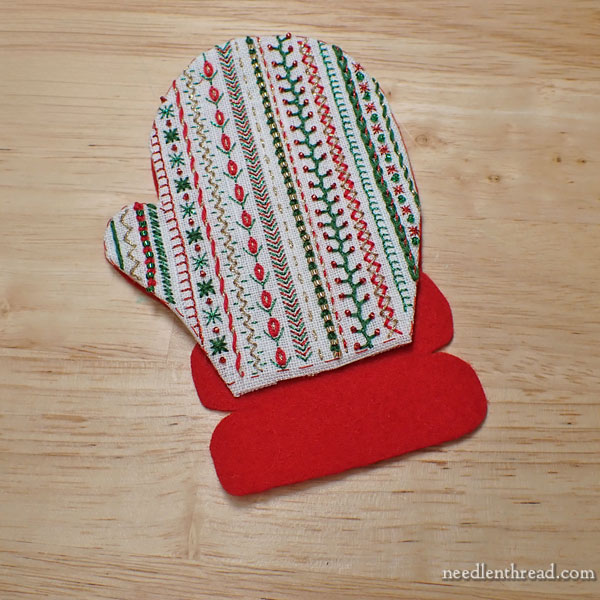
To stack them in order, stack the embroidered mitten on top of the cuff felt (Pattern B), and stack that on top of the Pocket Felt (Pattern C).
Line up the thumbs and the round edge of the hand.
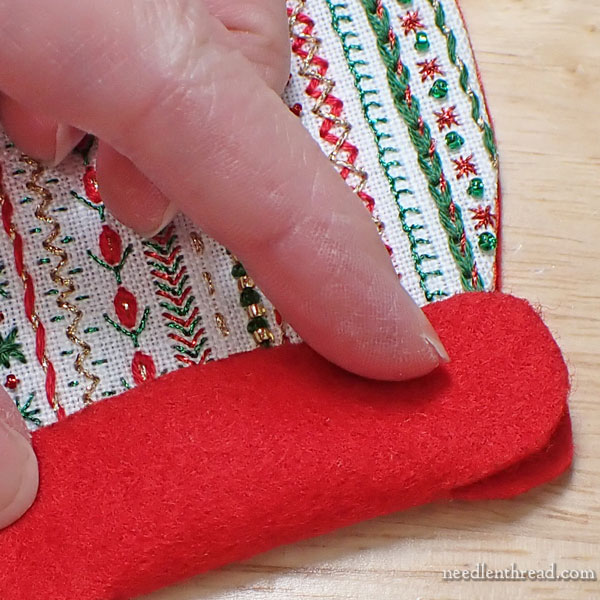
The cuff is formed on the ornament by folding the upper portion over the straight edge of the mitten, so that the pieces of the cuff align with each other, sandwiching the straight edge of the mitten between them.
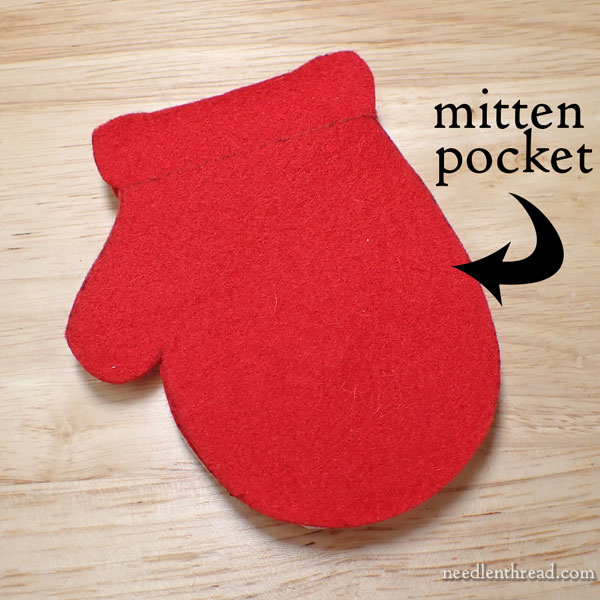
The mitten pocket (seen from the back, above) fits over the hand and thumb of the mitten, but not over the cuff.
Now that you see where everything aligns, let’s tidy things up and get them ready to sew.
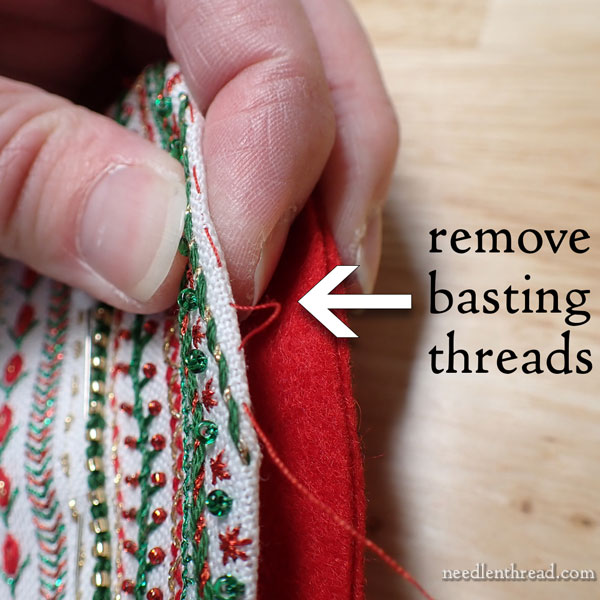
Before you sew the ornament together, remove the basting thread that you used to transfer the design (if you used a thread).
This is not the basting thread that sews the linen to the interfacing. You’re not going to remove that thread, because there’s no chance of its showing through to the front. It can stay where it is.
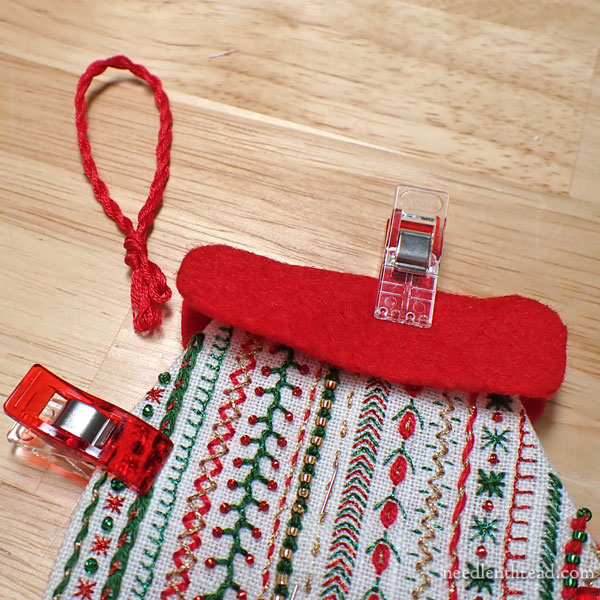
Clips come in handy to hold things in place while you’re working!
Check to make sure everything fits together. If you need to trim any felt, this is the time to do it. If you need to smooth out the edge of your linen, this is the time to do it!
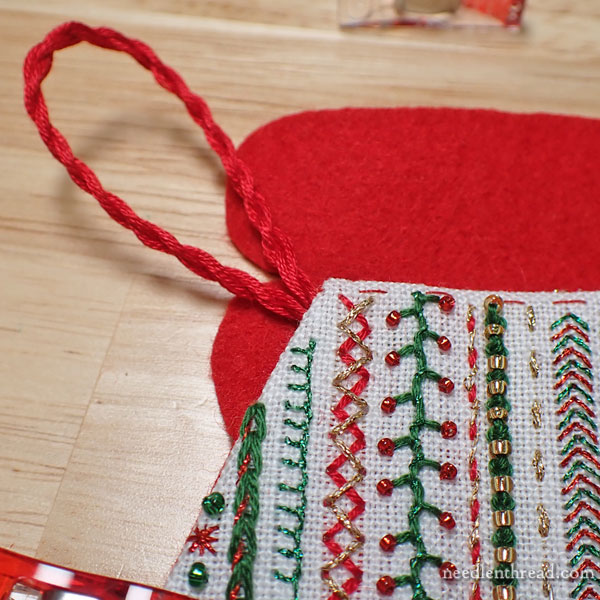
Now that we know everything is as it should be – everything fits together and lines up well – we’re going to sew the hanging cord in place.
The hanging cord is situated at the base of the cuff, behind the linen, and opposite the side that the thumb is on. In this case, if the mitten is hanging downwards (the fingers of the hand would be pointing down as if you’re wearing the mitten with your arms hanging at your sides), the hanging cord goes in the upper left “corner” of the linen, just below the cuff.
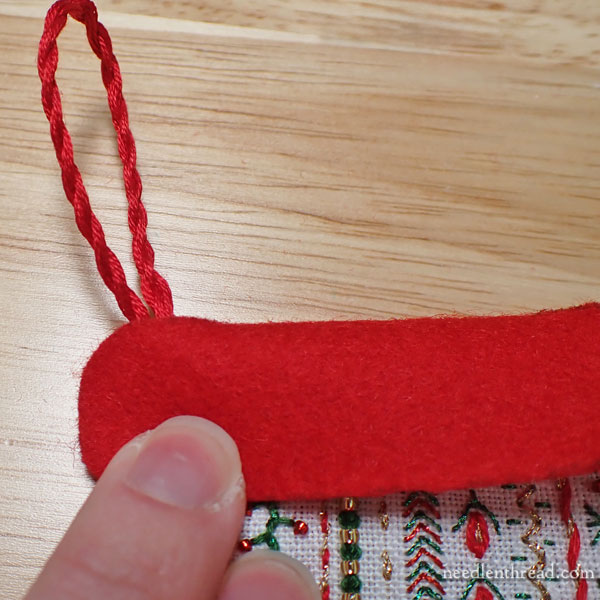
When the cuff is folded down, the cord should fit in the slit where the cuff felt is cut in towards the folded edge of felt.
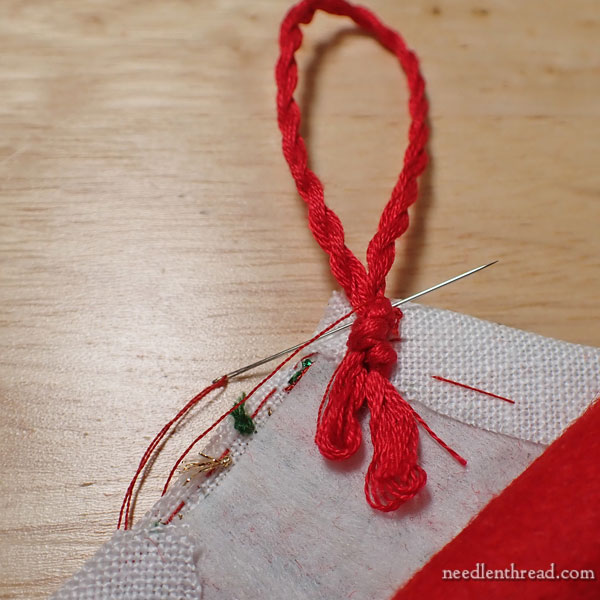
Use a piece of sewing thread to over-sew the cord, stitching over it (and even through it), to sew it securely onto the back of this corner of the linen where it is folded over the interfacing, as shown above.
You don’t have to be super particular here. It’s true that the knot is a bit of a lump, but with all the felt padding, it won’t be noticeable. It’s ok!
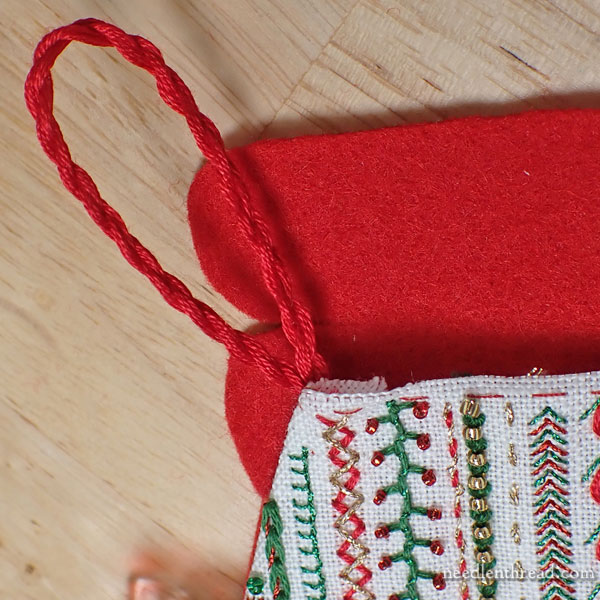
Here is the cord, sewn into place.
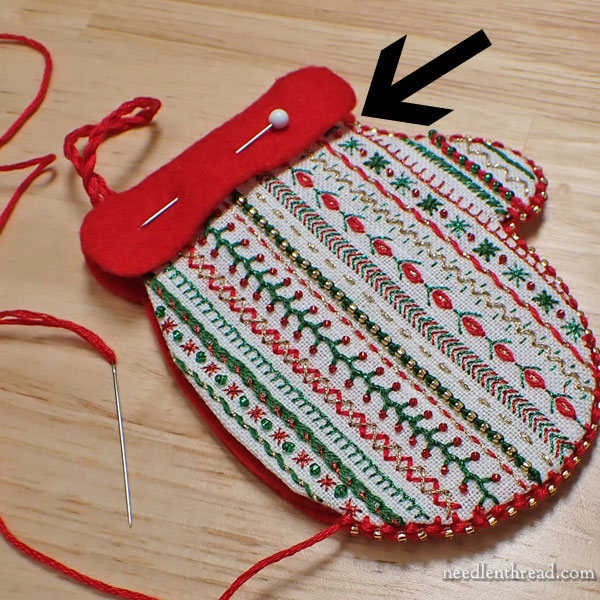
Fold the cuff into place, pull the hanging cord up so that it fits nicely in the slit opening on the side of the folded edge of the felt, and pin the cuff through all layers, to hold it securely in place.
Then, starting where the arrow is pointing, and using six strands of red DMC and the 11/0 gold seed beads, work a beaded Palestrina stitch around the whole hand of the mitten.
You’ll be working the Palestrina stitch along the edge, through three layers: the linen, the felt backing, and the felt pocket.
To learn all about the beaded Palestrina stitch and how it works, take a look at the following three tutorials:
You will find a tutorial for Palestrina stitch here.
You’ll find a tutorial for beaded Palestrina stitch here.
And you’ll find a tutorial for stitching the beaded Palestrina stitch along an edge, here.
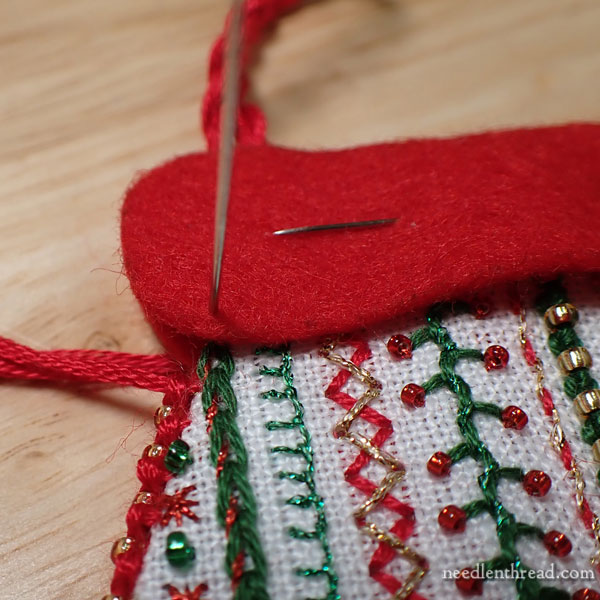
When you get to the other side of the mitten and to the base of the cuff, keep on going! You’re going to stitch around the outside perimeter of the cuff first.
At this point, right where the cuff folds over the linen, you’ll be stitching through the front of the cuff, the linen, the back of the cuff, and maybe the corner of the back of the pocket. (The latter depends on how things lined up for you when you assembled everything. You may have already secured the corner of the pocket.)
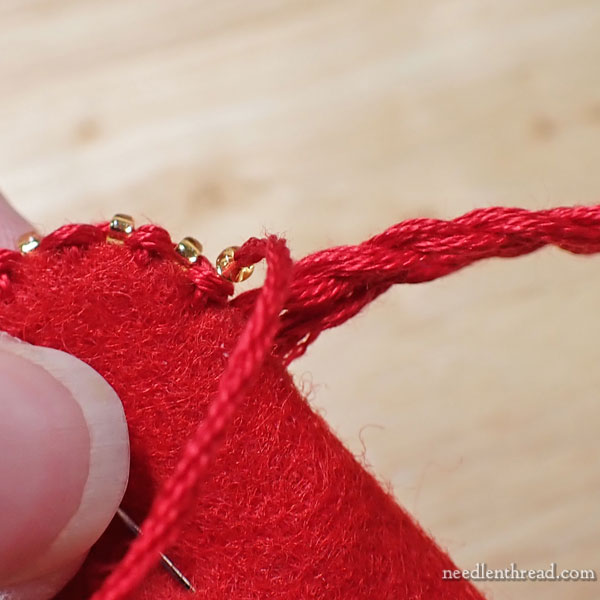
As you get to the hanging cord, keep going!
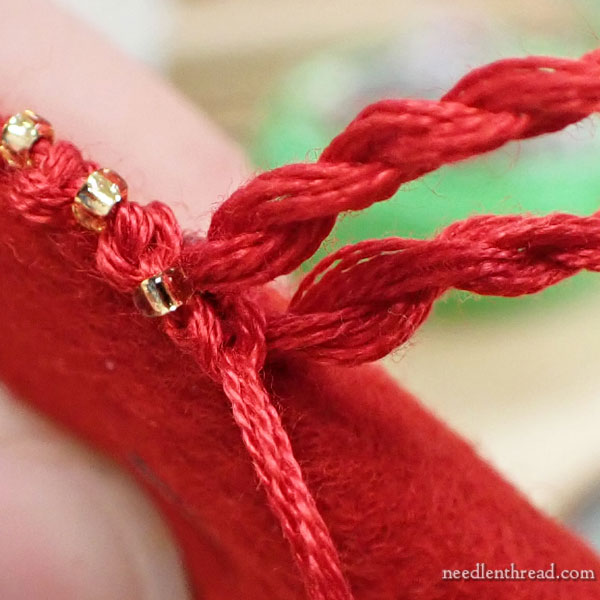
You can put a stitch (or a bead) right between the two sides of the hanging cord. Just work your way around and between these two sides of the cord as you need to.
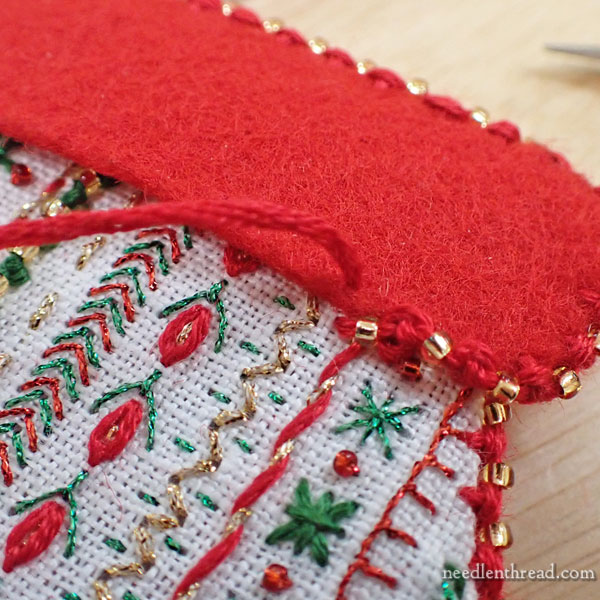
Continue around the perimeter of the cuff until you get to the corner where you started the Palestrina stitch.
Keep going now, stitch the base of the cuff to the linen.
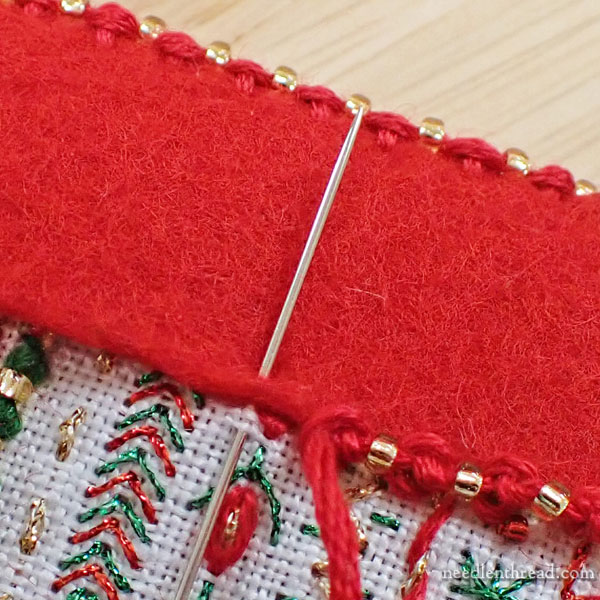
To do this, pick up just the front of the linen, as shown above. You’re just picking up a small stitch of linen and going up into the felt on the lower edge of the cuff, to secure the cuff to the linen.
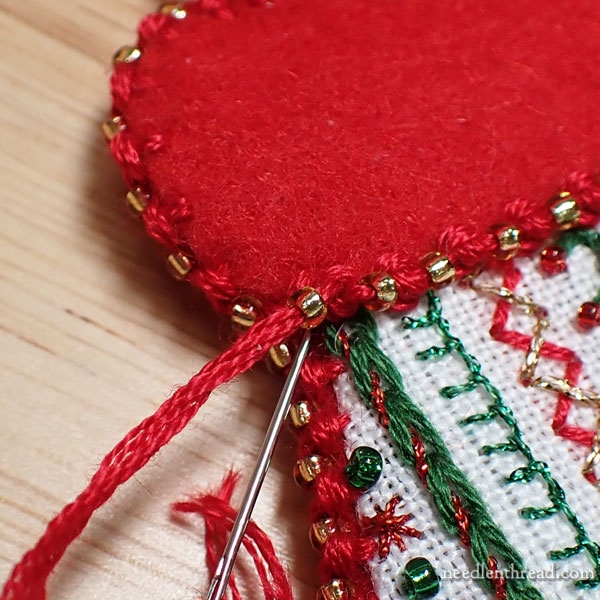
Finish the cuff at the lower corner on the same side of the cuff that the hanging cord is on. To finish the Palestrina stitch here, work a discrete knot right up into the corner…
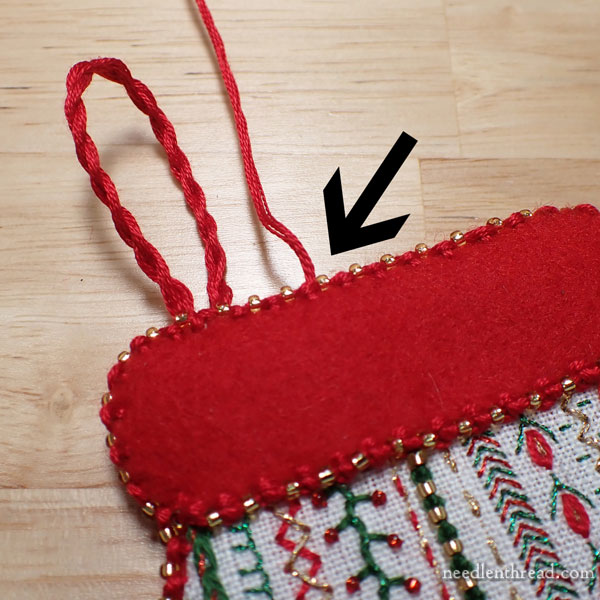
…and then take your needle up into the felt of the cuff, coming out on an edge somewhere.
Trim the thread close and let it work back between the felt sides of the cuff.
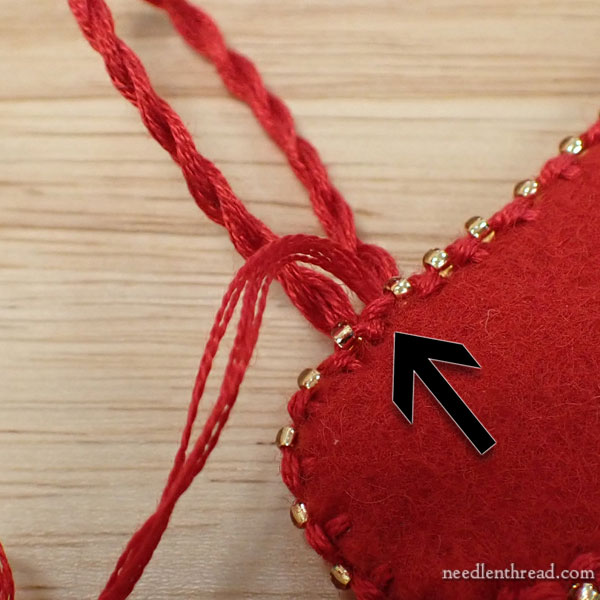
Knot a new piece of floss (all six strands) and discreetly bring the thread to the front between the two sides of the hanging cord. Try to manipulate the thread so that the knot is inside the cuff felt, unseen, and so that it catches inside the felt between those cord ends.
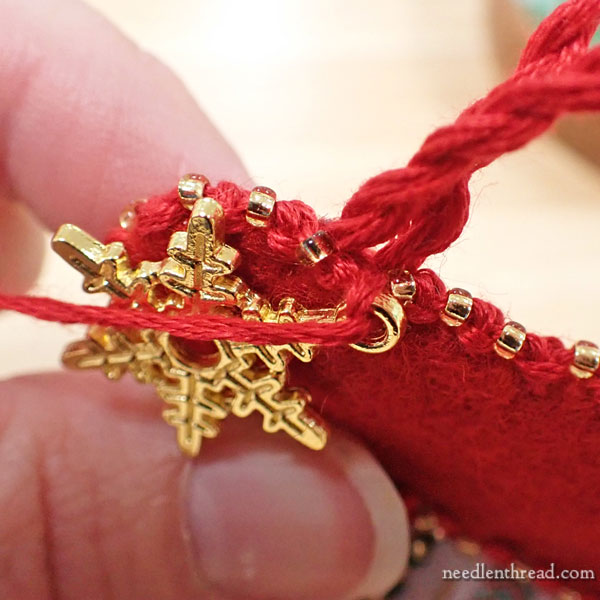
Pass through the felt and the hole on the charm two or three times, to sew the charm in place.
End the thread with a knot back behind the charm and behind the Palestrina stitch, making it discreet again (somewhere behind the stitches, where it can’t be seen). End the thread by taking the needle into the cuff again and coming out somewhere on the edge and trimming the thread.
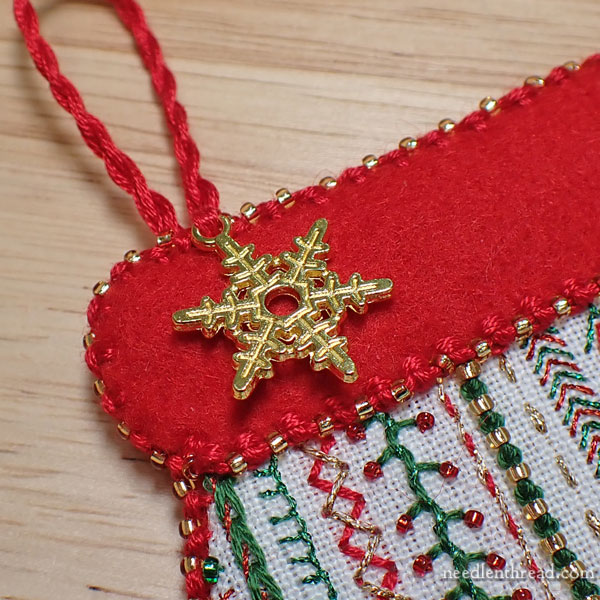
Voilá!
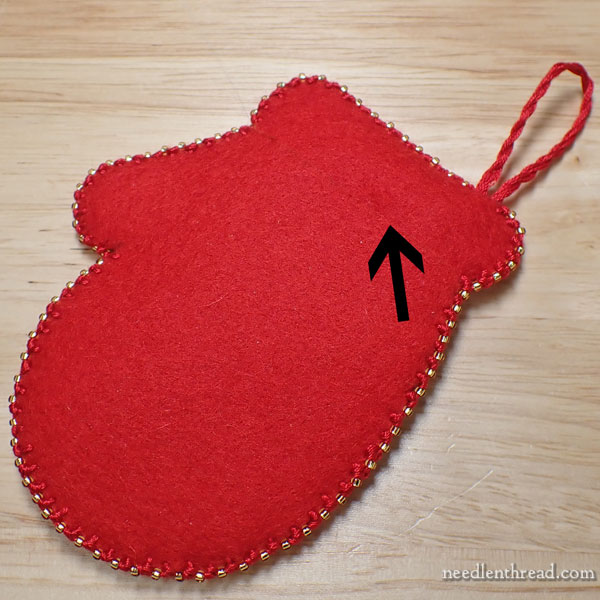
If you turn the mitten over, you can see that the felt pocket on the back is not super visible, but it’s there! Perfect to slide a gift card, cash, a note, a mini candy cane or two into it…
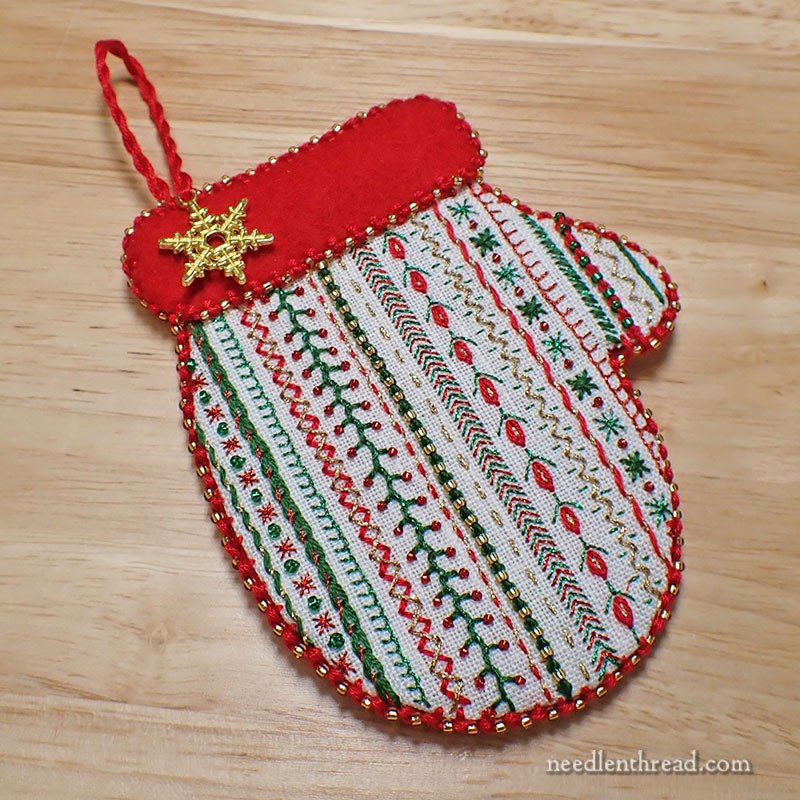
And voilá again!
You’re finished!
Amen!
Go hang it on the tree!
Good grief, that was a lot of words and a ton of pictures. I’m sorry for dumping it all on you at once, but it made more sense to do it this way than to try to split it and have you waiting to finish it until the end of the week.
Don’t forget, you’ll find all the instructions for this project in the Project Index here, if you’re looking for more!
Coming Up!
Wow! We had a GREAT two weekends of Open House here at the Studio. I’ll tell you all about it on Wednesday… and we’ll also be launching a pre-Christmas shop-wide sale for you, so that there’s still time to ship! And that way, everyone gets a little piece of the celebration, even if you couldn’t be here with us!
And then we have a few delightful give-aways to work our way through, to give you a chance at some thoroughly delectable needlework goodies for your stitching pleasure. Cheery!!
Stay tuned for all that! And, of course, More.
I’m all talked out now… Ciao!


I really enjoy embroidery, especially during these long winter nights. My question is what to do with them. I’ve added
them to the front of purses I’ve made, and to pillow fronts. Don’t have wall space to hang them. Any other suggestions?
Love your web site – always have inspirational posts! The step by step photos are so helpful – thanks!!!
Hi! This is such a cute project. Do you think the Palestrina stitch could be used to attach a fabric lining to a felt/wool Christmas stocking, so that the top of the stocking looks more finished than when the lining is attached with a simple whip stitch? And would this hanging cord be sturdy enough for use on a stocking? Is Palestrina an “advanced” stitch? I am not advanced 🙂 Thank you!