Happy Monday and welcome to the fourth installment of The Christmas Mitten! I hope you had a great weekend and have enjoyed stitching the project so far!
Today, we’re going to finish up the embroidery on the decorative front of the mitten. We’ll be doing bands 12 through 19.
If you’re just joining us for this project, you’ll find all the lessons so far – including materials lists, patterns, set-up, and the previous stitching – listed here in the Christmas Mitten Project Index.
If you would like to procure a complete materials list to create this cute little ornament, you’ll find the materials kits available here.
For those who are members of the Needle ‘n Thread community on Patreon, you’ve already received the instructions below in the first PDF that’s available over there for download and easy printing.
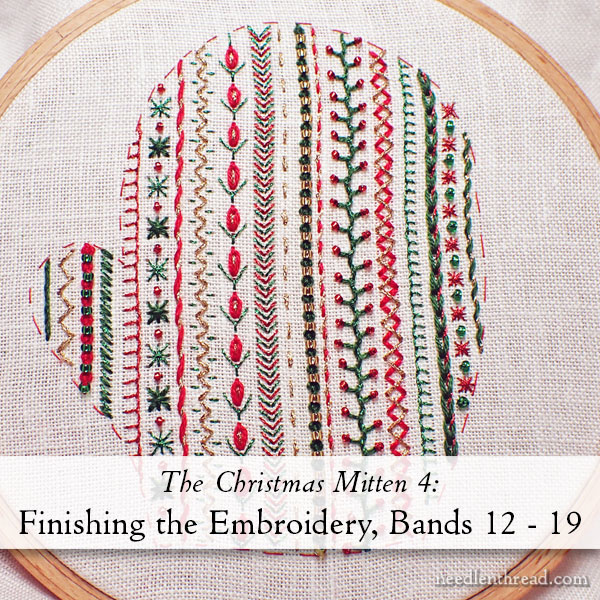
As we work through bands 12 – 19 on the mitten, I’ll be linking to various stitch tutorials where necessary. If we have already covered the stitch – or similar aspects of the stitch – you can apply what you’ve already learned to the new band of embroidery.
But First, This…
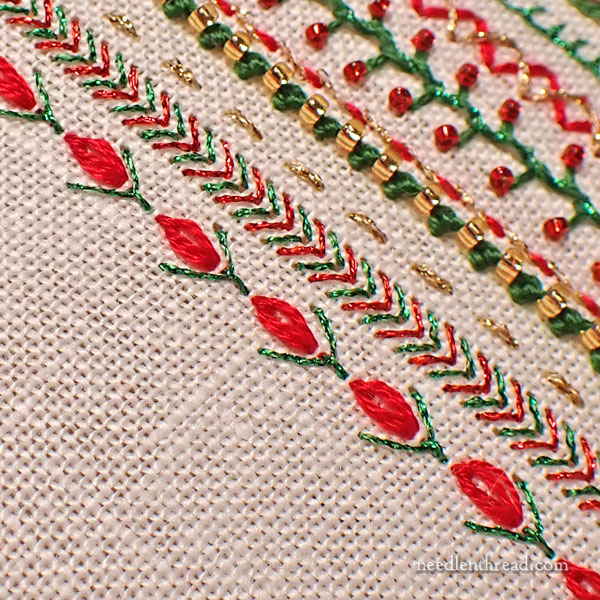
Last week, we finished Part 3 of the project by stitching this detached chain stitch band, creating a line of “buds” with fly stitch stems.
On that line, if you want to add a festive touch with a little more sparkle, work a straight stitch in the #8 gold metallic in the center of each detached chain stitch. I forgot to mention this step in the previous less, but I have since rectified the oversight and added this step in the previous lesson.
Band #12: Golden Zigzag Band
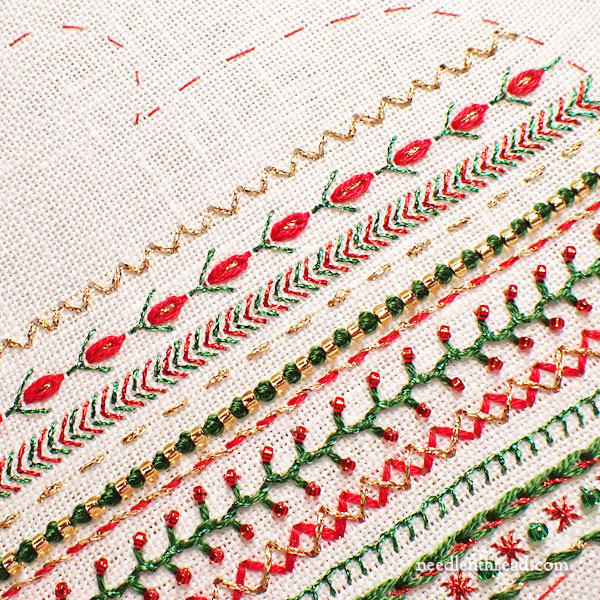
Band #12 begins with a zigzag foundation similar to Band 5, only in a single layer, using #8 gold metallic.
The easiest way to stitch these zigzag lines is to approach the line as a running stitch, working one side of each zigzag down the line and then returning in the opposite direction to work the other side.
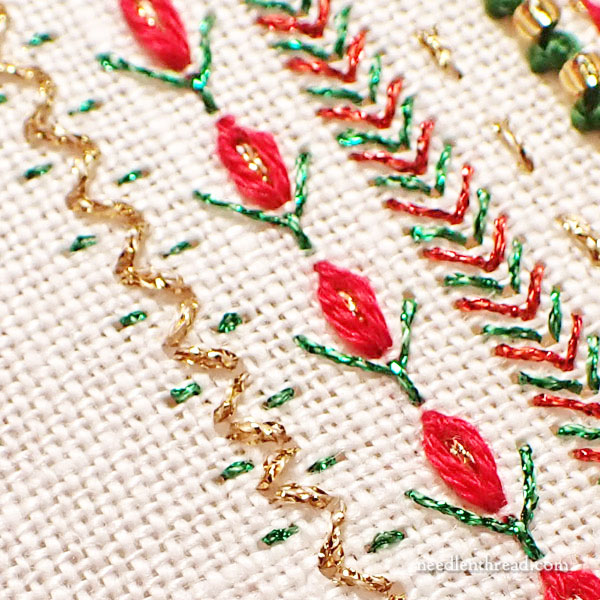
Work some straight stitches in the green metallic, in the center of each zig and zag, as shown above. These stitches are over two threads of fabric, so they are small.
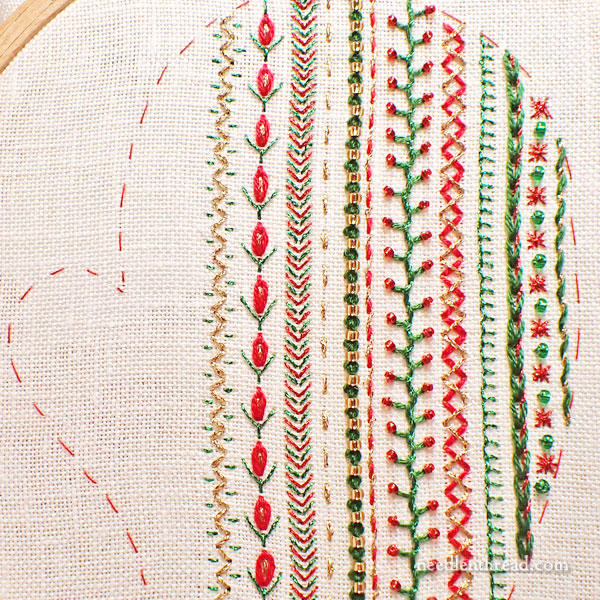
Here you can see the finished band.
Band #13: Whipped Running Stitch
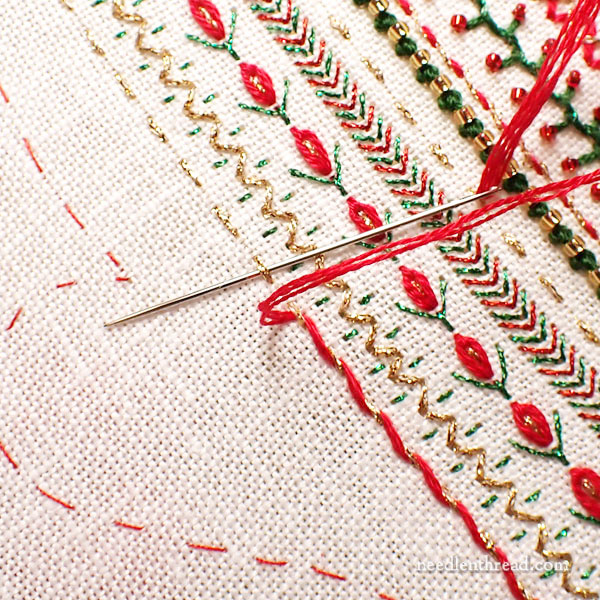
Band #13 begins with a running stitch foundation in #8 metallic, whipped with three strands of DMC 321.
Band #14: Double Cross Stitch & Beads
Band #14 is a repeat of Band #2, with some slight variations.
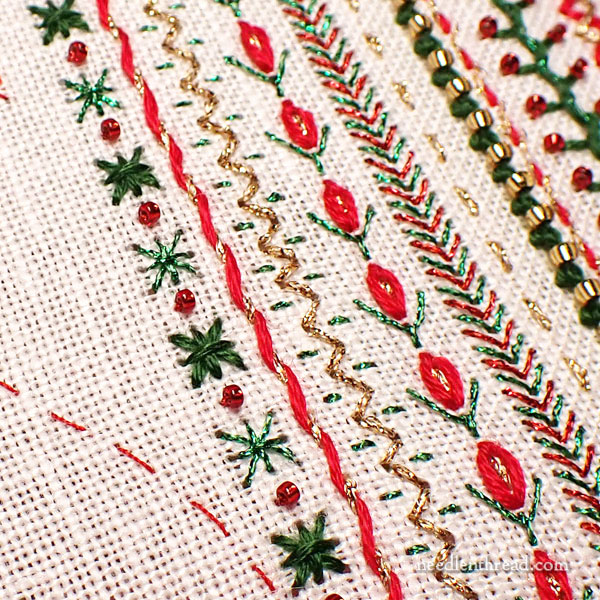
The double cross stitches alternate between DMC 986 and the metallic green.
Sew a red 15/0 seed bead between each double cross stitch, using red floss.
Band #15: Buttonhole in Red Metallic
Band #15 is a repeat of the buttonhole stitch band (#4), only notice that the buttonhole stitches are worked in the opposite directions so that the “arms” point towards the thumb.
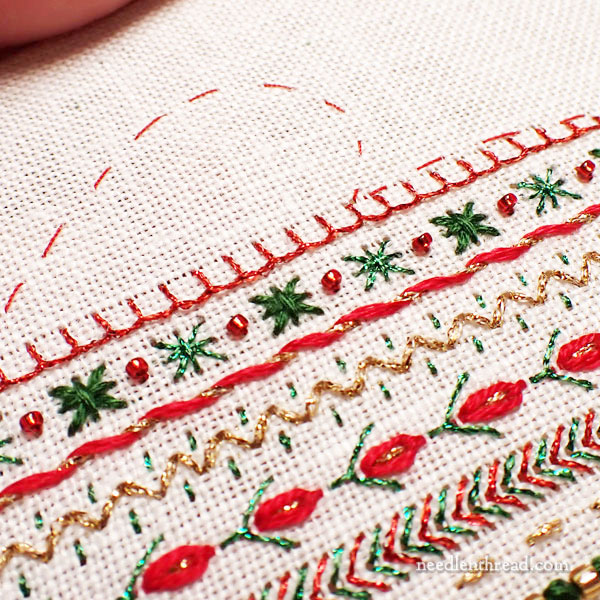
You can see the buttonhole stitch band in progress above.
Line Spacing!
As you work towards the thumb, think carefully about the spacing of your lines.
Try to maintain consistent spacing, but don’t try to “force” or crowd lines of embroidery in. If your embroidered bands aren’t going to fill the remaining space in the same way that’s seen in the sample, don’t worry about that. If necessary, you might need to add an extra fabric thread of space between bands here and there, or reduce the number of threads of space by stitching a band closer than shown in the sample.
Essentially, at this point, you want the lines of embroidery to fit into the space in the thumb area, but you don’t want to crowd them in. You may need to drop a line of stitching altogether. And that’s ok!
As you work in the curve of the mitten and into the thumb space here, you can adjust your line of stitching so your stitches fit within the outline of the mitten.
Band #16: Straight Stitch in Floss & Metallic
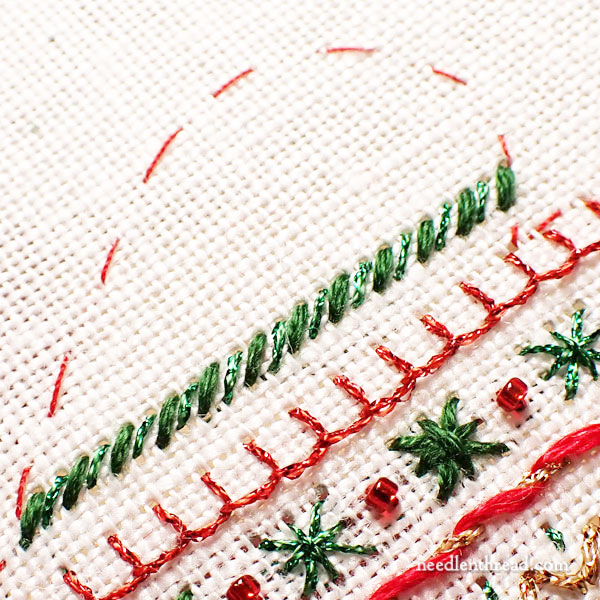
Band #16 is made up of straight diagonal stitches, alternating between green floss and green metallic.
The diagonal stitch is worked over three threads of fabric. There are four threads of fabric between each floss stitch, so that the metallics are centered between the floss stitches and separated from them by only two threads. So, basically, going over every other thread of fabric, you have floss stitch (skip two threads of fabric) metallic stitch (skip two threads of fabric) floss stitch (two threads of fabric) metallic, etc.
Band #17: Beaded Palestrina
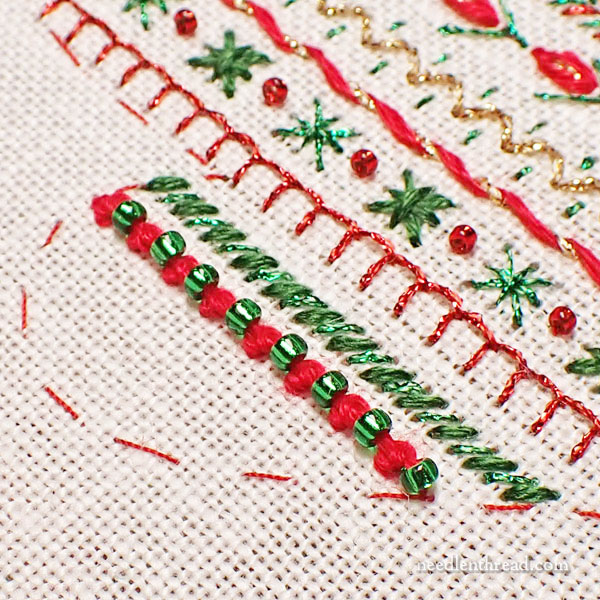
This band is a repeat of Band 8 – beaded Palestrina stitch – only worked with three strands of 321, and using the green seed beads.
Band #18: Simple Gold Zigzag
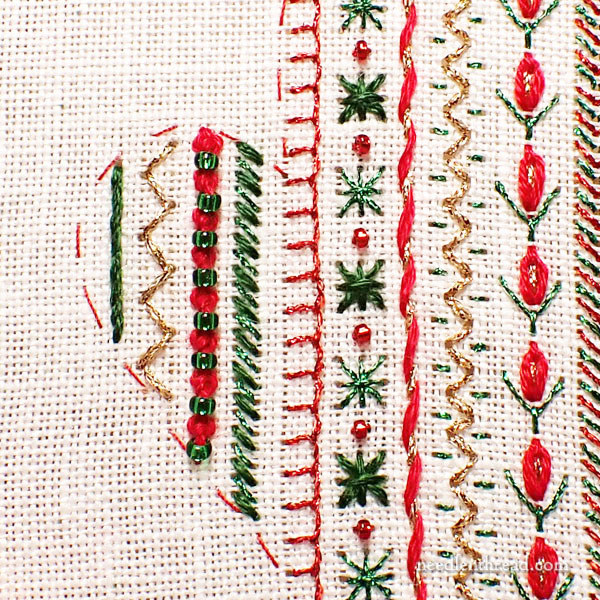
This band is a simple zigzag band of straight stitches in #8 gold metallic.
Like Band 12, the quickest approach to the zigzag, without having to carry threads, would be to treat it like a running stitch going in one direction (working one side of the zigzag) and then returning down the band of stitching, working the other side of the zigzag.
Band #19: Stem Stitch
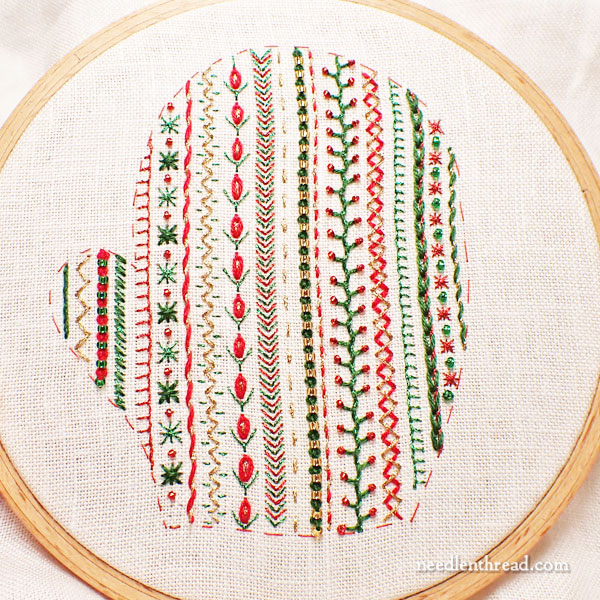
Band #19, if you can fit it in (if you can’t, just skip it!) is a simple stem stitch with three strands of DMC 986.
And that completes the embroidery on the mitten!
Prepare for the Finish Work!
To prepare for the finish work, damp stretch and block your embroidery.
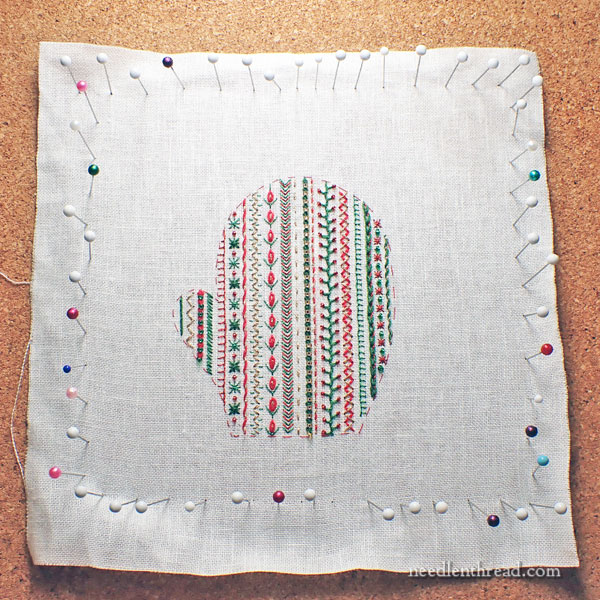
If you’re not familiar with this process, you will find two useful tutorials here on Needle ‘n Thread:
Damp Stretching & Blocking Needlework
What’s Next?
In our next installment on The Christmas Mitten, we’ll begin the finish work! It will take a couple articles to cover the finish work, but we are on schedule to be finished with this project next week!
Remember, you can find all the articles for this project listed here under The Christmas Mitten Project Index.


Dear Mary
It’s been a long time since I have commented on one of your posts. But the mittens are lovely so bright and Christmassy, I would love to follow but I am quite busy at the moment. I’ve just finished another quiet book for my 3 year old adopted Nephew. Which is filled with felt activities, so I hope he likes it. I do hope you are well and it looks like you had a great time on the first opening of your shop. I wish I could come over and visit, would love to meet you after all these years. Take care
Regards Anita simmance
Thanks so much, Anita! I’m glad you’re enjoying making lovely things for your family! I hope all is well with you!
Glad to have found this information as I am renewing my interest in crewel embroidery and seeking good resources and links to suppliers, especially for complete yarns for a project. Lovely to view and save as a resource. Thank you!