Today, we approach the finishing process for the Christmas Mitten stitch-along! Yay!! We’re oh-so-close to having a hanging ornament!
As is always the case, I have to break the process of finishing down into parts here on the website, because it’s too much to fit in one blog post. I think there are some 40+ pictures for the finish work!
So today, we’re just going to concentrate on preparing the pieces for finishing. I’ll share a few tips on pesky bits, like marking and cutting felt.
For members of the Needle ‘n Thread Community on Patreon, you’ll receive all of this information, plus all of the finishing process, in one PDF, which will post either Sunday or Monday of on Patreon.
If you’re just joining in on this project, you will find all the lessons relating to creating your own Christmas Mitten ornament here, in the Christmas Mitten Project Index.
We still have a few materials kits for the Christmas Mitten available, if you’d like to have everything for creating the mitten in one neat little package.
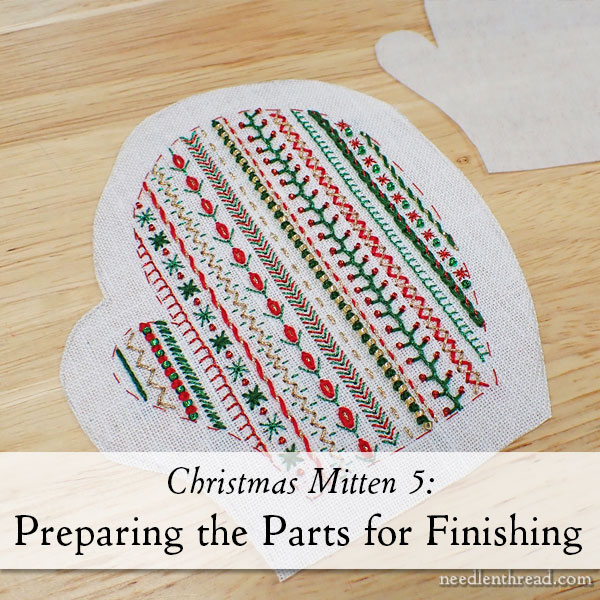
Sometimes, finishing can be an intimidating process, especially when it involves cutting things up. To help overcome any hesitancy that you might have, read through all the instructions at least once, maybe twice, and heck… a third time wouldn’t hurt!
Orientation
One of the key aspects of this process that you definitely need to get right is the orientation of the pieces as you cut them out. While there’s no front or back to felt, I personally prefer marking on what will be the back of the felt when it’s in place on the back of the embroidered piece.
If you want to make sure that your felt is marked on the back of the felt, when it’s in its proper place fixed to the back of the embroidery street, think about the direction of the pattern carefully before you trace. Thumbs go together on the back of the ornament!
But… it doesn’t really matter that much. The edge of the ornament will be covered. The only reason it might matter where your traced line ends up is if you make a Very Heavy Line when tracing, that you won’t be able to hide with the edge stitching.
Just keep this things in mind while you’re preparing to cut your pieces out.
The Pieces
In Part One of the Christmas Mitten project, you received the PDF download for all the pattern pieces.
For this part of the project, you’re going to cut out the following pieces:
A (interfacing) – we used Pellon 40
B (back pocket) – cut out in red felt
C (back & cuff in one piece) – cut out in red felt
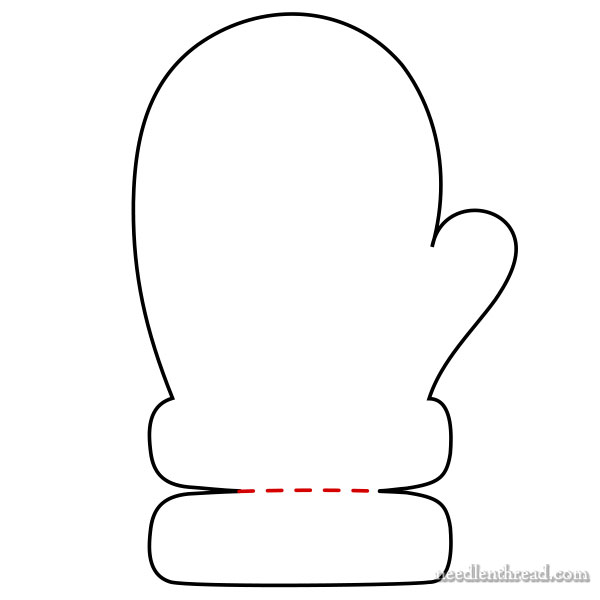
When I cut piece C – that’s the image above – I didn’t cut two pieces out. I cut only where the solid line is indicated in the diagram above, and I left the cuff attached to the main backing of the mitten, in one piece. The red dashed line indicates where the cuff folds over the front of the mitten.
You can cut out two pieces. I just preferred not to, because it was less fiddly when doing the sewing up of everything.
Possible Personalization
If you want to personalize your mitten by stitching a name or something on the cuff, do that before you cut the cuff out from the felt. But remember!! You have to think in terms of orientation! That cuff folds down over the front of the embroidery on the linen, so you have to stitch the name on what would effectively be the back of the cuff, and upside down. Figure that out before you try to personalize the cuff!
We did not personalize the cuff, because I’ve never been a huge fan of personalizing the front of an ornament, but I can see how it would be a great way to personalize the ornament as a gift
Another option for personalization would be embroidering a name of date on the back pocket piece of the felt (pattern part C). If you want to do that, remember to figure out the orientation of the piece before you mark it for embroidery.
Embroider any personalization before you cut out the piece. And make sure you’re very careful with your stitch tension if you personalize any of the felt, because if your stitches are tight, they’ll pull the felt out of shape.
Let’s Get Cutting
Up to this point, that’s all background preparatory information, so that you’re thinking ahead.
Now, let’s cut out the pieces.
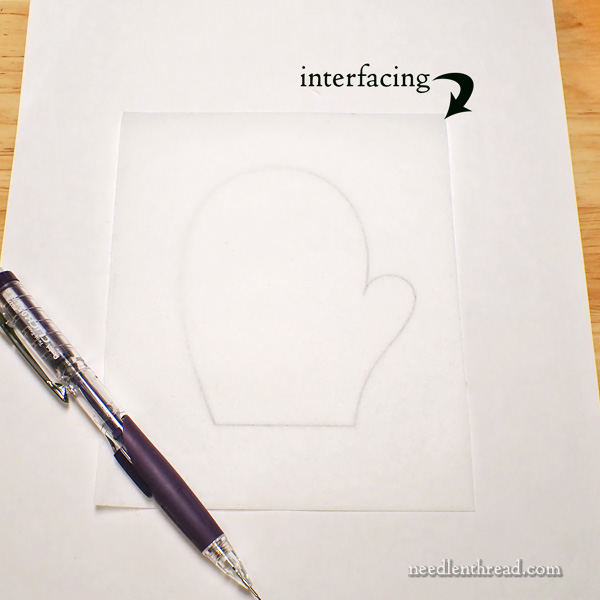
The interfacing is easy enough – it’s see-through!
You’ll be cutting out a piece of interfacing using pattern piece A, which is the same pattern piece you stitched for the front of the mitten.
When you trace pattern piece A, you can trace right on the line, as long as you cut just inside the line when you cut out the interfacing. The interfacing needs to be a hair smaller than A.
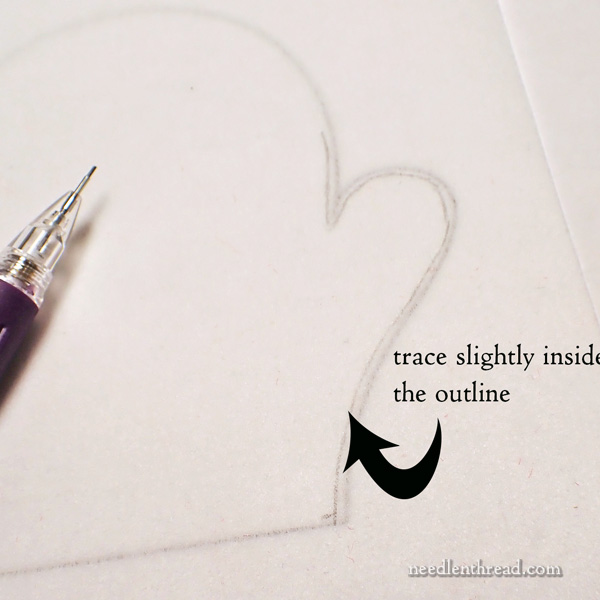
If you’re not a confident cutter, though, it might be better to do what Anna did. She traced just inside the line, about 1/16″ smaller all around, to mark the interfacing for cutting.
If you take this route, just take your time tracing with a pencil. There’s not a lot to worry about when tracing the interfacing, because the interfacing is totally hidden. You can make a mistake on it, and it won’t matter at all.
So, cut the interfacing out of pattern A, about 1/16″ smaller all around.
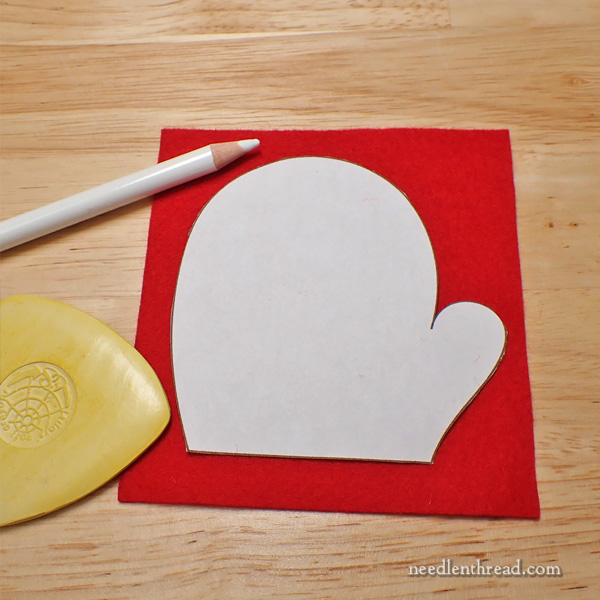
Pattern piece C is the pocket that goes on the back of the mitten.
Marking felt is no fun thing. It can be persnickety. I’ll tell you a couple approaches that may work for you, and then I’ll tell you my two favorite approaches when cutting out something like this.
You can use a white chalk pencil. You can even use tailor’s chalk (the yellow triangle in the photo above). Both will give a visible-ish line. But I find it hard to draw around a shape with them.
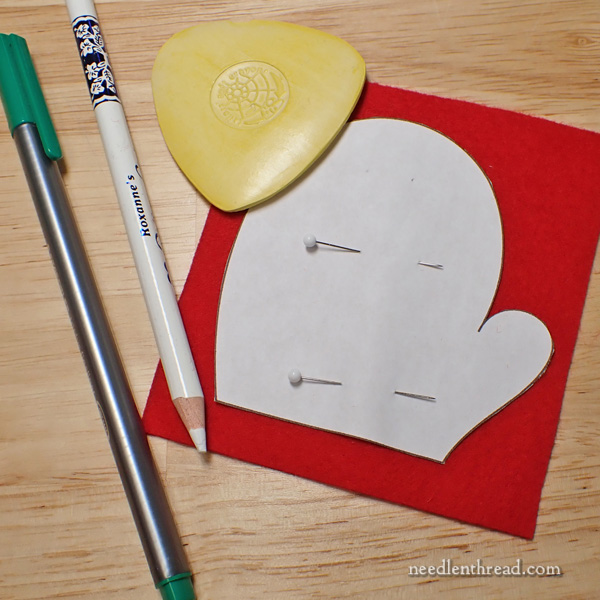
You can also use a marker. Make it a fine tip marker.
Pin!! Pin the pattern to the felt so that it doesn’t shift!
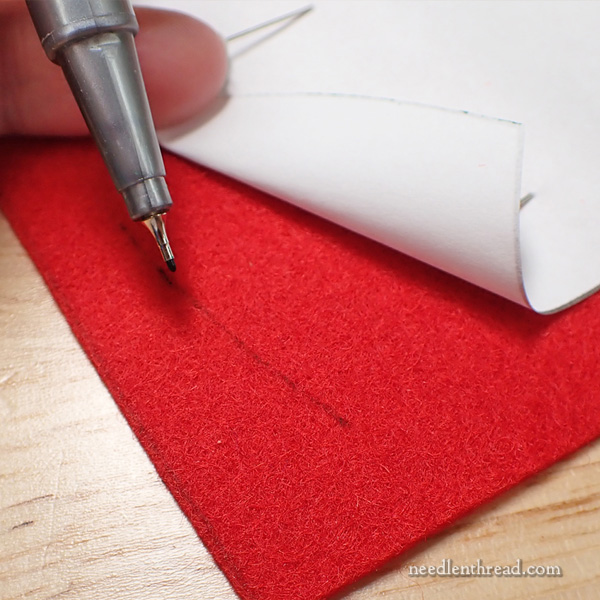
The marker line looks ok on the felt. I’ve pulled the paper back here so you can see it.
If you use a marker like this to trace around the outside with a line, it helps if you hold the marker at a low angle to the fabric and pull it along. If you hold the marker upright, it snags in the felt.
When tracing the shape like this, pin the pattern to the felt, and trace carefully around the pattern.
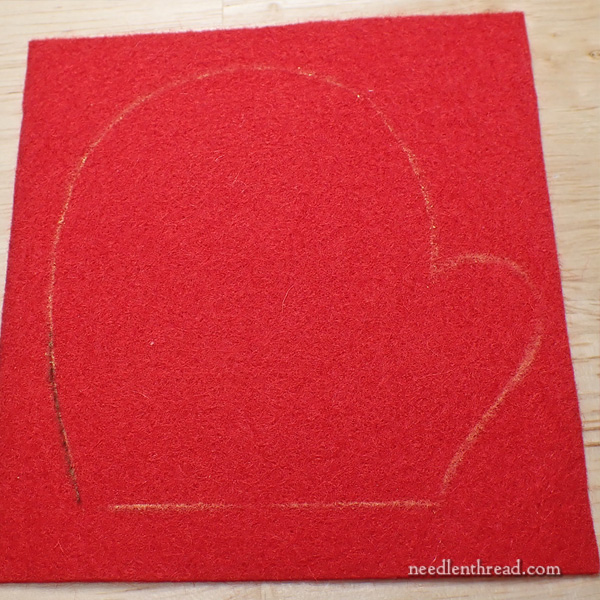
You can see here a combination of white pencil, yellow tailor’s chalk, and marker line.
They all work.
None are that pleasant to draw with on felt, though.
But they work! And that’s what matters.
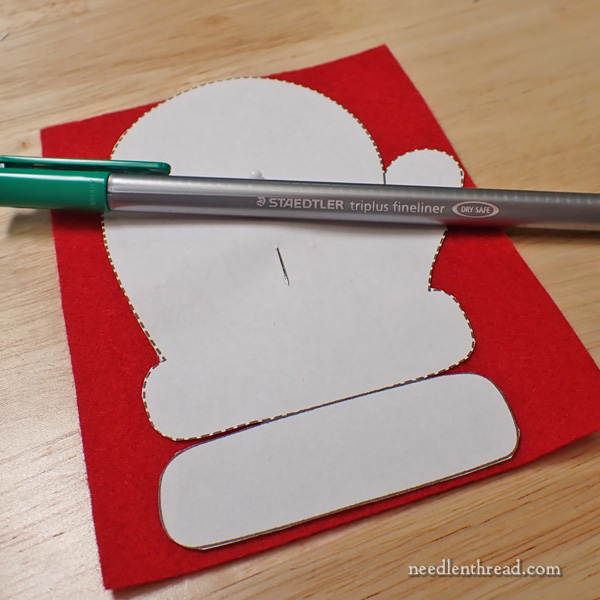
Here you can see piece B lined up and ready to cut. Notice that the pattern is not cut through where the cuff joins.
Again, pin!! Make sure you pin your pattern piece to your felt!
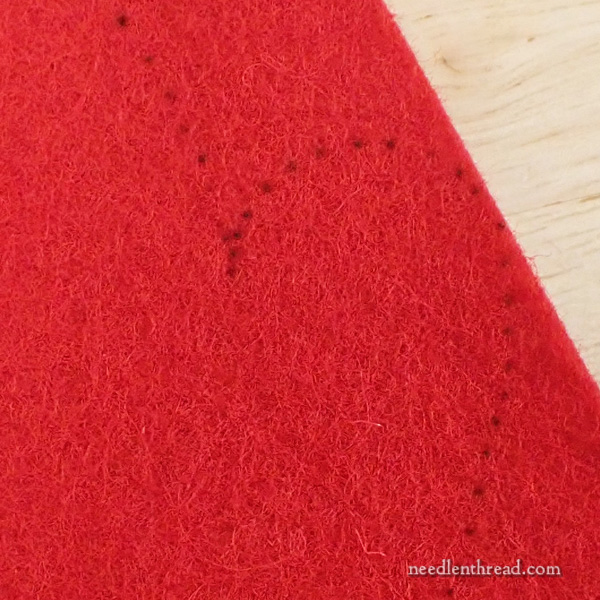
If I’m going to use a marker to mark along the outline of something like this on felt, generally I prefer dots.
Instead of dragging the tip of a fine marker along wool felt, I will just make tiny dots just along the edge of the paper pattern, as you can see on the felt above.
This becomes my cutting guideline. It takes a little longer to do, but it’s much less frustrating than dealing with the tip of a marker snagging into felt.
But… There’s Another Way!
Truthfully, though, if you’re careful, if you pin your pattern onto the felt so that it doesn’t shift, if you take your time, if you’re confident in cutting things like this – the fact of the matter is…
… you don’t really have to mark the felt. You can just carefully cut the pattern out, using the pinned-on paper as a guide.
To each his own, in this case! My two favorite approaches are dots or nothing. A lot depends on what you’re comfortable with!
Cutting the Linen
Next, cut out the embroidered linen.
This is the point where I always hesitate. Measure twice, cut once! And especially when you’ve put so much time into the embroidery!
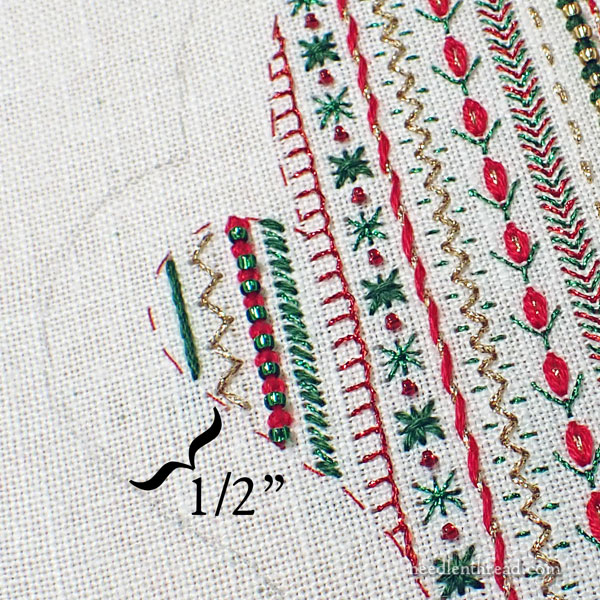
Take your damp-stretched, blocked, and ready piece of linen with the embroidered mitten on it.
Carefully draw an outline around the mitten, using a pencil. The outline should be about 1/2″ away from the mitten’s edge, as shown above.
I just measured all around the mitten half an inch, making small marks on the fabric with the pencil, and then I drew the outline following the marks, kind of like a dot-to-dot drawing.
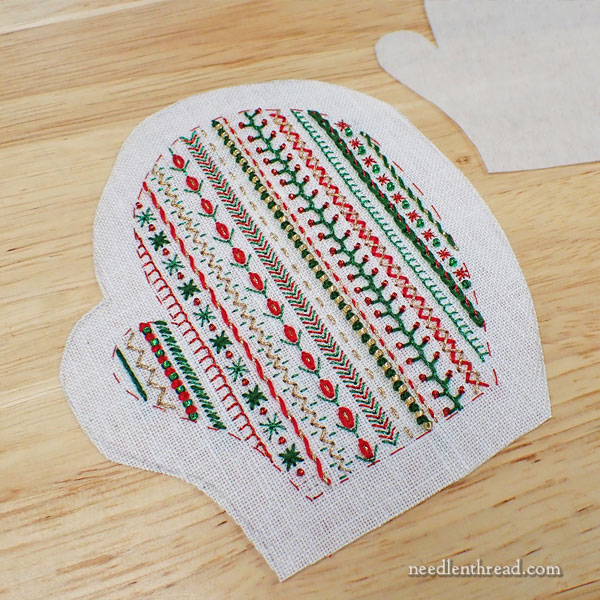
Cut the mitten out carefully. We’ll be trimming some of this a little later as we sew it up, but for now, this is what you need.
Make a Hanging Cord
Cut a piece of red floss about 30″ long. This is all six strands together – don’t separate the strands.
Fold the 30″ piece in half, and loop the fold around a finger.
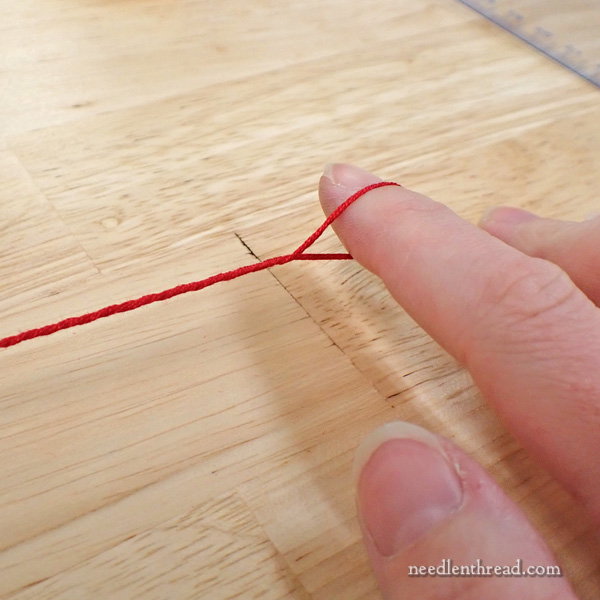
With the fold area around your finger, start twisting the floss by moving that finger in a circular motion, to twist the thread. As the thread twists, the loop will get tighter around your finger.
When it gets tight, but not too tight to take it off, fold the thread in half again, to meet the cut ends that you’re holding in your other hand.
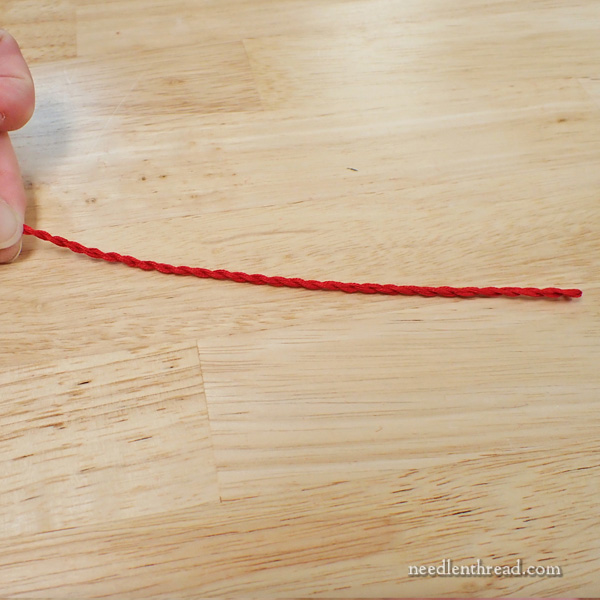
Still holding onto the cut ends, and taking the loop from your finger with the same fingers that are holding the cut ends, remove the loop so that the whole piece of thread twists up on itself and makes a shorter piece of twist.
Don’t let go of the ends that you’re holding!
Shake the thread up to get the twists to even out, and smooth the whole twist out so that it’s straight and the twists are evenly distributed.
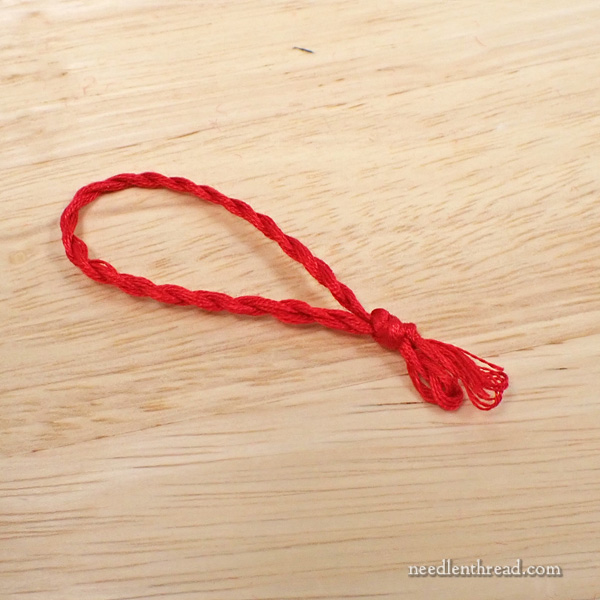
Fold the twist in half without letting go of the ends, and then knot the two ends together, as shown above.
It’ll make a chunky knot, but that’s ok. It’ll be hidden.
That’s It! You’re Ready!
And that’s it! All your parts are ready, and next week we will assemble, stitch, and decorate.
Site-Wide Sale and Give-Away!
Next week, we will also have a site-wide pre-Christmas sale… and a give-away! I’m excited! And I hope you are, too!
Today and tomorrow here in Kansas, we’re having our second Open House weekend, and I can’t wait to welcome folks into the studio to browse, visit, and see what we do.
I hope you have a lovely weekend!


Er, was that “Do let go of the ends that you’re holding!” supposed to be a “Don’t”?? 😀
whoops! LOL! Thanks for catching that – I corrected it!
Dear Mary
These are very detailed instructions for the mitten which are very useful if you are making the mitten. I like the colour you have chosen for the mitten as red is my favourite Christmas colour. Thank you for sharing the detailed instructions for the mitten and for sharing it with us. A lot of work has gone into this blog, so thank you.
Regards Anita Simmance