Welcome back to our stitch-along for The Christmas Mitten! Today, we’re on Part 3, where exploring the next six bands of embroidery on the mitten.
If you’re just joining us for this project, you’ll find all the lessons so far – including materials lists, patterns, set-up, and the first stitches – listed here in the Christmas Mitten Project Index.
If you would like to procure a complete materials list to create this cute little ornament, you’ll find the materials kits available here.
For those who are members of the Needle ‘n Thread community on Patreon, you’ve already received the instructions below in the first PDF that’s available over there for download and easy printing.
And now, on to the stitching!
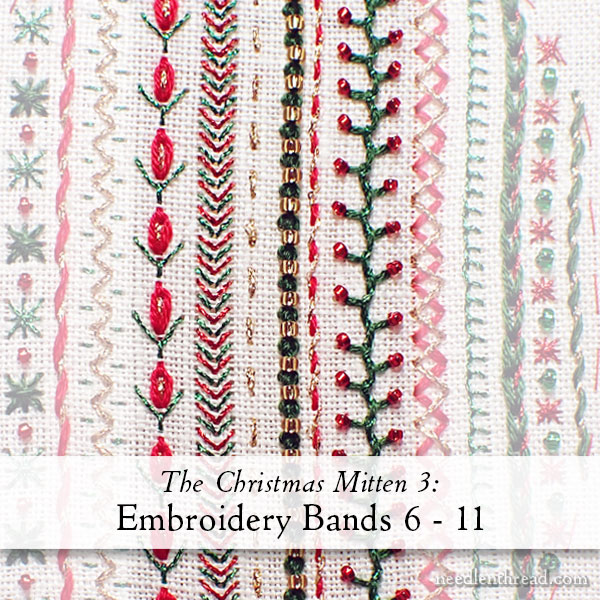
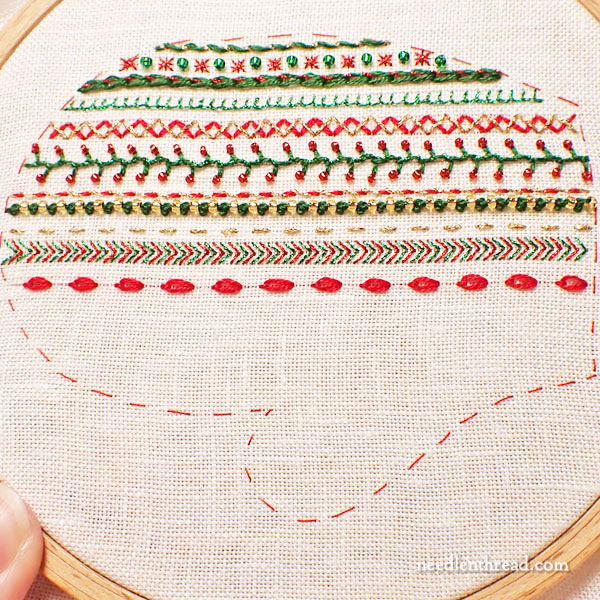
The bands we’re working today are the 6th through the 11th bands, from right to left on the mitten. In the last installment, we began the stitching on the right side of the mitten (opposite the thumb on the left, if the mitten is upright, cuff down).
Most (but not all) of my photos show the mitten pointing upwards on the fabric, with the thumb to the left and the cuff at the base. It doesn’t matter so much which way your mitten is pointed while you’re stitching it. Just pick the direction that makes the most sense for your comfort while working the embroidery, and turn your hoop accordingly.
Band #6: Whipped and Beaded Feather Stitch Band
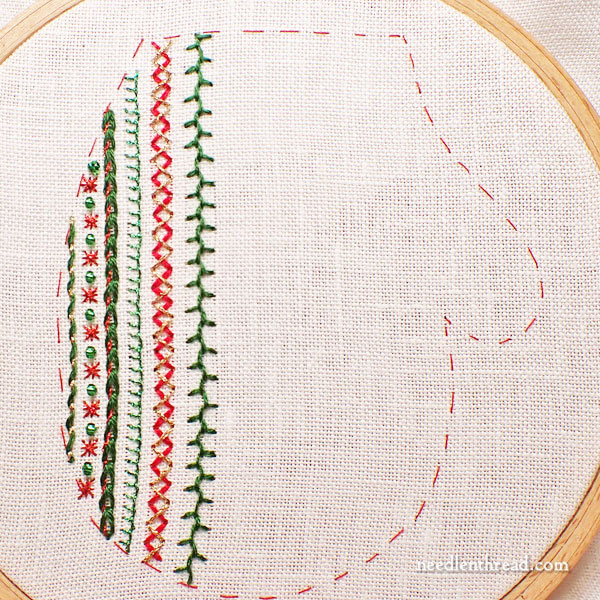
Here, the mitten is turned so that it’s pointing downwards, with the thumb on the right and the cuff up above. This is the hanging orientation of the mitten.
Next to the double zigzag band that we worked last in the previous installment, stitch a feather stitch band in green, using three strands of floss.
Then, whip down the center of the feather stitch with the green metallic, and finally, sew a 15/0 red bead to the tip of each “arm” on the feather stitch band, following the instructions for sewing on beads found in the tips in Part 2.
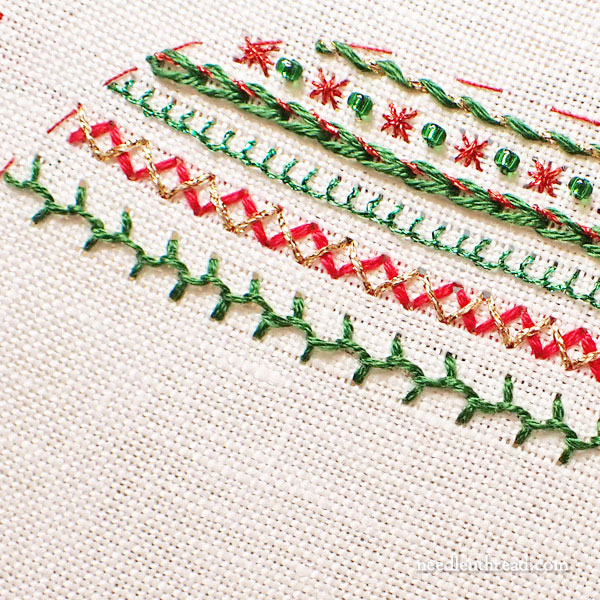
The center of the feather stitch band is about 8 linen fabric threads from the adjoining side of the double zigzag band. Each “arm” of the feature stitch extends about 4 fabric threads from center, and alternating sides. So the whole band is about 8 threads wide.
The finished band ends up situated, then, about 4 threads over from the double zigzag.
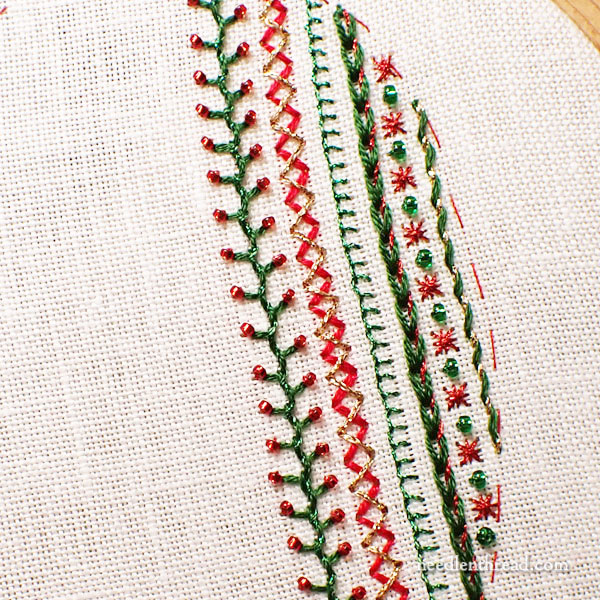
Whip the center of the feather stitch band the same way you’d whip any stitch (we discussed this in Part 2), by passing the needle under stitch down the center of the band, always from the same direction.
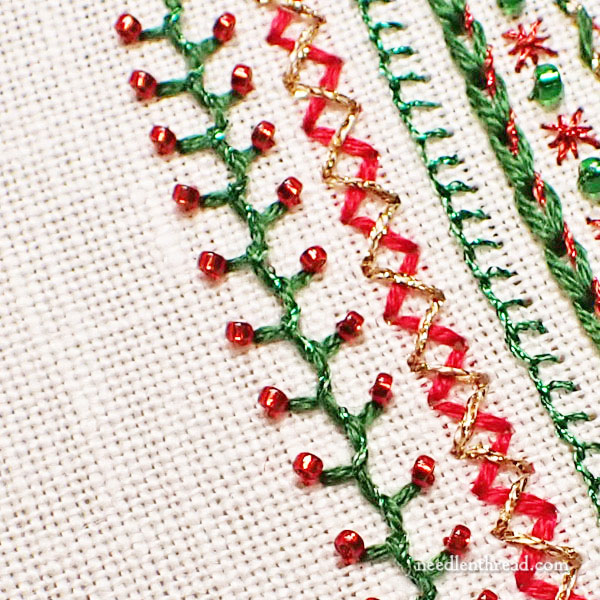
Use one strand of red floss to sew on the 15/0 red seed beads.
The beads extend from the “arms” of the feature stitch in the same direction, as shown in the photo above.
Band #7: Whipped Running Stitch
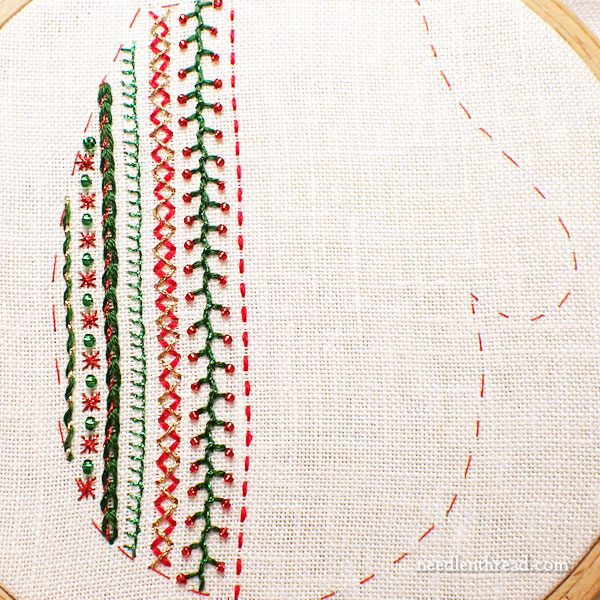
About 4 more threads over from the feather stitch line, work a line of running stitch in three strands of red floss.
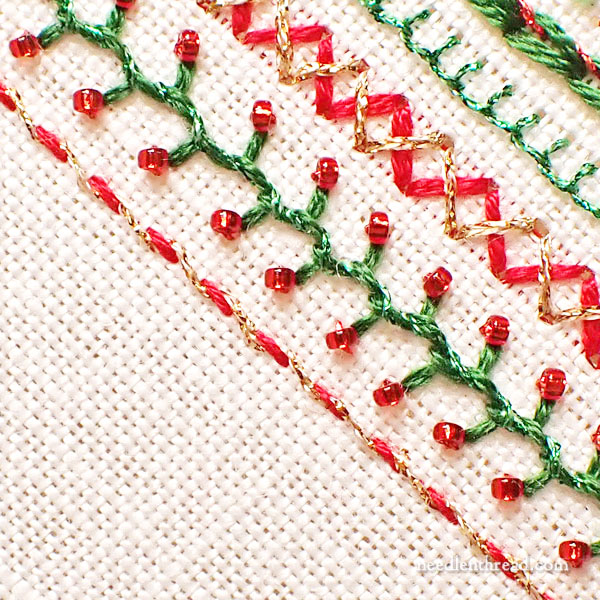
Whip the running stitch with the #4 gold metallic.
Band #8: Beaded Palestrina Stitch
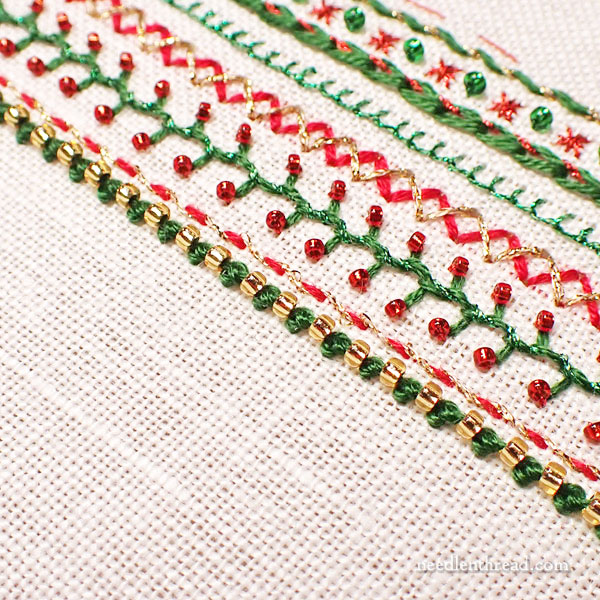
The next line is a beaded Palestrina stitch, using three strands of green floss and the 11/0 transparent gold seed beads.
If you’re not familiar with beaded Palestrina stitch, you’ll find the following tutorials helpful:
Palestrina stitch how-to video
Beaded Palestrina Stitch tutorial
Band #9: Running Stitch
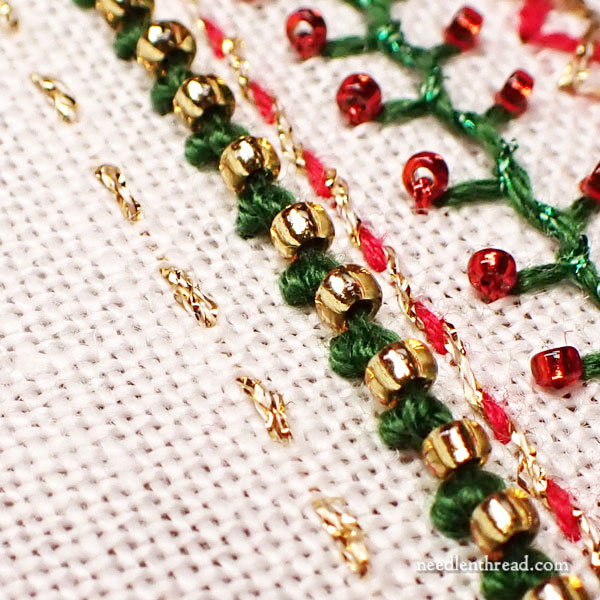
About six threads over from the beaded Palestrina, work a line of running stitch in the #8 gold metallic.
Band #10: Straight Stitches in a “V” Configuration
Using the #4 green metallic, work a band of “V” shaped straight stitches.
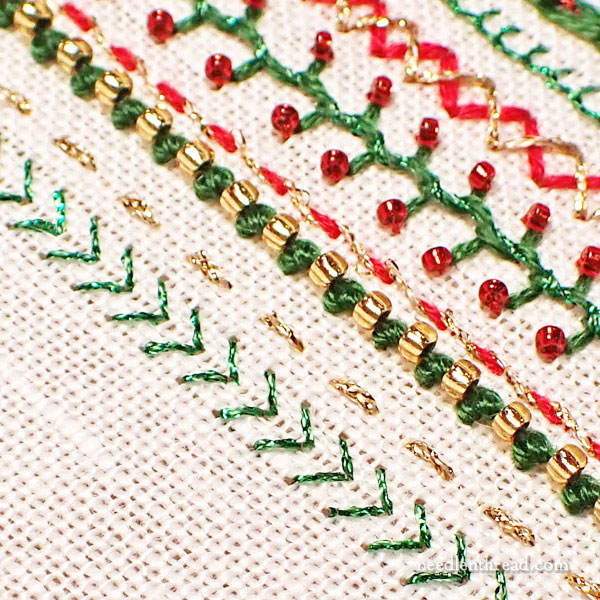
This band is 6 threads wide, which means the point of the “V” in the center is over three threads of fabric. Each “V” is four threads of fabric below the previous V.
It’s important to space the V’s an equal number of stitches apart, to make it easy to add the second color between the first green V’s, as shown below.
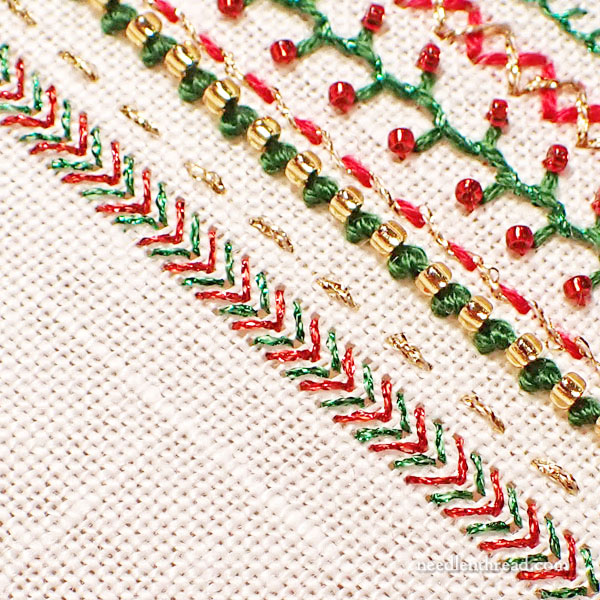
Halfway between each green “V”, work a red “V” in the red metallic.
Such a simple, but festive, band!
Band #11: Daisy Stitch Buds
This band is a combination of daisy stitch (detached chain stitch) worked with three strands of red floss, and fly stitch, worked with green metallic.
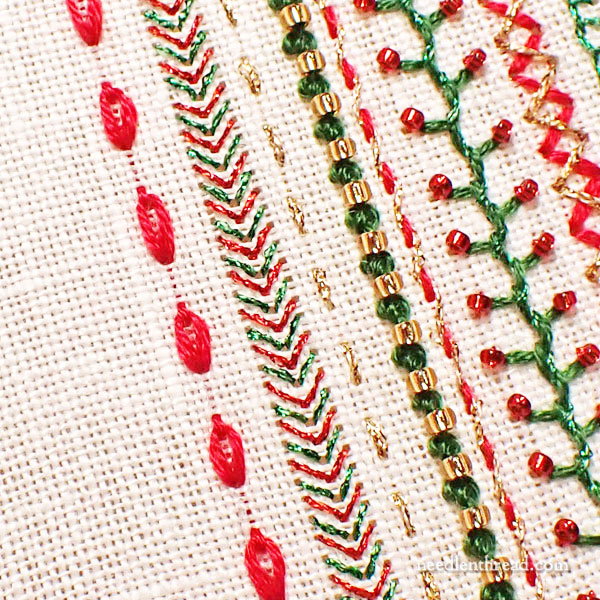
The detached chain stitches in this band are worked over about six threads of fabric, so they are quite large and long.
There are about five threads of fabric between each daisy stitch.
It’s important to space these “buds” consistently, to achieve a clean look to this line.
You might find it easier to work the line of chain stitches with the embroidery lying horizontal, so turn your hoop accordingly.
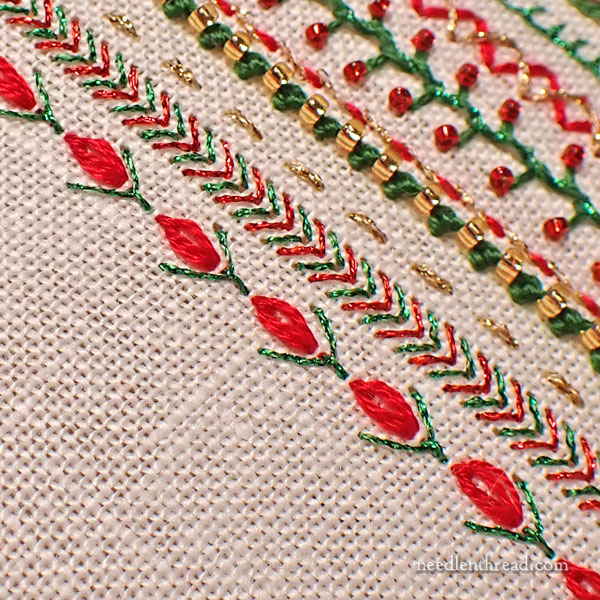
At the base of each bud, work a fly stitch, as shown above. You want the “arms” to extend about halfway up the side of the chain stitch, and the anchor stitch should be situated directly in the center. The anchor stitch covers about three threads in the fabric, to give the effect of a little stem at the base of the bud.
In the center of each detached chain stitch “bud,” work a straight stitch with the #8 gold metallic, to fill the center of the stitch and add a little sparkle.
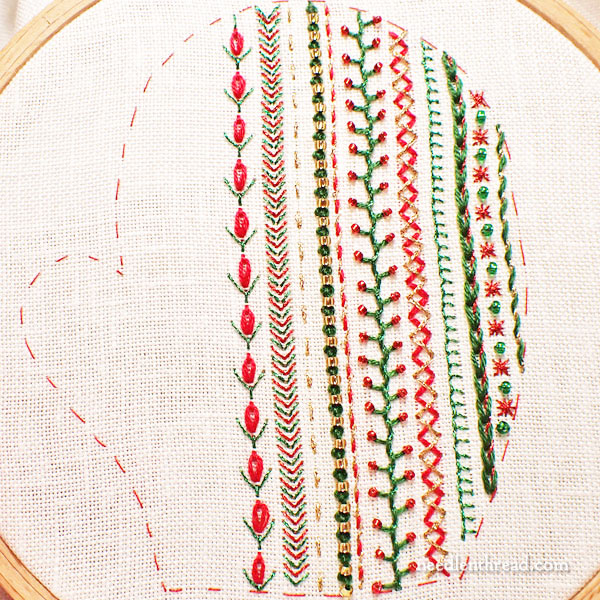
And here we have the mitten so far!
In the next installment, which will be next Monday, we will finish the embroidery and prepare the embroidered mitten design for the finishing process.
Announcements!
Tomorrow, I will pop in to wish you a Happy Thanksgiving, and I’ll hopefully be able to share with you some photos of the new insides of the studio. We’ll be deep cleaning all day today (!) – finishing in time to participate in some of the preparation for tomorrow’s holiday.
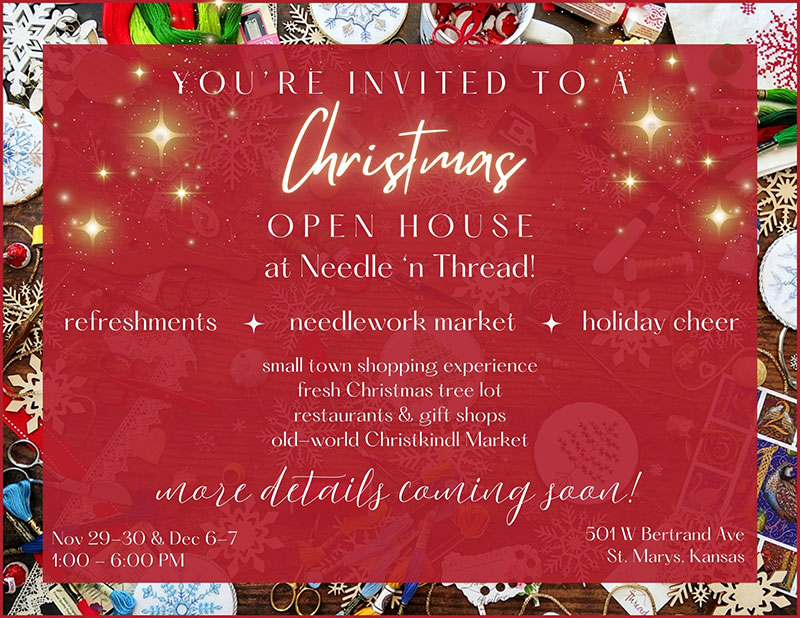
On Friday and Saturday, we have our first Open House weekend! Yay!!! You can read all about that here. Needle ‘n Thread will be open for visitors from 1:00 PM – 6:00 PM on Friday and Saturday of this weekend and on the same days and times next weekend (December 6 & 7) as well.
We’ll have heaps of door prizes for everyone (well, for every adult visitor, 16+). We’ll have an array of delicious refreshments, coffee, tea, and mulled cider.
Visitors have the opportunity to browse through needlework books galore, to examine a display of lots of embroidery samples from the blog, and of course, the opportunity to shop in person for our curated line-up of needlework supplies, kits, and goodies.
We’ll have a few items that we’re launching at the Open House, too – those will shortly also be on the website.
Although we don’t stock full lines of threads and fabrics, we have some beautiful linens you can see in person, as well as thread collections of floche, wool, and metallics.
If you can make it to our little nook in NE Kansas either weekend, you’ll be most welcome!
We will be taking Friday off from the blog, so I’ll see you next Monday! Any purchases made in the shop today and Friday will ship on Monday, since we won’t be able to do a post office run until Monday.


my favourite holiday tradition is the family meal with roast turkey, stuffing, mashed potatoes and brussels sprouts.