It’s Friday! Yay!! And you know what that means? We’re moving forward with The Christmas Mitten today!
If you’re just joining in on this project, the Christmas Mitten is a stitch-along here on Needle ‘n Thread, where we will be working together through the embroidery and finishing of a sampler-style Christmas Mitten ornament. You can read all the details about the stitch-along here, if you’d like to see how it works.
We offer a full materials kit for the stitch-along. It includes everything you need to create your own mitten ornament, with plenty of thread and beads left over.
If you’re a member of the Needle ‘n Thread Community on Patreon, you have already received this installment. In fact, the PDF posted yesterday on Patreon covers all the embroidery on the mitten project. I can’t quite fit as much information in a blog post as I can in a PDF, so I went ahead and prepared all the embroidery instructions for this project in the first PDF.
Earlier this week, I published the patterns, and we set up the project and transferred it. You can read all about that process here.
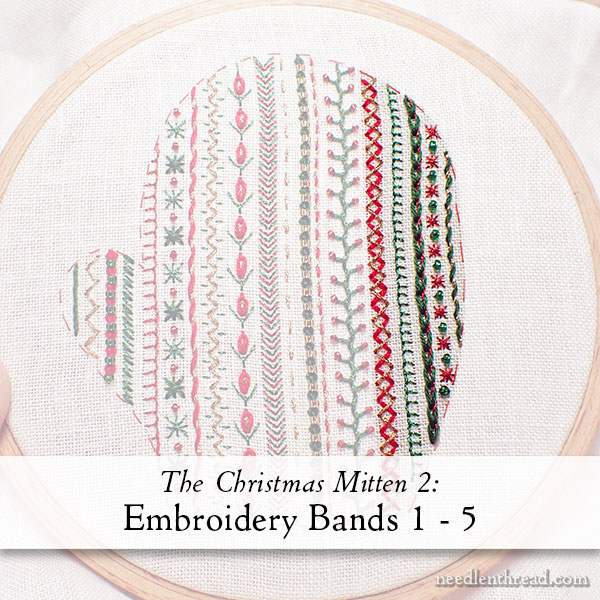
Today, we’re going to discuss some stitching tips that apply to the project as a whole, and then we’ll embroider the first five bands on the mitten.
As usual, please read through the entire article below before you begin stitching, so that you know where you’re headed with each step of the project.
Stitching Tips
These stitching tips will help you throughout the whole project.
- Working with Metallics: When working with metallics, use shorter lengths of thread (15 – 16″ max). Stab your stitches, don’t scoop them! The “stab” method of stitching involves taking the needle and thread to the back of the fabric completely with each stitch, as opposed to the “sewing” method, which is worked from the front and involves scooping up a bit of fabric.
- Working with Floss: To get the best and fullest coverage with floss, strip the floss before you thread your needle. Stripping floss is separating each one of the six strands and then putting back together the number you will work with and threading your needle with those. You can see how to strip floss in this tutorial.
All the embroidery with floss in this project is done with three strands of floss in the needle, with the exception of the embroidered edge, which uses six strands of floss. - Whipped Stitches: When whipping embroidery stitches (like running stitch and chain stitch) always whip each stitch from the same direction.
- Counted Stitches & Spaces: Because this is an even-weave linen and the project is set up on the grain or weave, you’ll be able to use the lines of the weave to help you gauge both the length of your stitches and the spaces in between. You don’t necessarily have to count everything, but you will achieve a more regular look if you try to keep the length of the stitches and spaces more or less the same within a band of stitching.
- Stitch Direction & Maneuvering the Hoop: It does not matter if you stitch up or down the mitten. The lines are vertical, but it makes no difference if you begin at the top of the mitten or the cuff. As you work, turn your hoop to accommodate your stitching, to keep your stitching experience comfortable.
- Sewing on Beads: To sew on beads, use one strand of floss in a coordinating color. Situate the bead so that it is sitting upright on the fabric, like a tire sits on the road. Work two stitches through the bead, preferably in a cross stitch configuration, to secure the bead.
- Line Spacing Across the Mitten: The space between the bands on the mitten is 1/8″ – 1/4″. You can count the number of threads between the lines if you wish by zooming in and examining the distance in the photos. As we begin, I will mention the approximate number of stitches between bands, but please be assured that it is not absolutely necessary to count the spacing. You can just eyeball it! As you work across the mitten, if you run out of space towards the final band, that’s ok. You can always skip the last line, or you can make it smaller or work it closer to the previous line.
Band #1: Whipped Running Stitch
To begin, mark your first band on the mitten using a pencil.
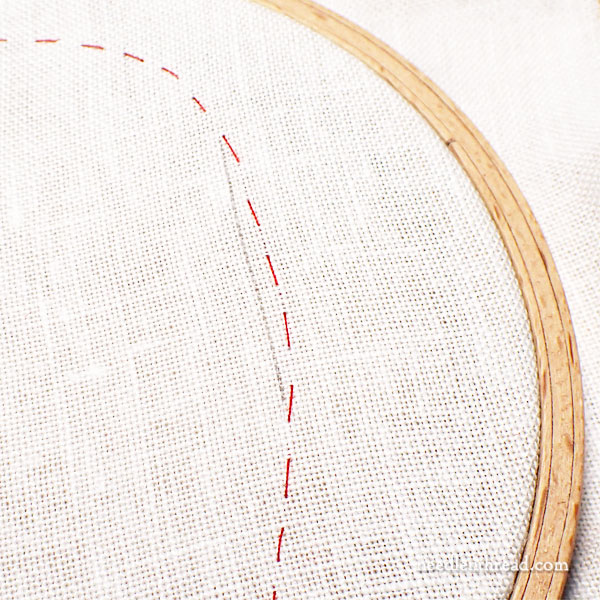
I use a mechanical pencil (with a 0.5 lead) to draw my lines when necessary. The first line is just over 1/8″ from the edge of the mitten that’s on the opposite side to the thumb. This works out to about 4 fabric threads over from the edge.
Draw your guideline by gently pulling the pencil along the “groove” in the fabric weave, so that you get a straight line on the grain of the fabric.
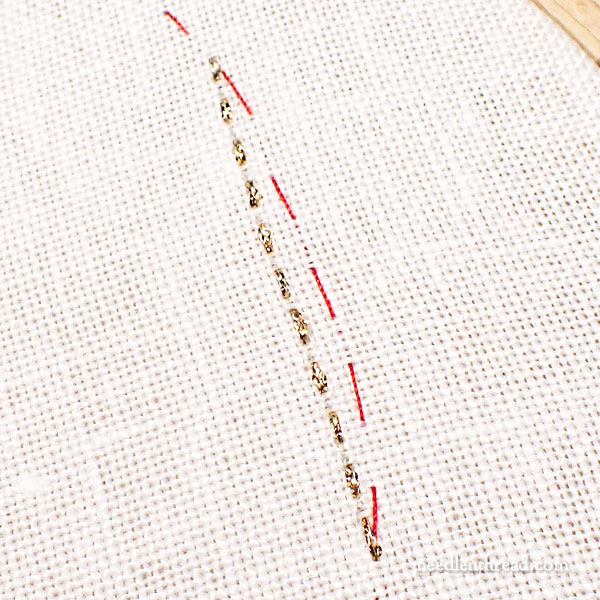
Work a running stitch on this line using the #8 gold metallic.
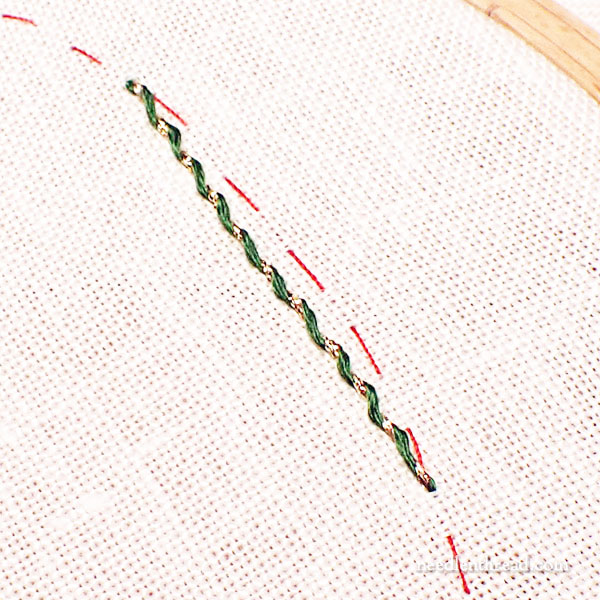
Whip the gold running stitch with green floss (three strands in the needle).
You can find a tutorial for running stitch here. You can find a tutorial for whipped running stitch here.
Band #2: Double Cross Stitch with Beads Between
For the second band, use the red metallic thread. Work a double cross stitch over four threads of fabric, each double cross stitch spaced about six threads apart.
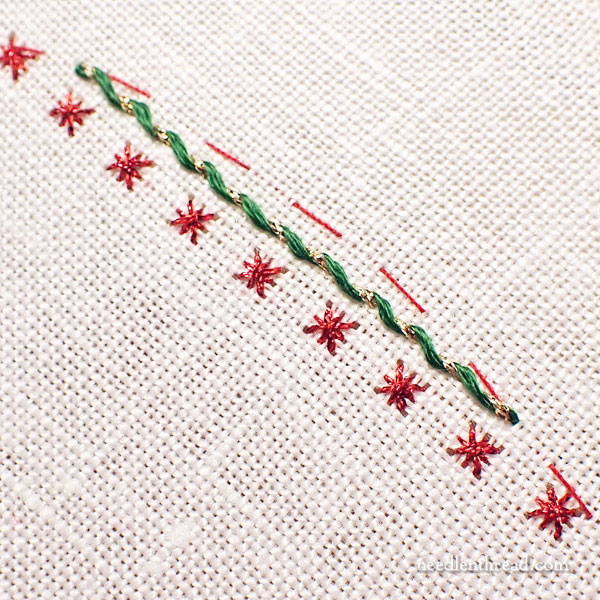
A double cross stitch is simply a regular cross stitch (two diagonal straight stitches on top of each other to form an “X”) with an upright cross stitch (two perpendicular straight stitches that look like a plus sign) stitched on top of it.
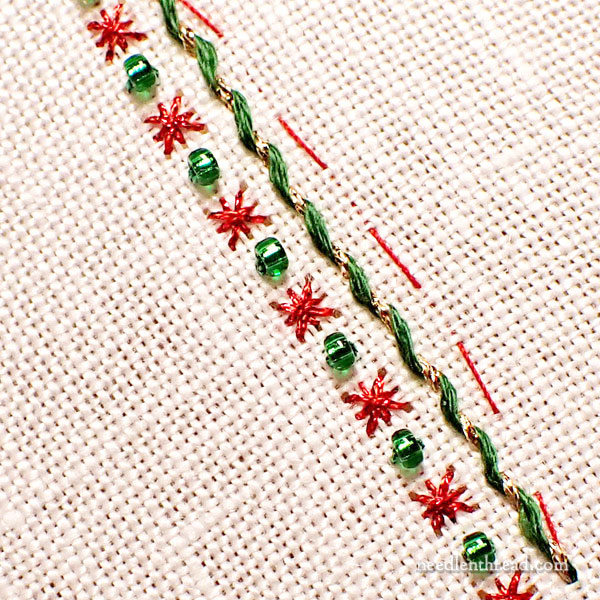
Between each double cross stitch along the band, sew a green seed bead.
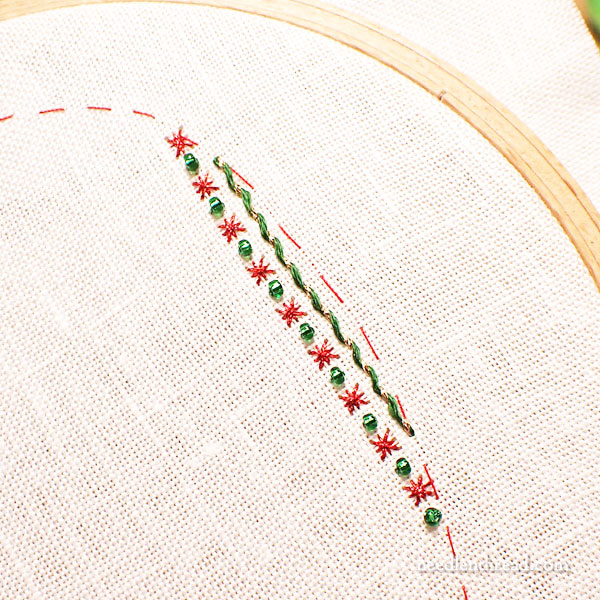
Here you see the first two bands, finished.
Band #3: Chain Stitch with One Side Whipped
The next line is chain stitch worked with three strands of green.
The chain stitch line is approximately 4 threads over from the double cross stitch line.
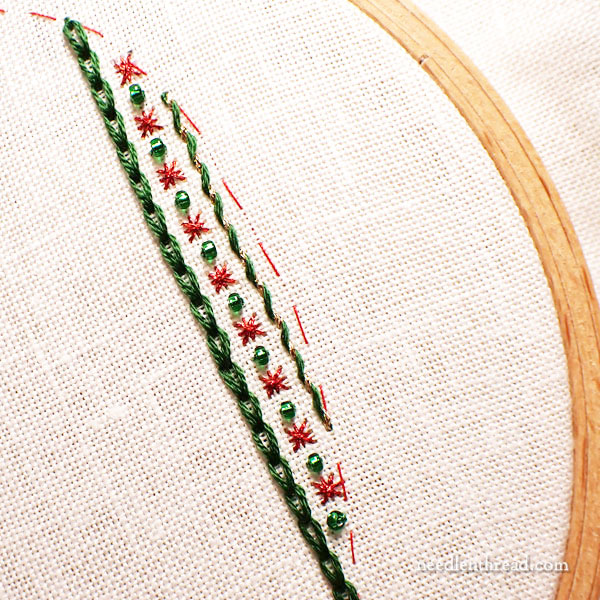
Each chain stitch covers about 5-6 threads of fabric. Try to work them at a consistent length.
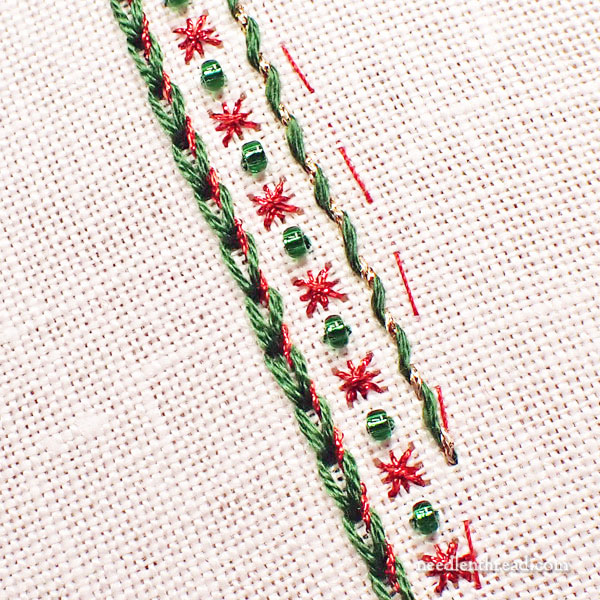
Whip the right side of the chain stitch with red metallic (the right side in this case is the side closest to the previous line of stitching).
You can find a tutorial for chain stitch here. Whip one side of the chain stitch in the same manner that you whipped the running stitch.
Band #4: Buttonhole Stitch
The next line is a buttonhole stitch worked with green metallic.
I find it easiest to work buttonhole stitch with the hoop turned so that the stitched line is horizontal.
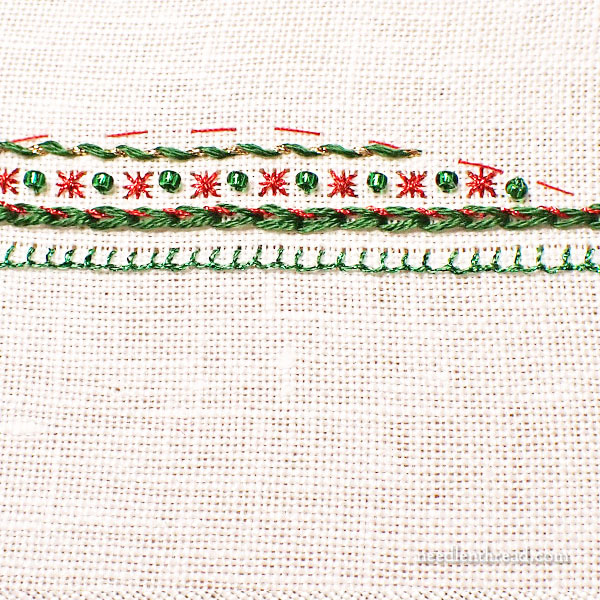
The buttonhole stitch is worked over three threads of fabric and there are three threads of fabric between each stitch.
You can find a tutorial for the buttonhole stitch here.
Band #5: Overlapping Zigzag Lines
The next band, about 4 threads of fabric over from the buttonhole, begins with a zigzag line of straight stitches in three strands of red floss.
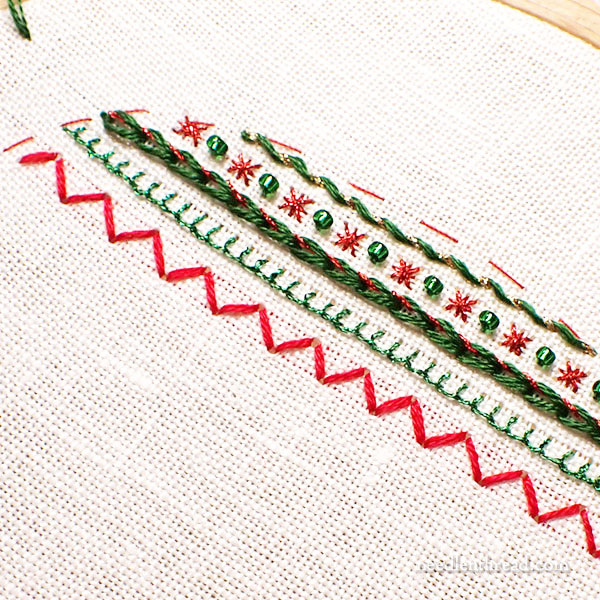
Essentially, this is more or less a backstitch in a zigzag pattern. The band is five threads of fabric wide and each zig and zag is five threads down from the previous, worked on the diagonal.
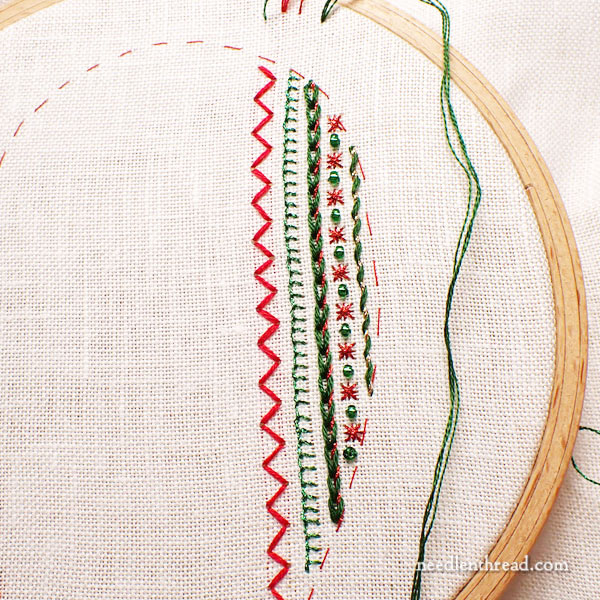
Here you see the zigzag foundation in red.
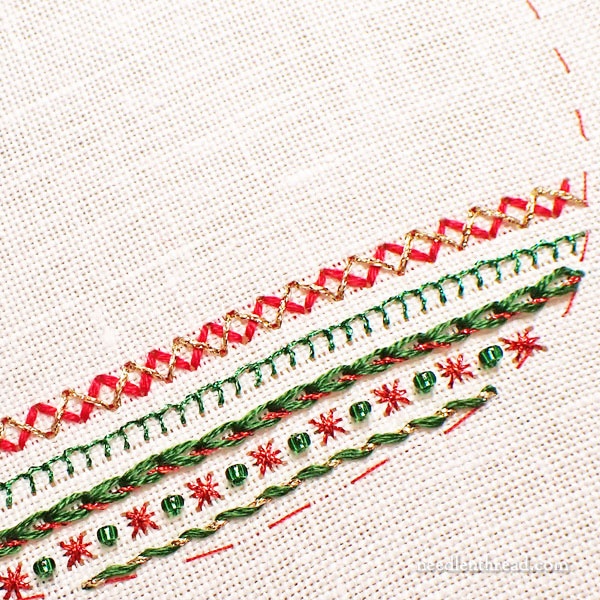
Work a second layer of zigzag stitches over the first, off-set with the first, in #8 gold metallic.
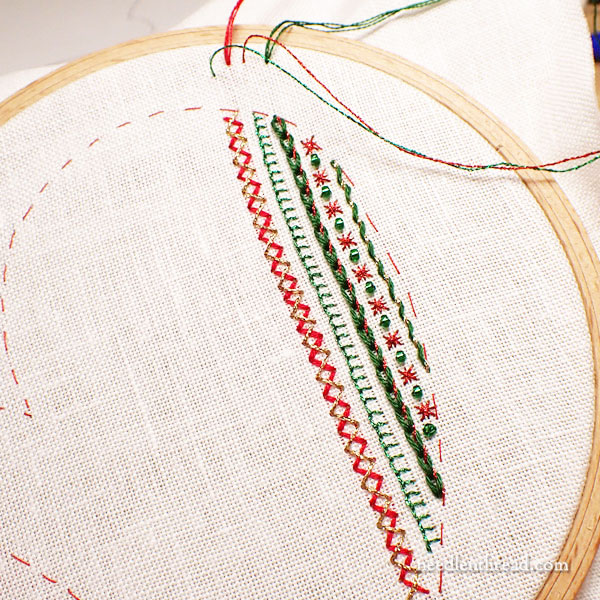
Here, you see the finished red and gold zigzag line and the first five bands of embroidery, completed!
Next Up!
Next, we will embroider bands 6 – 11!
Shortly, I will set up an index of articles for The Christmas Mitten so that you can easily find each article. It will be under “Tips & Techniques” in the main menu, but I will publish it as a regular blog post so that you can bookmark it, too.
Here in the US, next week is a pretty busy holiday week. We celebrate Thanksgiving next Thursday. I’ll definitely have the next part of the mitten up for you and the index available next week, too, just in case you have extra time for stitching over the holiday weekend!


Will you be carrying, “Enchanted Embroidery” book by Jenny Adin-Christie? If so, would I be permitted to preorder? Thank you. Laurie
Yes, I will! I’m debating about the pre-order. Last time we did it that way, the books didn’t show up on time (almost two months later) and when they did, about 1/3 of them were damaged too much to sell. I ended up losing money on that whole kerfuffle. So we shall see – if I do a pre-order, it will likely be just before or just after Christmas. I already ordered quite a few of the books, because I believe it will be quite popular and I want everyone who wants it to have the opportunity to get it!
Would it be OK to use a Holbein kind of stitch on band 5 rather than carrying the thread on the back?
Of course! You can go at it any way you want! Good idea!