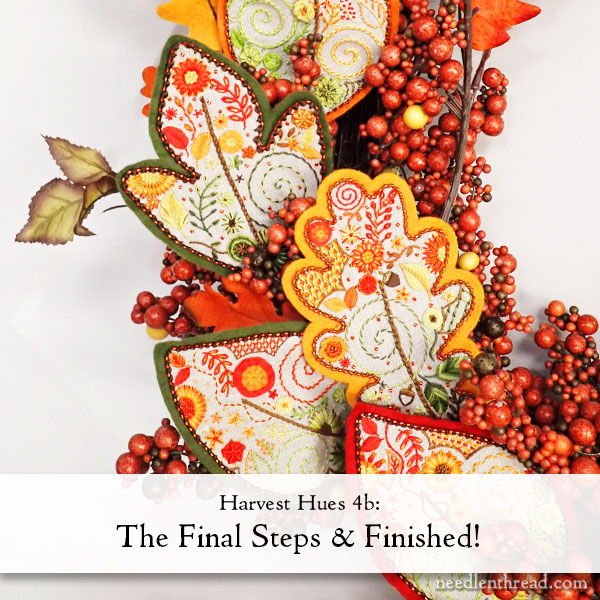
Yesterday, we began the finishing process on Harvest Hues, and today, we are going to tie up the project!
In this final lesson, we’ll be adding the stiff floral wire to the back of the leaf to create a hanger and a “spine” that is bendable, so that you can style your leaves by bending them, if you wish.
Finally, we will sew the embroidered leaf to the felt backing.
If you are just joining in on this project – or if you’re just catching up – you can find all the installments of this stitch-along listed here in the Harvest Hues Project Index.
If you’re a member of the Patreon Community on Needle ‘n Thread, you will find the downloadable and printable PDF with all the finishing instructions already posted.
Let’s finish the leaf, shall we?
For the rest of the finishing process, you’ll need your prepared leaf from yesterday’s lesson, the florist wire that came in the kit, some pliers for bending (I used needle nose), brown floss that matches your leaf’s stem (or whatever color your stem is), needle, thread, scissors, and embroidery floss that matches the felt backing.
About the Florist Wire
We used a heavy-duty 18 gauge wrapped wire. You can use a higher gauge (or finer wire) if you want. If you purchased the kit, we already cut the wire for you and you don’t need to cut it.
If you are cutting your own wire, you’ll also want some wire cutters. You’ll want about 7-8″ per leaf.
We preferred wrapped wire rather than unwrapped. It is easier to cover with the buttonhole stitching.
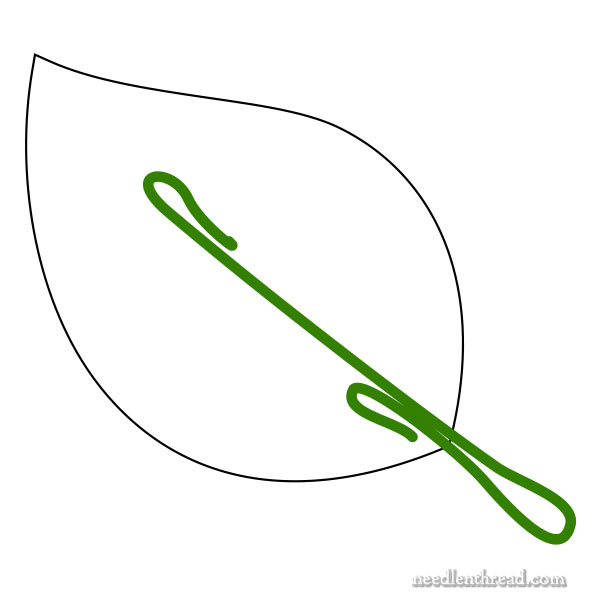
Start by bending back both ends of the wire, with about a 3/4″ – 1″ turn-back on each end.
Then, lay the wire on the back of the leaf, to correspond about where the leaf vein is. You’ll have a good bit of wire extending past the base of the leaf. Slightly bend the wire to match the bend in the vein of the leaf.
Then, bend the “stem” part of the wire that extends past the base of the leaf back onto itself, leaving only about 1.25 – 1.5″ of folded wire beyond the base of the leaf.
The layout of the bent wire’s path is shown in the diagram above.
Once the wire is bent according to the diagram and measurements, we are going to attach the wire to the back of the leaf first, and then we’re going to buttonhole stitch around the protruding stem, leaving an open loop in the stem. This open loop should be about 1″ long.
Don’t skip the small bends on the ends.
The small bends at the ends of the wire keep the wire in place, no matter what.
We tried various configurations of the wire, and we found that, without these small “hooks” at the ends of the wire, the wire tended to slip out of the stitching on the back of the leaf if the leaf got tugged on. This was problematic when adding leaves to greenery, wreaths, and so forth, when we needed to do a lot of manipulating of both the leaves and the greenery.
With the “hooks” at the ends of the wire, the wire will not move and the leaf will not slip off it, even during aggressive manipulation in pre-made floral objects.
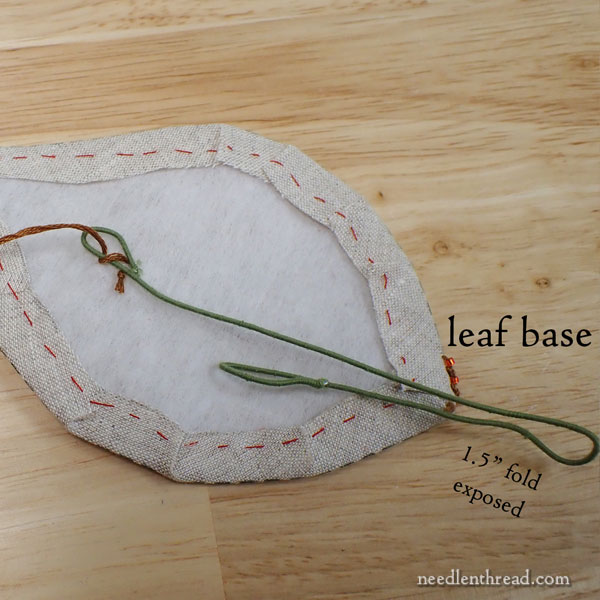
To attach the wire, start with about 18″ of embroidery floss (we used all six strands), or you could simply use sewing thread at this point. The embroidery floss, being much heavier yet smooth, just seemed to work better for this.
Knot the end of the thread and pass it through the interfacing by the inside hook in the center of the leaf.
Whip stitch around the hook and down the wire towards the larger bend on the base.
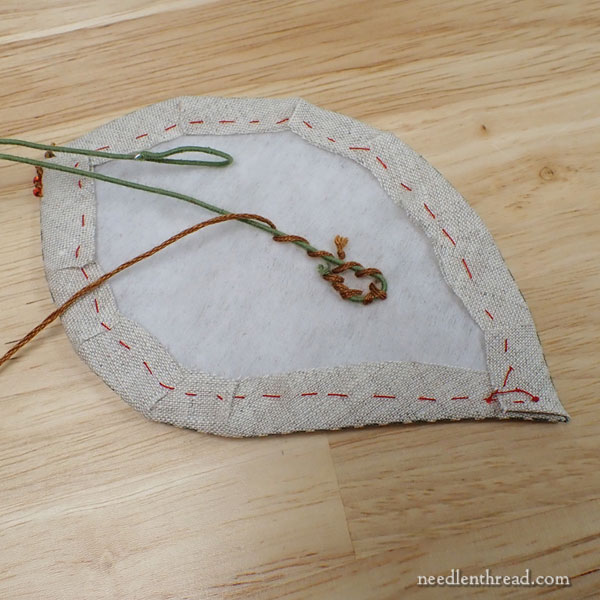
Each time you whip around the wire, pick up a little interfacing. You can also pass through the backs of the stitches on the vein of your leaf, if you can find them by feeling them as you stitch. But if you can’t, don’t worry about it. Picking up a little interfacing will suffice.
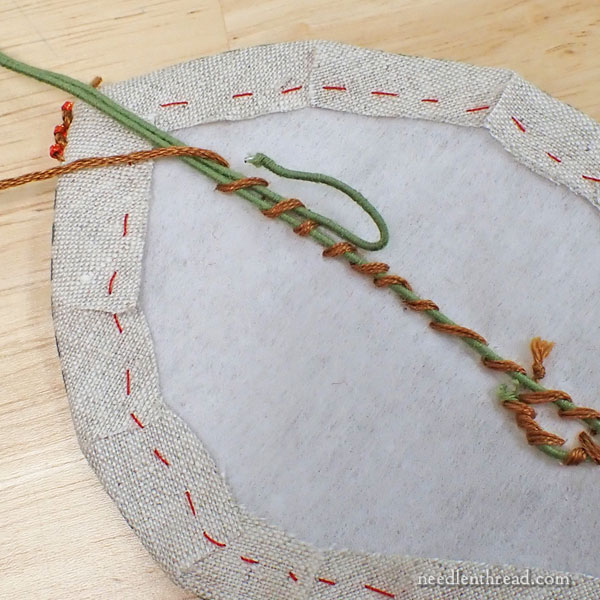
Go ahead and whip around the wire where it doubles, as shown above, still picking up interfacing.
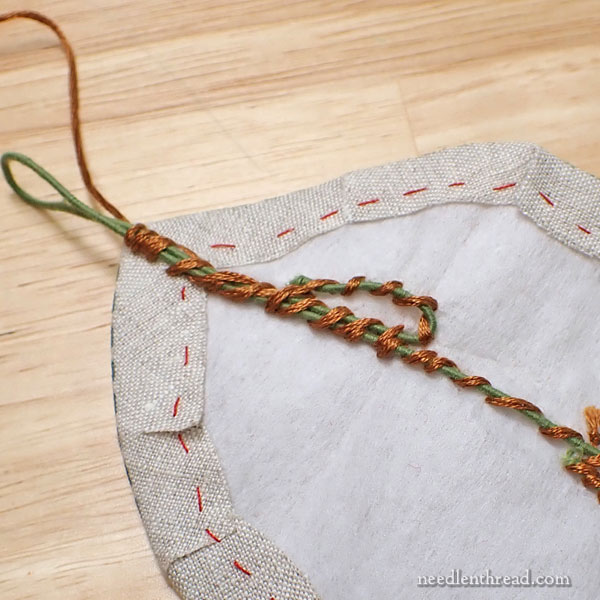
Then, whip back to the hook, and cover it, coming up at the end of the hook and picking up the main two wires again. Continue to whip around the two wires until you come to just inside the edge of the base of the leaf.
End this thread before the edge, by knotting around the wires and into the linen near the wire.
Start a new thread – 6 strands of whichever brown (or other color) that matches your stem on the front of the leaf – and knot the end.
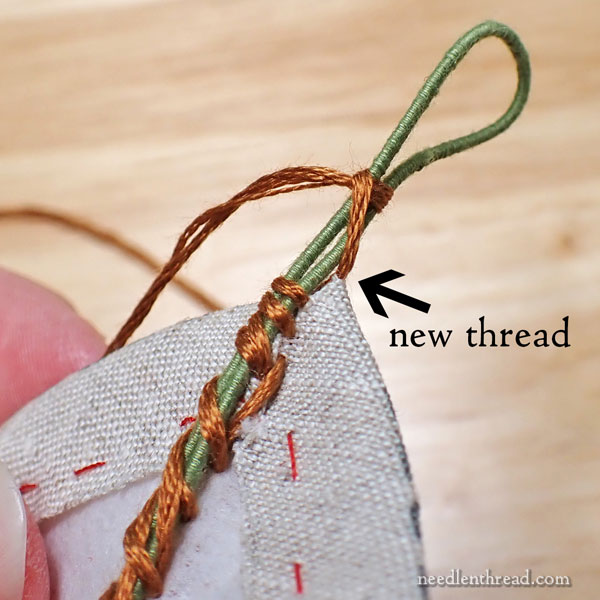
Bring the needle and thread out through the “corner” or tip at the base of the leaf, with the knot inside the linen and interfacing, where it will hold.
Give the wire that forms the protruding stem a good pinch, so that the two wires come together at the base of the wire loop, about 1/4″ or so out from the leaf.
Take your thread up around the “neck” of the open loop and wrap it around the neck once, coming out over the work thread after the wrap, to form a holding buttonhole stitch.
Now we’re just going to buttonhole stitch around the loop itself.
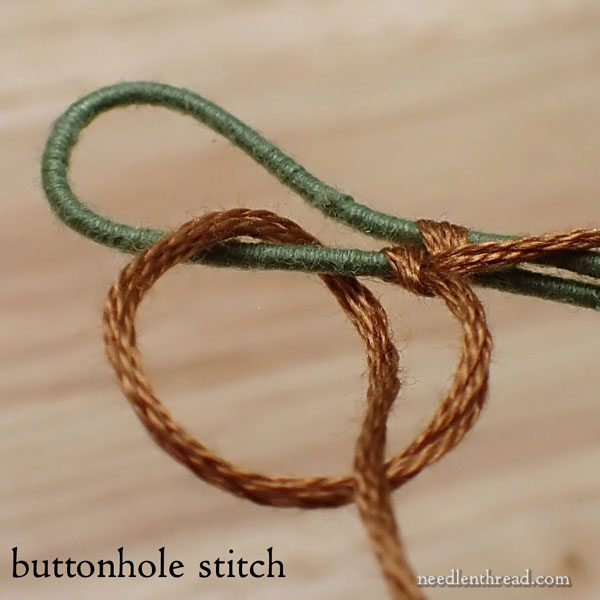
Buttonhole stitch around the loop by passing the needle into the loop and then out over the working thread, in the configuration shown above.
Pull the buttonhole stitch snuggly around the wire.
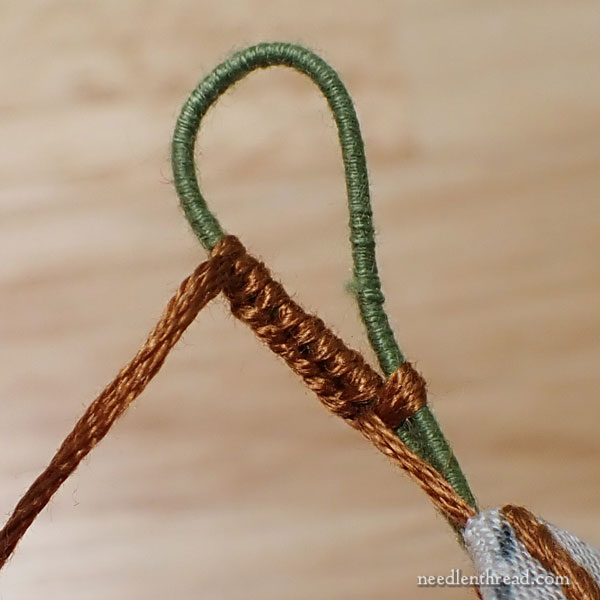
Each time you pull your buttonhole stitch tight, make sure it’s moving up right next to the previous stitch, so that the wire is covered.
As far as the buttonhole stitch direction goes, work around the loop in whatever direction you are most comfortable with, when working the buttonhole. In the photo above, the stitching is moving from right to left, so the tensioning of the buttonholes pulls to the left.
You can go in either direction, whether you are right or left handed. You just have to tension your stitch in the direction that you’re traveling around the loop.
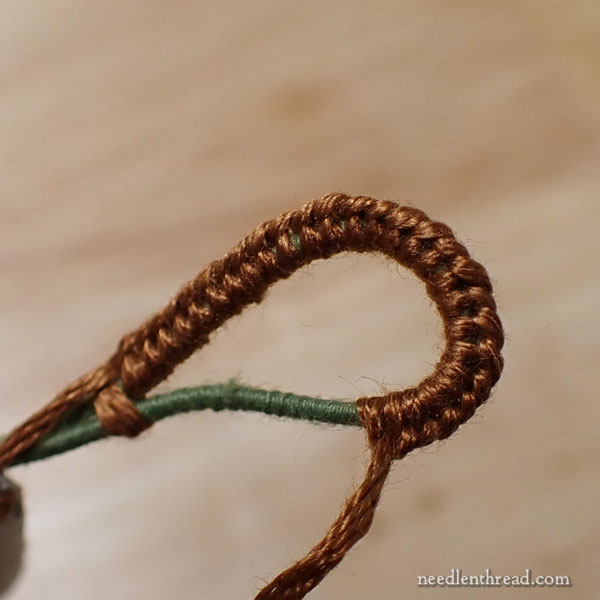
Keep working all the way around the loop.
Occasionally, you might hold the leaf up and let your needle drop towards the floor, to allow your thread to untwist itself. Sometimes, with this type of buttonholing, the thread can twist up. Removing that twist by letting your needle dangle towards the floor so the thread can untwist can help eliminate the frustration of twisted thread.
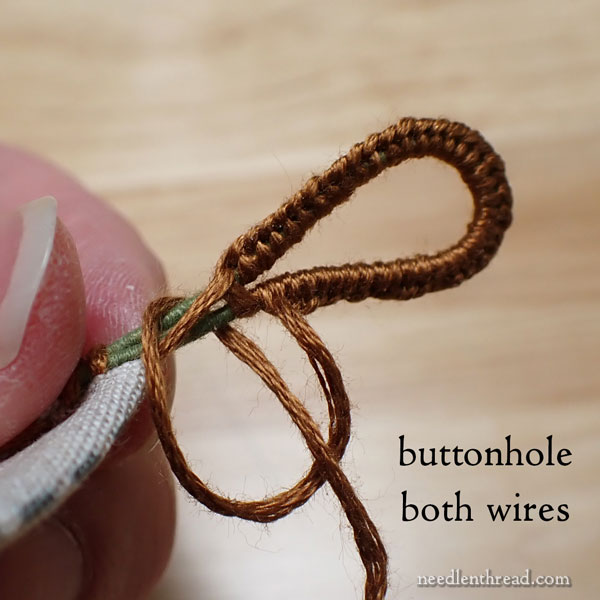
When you return to the base of the loop, you’re now going to buttonhole stitch over two wires and the carried thread from the beginning of the process.
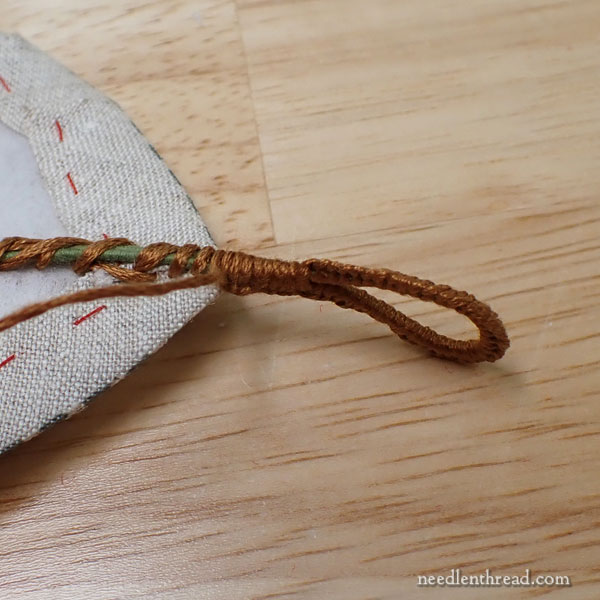
When you finish the final buttonhole stitch all the way down the stem to the leaf edge, end the thread in the linen and interfacing on the back of the leaf, or knot it around the wire that will be hidden by the felt backing.
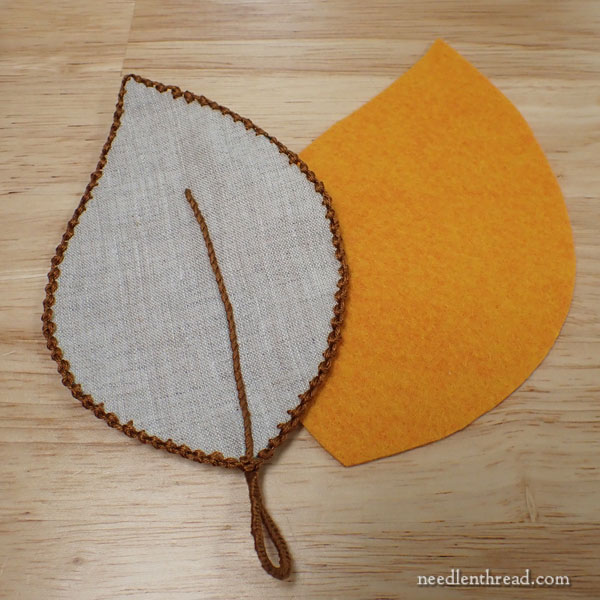
Here’s the leaf, finished, with the attached stem, also finished.
Now we’ll sew the leaf onto the colored felt.
Choose the floss color that matches the felt backing, and use one strand of embroidery floss for this process.
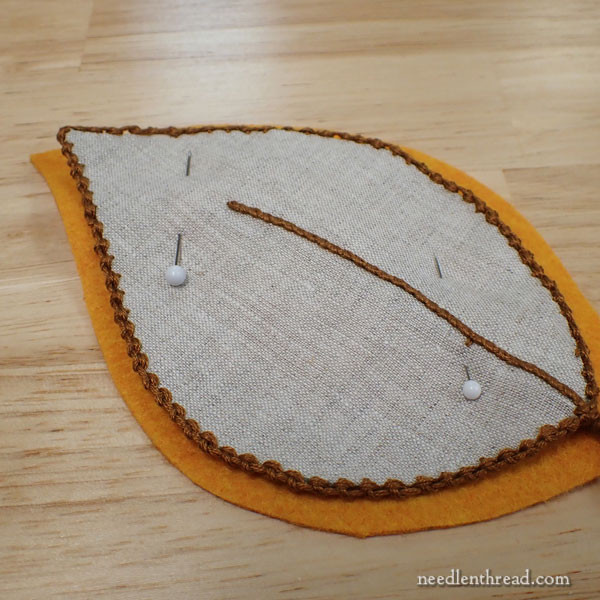
Situate the finished leaf on the felt backing so that the felt is even all around the leaf.
It’s ok to pin through the entire leaf – just try not to interfere with your embroidery stitches!
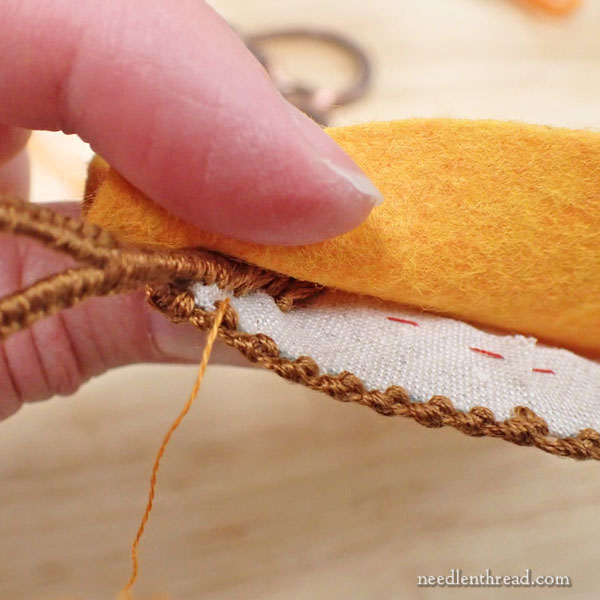
Bring your needle and thread out in the linen just along the inside edge of the back of the leaf, near the Palestrina stitch edging.
Let the knot catch inside, where it won’t be seen.
We’re going to work a blind stitch inside this edging. Blind stitch is essentially just a running stitch that alternates from the linen side to the felt side, moving forward along the edge and back and forth between felt and linen. When you pull the running stitches through, the felt and linen will come together.
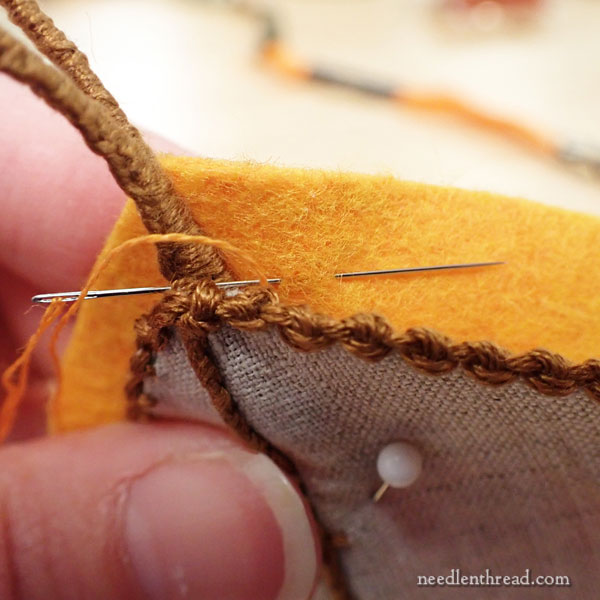
Move over to the felt side, and take a small stitch forward. These stitches should be well within the felt, where they will not be seen when the two sides – linen and felt – come together.
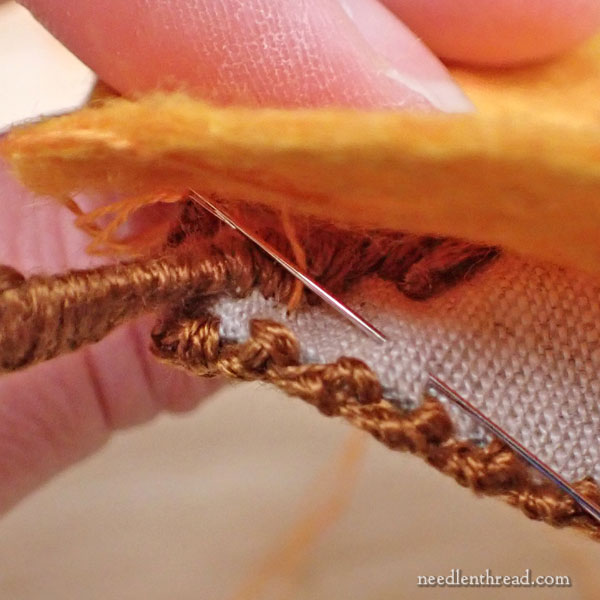
Then step back over the linen side, and take a small stitch forward…
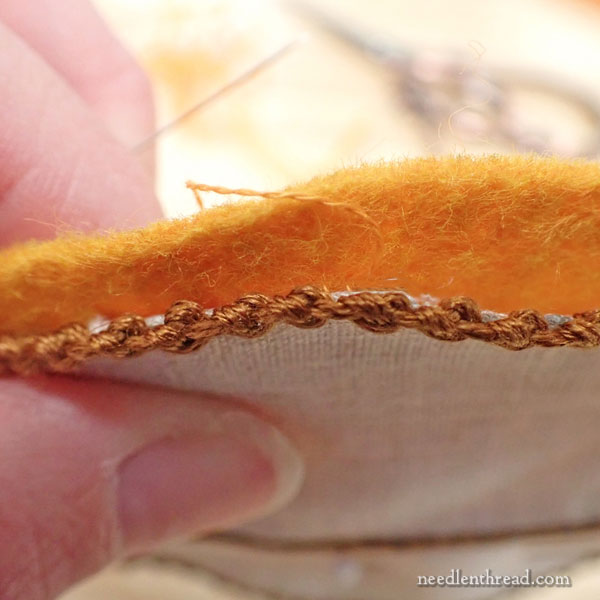
…then back to the felt side. As you pull your stitches, the felt and linen will come together.
Finish stitching all around the leaf and felt in this manner, to attach the felt to the leaf. Knot inside the hidden area by the stem, in the linen edge, snip your thread, and you’re finished!
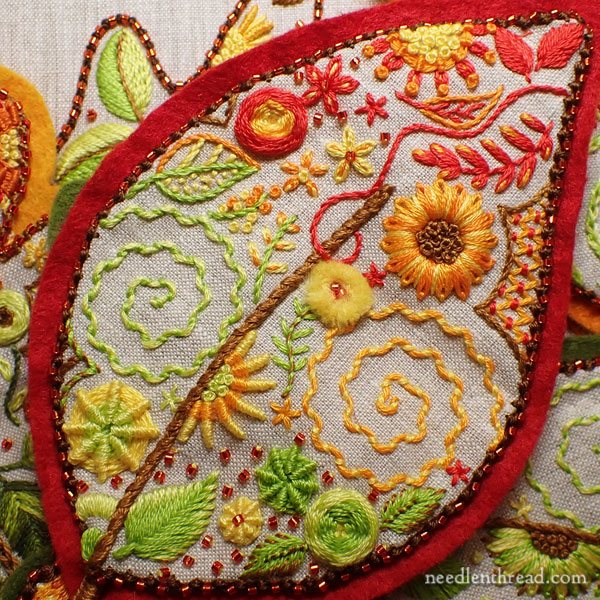
And that, my friends, brings us to the end of Harvest Hues!
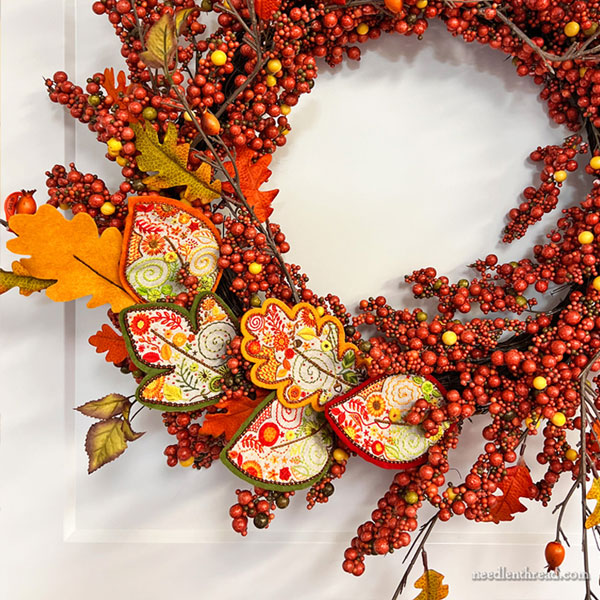
My favorite use of the leaves was to style them in a pre-made autumn wreath, but you can also string them on wide ribbon or colorful bias tape or twill tape, to create pennant-style leaves. Or you can scatter the embroidered leaves along a plain table runner, tuck them into other foliage, and so forth.
It’s definitely worth taking the time to find a good way to style them to suit your own decor!
I hope you enjoyed this project!
Don’t forget that you can find all the installments for this project listed here in the project index for Harvest Hues! Feel free to finish up at your own pace – the lessons are waiting for you there.


Leave A Comment