Welcome back to Harvest Hues, our current stitch-along here on Needle ‘n Thread, where we are exploring the embroidering of autumn leaves!
If you’re just joining us on the stitch-along, you can find all the previous lessons for the stitch-along available here in the Harvest Hues Project Index.
Members of the Needle ‘n Thread Community on Patreon have already received today’s lesson as part of the downloadable PDF for Part 2. We have to break up all that content when adding it to the blog here, since I can fit a lot more in a PDF than I can in a blog post! So you’ve already received this lesson in the PDF format, if you’re on Patreon.
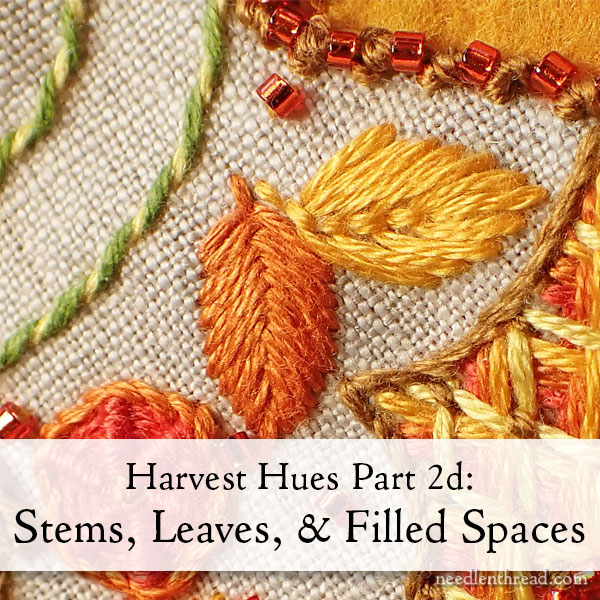
So far, we have embroidered the stem and spirals, then all the large round floral elements, and then the half elements on the leaf.
Today, we will look at stems (branches with buds and other little stem-looking items), individual leaves, and the filled larger spaces on the edges of the leaf.
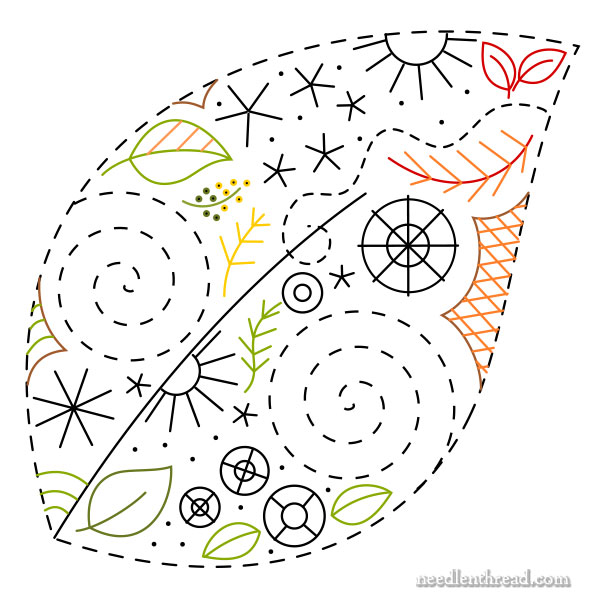
You can see all of these areas marked off in color in the diagram above.
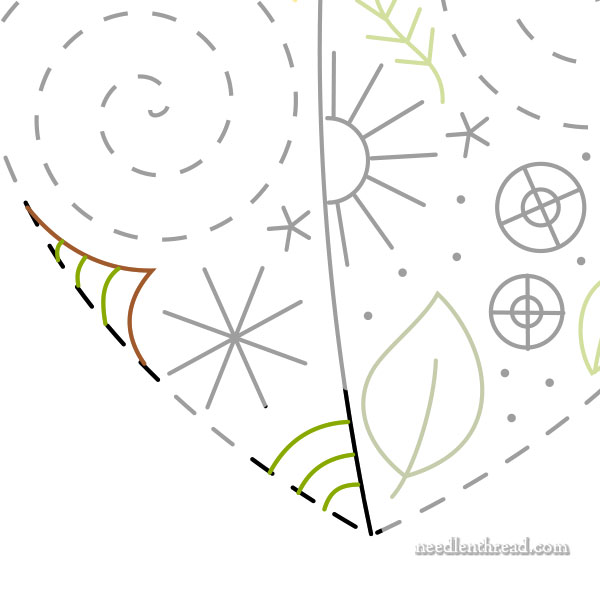
Before we go any further, we’ll talk about those two elements highlight in the diagram above.
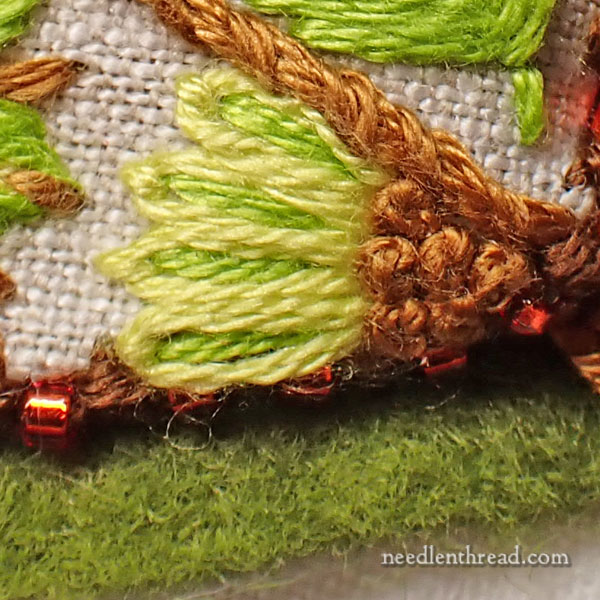
The lower element in the corner of the leaf was treated ways on different samples. I think my favorite approach was just to make that area a partial floral element, as shown above. French knots fill the corner (three strands in brown), with light green daisy stitches filled with darker green straight stitch centers.
Of course, the colors and stitches are up to you! You can experiment with other approaches. On one leaf, I satin stitched those corner “arches” so that they were striped green. It was ok, but not my favorite approach.
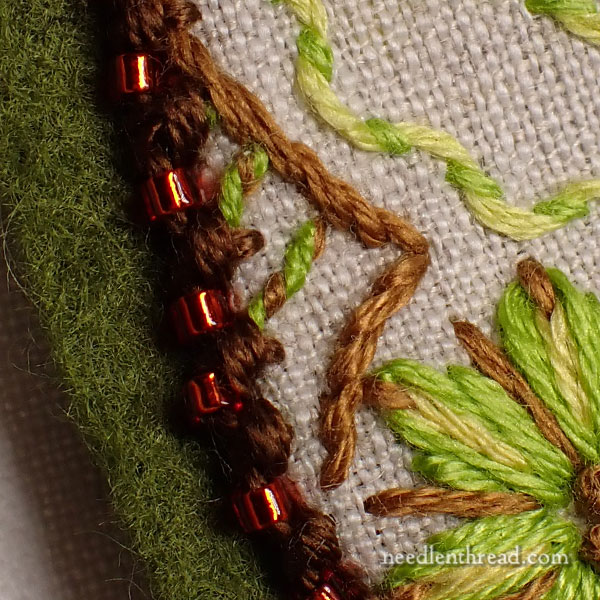
The upper cut-out area was treated pretty simply.
I outlined it in the light brown, using two strands in stem stitch. I embroidered the parallel lines inside in whipped backstitch (it only took 2-3 backstitches on each line) in the light brown, which I whipped with two strands of green.
Stem Elements
Now, let’s go on to the stem elements.
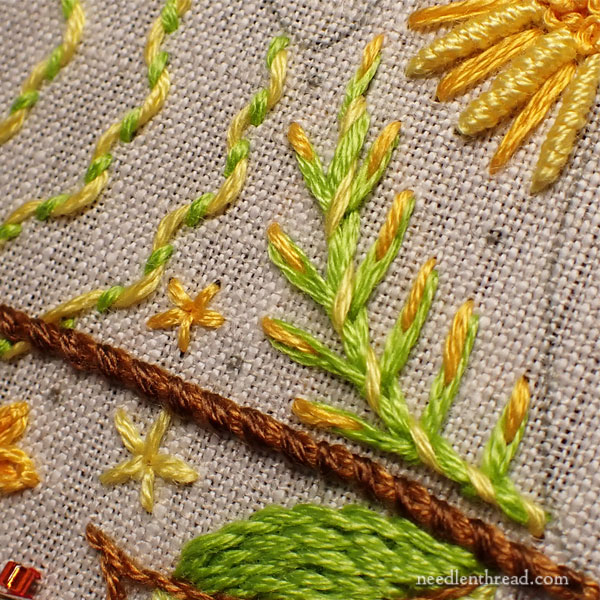
This is a typical stem element.
Work the central main branch of any stem element in whatever line stitch you prefer. For the most part, I used chain stitches or stem stitches, although occasionally, I used whipped backstitch or even just a vertical fly stitch to cover the whole “branch.”
Mostly, I used either two or three strands of floss, depending on the weight I wanted for the branch. On smaller branches in more crowded areas, use two strands. On larger, more isolated branches, you easily have room for heavier threads, so use three strands.
On the sample above, I used chain stitch for the main branch, which I added straight stitches to, to make a kind of “mock wheatear.” Then I whipped the center chain stitch line with yellow (2 strands), and I worked a small yellow split stitch at the tip of each straight stitch arm with the same thread.
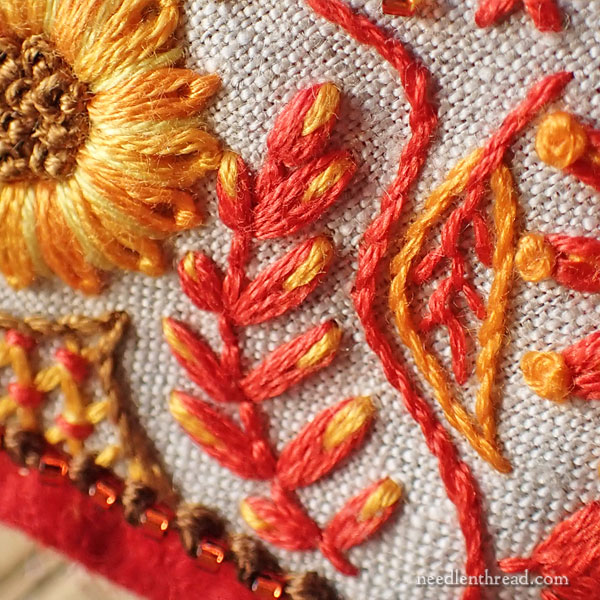
Here’s another example of a stem element.
This one is worked with backstitch down the center stem, in three strands of red. The “petals” are small granitos, using two strands of floss. The granitos are split at their tips with a small straight stitch using three strands of yellow.
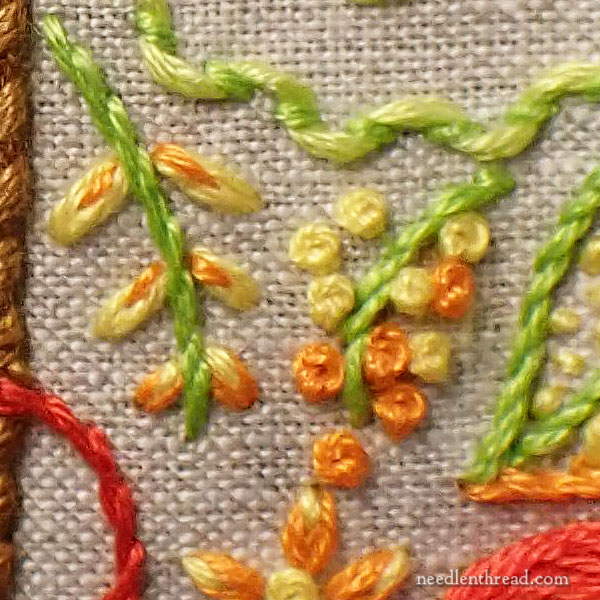
The two little stem elements here were worked in a more crowded space, so they were stitched with two strands of floss, using green in stem stitch for the main branch. The buds on the left example are small granitos (two strands) in yellow, split at the base by the stem with a small stitch in orange (one strand).
The French knots around the right branch are worked with two strands in either orange or yellow.
You can take your little stem elements in any direction the spirit moves you! Feel free to experiment with stitches and colors!
Large Leaves
Now let’s take a look at the larger leaves.
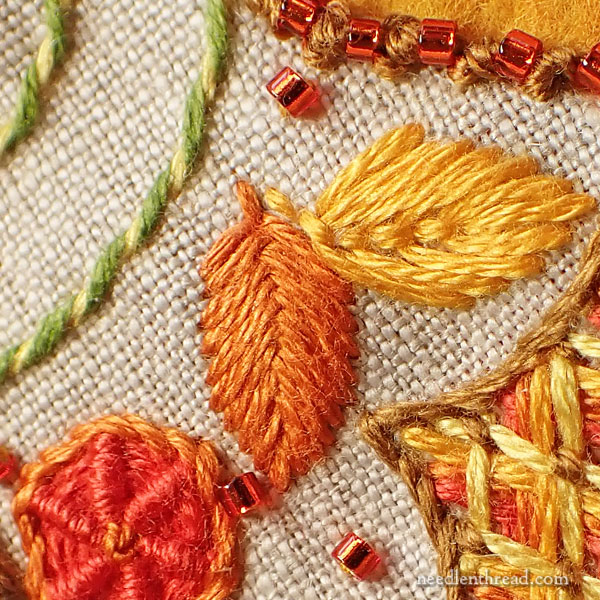
The larger leaves on the leaf were embroidered in three different ways: fishbone stitch (the orange stitch on the left), vertical fly stitch (the yellow leaf on the right), or in a combination of satin stitch and stem stitch filling, shown below:
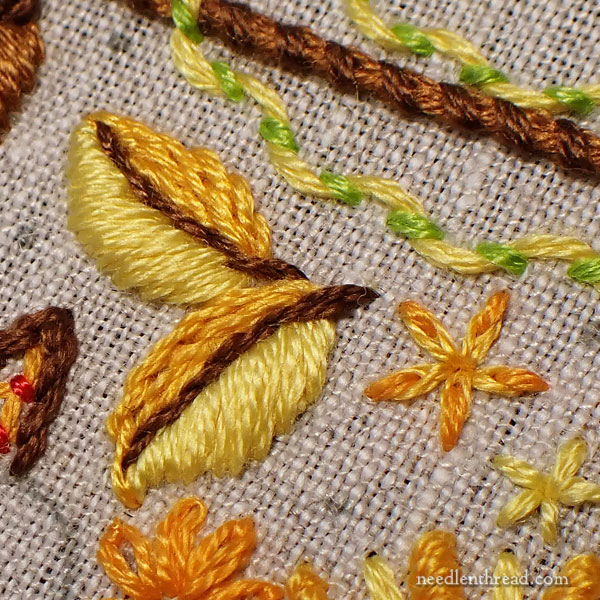
In the example above, the satin stitch is worked with orange (2 strands). The stem stitch filling (just rows of stem stitch worked close together) is worked with two strands of yellow. The center is a dark brown line of stem stitch (two strands).
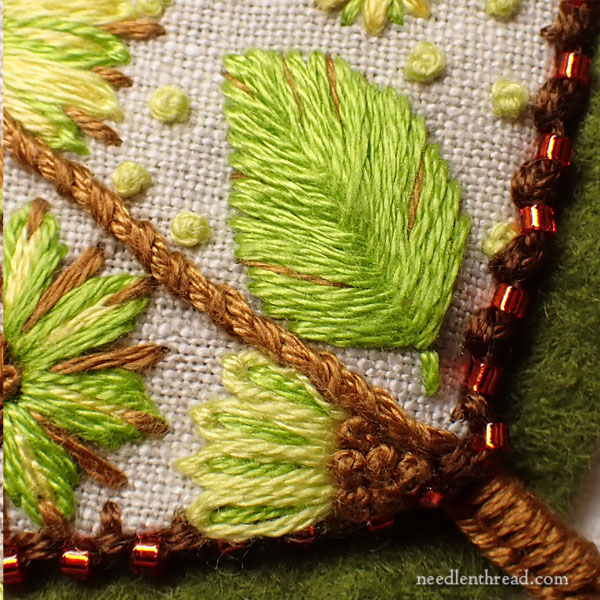
The large flat leaf above is worked in fishbone stitch using two or three strands (up to you). Randomly along the edge of the leaf, the tips of the stitches are split with brown straight stitches (one strand), to add some contrast.
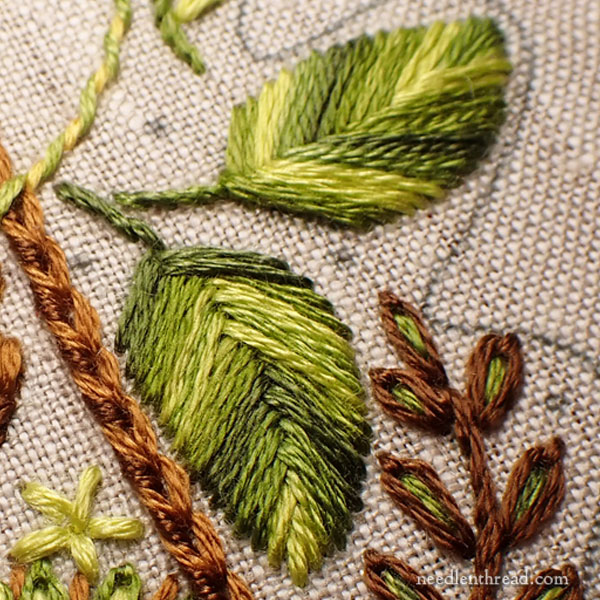
These leaves are worked in fishbone stitch with two strands of variegated green.
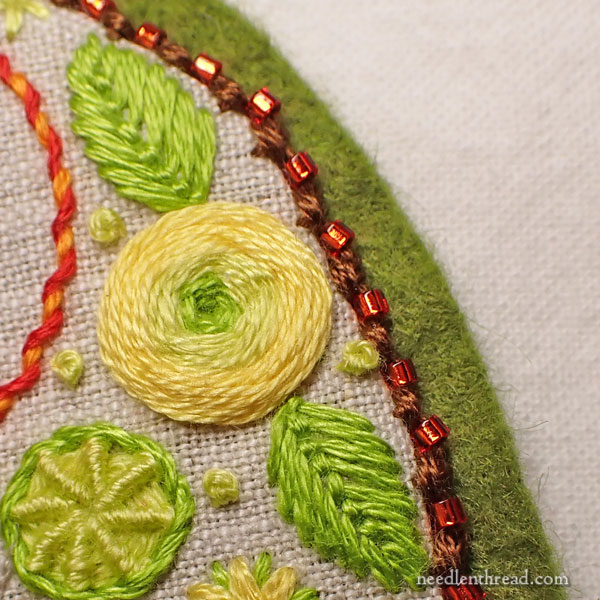
Here’s another example of leaves worked in vertical fly stitch.
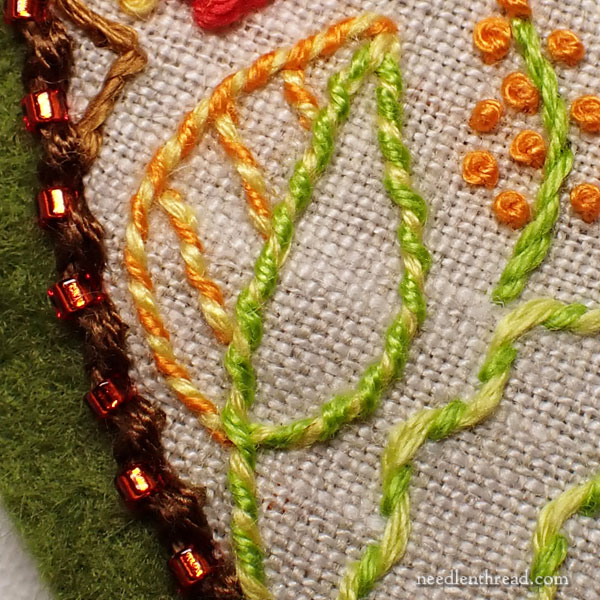
And here’s an example of the very large leaf outlined and not filled. This is whipped backstitch in a variety of colors.
Lattice Filled Elements
Finally, let’s take a look at the larger cut-out areas on the sides of the leaves, which are filled with lattice fillings of sorts.
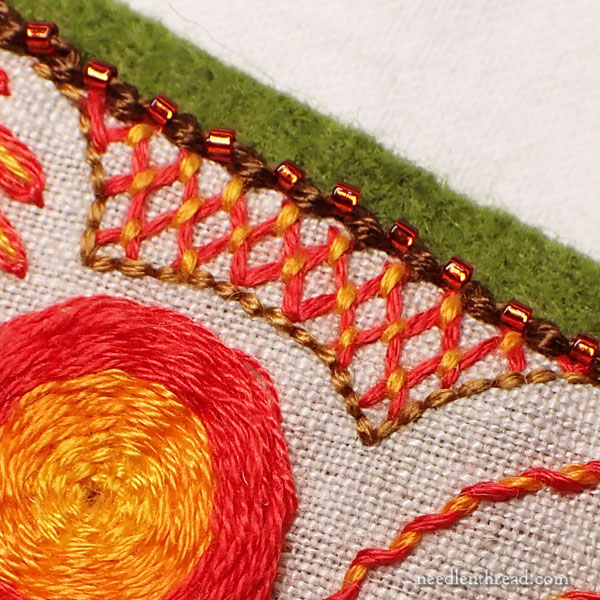
Again, all of these cut-out areas are outlined with brown, mostly in stem stitch on my samples but you can really use any line stitch you want.
The insides of these areas are filled with laid stitches that are couched over at the intersection. Usually, especially in the roomier areas, I used three strands for the long, laid stitches that form the lattice (this are simply long straight stitches), and two or three strands of the small couching stitch at the intersection, that holds the laid stitches in place.
You can get a good idea of lattice work in this article, which features a pretty old how-to video.
You can also find all kinds of other lattice fillings featured in this article here and in this article here.
Griffin Stitch is also a lattice filling, but it might be a little too complex for these smaller spaces.
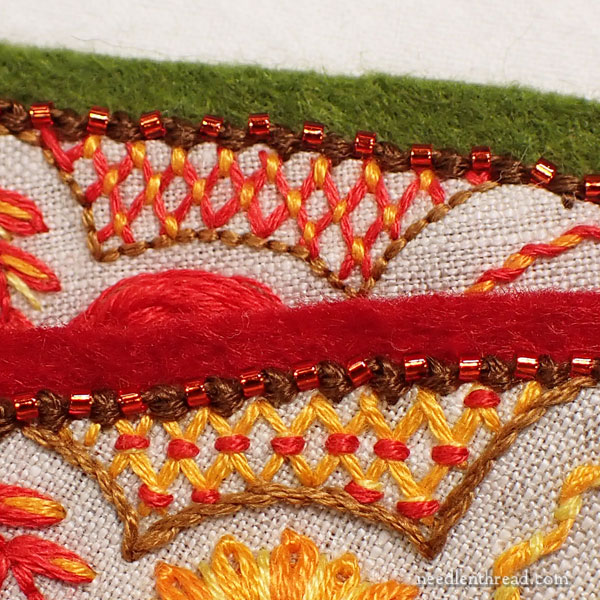
In the samples above, you can see how the direction and weight of the couching stitch can change the look of the filled lattice area.
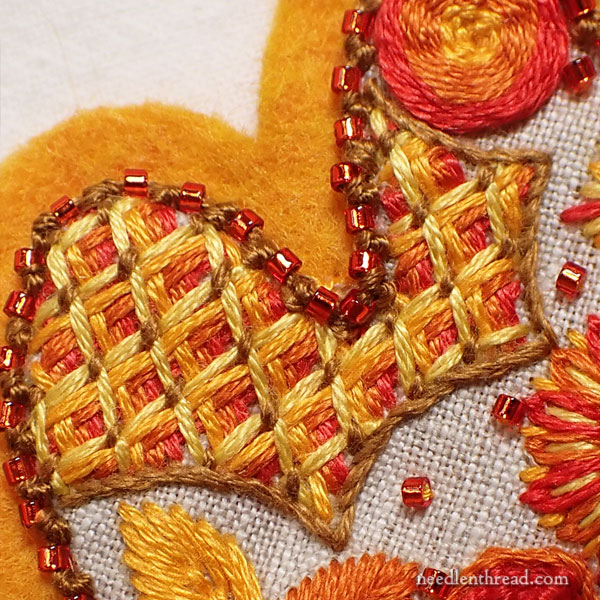
Finally, there’s always battlement couching. One of my favorite laid thread techniques, this is colorful and dimensional looking, and worth trying out!
What’s Up Next?
Next, we’ll be moving along with the smaller elements scattered around the leaf, that fill in between all these larger elements we’ve been looking at.
Then, we’ll move on to finishing!
Feel free to visit the Harvest Hues Project Index for previous tutorials in this stitch-along.
If you’re looking for a materials kit, you can find them available here!
Between the tutorials, we’ll be looking at a few other goings-on behind the scenes here at Needle ‘n Thread. We’ve been working on some ideas, preparing our Christmas ornament kit for this year, and other fun stuff.
Finally, apologies for the Tuesday post today. Normally, I publish Monday, Wednesday, and Friday. But oh wonder of wonders! I had a plumbing problem to deal with Monday morning, and I have appointments all day Friday. I’ll be publishing again on Thursday and taking Friday off from the blog. We’ll be back on the normal schedule again next week!
See you Thursday!


Dear Mary,
Whether I’m working a project or not, I drool over each iteration of your patterns — sometimes the color combos, but more often your interesting interpretations of (for others) simple stitches.
It’s why I have to read your email news last: I could easily spend twice as long pondering their beauty and forgetting the the work I must get back to!
Where do I start. I see your beautiful sampler and i’d love to recreate it but my confidence is lacking. I’m not creative, but i can copy. You have so much information on your site, so I just want to send you a very BIG THANKYOU!. I just have to start.
from Lillian (Western Australia)
Sometimes, starting is the Hardest Part of any journey. But once you’ve started, think of how much fun you’ll have!!