This past Monday, we discussed embroidering the larger round elements on Harvest Hues, and today, we’re going to follow that up with just a short little blurb on what I call the “half elements.”
The half elements are those elements that look like half a flower.
If you are just joining in on this stitch-along, you can find links to all the previous lessons for Harvest Hues here in the Harvest Hues Project Index.
If you’re a member of the Needle ‘n Thread Community on Patreon, you’ve already received the downloadable and printable PDF with this information in it, as part of the PDF titled “Part 2: Color and First Stitches.”
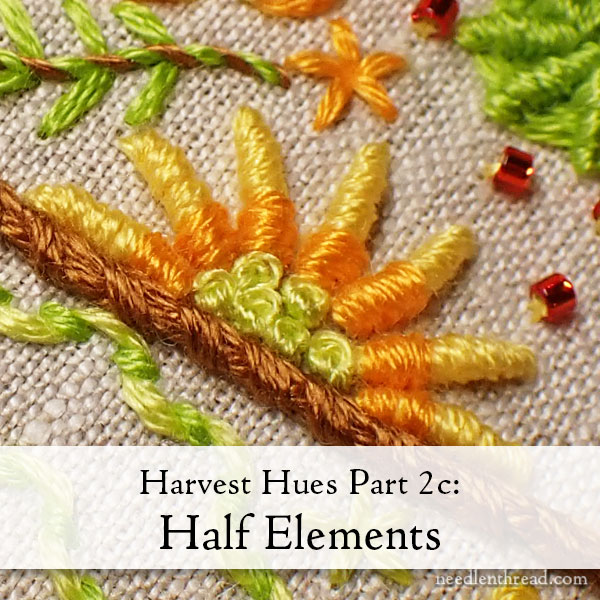
On the original leaf design (which was presented in Part 1 of Harvest Hues), there are two half elements. One is towards the tip of the leaf and the other along the vein of the leaf towards the base.
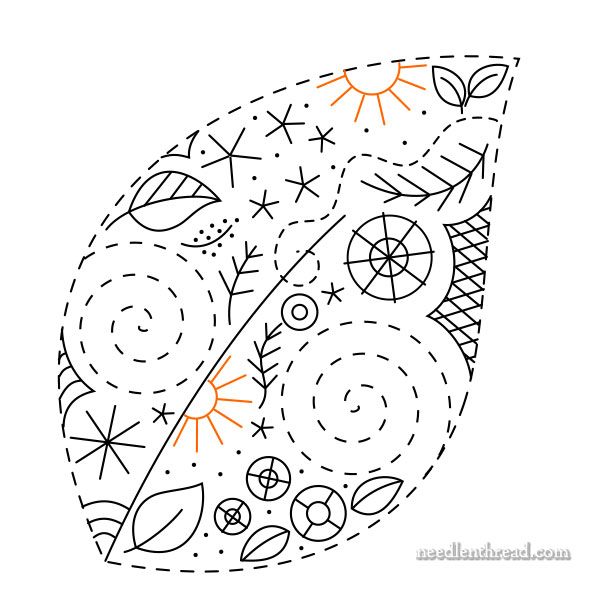
In the diagram above, you can see the half elements highlighted in color.
In the sample leaves, these half elements are embroidered a couple different ways: using the same padded daisy stitch technique explained in this past Monday’s lesson covering the larger round elements, or using bullion stitches for the petals.
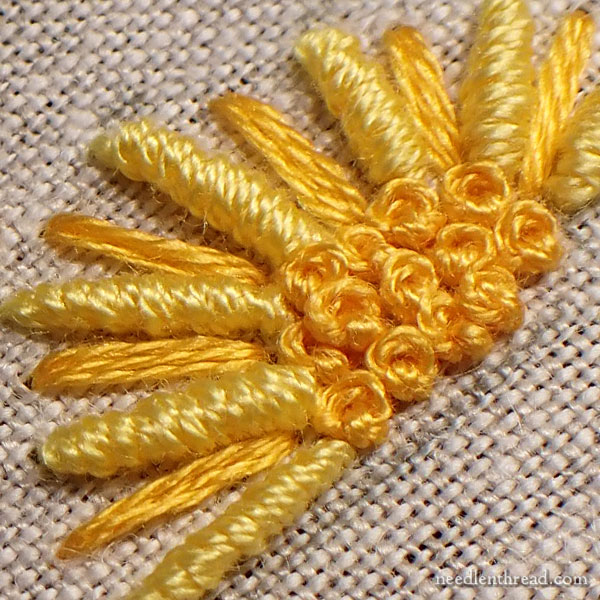
The half element above is a combination of bullion knots, straight stitches, and French knots.
The bullion knots are all worked with three or four strands of floss, depending on how heavy you want them. In the sample above, I used four strands of floss, because I wanted nice fat bullions.
The straight stitches are worked with three strands of floss, as are the French knots in the center.
Work the petal elements first, and then fill the center, if you’re using French knots or beads as your center filling.
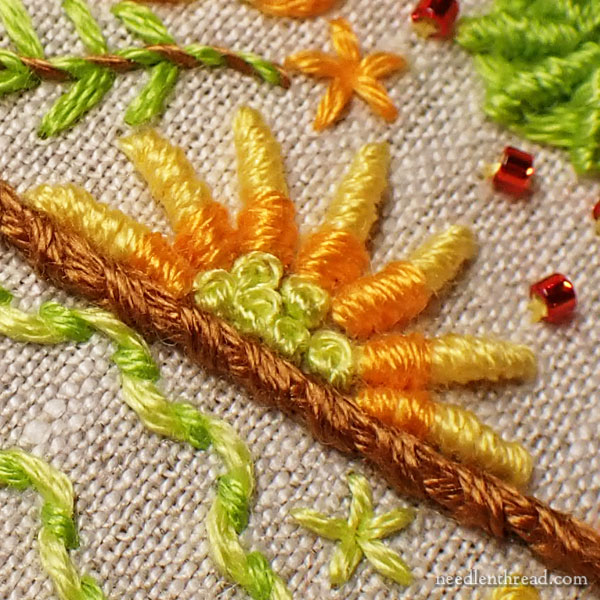
On this sample, I used bullion knots and French knots. The bullion knots are worked with four strands of floss in the lighter yellow. Then I used two strands of orange-yellow (the darker yellow) and I worked satin stitches very carefully over the base of each bullion, to get the two-toned color on the bullions.
The French knots are worked with three strands of the light green.
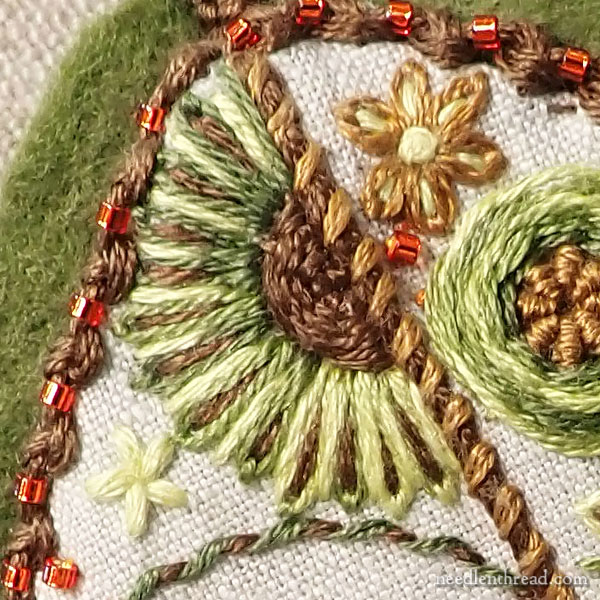
Several of the half elements are padded daisy stitch flowers, embroidered with the same techniques as the full padded daisy stitch flowers.
In the sample above, the center is half of a woven wheel. If you decide to work your center in this method – or maybe as half of a ribbed wheel – make sure you embroider the center first and then work the padding and the daisy stitches.
On this particular sample, I used the variegated green for the daisy stitches and I worked a brown straight stitch in the center of each daisy stitch.
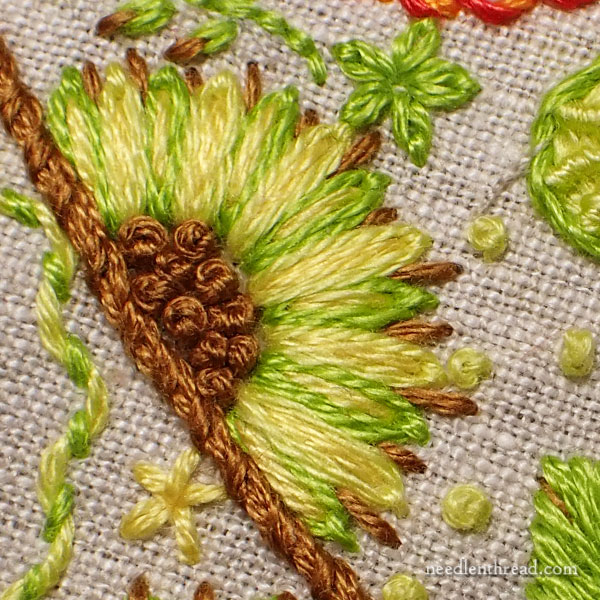
On the sample above, the padded daisy stitch features French knot centers.
Small tips of brown are embroidered between the petals using tiny straight stitches just between the tips of the petals, and using just one strand of brown.
It’s just there to add a little tip of contrasting color between the outer tips of the petals.
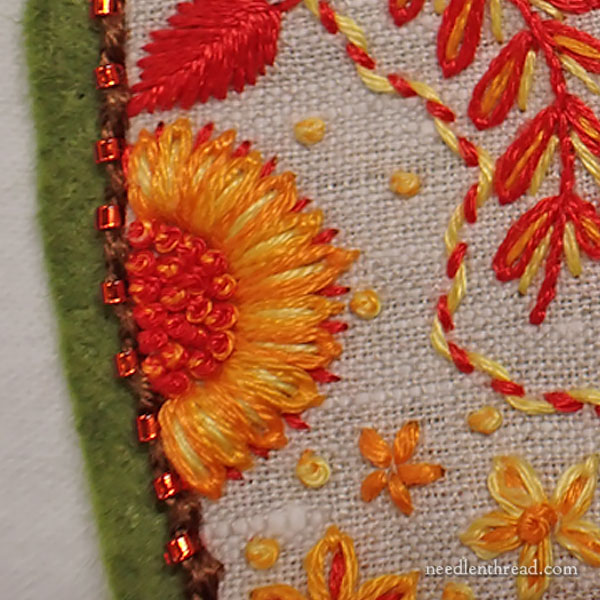
And here, you can see another example worked the same way, but in a different color scheme.
Mix It Up!
Don’t forget, you can mix things up on these elements in any way you wish. Maybe you have a different stitch or a different configuration you’d like to try? Don’t hesitate! The more variety you can add across all your leaves, the more interesting the outcome.
Looking for More?
You can find all the lessons in this stitch-along so far listed here in the Harvest Hues project index.
If you’d like to pick up a materials kit before they run out, you’ll find the kits available here.


Yay! I’m glad you are seeing a bit better, I hope it continues to improve. It must be devastating when your joy and job is so visual!
I’m having a lot of fun sewing along and trying out different color combinations. I tried woven wheel for one of the half-round elements like shown but couldn’t figure it how to do half a wheel. Reddit said to plunge the threads and run them under the work where the circle ends. Is that what you did too? I’m going to try it again.
Yes, that’s right. Just end the thread at the opposite side of the wheel, and bring it up again on the side you began on. Make sure you off-set the weaving pattern. So if your previous pass was over-under-over-under, the next pass would be under-over-under-over. This helps achieve that woven look.