This past Friday, we began stitching on Harvest Hues, stitching the stem, the spirals, and the little dashed line at the tip of the leaf.
Today, we’ll look at stitching the larger elements on the leaf.
Take your time! You don’t need to feel pressured to move ahead on the project if you’re not at this point yet. I just want to get some of these lessons out so that we can catch up with my publishing calendar.
As always, you’ll find the lessons listed here on the Harvest Hues project index, where you can easily access each lesson in chronological order.
If you are a member of the Needle ‘n Thread Community on Patreon, you have already received this lesson. It is part of the PDF titled Harvest Hues Part 2: Color & First Stitches, posted over there last week.
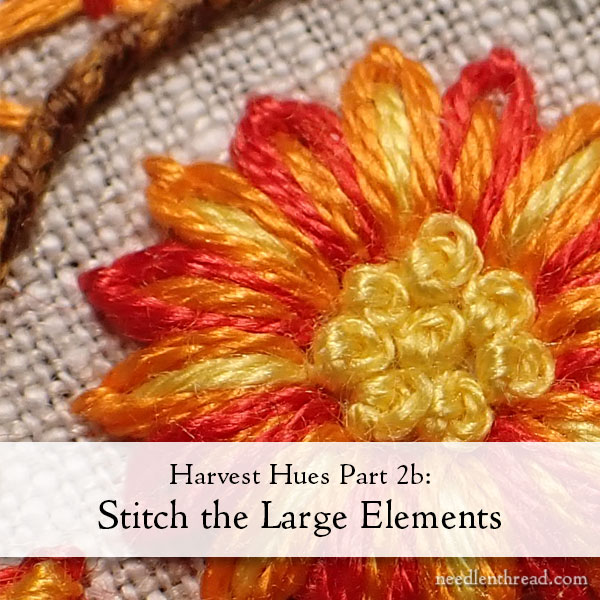
In today’s installment, we are going to look at all the larger, round elements on the leaf.
I’ll show you many different ways you can interpret the elements. These illustrations will provide you with plenty of ideas for your own leaves – you can mix up the techniques, colors, stitches, and so forth, depending on what you like, how much effort you want to expend, and what look you want to achieve with your leaf.
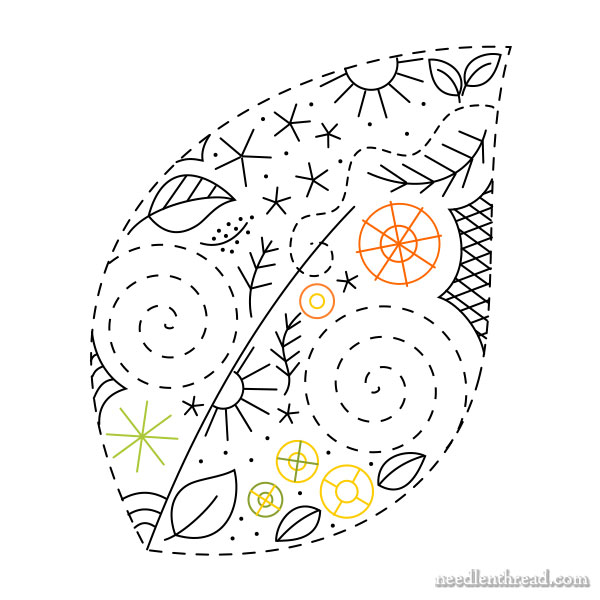
In the diagram above, the elements that I’m talking about are all highlighted in various colors. Of course, the colors you use on each individual element are up to you.
As we discussed in the first lesson, very few elements on this project are worked in single, solid colors. Instead, try to pull in the surrounding colors, so that the colors flow gradually around the leaf without looking too blocky.
You can use these techniques on other floral elements on the leaf, too – you don’t have to restrict yourself just to the round ones highlighted in the diagram. Just remember that the smaller the element, the more difficult it will be to work more complicated techniques on it.
Raised Daisy Stitch Flowers
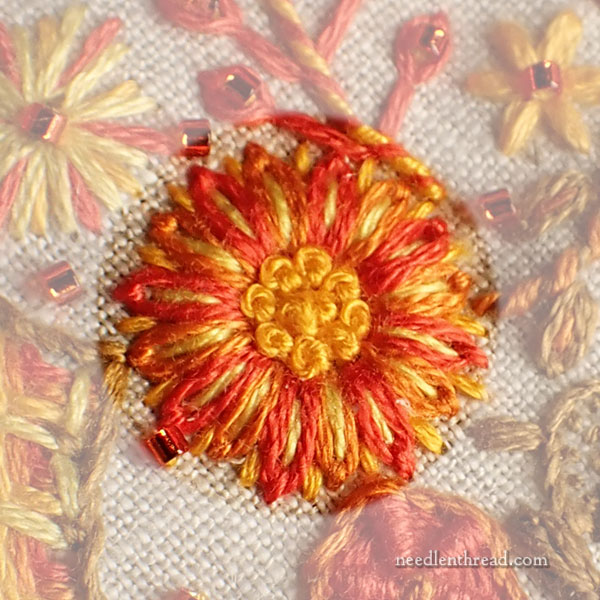
On many of my leaf samples, the large orange element towards the top of the leaf is stitched as a raised daisy stitch flower, explained below.
I used three strands of floss for everything: yellow stem stitch padding; orange and red daisy stitches (alternating, as explained below); light yellow for the straight stitches in the center of each daisy stitch; dark yellow for the straight stitch between each daisy stitch; and the same dark yellow for French knots in the center of the flower.
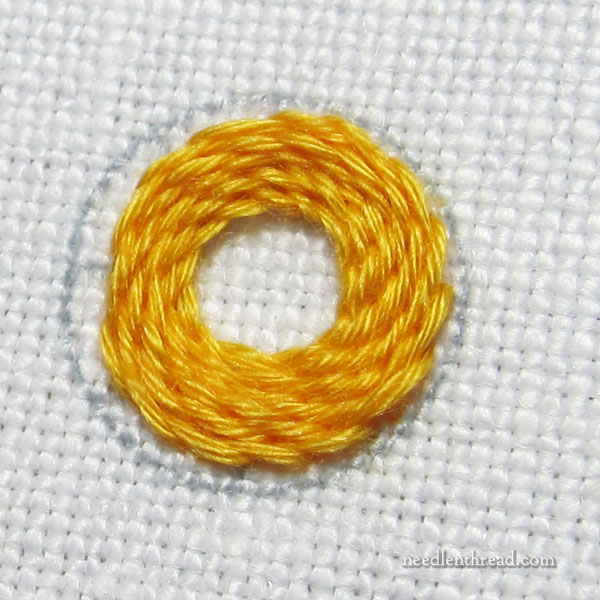
The samples here are shown worked with floche, but the concept is the same, no matter what thread you’re using. I’ve linked to stitch tutorials, in case you need them.
Begin with the stem stitch padding, by working a ring of rows of stem stitch filling, as shown above.
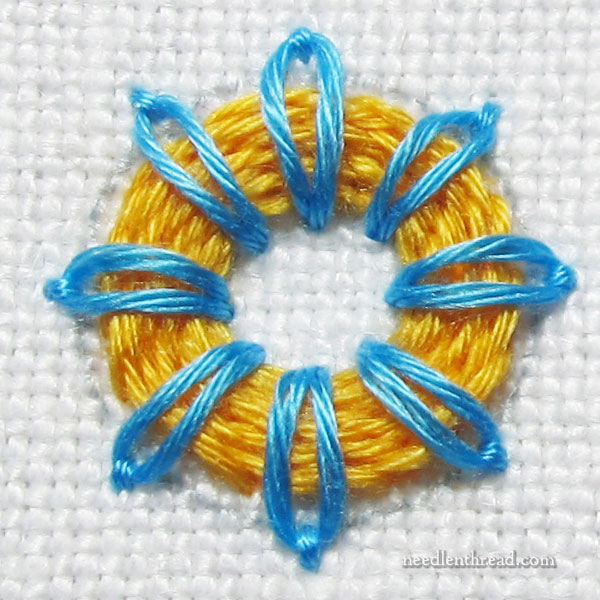
When you work the daisy stitches over the padding, start by working four stitches that divide the flower vertically and horizontally, like a compass (north, south, east, west) or the hands of a clock (12, 3, 6, and 9).
Then, work a stitch centered between each of those stitches, so that you have eight equally spaced “spokes” around the ring.
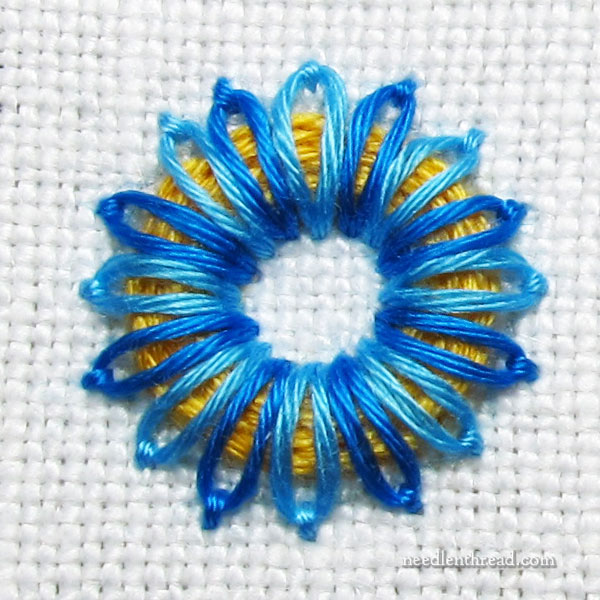
Finally, work daisy stitches between the first eight stitches. You can use a second color for this, if you prefer. In the leaf element shown above, I used three strands of floss orange for the first eight daisy stitches, and then I used three strands of red for the alternating color between the orange.
Finally, using three strands of lighter yellow, I worked straight stitches in the center of each daisy stitch. Using three strands of darker yellow, I worked straight stitches between each daisy stitch petal. And then I filled the center with French knots using the same darker yellow.
Woven Wheels
Woven wheels are another effective way of embroidering the round elements.
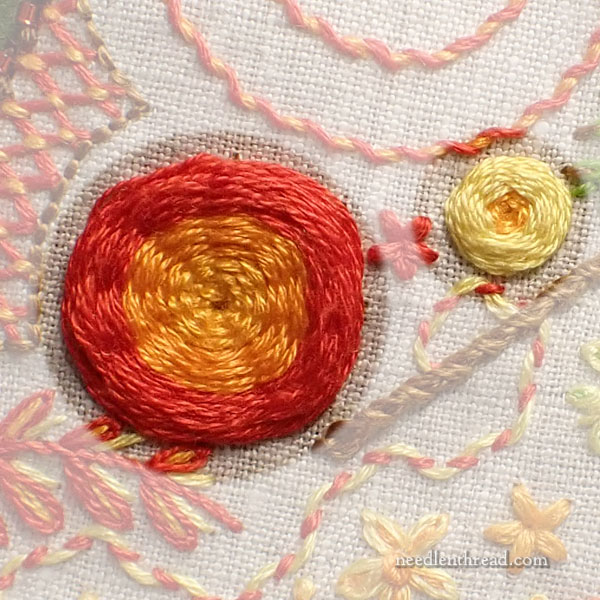
You’ll find a video tutorial for Woven wheels here.
Woven wheels work best with elements that have an odd number of spokes, so if you want to use a woven wheel on any round element that has an even number of spokes, just adjust the number of spokes and their layout to an odd number.
If you want to use more than one color in a woven wheel, follow the same technique for changing thread shown in this tutorial for multi-colored ribbed wheels.
On the leaves, when working the larger elements using woven wheels, use three strands of floss, unless you decide to work the largest of the round elements as a woven wheel (in which case, use four strands of floss).
If you want to work small elements with woven wheels, you can experiment with two or three strands of floss, to see which works better for the size of the element you’re working. For the most part, I used three strands of floss, despite the size of the element, on most of my samples.
Note: it’s easiest to use the tapestry needle for the weaving part of the stitch.
Ribbed Wheels
On many of the larger round elements, I also used ribbed wheels. Ribbed wheels can be worked over either odd or even numbers of spokes.
This is the video tutorial for ribbed wheels, and this tutorial will show you how to work a ribbed wheel with multiple color changes.
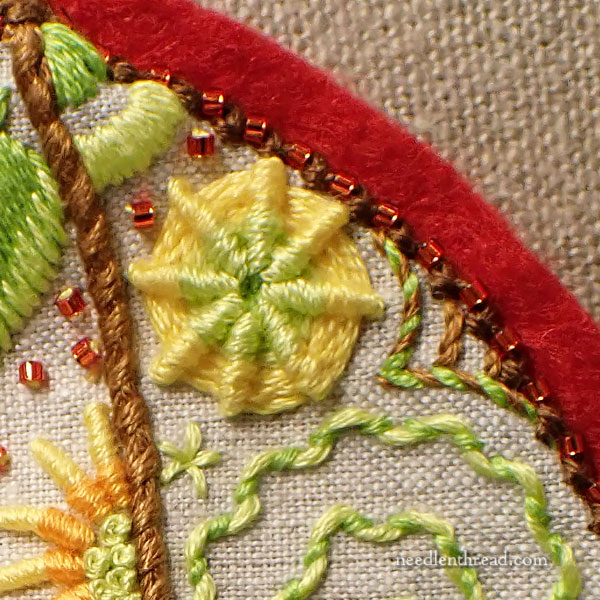
For the most part, on the larger wheels, I used three strands of floss for both the foundation and the wrapping. On small elements, though, I used two strands of floss for the wrapping.
You may need to experiment, to see which works better for you, depending on the size of the element you’re working. You want the wrapping stitches to be as smooth as possible when they cover the foundation spokes. If the element is smaller, it’s often difficult to get smooth wrapping stitches with more than two strands of floss.
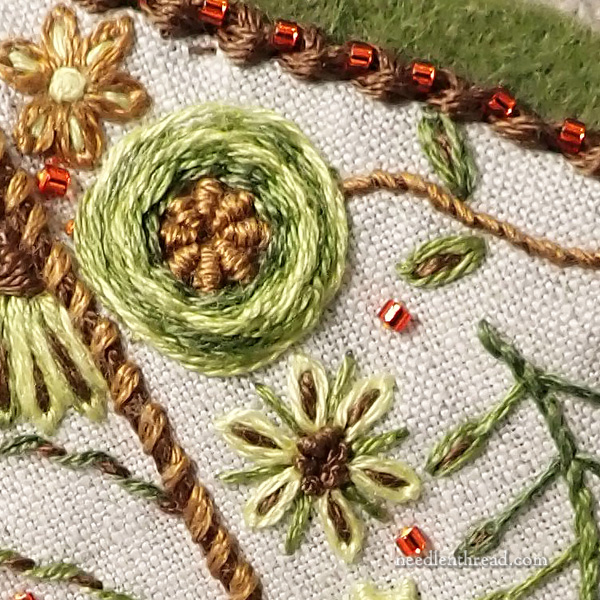
The sample above shows a combination of a ribbed wheel (in brown, center) and a woven wheel stitch (the variegated green). For this to work, make sure that the foundation is an odd number of spokes. It won’t matter on the ribbed wheel interior of the element, but it will matter on the woven wheel on the outside of the element.
Other Possibilities
On some samples, we experimented with other textural stitches for the flowers.
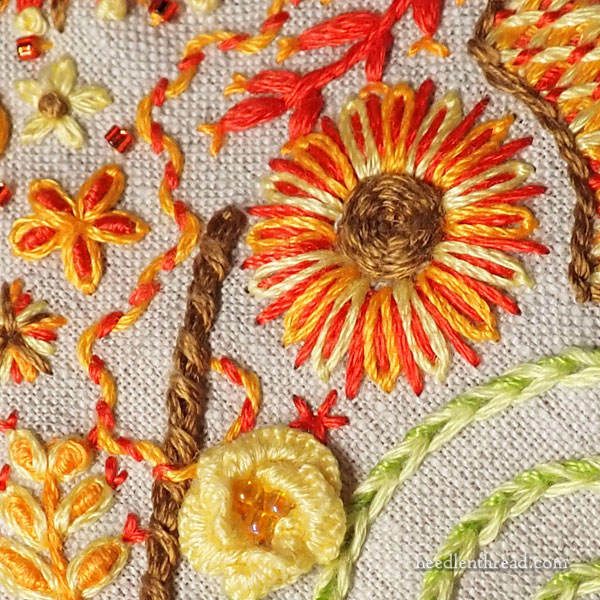
In the sample above, you can see the small yellow flower that’s worked as a cast-on stitch rose. You can find a tutorial for working cast-on stitch rose here.
I also worked a floral element using a fuzzy Turkey Work filling.
In retrospect, I found these stitches somewhat fiddly in these small spaces, and opted not to use them for my final samples.
But if you would like to challenge yourself, you can definitely give them a try. It’s up to you!
Flower Centers
As you can see in the samples above, some of the centers of the larger floral elements are worked with ribbed or woven wheels. If you want to do this, you have to plan ahead and work the center first.
French knots also make a good center for the floral elements, and in some cases, I used beads for flower centers. Knots and beads can be worked after the petals are embroidered.
Looking for More?
If you’re just joining us, you’ll find previous lessons for Harvest Hues listed here in the project index.
You can find materials kits for this project available here.
The next time we visit this project, we’ll look at the half elements in a very brief article, and then we’ll tackle stems and other filled spaces.


Leave A Comment