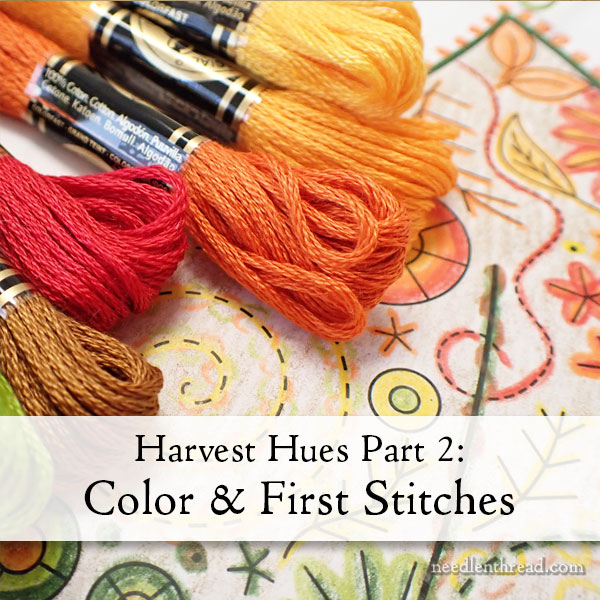
Today, we’re tackling Part 2 of Harvest Hues, our current stitch-along! We’re stitching decorative autumn leaves adorned with myriad embroidery stitches, resplendent in autumn colors.
If you’re new to the stitch-along concept or you’re just joining us on this project, you can read more about Harvest Hues and how the stitch-along works here in the Harvest Hues Project Index. You can also read more about the stitch-along and the project in general here in this introduction.
If you want to use the same materials that are shown in the stitched samples for Harvest Hues – including high quality embroidery linen that you won’t find in local fabric stores, coordinating colors of wool-blend felt, all the threads and beads, and other materials for finishing – you can find the materials kit for Harvest Hues available here in my shop. Once it sells out, it’s gone for at least a year if not longer. So grab one while you can! Each kit contains at least enough supplies for three complete leaves.
If you are a member of the Needle ‘n Thread Community on Patreon, I’ve already posted all the information that you’ll find in this article – plus a lot more (we usually work ahead a bit on Patreon) – in the downloadable PDF for Part 2.
Here we go!

In Part 1 of Harvest Hues, I presented you with the design, materials list, and information on set-up and transfer for the project.
Today we’re going to look at the question of color and we’ll put in the first stitches.
Please note that this project leaves you a lot of room for your own interpretation. I’m not going to tell you “Stitch this stitch in this color on this element.” Instead, I’m going to show you how to consider the colors and get them to work in a progression across your leaf design. And then I’m going to give you stitch suggestions and show you some of the (many) ways you can stitch the elements.
Our samples here at the studio are widely varied. I stitched some and Anna stitched some, and, working with certain parameters for our stitch choices (mostly keeping them very basic), we interpreted elements as we went. This afforded a lot of variety among the leaves, so that no two leaves are the same.
I encourage you to approach stitching this project the same way. You want each leaf to end up being an interesting variation of the design. If you have three or more leaves adorning some decorative aspect of your home, they will draw the eye and engage the mind a little more if they are all a little different. So strive for variety among the leaves in both color placement and stitch choice, instead of absolute uniformity.

Before you start stitching, think about the colors you’re using and the leaf you’re embroidering.
To get that color movement across the leaf that is typical of the autumn color change, you want to gradually move the color up from the base of the leaf to the tip.
I arranged my colors going from greens (and browns) at the base (the wide part of the leaf) to lighter yellow, darker yellow, oranges, and then reds (at the tip).
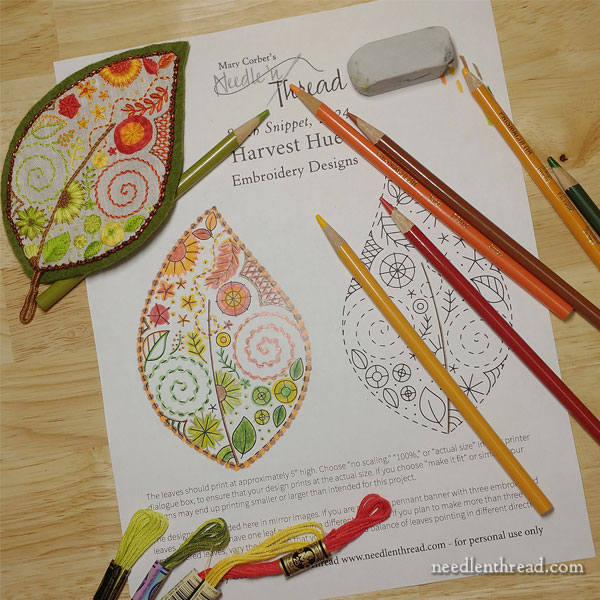
It might help to sit down with some colored pencils or similar, print the design page that’s in Part 1, and mark up the design with a progression of color up the leaf.
You don’t have to follow your marked up leaf exactly, but doing this will help you be aware of the general areas of color that you want to bring across in your finished leaf.
Blending Color
There are a number of ways to blend colors when working with embroidery floss on this type of design. What we want to achieve is a gradual flowing of color up the leaf, rather than blocks of solid color.
These are some ways you can move color gradually across the project using the thread colors provided:
1. You can use variegated threads (we have one variegated thread in the kit).
2. You can use more than one thread color in the needle.
3. You can use many shades of various colors. (We use a couple shades of most of the colors in the project.)
4. You can use more than one color on an embroidered element, drawing in the various colors from the surrounding color areas, to make each color area blend together. (This is what we will primarily do on this project.)
You will notice as I post pictures of the elements of the leaves, that most of the elements are embroidered in more than one color, drawing in the surrounding colors to help them blend and to keep from forming solid blocks of color on the leaf. Here and there, sure, there are some solid colored elements, and that’s fine, too! Add solid colored elements where you really want to concentrate a color on the leaf.
You can manipulate what color stands out in an area of the leaf by determining how much of any one color you will use on an element. Use the dominant color the most, and the secondary colors as accents. You’ll see this illustrated as we work through the stitched elements.
First Stitches
The first elements we are going to stitch on this project are highlighted in color on the diagram below. They include the stem or vein up the center of the leaf, the two spiral elements, and the small dashed line that meanders down from the tip of the leaf.

After stitching many leaves, it became evident that it is easiest to start with the heavy vein down the middle of the leaf and then to stitch around that vein (or even, in some cases, over it) when working the surrounding elements.
To keep the vein nice and heavy and prominent (which will come in handy when finishing), I embroidered it in whipped chain stitch, and on most samples, it is stitched in brown.
On most of my samples, the foundation chain stitch is worked with four strands of dark brown floss and the whipped stitch around each chain stitch is worked in three strands of light brown floss. This makes a heavy embroidered line. On samples, the chain is light brown, the whipped stitch is dark brown. And on at least one sample, the vein is green whipped with brown.
You can find a tutorial for chain stitch here. Try to work the chain stitches between 1/8″ – 1/4″ long. 1/8″ will probably be too short, because you’re using a heavy amount of floss. Shorter chain stitches will end up fatter. 1/4″ might be slightly long – which will thin the chain stitches out. Try for something in between.
You can find a tutorial for whipping a stitch here. It’s a whipped backstitch tutorial, but the concept is the same for any whipped stitch.

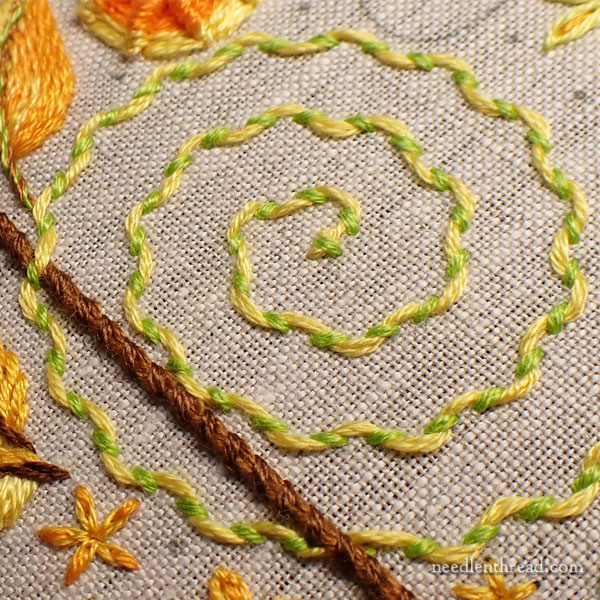
In the photo above, you can see the bold vein in brown. On this particular sample, the spiral overlaps the vein.
Notice that the dominant color in the spiral is yellow. The foundation was worked with light green, using four strands of floss, in running stitch.
Then, I laced the running stitch with light yellow, to pull in more yellow. Lacing is slightly different from whipping a stitch, and more of the yellow showed up because the lacing stitches are longer and more visible than the shorter running stitches.
You can find a tutorial for running stitch here.
You can find a tutorial for lacing a stitch here. It is laced backstitch in the tutorial, but the concept is the same when lacing any stitch.

In this spiral, I used the darker yellow-orange for the running stitch, and I whipped the funning stitch with red. This pulled in a lot of red on that side of the leaf.
Tip: Use a tapestry needle when whipping or lacing your stitches! The blunt tip will be less likely to catch on the foundation stitches or the fabric as you work the whipping or lacing.

In the photo above, you can see the small meandering line that comes down from the tip and swirls over the end of the vein.
I worked that in red, using two strands of floss and a stem stitch.
The two strands and stem stitch kept this curving line much lighter than the stem, so it didn’t break the leaf apart all the way up to the tip.
You can work this line in running stitch, whipped or laced or left plain, depending on how much weight you want to the line.
You’ll notice in that photo that there are lots of surrounding elements that are stitched in multiple colors. This is how we made the color flow up the leaf, rather than show up in blocks of solid color.
It also makes stitching the elements much more entertaining!
These elements will get you started with the stitching on Harvest Hues, and next week, we’ll move on to some of the larger floral elements around the leaf.
Remember, these are all stitch suggestions. If you have favorite stitches or other ideas that you want to try out, don’t hesitate! One of the main points of this project is to achieve a varied look to the leaf, and sometimes, the best way to do that on any project is through experimentation.
Looking for More?
You can find all sorts of stitch instructions under the How To section here on Needle ‘n Thread. You’ll also find more stitches, composite stitches, and stitch combinations in the Stitch Fun series here on Needle ‘n Thread. Feel free to explore those!
You’ll find the Harvest Hues Project Index here, for other articles in this stitch-along. As the stitch-along develops, each article will be added to the list.
Have a great weekend!


Hello, thank you for another great project. When you lace with bigger loops (like in your lacing instruction video) how do you ensure the loops stay in place afterwards? I end up yanking them out of shape while working on other parts of the piece, or even after the piece is completed.
Hmmmm. I’m not quite sure I can picture what you mean. If your foundation stitches are not too wide spread, and if your lacing is pulled comfortably snug, so that it is flopping about (you don’t want it to be loose), I am not sure why it would yank out of shape. Laced and whipped stitches aren’t meant to be loose and floppy. Now, you might have to exercise some care while you’re stitching near them, if you mean that you snag your needle into previous stitches – but that would be the same if you were stitching near any other stitching. You always have to be careful and take things slowly, when you’re filling areas with multiple stitched elements. Take your time and watch what you’re doing, and it should be fine. I use whipped and laced stitches all the time, even on items that go through the laundry, and I don’t have problems with them getting pulled out whack, so I think it’s probably just a matter of making sure you’re tensioning them and not leaving them loose and floppy.
I’m so glad this update popped up in my Facebook feed!
Does anyone have advice or experience to share about using percale as a fabric for embroidery?
I’ve got more old pillow cases than I know what to do with, and have been thinking of using their fabric to make some sort of embroidered patchwork coverlet. Nothing fancy, just a way to make more time for stitching, use up fabric that would likely gather dust, and to craft a bedspread I actually like and can use in the heat of summer.
I can’t help thinking that this sort of embroidery might be just the thing to kick start my creative energies. I keep thinking about sewing and cross stitch, my two old standbys, but I am intrigued by sashiko techniques and visible mending, and thought this would be a fun little project as a proof of concept.
I have some eye issues of my own, and I can’t help thinking that simple embroidery might be more manageable than some of the fiddlier hobbies I used to depend on.
Thanks for any prompts, advice or suggestions, I’m truly happy to keep learning and exploring.
There’s no reason why you can’t use percale. One thing about cotton, though, is that it tends not to be as forgivable a fabric, especially the firmer the weave – especially if you do a lot of picking out. It just doesn’t hold up as well to a lot of picking out, etc. But it’s still a suitable fabric for stitching. I’ve embroidered plenty of cotton percale pillow cases, sheets, and the like!
If you don’t have a tapestry needle, you can lace or whip with your regular needle by using the end with the eye instead of the point. It’s not ideal as you need to be aware of the pointy end to avoid sticking yourself, but it’s definitely doable. Depending on what/where you’re stitching though, you can also use the pointy end of regular needle and gently “sweep” the point from side to side as you lace/whip to make sure you’re not puncturing the fabric or catching other threads.
True, true! But I included tapestry needles in the kits for this very reason – much easier!