


Aaaaaaand…. we’re off! It’s time to start our Harvest Hues stitch-along here on Needle ‘n Thread!
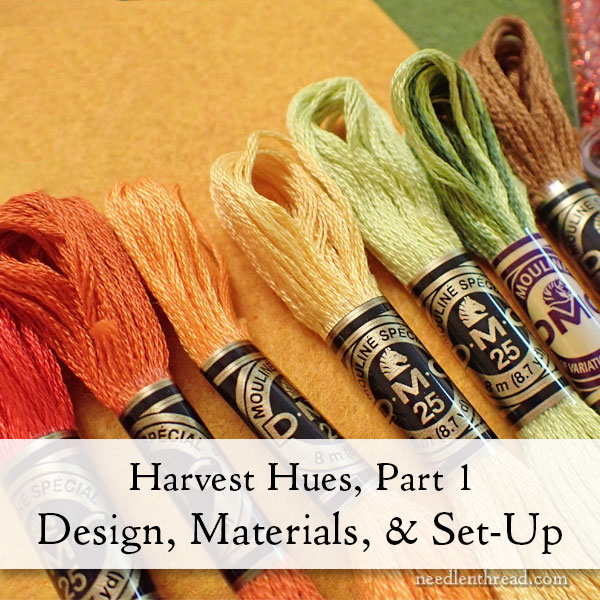
Harvest Hues focuses on creating embroidered autumn-themed leaves using a range of autumn colors, with a few beaded accents for a bit of sparkle.
We’ll be finishing the leaves with interfacing and coordinating felt backing, so that they can be used individually or in groups as part of fall decor.
Once you’ve stitched a basic leaf, you’ll be able to take all that you’ve learned and apply it to any leaf shape with any color scheme for any season!
If this is your first stitch-along on Needle ‘n Thread, please read this article, which will tell you what you can expect from Harvest Hues as we progress through the project.
Once we have the project underway, I’ll be creating a project index for Harvest Hues so that you can easily find it on Needle ‘n Thread, for future reference.
If you are a member of the Needle ‘n Thread Community on Patreon, you’ll find the first installment already posted in a handy PDF formatted for easy printing and downloading. Members also receive a few extras on the project, such as additional leaf designs. For the Dedicated and Avid levels of membership, you’ll also have access to at least one instructional video.
You can find the materials kit for Harvest Hues available here. It includes enough supplies for at least three leaves: the linen ground fabric for the embroidered leaves; interfacing; three different colors of wool blend felt, full skeins of embroidery floss, a tube of beads, the required needles, and florist wire for for the leaf stems.
The advantage of the materials kit is that you’ll have all the necessary supplies on hand to follow along easily with the project, without having to hunt for and source the supplies yourself.
The Leaf Design – PDF
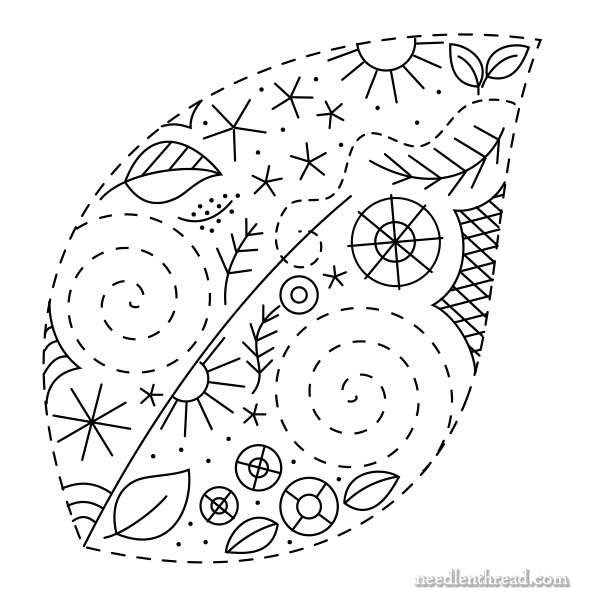
This is the design for the basic leaf for Harvest Hues. It’s provided as a PDF download below.
In the PDF, you’ll notice that there are two leaves, each a mirrored image of the other. If you are embroidering three of the same leaf, you’ll be able to easily switch the direction of one leaf. Of course, if you want all three to face the same direction, that’s fine! I find that they tend to style better, though, if all three leaves are not curving in the same direction.
Harvest Hues Design Download (PDF)
The leaf prints about 5″ from base to tip. Please choose “actual size” (or “100%” or “no scaling”) in your printer dialogue box to ensure that your leaf design prints at the correct size.
Materials List
Ground Fabric: Manuscript Vellum (in the US) – part of the “Legacy” line from Access Commodities; outside the US, look for Graziano 6262 in “Melange.” 12″ square piece, minimum.
Interfacing: Pellon 40 sew-in stabilizer – enough to back each leaf
Wool-blend Felt: Wool or wool-blend felt in a craft weight (2mm or 3mm). Avoid acrylic craft felt, because it tends to be a bit too flimsy and it does not cut with as clean an edge – approximately 5.5″ x 4″ for each leaf
Threads: DMC stranded cotton in the following solid colors: 12, 434, 666, 720, 725, 741, 801; and DMC Variations in 4066
Beads: Miyuki silver-lined flame red delica beads, color #0043
Needles: #9 crewel; #26 tapestry
Florist Wire: green-wrapped florist wire in 18 gauge or higher – 8″ per leaf
Other Tools: Hoop or frame, scissors, transfer pen or pencil, light box or sunny window, tape, and finishing tools such as pins, clips, and the like. A pair of needle nose pliers / cutters will be handy for manipulating the wire. We will discuss finishing tools when we get to this point of the project.
Transfer & Set-Up
Iron the linen ground fabric to remove any creases. You can use a light mist of water to do this. You do not need to pre-wash the linen.
If you have a favorite transfer method, feel free to use it.
To transfer this design, I found it easiest to trace it, but you can also use a printable and water-soluble transfer medium like Sulky’s sticky fabrisolvy for this type of stitching. This is up to you!
However you plan to transfer, you’ll need to group your leaves in the center of the fabric with about 1″ of space between the leaves at any point. You will need a scant 1/2″ seam allowance for finishing, so do not place your leaves too close together.
However, they need to be close enough to allow you to hoop or frame your fabric.
I used two pairs of 11″ stretcher bars to make a square frame, and I pinned my fabric on top of the stretcher bar frame (rather than wrapping it around the sides).
If you feel you need more space around your fabric for accommodating a hoop or frame, follow the tips in this article for extending the size of your fabric for hooping or framing.
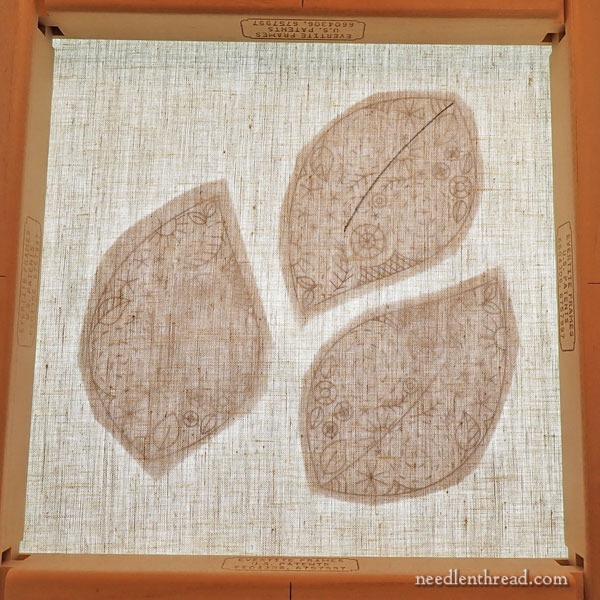
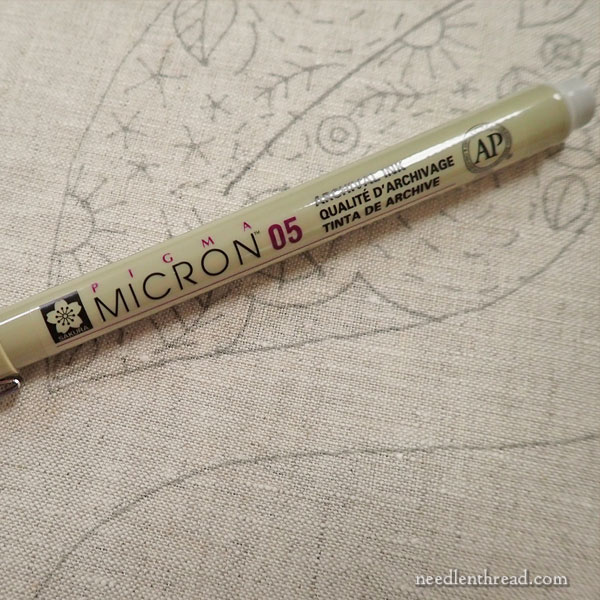
I traced the design onto my fabric, using a lightbox and a Micon pen, size 05, in light gray. If you participated in the Autumn Fire stitch-along and purchased the materials kit, the pens provided in that kit will work fine.
Group your leaves so that they fit in the center of the 12″ square of linen, with 1″ between any sides that come close to each other.
I laid the leaves out on the light box and taped them in place.
Then I centered my fabric over them and taped my fabric on all sides to prevent it from shifting.
Before I began tracing, I laid my frame on top to test the placement, to make sure I’d have enough room around all edges for tacking the fabric to the frame and also for comfortable stitching.
Lightly trace the design onto the fabric. Try not to “sketch” in short strokes but instead to draw in continuous light line.
It is not necessary to trace every element on the design. For example, I did not mark the dots that indicate bead or knot placement (any of the tiny black dots). I also did not mark in the crossed trellis lines on the trellis-filled sections. I would rather “eyeball” the placement of laid stitches as I go instead of relying on drawn lines.

When you are finished tracing, you can then mount your fabric onto your embroidery frame or into your hoop.
If you are using a hoop, you can get away with a hoop as large as about 10″ (although I think this is a stretch), if the hoop is thin. If you are using a thicker hoop, your hoop will need to be smaller than 9″.
A 6″ hoop will accommodate individual leaves, but you will need to add the beads to all the leaves once all the embroidery on all the leaves is complete. You’ll need to move the hoop around as you stitch.
And that’s the set-up for the project! Of course, if you have your favorite methods of preparation, transfer, and set up, feel free to use them. It’s always easier (and dare I say “safer”?) to work with methods you’re already familiar with!
Coming Up
In the next installment – which will be published next week – we’ll begin stitching the leaves!
Stay tuned!
I am looking forward to this SAL, as soon as I saw the posted photos of the leaves I just knew I had to join in. I have some lovely wool blend felt left over from a project I did about a year ago and some vintage linen to stitch my leaves onto. Thank you for such a beautiful pattern.
Mary,
It is me again and I had to tell you how
Much you inspire! It is always such a delight to read your notes! I love your sweet comments! I wanted to start the beautiful leaves, but had a few little events that postponed my start! I will try to catch up soon! You always do beautiful work & teach us so many things! God bless you!
Linda