We’ve been puttering about with a variety of embroidery stitches lately.
I really do like embroidery projects that employ lots of luscious and lovely stitches! We’re playing around with a multi-part project, and shortly, we’ll be taking you on a stitch-along journey so that you can do the same thing.
In the meantime, here are some sneak peeks and a wee bit of fuzzy stitching. I’ll add some links for different tutorials, just in case you’re in the mood to explore a variety of stitches this weekend, too.

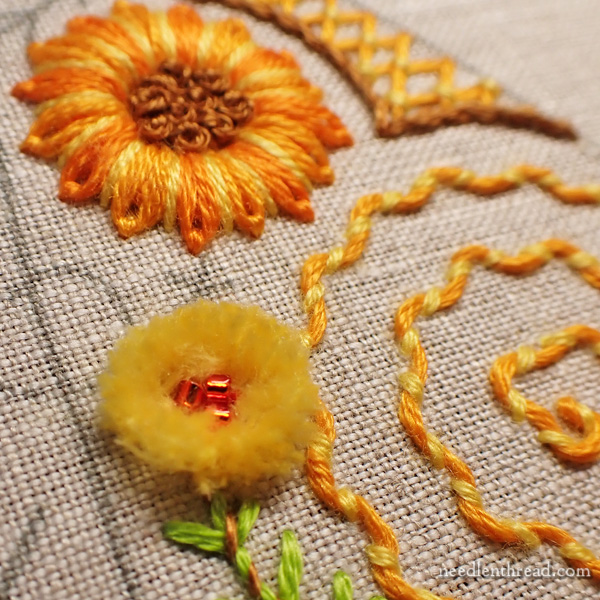
The fuzzy flower wasn’t initially planned.
There I was, stitching along, and I got to a little circle on the fabric, about 3/8″ in diameter.
I said to myself, “I want to make a fuzzy donut flower.”
And so I made a fuzzy donut flower.
Using three strands of regular DMC floss (from the six) and the Ghiordes knot stitch, better known as Turkey Work, it didn’t take too long to stitch up this little accent. In fact, it took longer to trim it up than it took to stitch it!
Here’s a video tutorial for Turkey work. It’s such a fun, effective technique!
To make the process easier, I started on the outside of the circle and, as I completed each “row” spiraling in towards the middle, I used tape to hold the previously worked stitches out of the way, just fanning them outward and lightly placing a little piece of Scotch tape on them. This made it much easier to pull the needle through with each stitch, without getting my fingers all caught up in the previous loops.
To finish the little fuzzy flower off, I clustered three 11/0 delica beads in the center.
It was a fun fuzzy flower. I’m fond of it.
If you’re keen to add texture like this – or with other textured stitches – you might find this collection of 16 stitches for adding texture to your embroidery helpful.

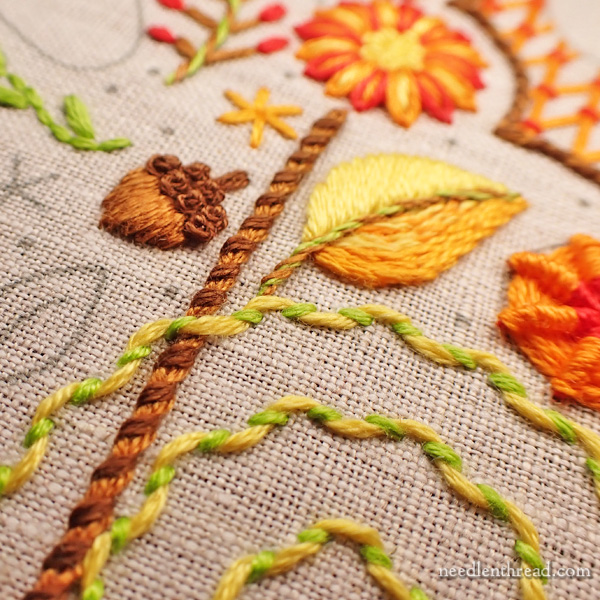
There’s not a massive variety of color in this piece, but there’s enough variety to give it the overall feel of fall. I’ve combined a little green, a little yellow, a little brown, a little orange, and just a touch of red in the palette.
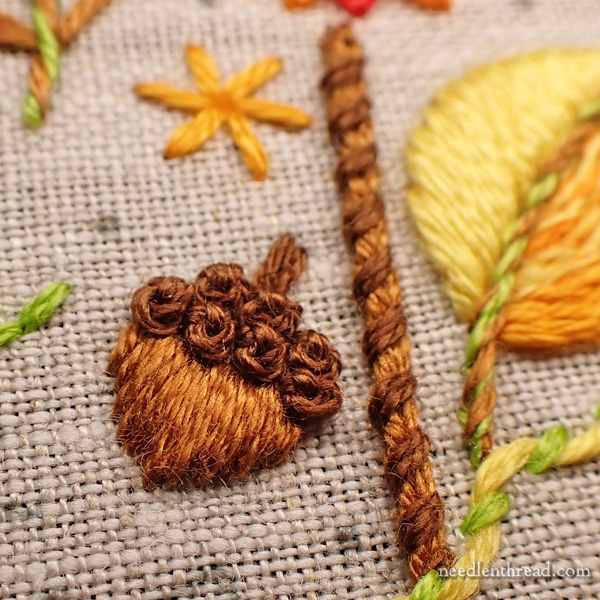
And then, of course, there’s an acorn.

This little acorn is about 3/8″ high.
To stitch it, I just used two shades of brown, a medium and a darker brown, with three strands of each. I stitched the acorn first, in padded satin stitch. To pad the seed, I worked straight stitches across it horizontally, and then I continued vertically to do the satin stitching over the top.
Because I was using three strands of floss in the needle and I wanted a smooth satin stitch, I used a laying tool as I worked the satin stitch.
Never, ever underestimate the powerful efficiency of the laying tool. If you’re not sure how to use one, this video will help you out!
For the cap, I used three strands of the darker brown and just filled the cap area with plump little French knots. I added a straight stitch stem to the tip of the cap, and voilà! The acorn.
If I were to tweak this design a little, I might elongate the seed a bit. But its little size and shape fit perfectly in the space I had available, and it does look rather beguiling in a cutesy-acorn sort of way, so I might just leave it.
More coming soon on this project! We’re actually a little farther along than all this – I can’t wait to show you our concoction!
Have a fabulous weekend!


You never cease to amaze me with your creative use of stitches and color as well as your generosity in sharing the techniques and tips used. Thank you!
love all these terrific stitches…love 3D dimensions to stitching…great article…
🙂 Thanks, BJ!
I really enjoy Turkey rug stitch(as I was taught it) It’s pretty easy when you get in the rhythm of the stitch. cutting the loops and smoothing them out nicely is very satisfying. It’s an unusual stitch, so it’s nice to pop it in for a little unexpected variety.