Good morning and Happy Monday! I’m so glad to be back from a long holiday weekend, and I hope you are, too!
Summer’s really trucking along! I arrived back home in Kansas early last week after being away for about 9 days. You couldn’t tell I was gone, could you? I planned ahead pretty well this year! Of course, I had my trusty-rusty phone with me to keep up as best as I could while away from home.
When I got home, though, the middle of the week involved playing the inevitable Catch-Up Game, followed by the holiday with some weekend events to navigate – all of which involved falling behind a bit. But now…. now!! We’re back to the Bliss of Routine and Reality! There is much good to be said for Routine!
As the Routine settles back to normal here at the studio, you can expect the following Grand Events this week:
Today, we’re going to look at some figure embroidery up close; Wednesday, we’ll have a little Tool Talk and compare a couple needles that may be of interest, especially for an upcoming tutorial; and Friday, we will finish Cornflowers. Yay!
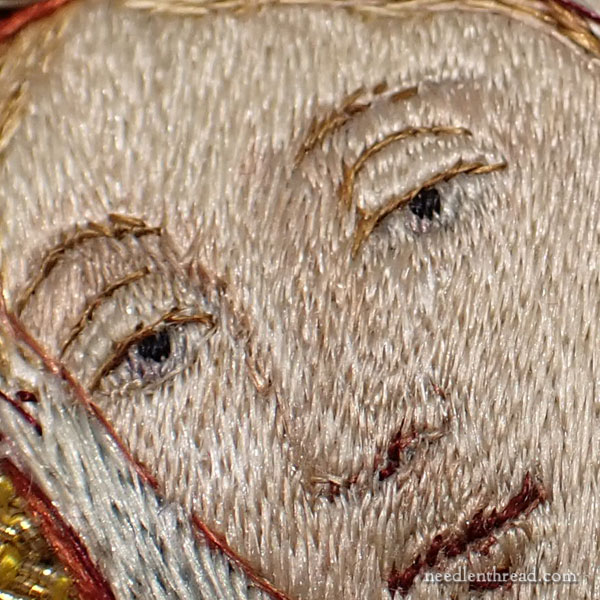
Recently, a collection of old 19th century ecclesiastical embroidery pieces came my way, and while I had it here in the studio, I took photos.
These pieces are part of a larger item, which we’ll look at down the road. Today, I just thought we’d look at a couple of the figure embroideries.
I love looking at figure embroidery close-up, and the best way to do that, at least for me, is by using a camera. Looking at them under a magnifier is great, but photos allow me to get closer than even a magnifier allows, and photos give me a lot more time to view the pieces closely.
The face above, in all its minute and precise detail, belongs to this figure:
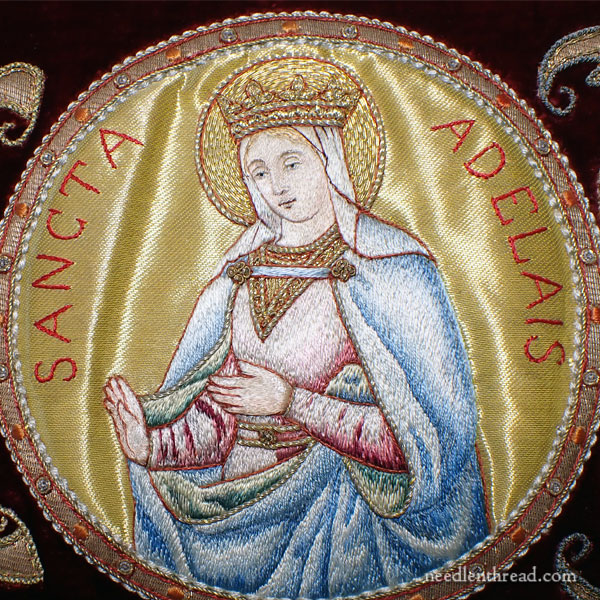
When you look at this whole figure of St. Adelaide from a little distance, you can see that the delicate detail of the face is rather mind-boggling! It’s so beautifully stitched that it looks painted. I think this is “needle painting” at its best.
The face is much more delicately stitched than the clothes, although the robes are beautifully worked as well.
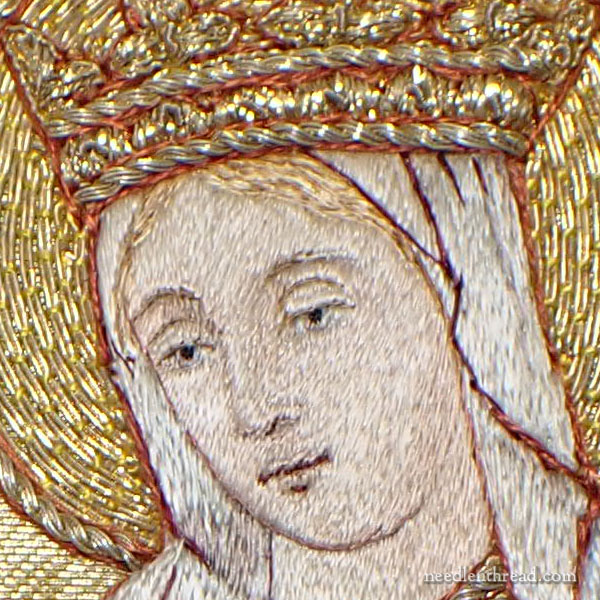
Approaching the face a little closer, we can see the detail better.
Notice that there’s not a lot of color here with the little shading that’s going on. There’s a change in tone on around the jaw line and neck, and a slightly darker tone used in areas around the eyes, the nose, below the nose, and just around the mouth.
The lips are a slightly deeper, rosier tone, accentuated by the darker outline thread.
But the whole face is not a mass of colors or even a wide range of tones. This certainly contributes to its refined, delicate look.
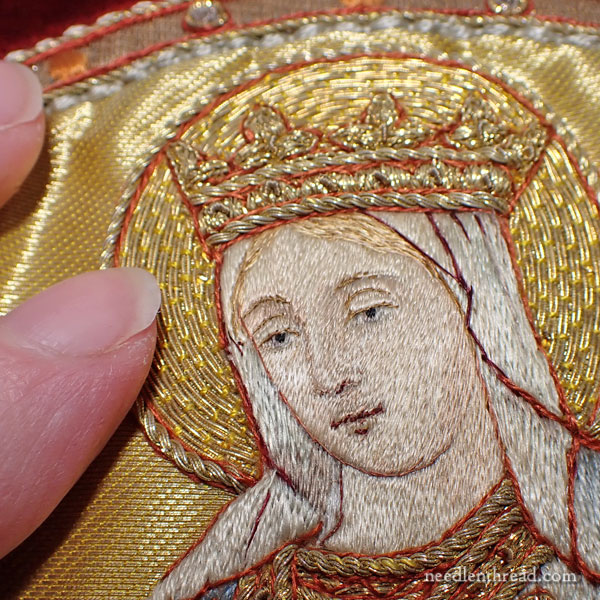
Just to put things in perspective, here’s my index finger next to the face.
The face – forehead to chin – isn’t more than in inch high.
See what I mean by the boggling of the mind?!
This was not embroidered in an era of HD lighting and magnification. It was embroidered around the mid-1800’s.
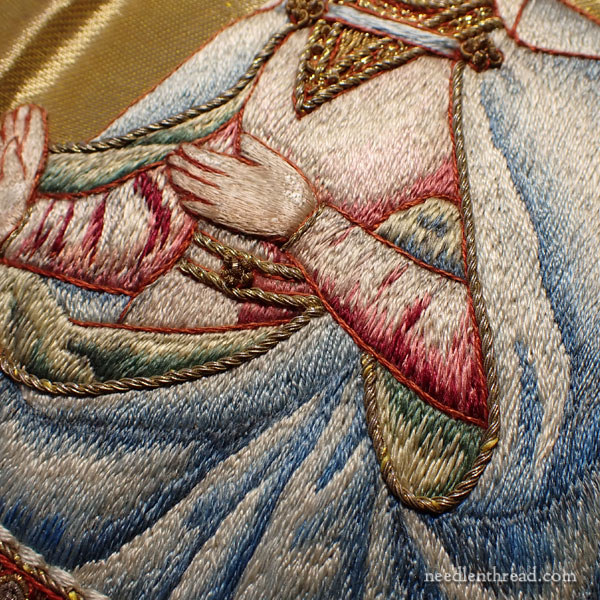
You can see that the robes are stitched with a slightly heavier thread, in a long-short pattern that aids in creating a shaded effect. Notice that there are not a lot of shades at play – about three shades of blue and three shades of pink.
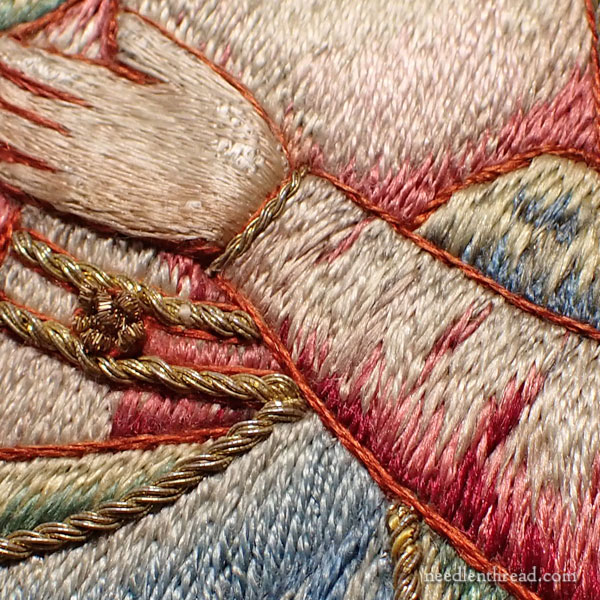
In the photo above, you can see that there’s some damage on the hand. If you compare the hand to the sleeve, you can perhaps see more clearly the difference in thread weight.
This type of finer silk used on the skin was referred to as “face weight” thread. It is very fine. You can still find very old skeins of face-weight silk in existence here and there, but I don’t know that any current silk thread manufacturers offer a true “face weight” thread these days.

Here’s another example of a figure from the same piece. I especially like this figure embroidery of St. Eugene because of his facial hair.
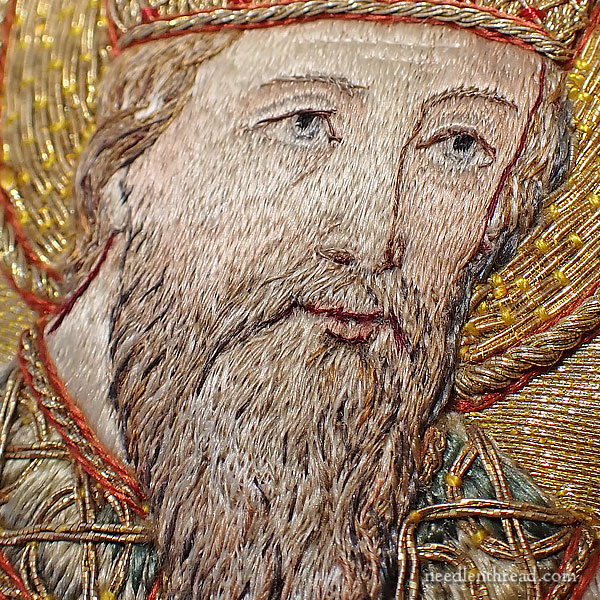
His beard is magnificent!
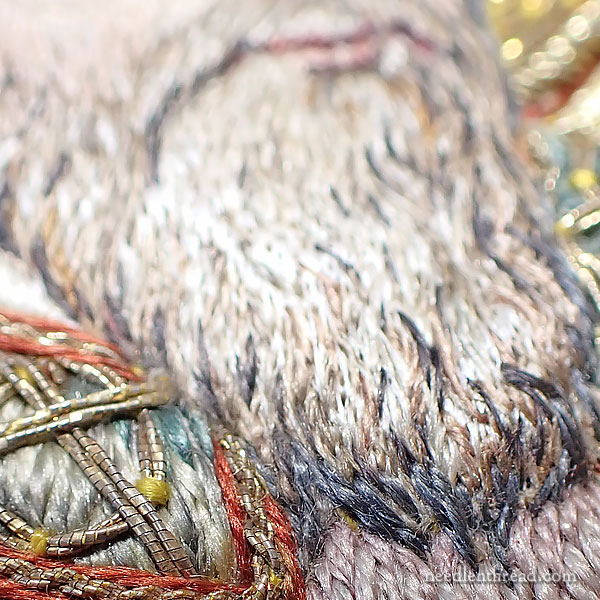
The texture and tones, along with the dimensionality of the beard, fascinate me!
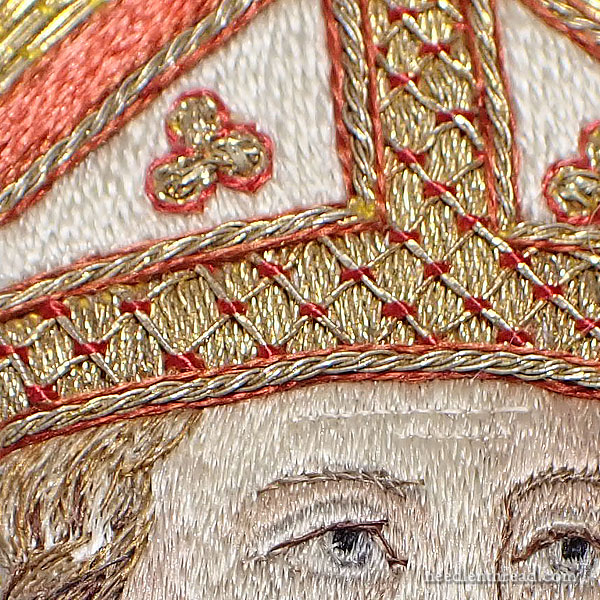
I also love the details on the miter (the hat) that St. Eugene is wearing. The couched trellis pattern in gold is so deliciously uniform.
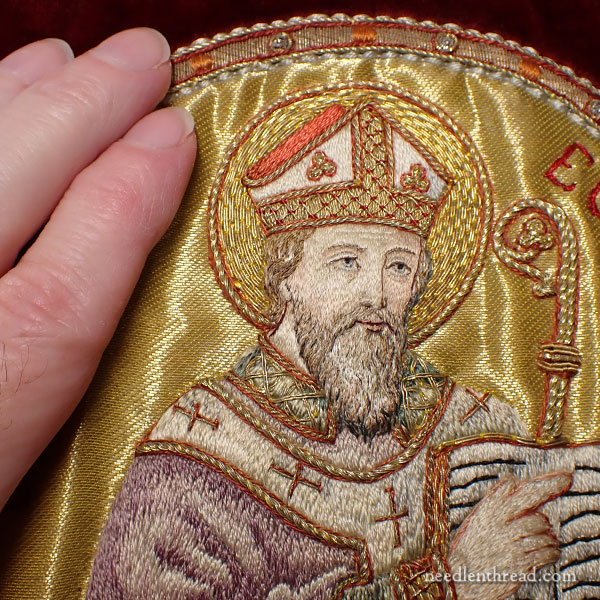
Again, to offer some perspective on size, here’s my hand.
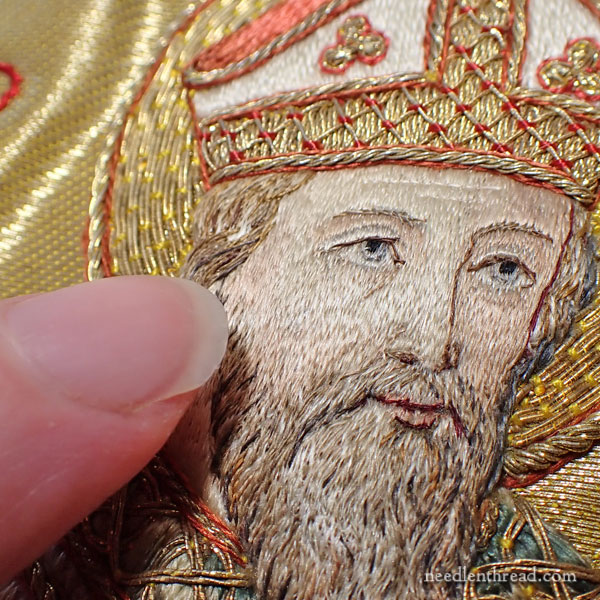
And here’s the tip of my index finger.
The entire medallion in which each figure is situated, including the frame around the gold cloth background, is 6″ in diameter.
I always find this type of figure embroidery exciting to think about. Even if I had the skill to achieve something like this – which I don’t! – I don’t think my eyes could manage it, regardless of our lighting and magnification options today.
Later on, I’ll show you some other examples of figures from this piece. Some of the other figures are not as skillfully stitched or even designed. We’ll also take a look at the rest of the embroidery, appliqué, and trim on the whole greater piece of furnishing that these are a part of. But that’s all for a later date!
I hope you enjoyed looking at these examples of figure embroidery!
On Wednesday, we’ll have a bit of Tool Talk, we’ll finish our Cornflowers scissor envelope on Friday!


Thank you so much for sharing these! They are fabulous! I’m captivated by all of it, but especially the forehead and eyelid lines on St. Eugene. They are so delicate, but I bet they really give the figure dimension when they caught the light when viewed from father away!
Really stunning work! Thank you for the close-ups and the perspective on size. I have embroidered many tiny faces and figures, but so far haven’t achieved anything close to this!
Have you heard of Devere Silks? they sell extremely fine silk thread–their finest weight is less than half of a single DMC strand of 6-strand cotton floss (they describe it as DMC 6-strand divided into twelve strands).
Does that sound similar to “face weight” silks used in the past? I hope to try embroidering some faces with it because it is so fine. I made one attempt so far, but I think I was working too small (less than 1/2″) so I will give it another try in the future.
Thank you for all your interesting posts!
Yes, I’m familiar with them, but I haven’t tried that weight of their thread, so I can’t really compare it. I have tried old face thread and I have some on hand for comparison, so if I get a chance, I’ll order some of the Devere and see how it compares.
When I saw the scale photos with your fingers in them to show size I literally screamed lol. Another great post! Truly astounding.
Absolutely beautiful stitching!!!! Love all things NeedlenThread… and you too Mary!
Wow. Absolutely stunning! I love seeing close-ups of such tiny fine details. The skill involved truly is mind-boggling. St. Eugene’s forehead creases gave me a smile. I appreciate learning about “face weight” thread and any history. Thanks for sharing!
I will never tire of seeing figure embroidery. I even saw slight shading of the iris in the St Eugene figure. Like you Mary, I also wish I had the skills to produce such work, but I am glad these pieces have survived for us to enjoy now.
And we think we’re hot stuff with our modern light, magnification and tools…….Not!
Thank you so much for showing the close-up of the faces. The stitching is almost unbelievable. Creativity should never be underestimated.
Truly mind boggling. The skill of the needlework makes me think of a mature hand with years of experience. But the minute detail makes me think of young eyes. I suspect that whoever created them, they started at a very young age. Beautiful.
Wow Mary! Thank you for sharing these. They are beyond exquisite. I also doubt I could produce such fine, detailed work using modern technology. I wonder who they were!
Have you ever seen the vestments at The Benedictine Convent of Perpetual Adoration near Conception, Mo? They have quite a collection. https://www.benedictinesisters.org/
Yes! I’ve written about them here on the website – years and years ago – and again more recently. I’ve been there. It’s definitely worth the drive!