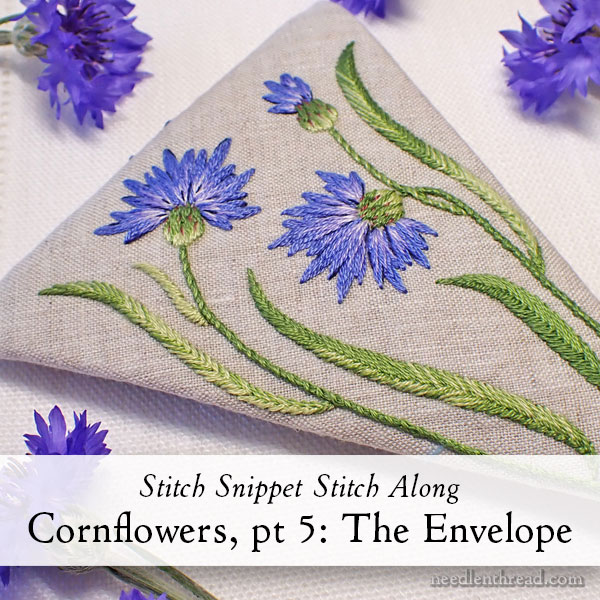
Today, we’ll look at the first part of finishing the Cornflowers Scissor Envelope, our current Stitch Snippet stitch-along here on Needle ‘n Thread!
Sadly, I can’t fit the entire finishing of the project in one blog post (it’s around 40 photos), so we’ll do half today and half on Monday.
If you are just joining in on this adventure, you can find all the previous articles for this stitch-along available here in the Cornflowers Project Index.
If you would like are looking for materials for stitching your own Cornflowers scissor case, you can find the Cornflowers Materials Kit available here.
For members on Patreon, the finishing will be covered in one downloadable PDF, which will be posted in the Needle ‘n Thread community on Patreon this weekend. Hopefully, before today is out, that will be available. I’m also working on a little video.
Let’s take a look at the first steps in finishing the Cornflowers project!
Block & Damp Stretch
The first thing you should do before you begin the finishing process is block and damp-stretch your embroidery piece. You can find instructions for that here. If you don’t understand why we damp stretch and block before finishing, that’s covered in this article, here.
Please read the instructions through completely before you begin. You might even read them through twice!
Finishing Supplies
For the finishing, you’ll need to gather a few extra items: some sewing thread (I use natural colored to match the ground fabric), some sewing pins, and, if you like, some clips, like Clover wonder clips. These are often helpful to hold things in place while you’re working, but they aren’t essential.
You’ll also need some kind of dull stick-like thing to use for turning.
And you’ll need an iron, an ironing surface, and a pressing cloth of some sort. This can just be a clean cotton flour sack towel or something like that. Even a clean pillowcase will work.
Machine or Hand Sewing Notes
I used a sewing machine to sew together the parts of the scissor case. If you do not have a machine, you can hand sew the pieces together. For hand sewing items like this, I’ll often use a quilting weight thread, but a good all purpose thread will work. That’s up to you!
For the constructive sewing part, we’re just sewing the pieces together around the perimeter and leaving a turning gap (as explained below). Whether machine sewing or hand sewing, you’re going to sew the same seam.
Note: In the first step when we transferred the design, you should have transferred a light pencil line around the perimeter of the design (at approximately 5″ square, like on the printed pattern), and the same line on the back of the fabric, so you can easily see where the seam should be as you sew. If you didn’t transfer a line on the back of the fabric as well, you’ll want to do that now!
To hand sew the pieces together, use a running stitch in one direction, and then return in the opposite direction, working the running stitch in the spaces between the first line of running stitches.
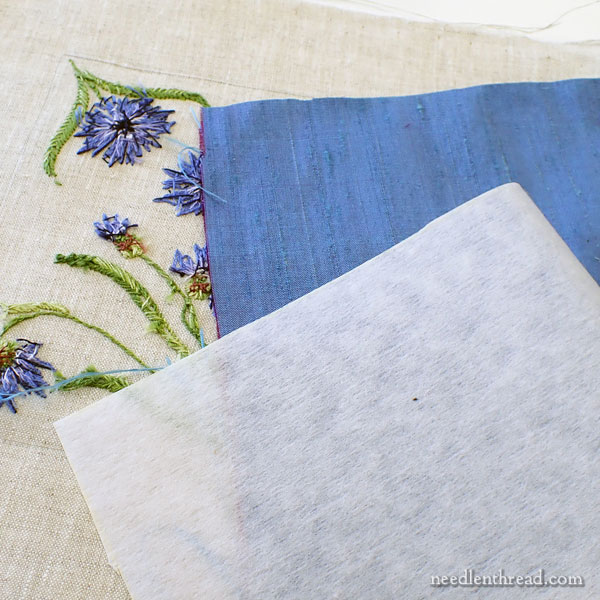
The three pieces you’ll be sewing together at this point are your ground fabric, which you have blocked and damp-stretched; your backing fabric, which is the shot blue silk dubioni (5.5 – 6″ square); and light, sew-in interfacing, also 5.5″ – 6″ square (Pellon #40 is what I use).
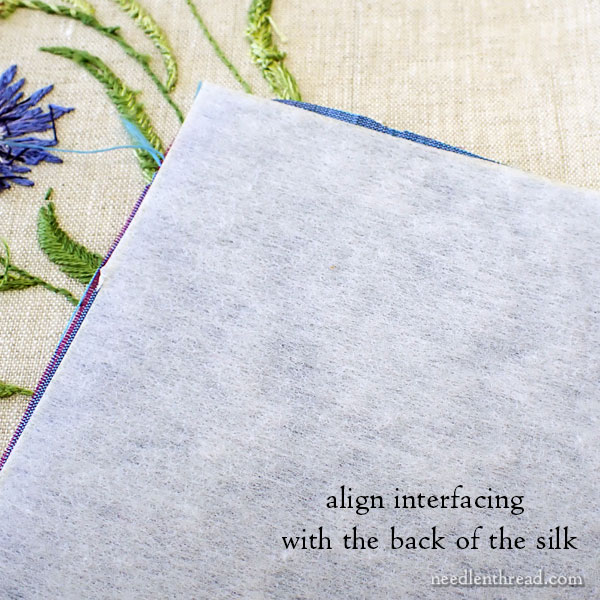
The interfacing is going to back the silk, so align the interfacing and the silk together, on the back of the silk. You might not be able to tell front from back on the silk – just pick the shinier side of the silk, if you can tell there’s a difference! (Some people don’t see a difference.)
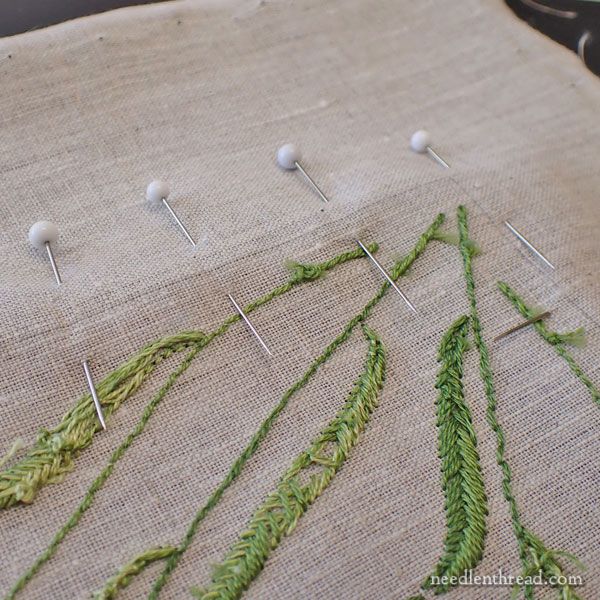
Put the right sides together of the silk and the embroidery. So, the front of your embroidery will be against the front of the silk (the shinier side).
Align the pieces so that they are square with each other. Pin all the parts together along the pencil outline of the perimeter on the back of the embroidery, as shown above. Notice that we’re working on the backside of the embroidery.
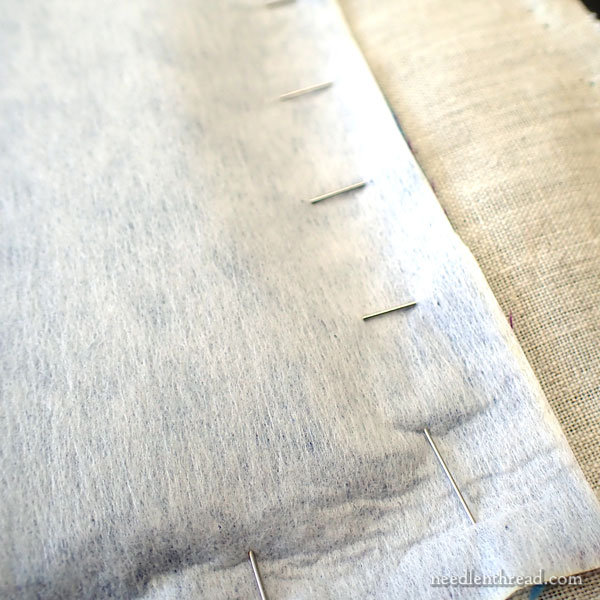
If you flip your pinned layers over, they will look like this – you’ll see the interfacing on the back. The silk will be sandwiched in between the interfacing and the embroidered fabric. The front of the embroidery is facing the silk.
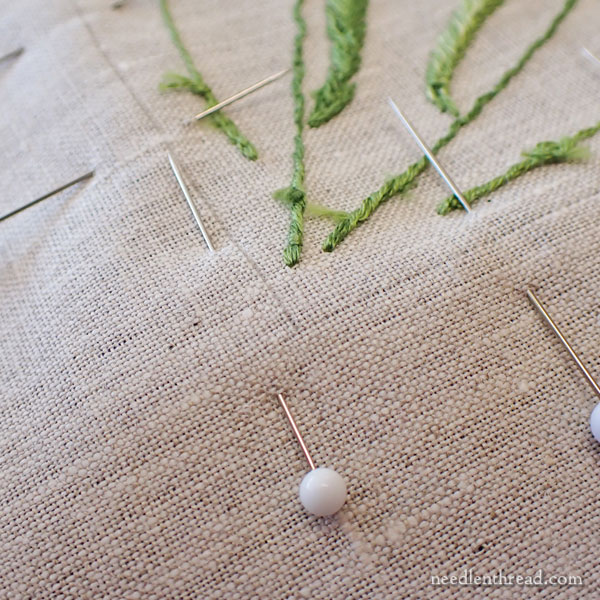
Pin all the way around, so that the fabrics don’t shift. Pin the corners as shown above – or in any way you’re comfortable doing, if you have your own sewing methods.
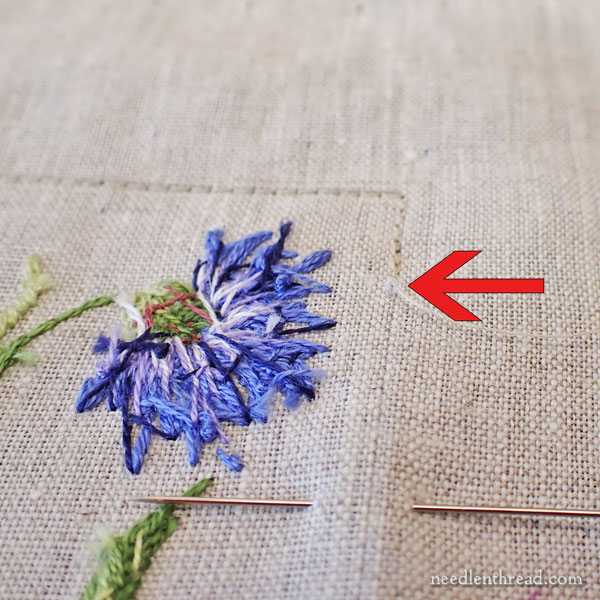
Begin sewing about 1″ into one side, towards the closest corner.
If you’re working on a machine, secure your start as you normally would (forward and backwards).
If you’re working by hand, secure your start with a knot and a couple close worked backstitches, before you begin the running stitch around the rest of the perimeter.
Sew along the drawn line towards the corner and around the whole perimeter until about 1″ into the corner on the same side you started on, leaving about a 3″ gap of unsewn fabric in the middle of that side.
The diagram below indicates the sewing path, if you start at the green dot and end at the red, following the dotted line:
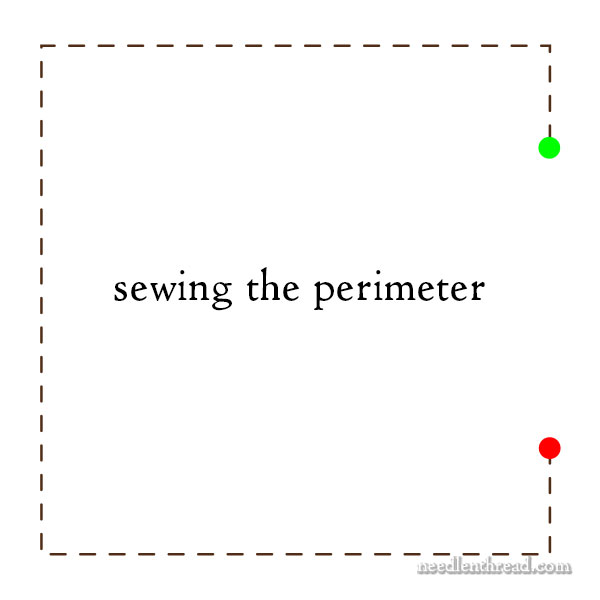
Remember, if you’re hand sewing, you’re going to be working a running stitch from the green dot to the red, and then switch directions and sew a running stitch between the previous running stitches, back to the green dot.
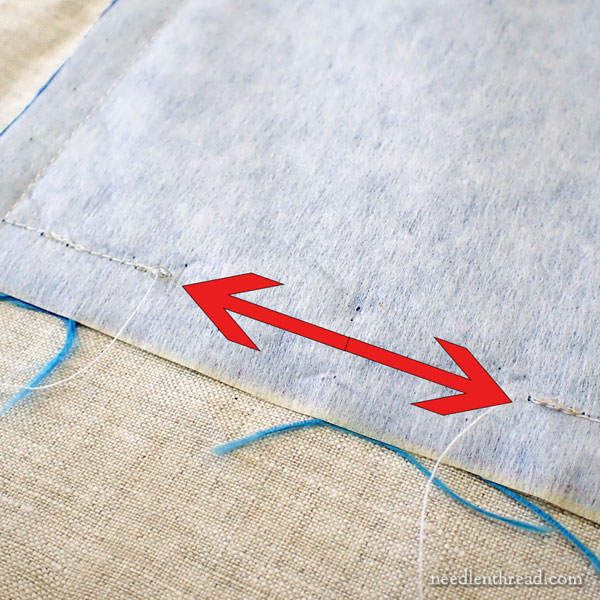
You can see the turning gap marked with the red arrows in the photo above.
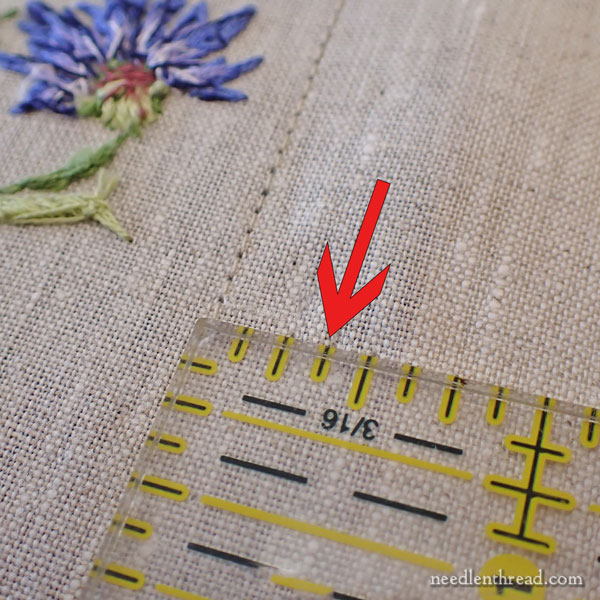
With your layer of fabrics all sewn together, now you need to trim them up. I trimmed at about 3/8ths of an inch. You can use a ruler and measure out 3/8″ from your sewing line and either draw a cutting line, or, if you’re proficient at it and have the tools, you can use a rotary cutter and mat.
Remember, it’s always better to measure twice and cut once!
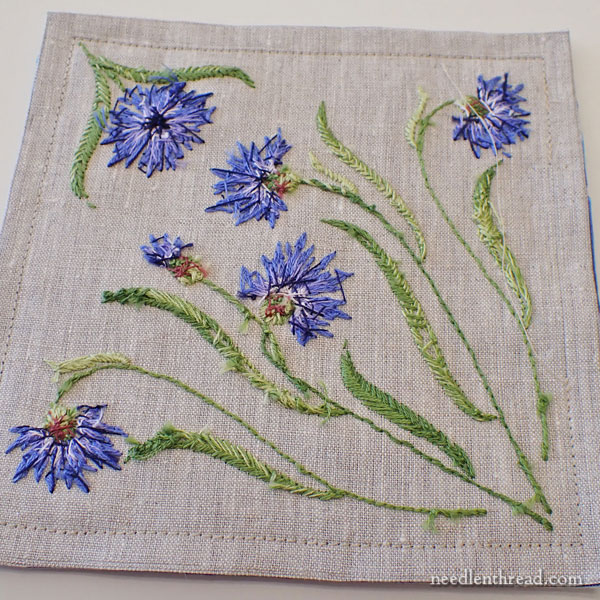
Here’s the sewn-together stack of fabrics with the sides trimmed to 3/8″.
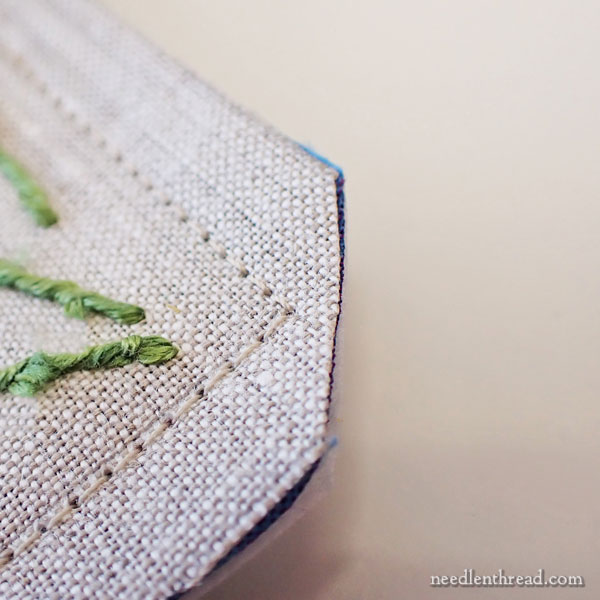
Now, trim the corners. Cut diagonally across the corners, about 1/8″ or even a little more away from the corner sewn edge.
Keep in mind that the silk tends to fray, so you don’t want to cut too close to the corner! At the same time, you need to cut some off, in order to turn the corners out enough. They don’t have to be perfectly square corners on this project – and they probably won’t be – but if you don’t trim some of the corner off, there will be too much fabric in the corners to turn.
I trimmed a tiny bit over 1/8″ away from the corner seam.
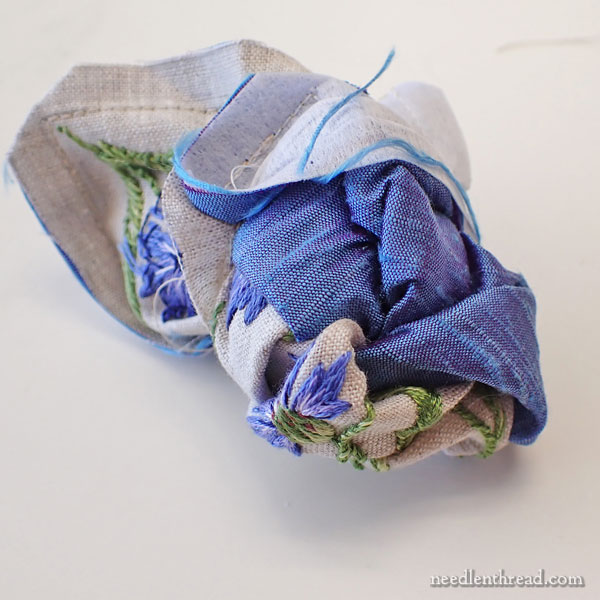
And now for the fun part. A bit harrowing, but fun!
Using the turning gap, turn everything night-side out.
Yes, it will be a wrinkled crumpled bunch of fabric – it’s inevitable.
Go gently, especially if you hand-sewed!
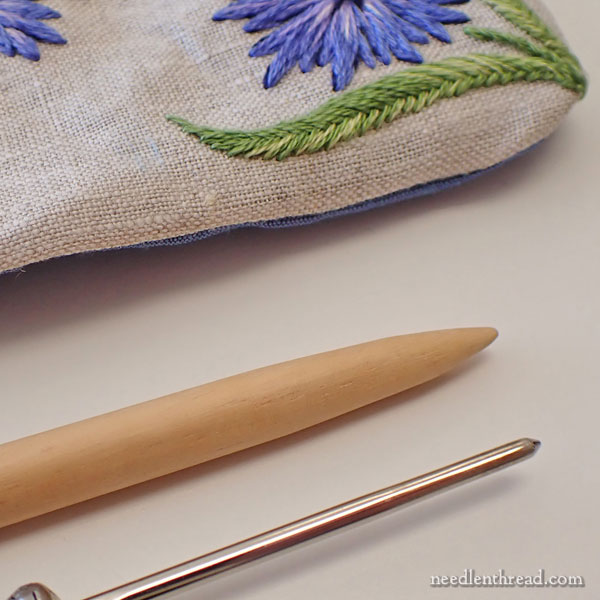
You’ll need to push the corners out gently with some kind of dull stick-like thing. Don’t use something exceptionally pokey! It will go through the fabric! Use something like chop stitch or a dull rounded something-or-other to push the corners out as best as you can.
Go gently when you do this. You might have to work it a bit, but it’s worth taking some time.
If the corners are particularly annoying, you can also use a pin and carefully “pick” the linen to help pull them out a little, but you have to be very careful doing this. It’s easy to dislodge threads of fabric, and once dislodged, it’s a pain in the neck to repair!
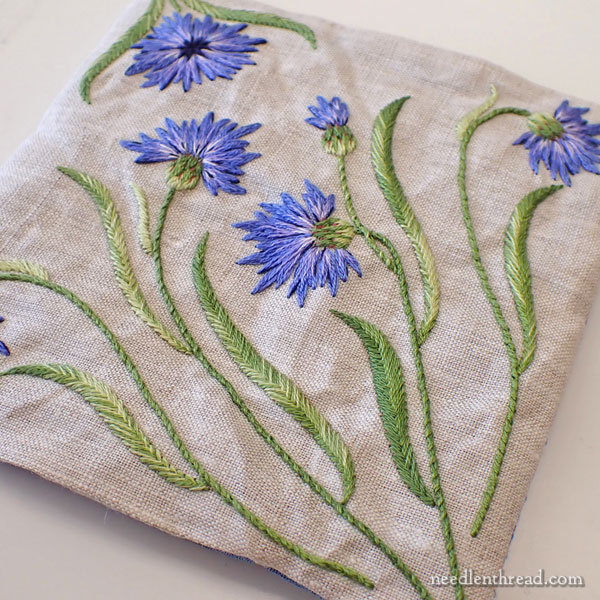
Once you get everything all turned out, you’ll notice that your beautiful embroidery is all wrinkled.
Rats!
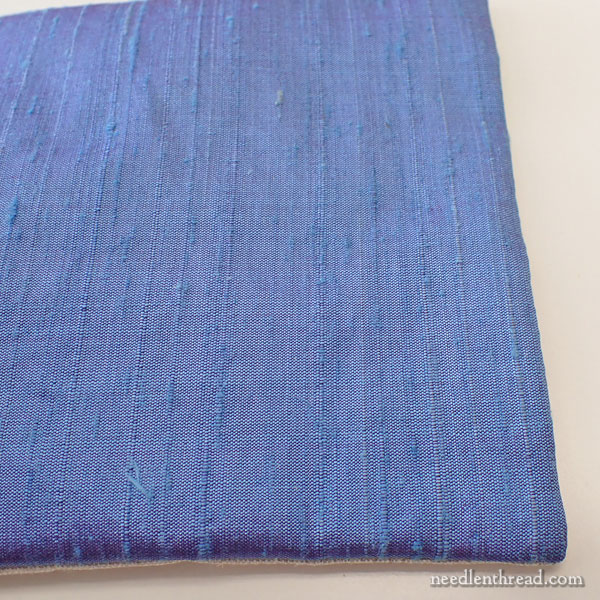
This is the piece from the back. The silk normally doesn’t wrinkle as much as the linen!
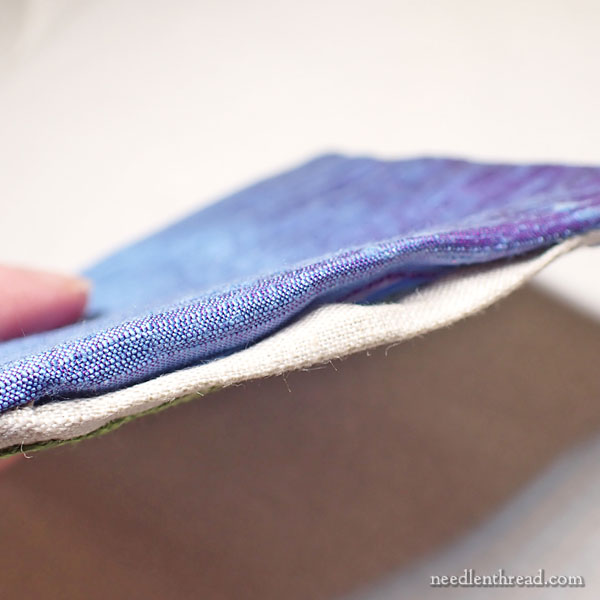
This is the turning gap. Make sure the seams are turned in to the inside, here, as they are where they’re sewn.
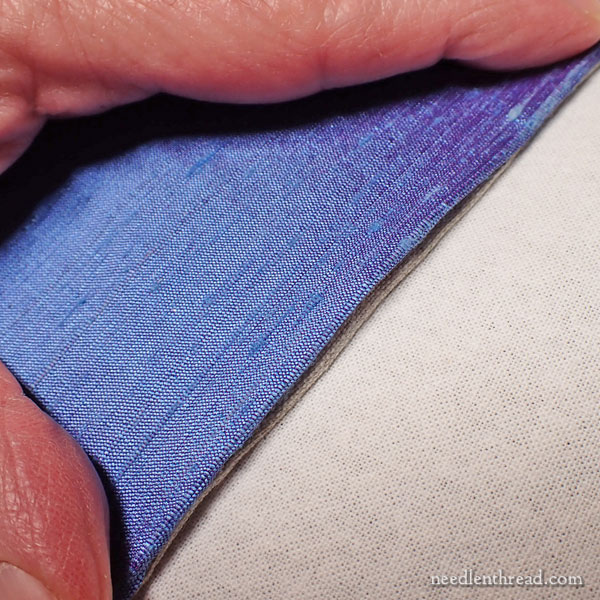
Make sure that your ironing surface is covered with a cloth (I use a floursack towel, but you could use a cotton pillow case), preferably folded a couple times to give it some cushioning.
I set my iron on not-quite the highest setting when I’m ironing the silk back. But I do want it hot enough to give me crisp seams here.
Iron the turning gap seams.
Sewing the Turning Gap
Using your sewing thread, sew the turning gap closed by hand, with a blind ladder stitch, which is explained and illustrated below, when we sew the scissor case together. It’s the same stitch – just a straight stitch inside the seam, alternating from side to side as you work up the seam. See the illustrations below.
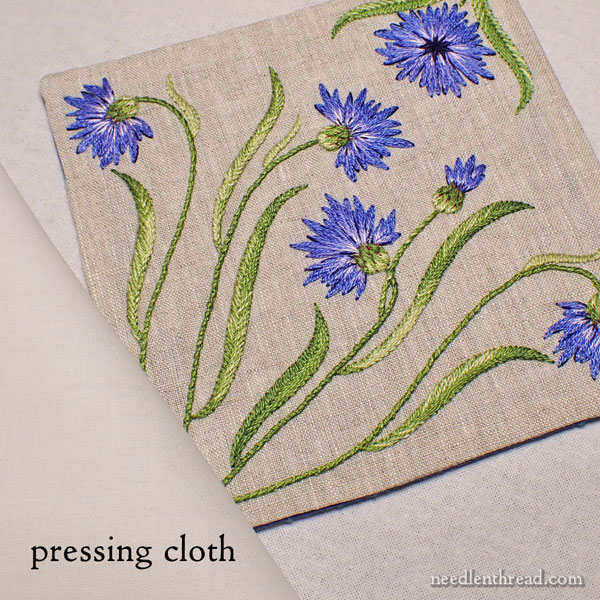
Then, turn the embroidery face up, and at this point, you can put your iron on the cotton / linen setting (usually the highest setting) and put your pressing cloth over the top of the embroidery, and iron the square carefully.
I don’t advise using steam. If you want to use a little moisture, it’s better to lightly mist the spraying cloth with water.
The point here is to remove the wrinkles from the turning process. A padded pressing cloth (I use a flour sack towel folded in half, so I’ve got two layers) will give the embroidery something to sink into, and help to avoid crushing it.
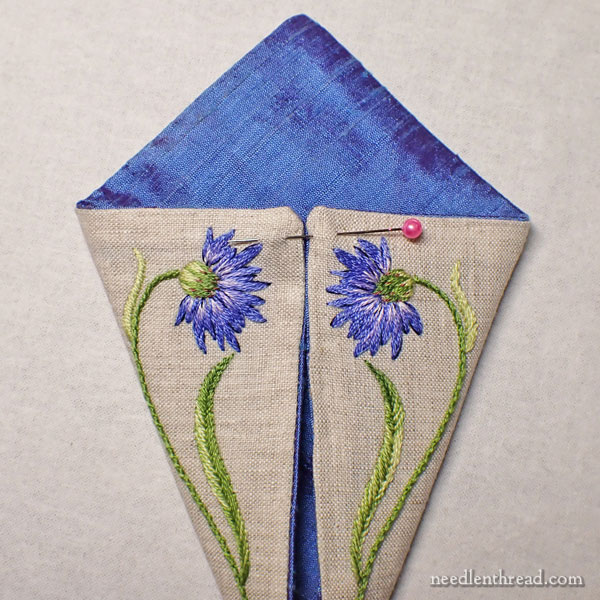
Now we’re ready to construct.
Lay your square silk side up in front of you on the table, so that, when you fold the sides in from the corner, you get the configuration of flowers that is shown in the photo above.
Your folding seams will correspond, more or less, to the dotted lines in the diagram below:
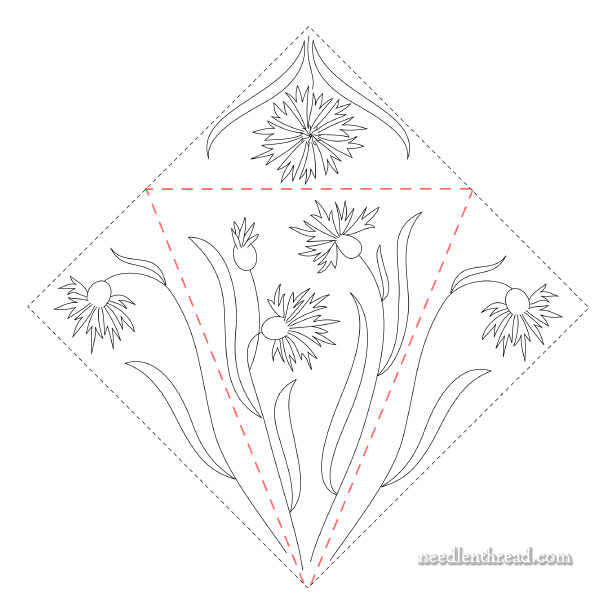
The folds will not be absolutely crisp and tight (which is fine!), but you do want them to be straight.
Align the edges of the top, inside part of the scissor case into a straight line, as shown in the photo above, and pin.
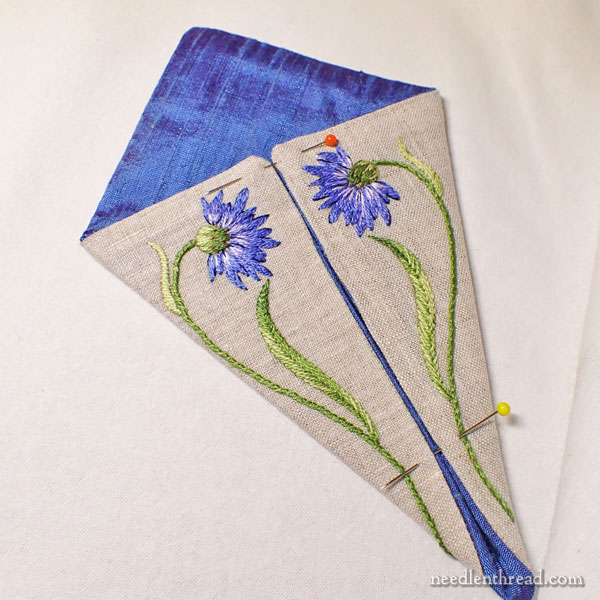
Pin towards the base of the case as well, as shown above.
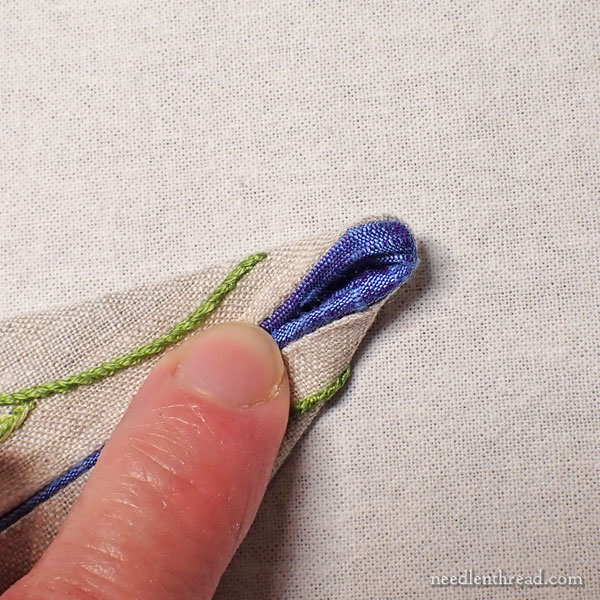
The seam here is purposely not completely sewn. For one thing, it would be really hard to sew all the fabric into place invisibly, in this tight corner.
But more importantly, I purposely designed this with an open area on the seam so that the pretty lining is visible here.
If your lining does not create a pleasing layout, you can use a pin to pick at it gently to kind of pull it into a nice looking little exposed corner. Be careful! You don’t want to pull out too much or dislodge your silk from the sewn corner.
When you pin the base of the case near this corner, pin it at the point where it becomes more difficult to bring the linen sides together easily.
On my case, this opening ended up being about 7/8″ long. On your case, it may be a little longer or a little shorter.
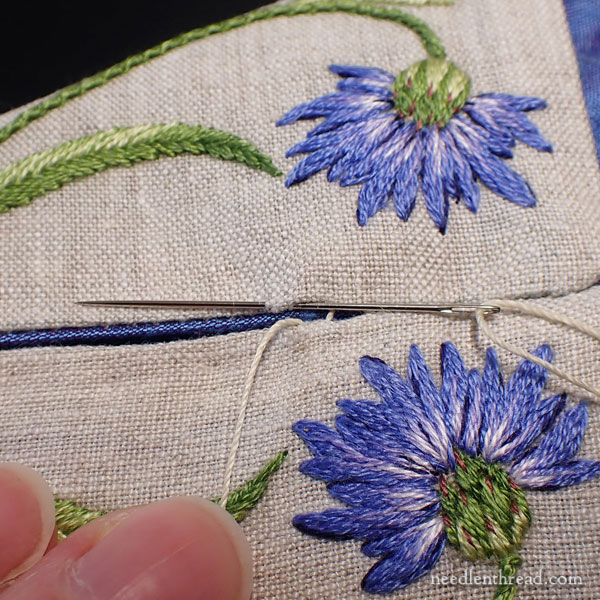
Now, we will use the blind ladder stitch inside the linen seam, to close the scissor envelope. You’ll be sewing from the top pin (where the two sides come together at the top of the inside of the case) down to the pin that exposes the lining pleat in the corner.
Knot your sewing thread (I’m using a natural colored quilting weight cotton here), and pass your needle and thread into the seam. You might need to give a little tug to get the knot to pass into the seam.
Then, you’ll sew a straight stitch inside the linen seam on one side of the case, going towards the pointed base…
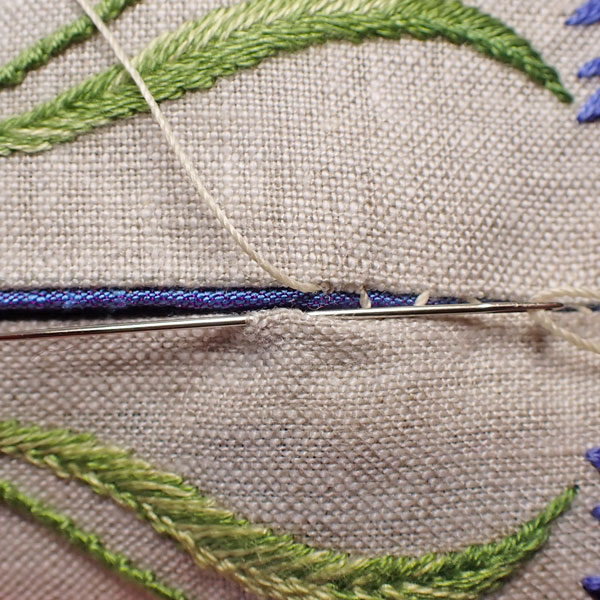
…and then you’ll move to the opposite seam, directly across from where you just ended the stitch, to move forward one stitch inside the opposite the opposite seam, as shown above.
These straight stitches inside the seams, alternating back and forth between each seam, form a small “ladder” that, when you tension the thread, pulls the seams together.
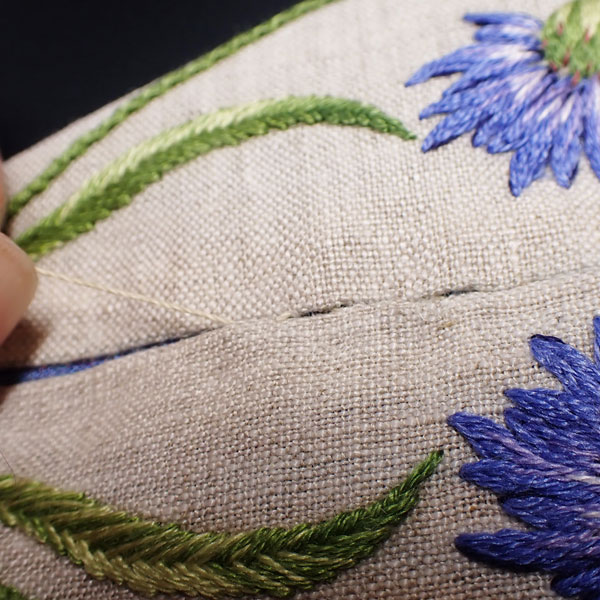
Here, I’ve tensioned the sewing thread, and you can see the seams coming together, practically invisibly.
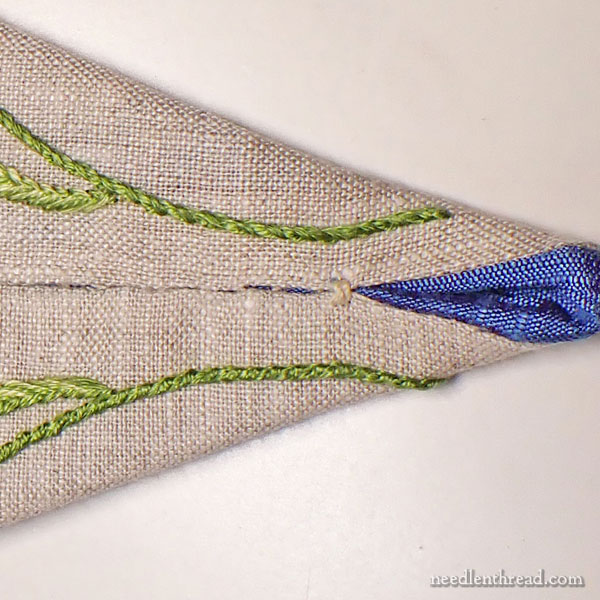
When you get to the base where your opening begins, work two or three small straight stitches right across the top of both seams, as shown above, to secure the seam well.
Then, manipulate your needle and thread into the inside of the fabrics and work some discreet small holding stitches – or even a knot, if you can manage one that can’t be seen – to end the thread.
This completes the sewn-up envelope.
Once you’ve read through these instructions, I hope you’ve found that it’s not as complicated as all these words and photos might make it seem. I’m just covering every step, so that you’re not left with questions, but really, you could distill the whole thing into just a few steps:
1. Block & damp stretch.
2. Stack your fabrics in the correct configuration, right sides together with interfacing backing the silk.
3. Pin around perimeter.
4. Sew together leaving a turning gap.
5. Turn.
6. Press the turning gap and sew it shut.
7. Press with a pressing cloth to remove wrinkles.
8. Fold into the triangular envelope and pin.
9. Sew the seam that creates the triangular envelope.
Next Step
On Monday, we will sew the pearl button in place and create the loop closure. This will finish your scissor envelop!
If you’re looking for other articles in this stitch-along, please visit the Cornflowers Project Index here.
Have a wonderful weekend!


Leave A Comment