


Hello and Welome to July! Golly, this year is going fast.
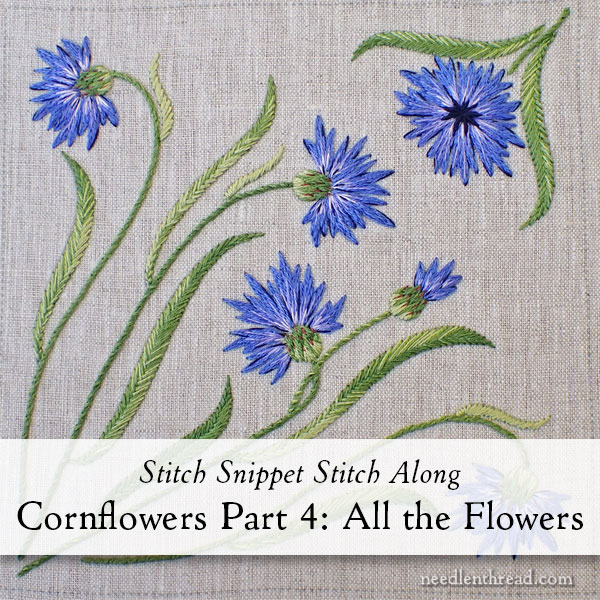
It is time to move on to the colorful and exciting part of our current stitch-along here on Needle ‘n Thread! Today, we’ll be addressing the cornflowers. This is a photo-heavy article, but please read the instructions as well!
If you are just joining in on this Stitch-Along, you can find all the previous articles for this project listed here, in the Cornflowers Scissor Envelope Project Index.
You can find the materials kit for this project available here, if you would like to have all the materials on hand that I used to create the scissor envelope shown in these lessons.
If you are a member of the Needle ‘n Thread community here on Patreon, you have already received this installment of Cornflowers as a handy PDF for downloading and printing. It was posted this past weekend on Patreon, so if you haven’t picked it up yet, hop on over and pick it up!
All the cornflowers are worked the same way, with what I call “rough” needlepainting.
It’s a very sketchy (in the drawing sense, not the suspicious sense!) approach to needlepainting, and a little bit rough compared to the more intricately detailed needlepainting out there, but it is easy and quick – and it works out great on these little cornflowers!
Don’t be intimidated, then, if I use the term “long and short stitch” or “needlepainting” when describing what we’re doing. We’re not using an advanced technique of any sort here. We’re really just going to work with split stitches and straight stitches, to fill our cornflowers.
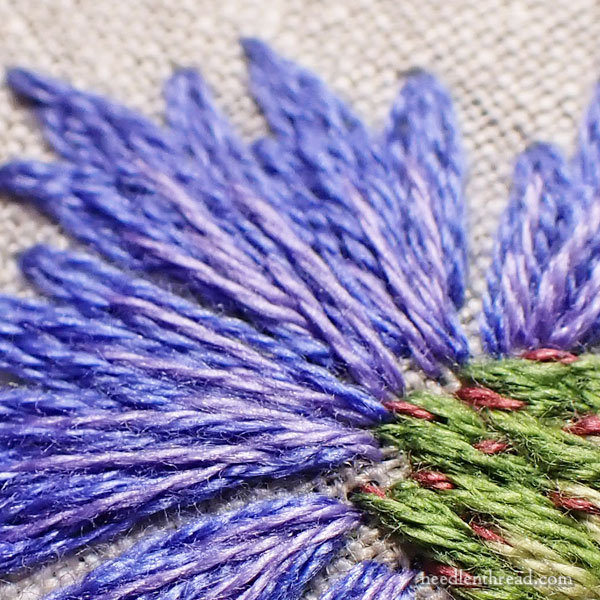
I’m using two strands of 3838 in the needle for the base layer of color on the flowers.
I started with a waste knot (on top of the fabric, inside the stitching area) and a couple tiny tacking stitches. After working the little tacking stitches (again, inside the stitching area), you can cut off that waste knot.
Then, I moved over the left-most petal on this particular flower to start stitching.
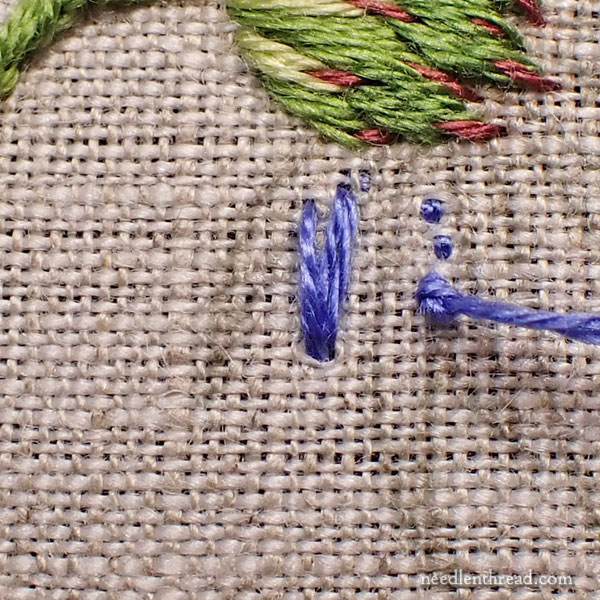
I worked straight stitches along the outline of the petal, always going down into the very points at the tips of the petal.
My goal here is to cover the design lines, to keep the tips of the petals as pointy as possible, and to eventually fill most of each petal with this fabulous cornlower blue that’s the foundation color for the flowers.
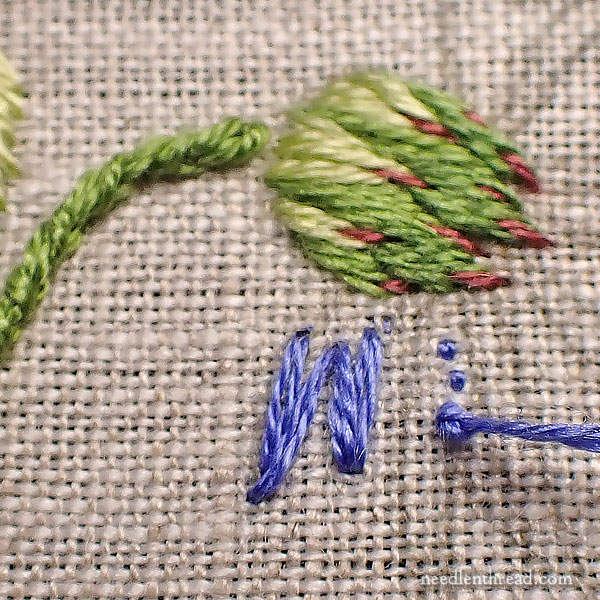
Here, you can see I’ve got the two tips of one side petal stitched. It’s just four straight stitches that come into a “V” at the tips of each part of the petal.
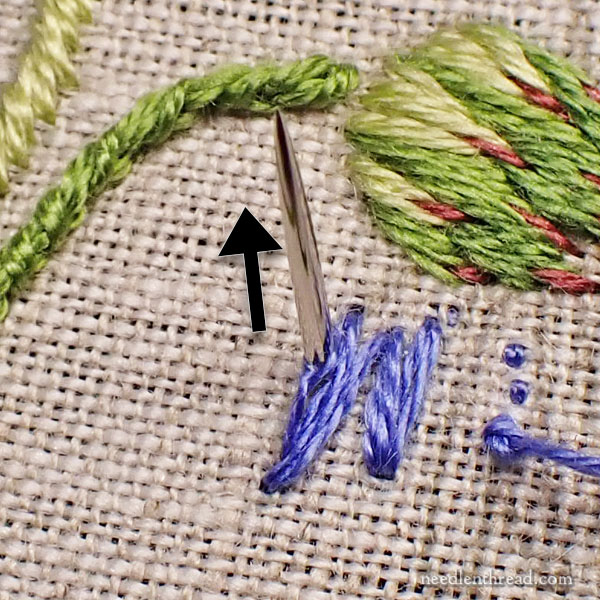
Now I’m going to cover the rest of the outline, by working split stitch into the previous stitches.
With the split stitch, pass your needle and thread up into the previous stitches.
I always try to split a thread, rather than just coming up between the two strands, because it creates a more solid line (you don’t end up seeing space between the two strands).
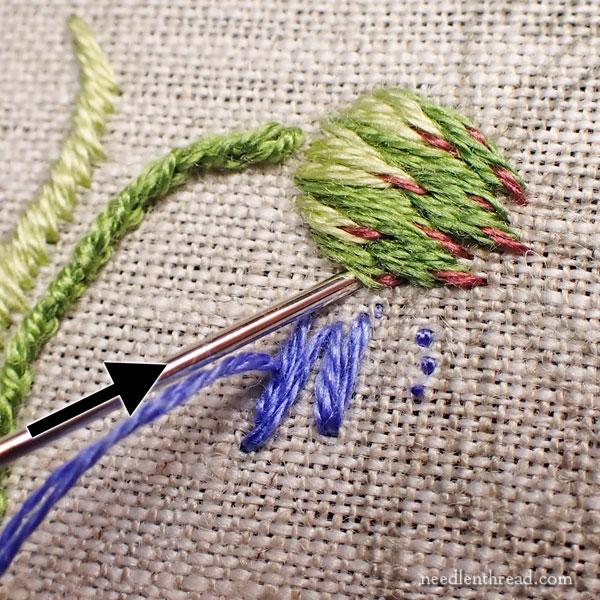
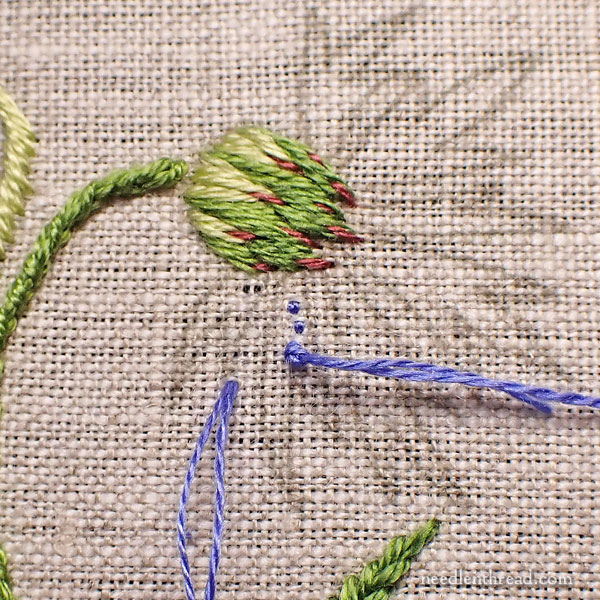
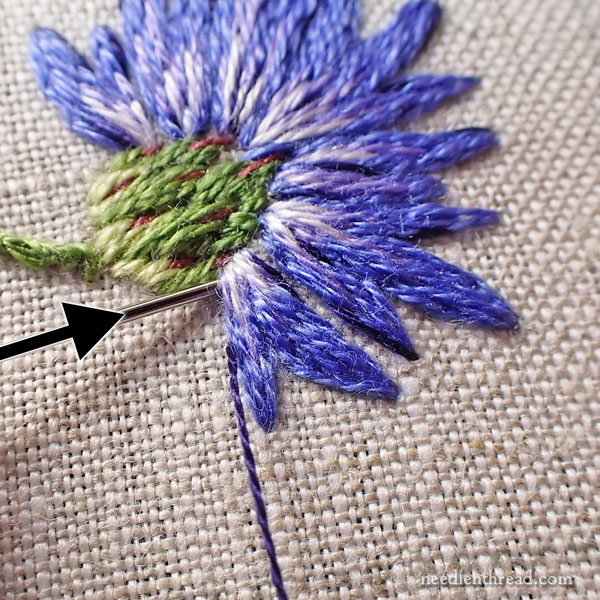
On the lower petals around the bulb, I prefer the bulb to sit on top of the petals, so that the petals seem to be behind the bulb.
In order for this to happen – since we’ve already stitched the bulbs – I end these stitches underneath the bulb by taking the needle in behind the bulb at a low slant, as shown above. This “sneaks” the stitch to the back, where otherwise, the stitch would just end right next to the bulb.
You can see here, very close up, how the needle is sliding back behind those stitches that make up the bulb.

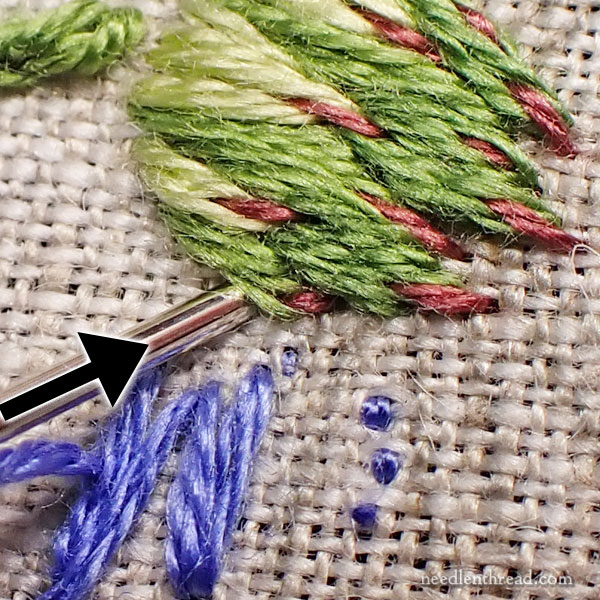
Because this lower side petal was relatively small, I don’t need to work anymore of the foundation color here. I’ll finish that petal with the other colors.
So now I can just move over to the adjacent petal and stitch it the same way, working the points of the petal first, then working down the sides of the petal.
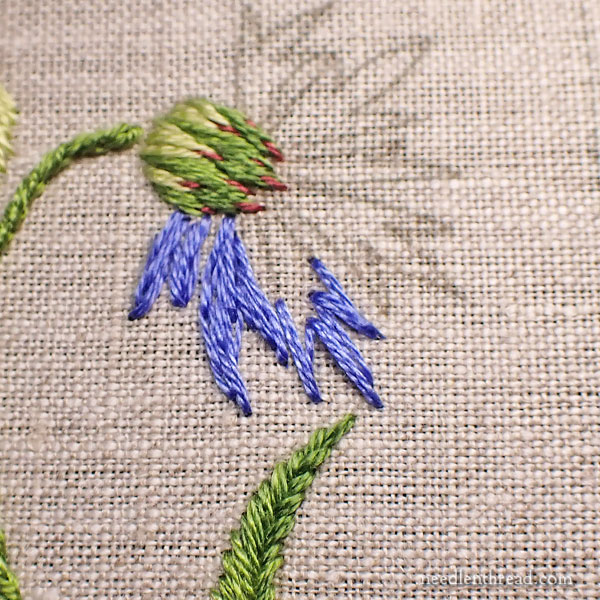
On the larger petals, I need to fill in more of the blue, so at this point, it’s just a matter of splitting into the outline stitches that are there, and working straight stitches inside the length of the petals – not necessarily all the way to the base – to fill in with color.
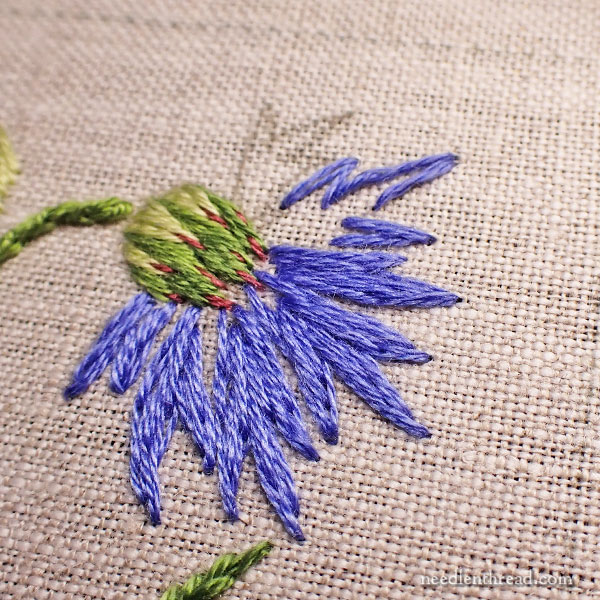
In the photo above, you can see that most of the petals are not filled all the way to the base. This is because I’ll use the other color to fill in the flowers more completely and to add some shading.
This foundation color of blue works in very quickly, because you’re using two strands of floss, the petals are not very large, and the stitches are relatively large.
Here, I’ve turned my frame so I could approach the cornflower from a different angle and finish filling all the petals on it with the foundation blue.
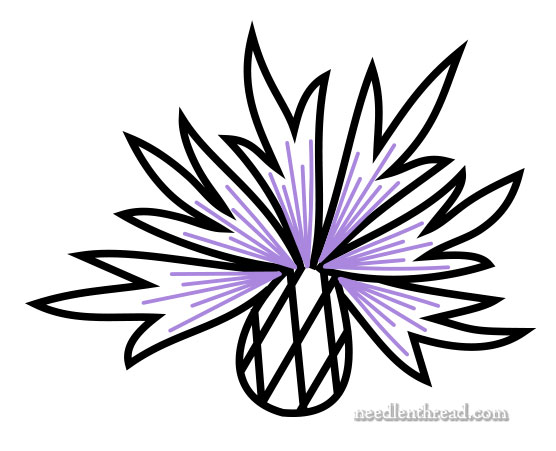
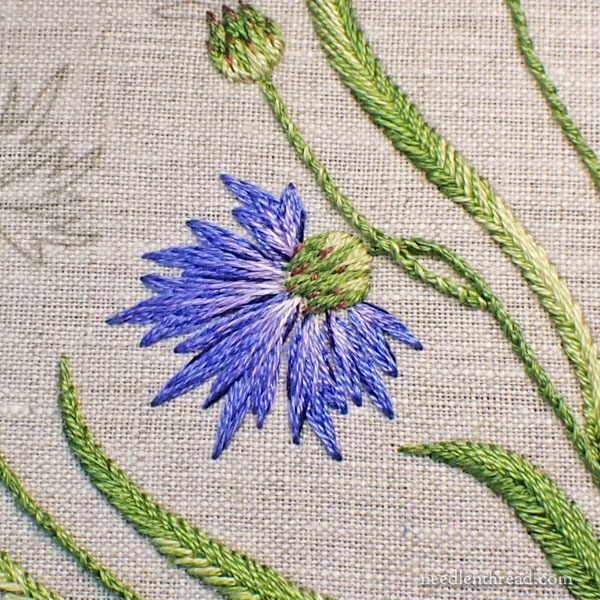
Now, switch to one strand of DMC 340, which is a medium violet.
Work long straight stitches down the center of the petals in a “fan” configuration, towards the natural growth point of the petal. The diagram below indicates the type of pattern you will follow with these stitches.
Make sure to come up into the previously worked foundation of stitches, and to take your needle down into the fabric at the base of the petal near the bulb.
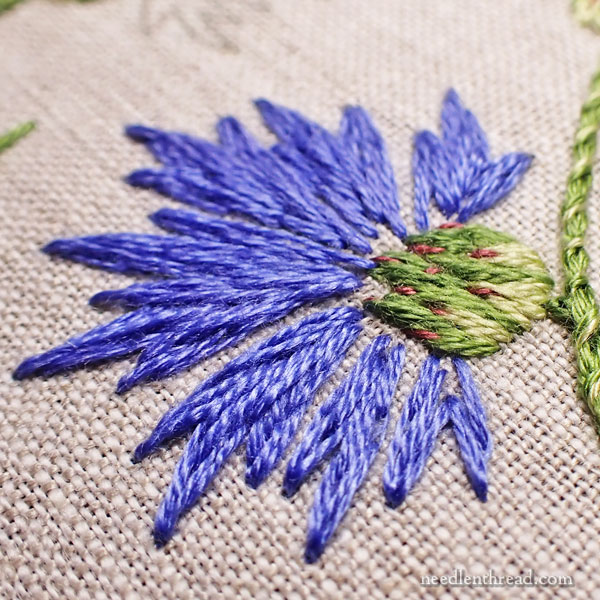
When we zoom in close on the petals, you can see the lighter purple stitches. Notice that they aren’t all perfectly fanned – some slant off a little bit to accommodate the sections of the petals.
You can see how some of the stitches might not even stretch all the way down to the base of the petal.
As you fill in with the lighter color, you’re not trying to make a perfectly executed long and short stitch with a long-short-long-short pattern. You’re really just filling in the rest of the petal and adding some sketchy lighter color stretching up towards the tips of the petals.
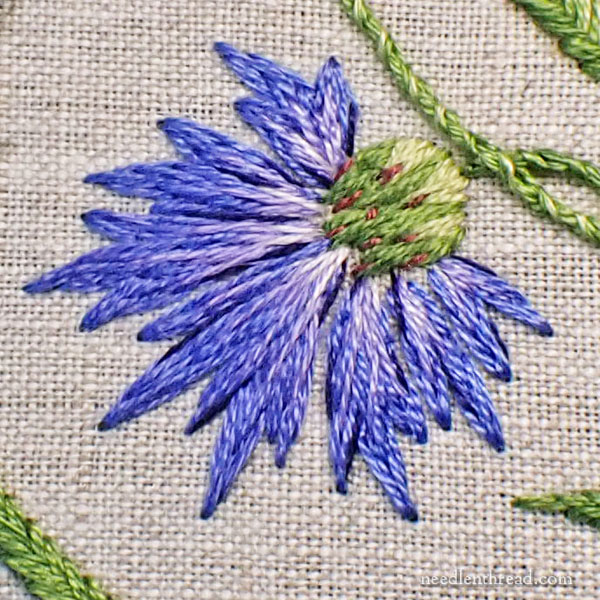
Now, using one strand of the lightest purple (24), “sketch” in some small split stitch just at the base of each petal.
These stitches should also fan from wider apart on the inside of the petal to closer together at the base, as shown above.
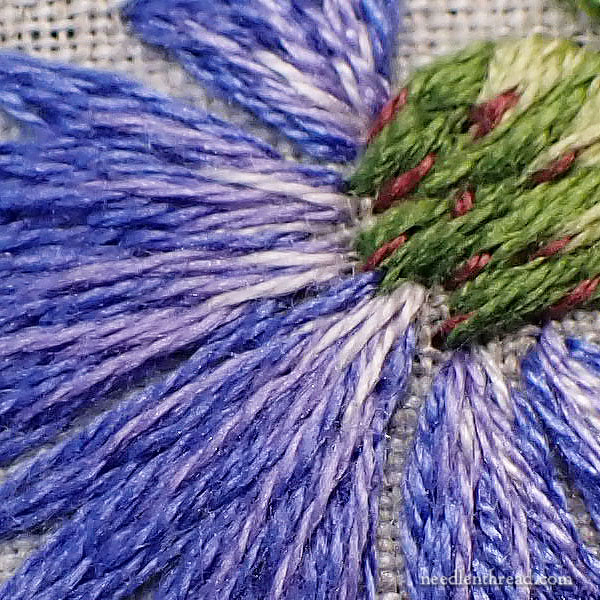
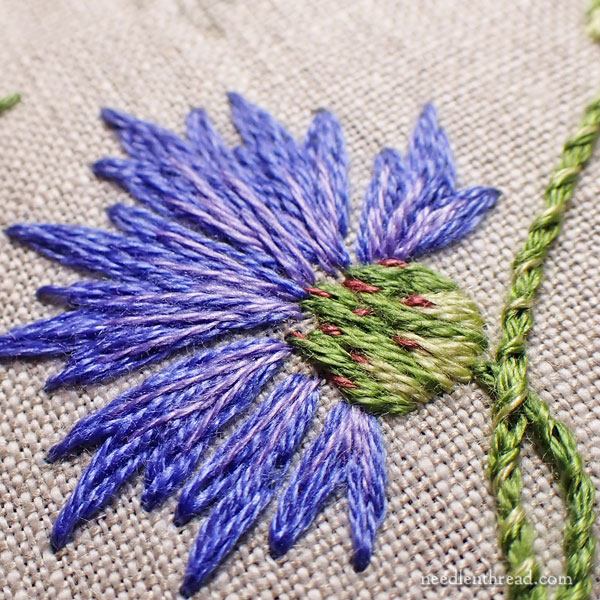
Another close up here to help you see the lighter stitches clearly.
Remember to come up into the inside of the petal, splitting the previous stitches from underneath, and then go down into the fabric at the base of the petal.
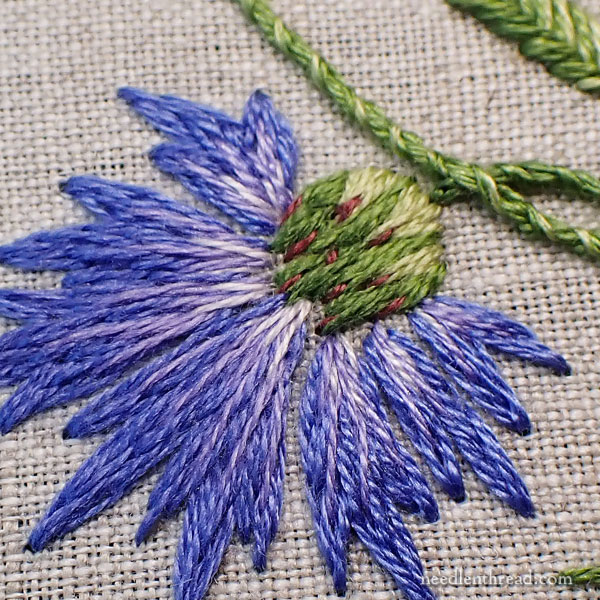
Switch to one strand of dark navy blue (823).*
*If you purchased the kit, this color is not in the kit, as explained in the errata notice published in this post on June 17th.
With this color, you’ll just “sketch” little dark lines around the petals (and inside the petals) here and there. These little touches of dark around the flowers will make the whole flower come to life.
So, focusing on the outside of the petals work some straight stitches very closely to the edge of the petals. You can split into the outlines of the petals and then pass into the fabric, tucking the needle under the previous stitches, as shown above.
You want these stitches to blend in with the flower, without being separate from it, so here and there, you’ll need to tuck the stitches underneath the edges of the flowers, to really pull the dark blue close in to the petals.
Also work occasional dark stitches next to the upper tips of the petals, as shown in the photo above, keeping close to the long edges that form the tips.
Occasionally, work a dark stitch between petals as well, especially where two petals butt up next to each other.
All the flowers are worked in the same manner, so follow all these steps above to finish the rest of the flowers.
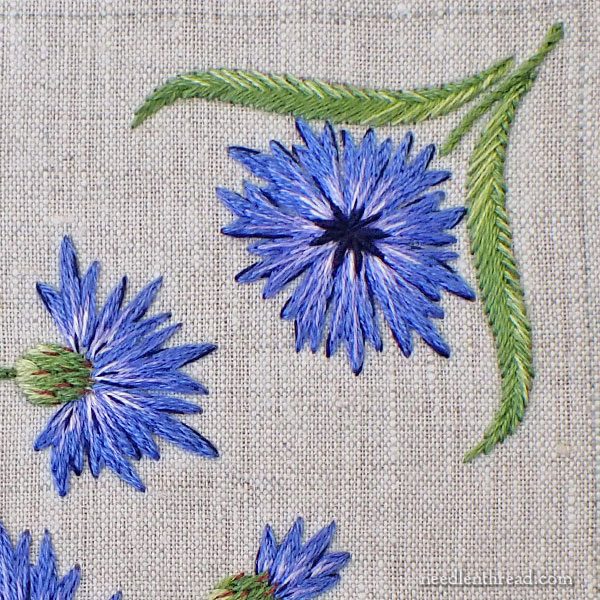
When it comes to the corner cornflower, you can work a series of dark straight stitches in the center of each petal’s base and down into the center of the flower. Work two or three stitches right next to each other (practically in the same holes), to create a very dark, thicker stitch at the base of each petal. This should fill the center of the whole flower, as shown above.
If there is any fabric showing in the center after doing this, fill in with an extra stitch or even with a French knot here and there, if desired.
Alternately, you can work bullion stitches in the base of each petal and into the center of the flower, if you’d like to add a little dimension. You can find a tutorial for the bullion knot here.
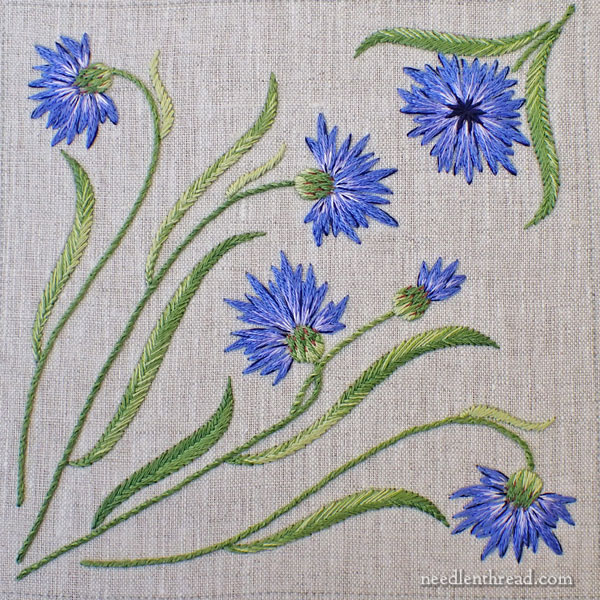
And here you have all the finished flowers, just like that!
Next up, we will construct the scissor envelope and finish it off with a fancy little button and loop closure.
You can find all the articles relating to this project so far listed in the Cornflowers Project Index, here.
Hope your week is off to a fabulous start!
Leave A Comment