


A couple weeks ago, I shared this sneak peek on an upcoming embroidery project featuring one of my favorite flowers, the cornflower.
It’s a funny thing. It’s not like the design is that complex, and my approach to stitching it is certainly not complicated. But sometimes, when you’re trying to work out just exactly how to stitch an element in a way that other people will be able to understand and do easily – without getting complicated! – I sure know how to get complicated.
Cornflowers have these little plump “receptacles” (the terminology for plant anatomy is eluding me at the moment, but I think that’s the right term) at the base of the flower. They’re covered with little individual bracts, and when they’re buds, that’s what you see – this plump bud covered with bracts, or individual tiny leaf-like bits that overlay each other to cover the bud and protect the flower.
On stylized flowers, these kinds of buds or receptacles that have this overlay of bracts are normally represented by laid threads that are couched down in a diamond pattern. Think: typical embroidered thistle, with diamond lattice work over the base part of the flower head – like this one that I embroidered on a project many years ago.
Chances are, if you search “embroidered thistle” online, pretty much every stylized hand-embroidered thistle you come up with will feature a similar approach to the bulby base of the thistle head.
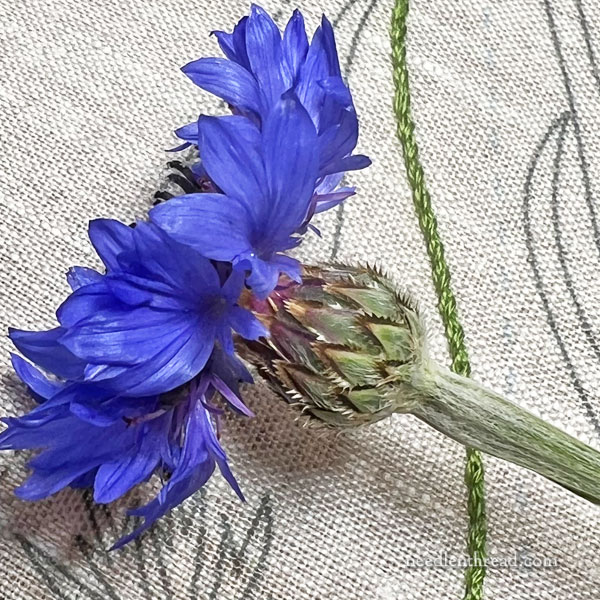
Cornflowers have something similar – see that bulby base or receptacle covered with bracts? – only they’re not nearly as mean as a thistle’s. They’re not as spiky.
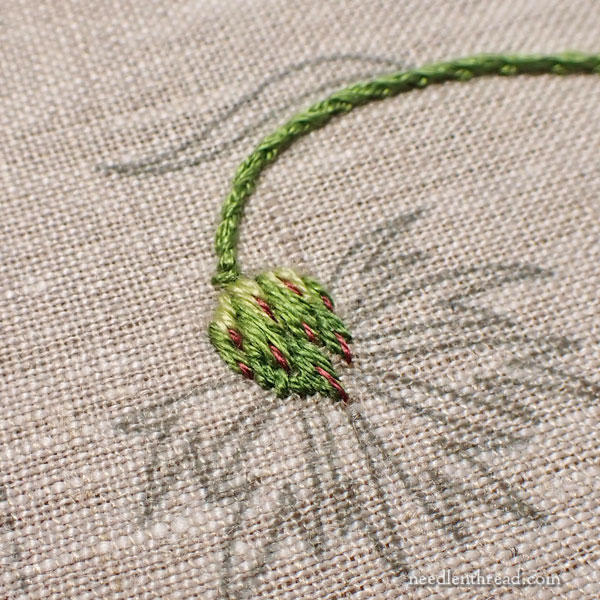
To embroider this part of the flower, I really did not want to do the whole couched diamond lattice thing. I tried it, thinking it would be the simplest approach:
But as I suspected it would be, the whole effect was just so flat. Keeping in mind that this is a very small part of the flower, I found it too crowded, too.
So I tried to find the right stitch to fill this part of the cornflower.
I tried overlapping detached chain stitches.
And then I tried them again in the opposite direction.
I tried fly stitches overlapping each other. I tried long and short stitch.
And I kept picking them all out.
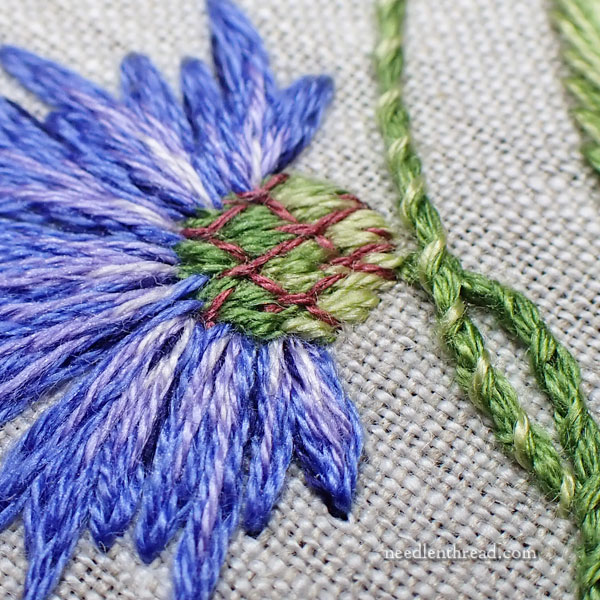
Finally: this.
I like this. It doesn’t outline the bracts, it’s true. But it works well in the tiny tiny space, and it has a very satisfying, plumpish look to it, and it gets across the right look.
I don’t enjoy picking out the same thing over and over again. Sometimes, it really drive me mad!
But finally… this worked.
And would you believe, it’s absolutely the simplest approach I could have taken?
I’m sure there’s a lesson to be learned in this…
More soon!
THAT is lovely, Mary…a most tantalizing tease!
Thanks for all the effort you put into your delightful projects for us.
We await…
Linda
Thank you for sharing this! I just finished a project that involved lavender spikes and it took forever to work out, not just colors but flower and leaf stitches. It really helped to read about your process too.
Looks really pretty!
And, it was the most beautiful and iconic choice you could make. So much better than the cross stitches. ❤️
That is lovely. All that picking out was worth it.
LOL…I don’t like to pick things out either! I choose to do a sampler sort of thing for my daughter. First I changed the wording a tiny bit, no big deal. Near the bottom was a bicycle, which I decided to make it their RV…of course I was trying to embroider on aida – ouch. The RV was basically black and white -sort of- with swirls of 2 shades of grey….. All the wording and trees on the sides turned out usual nice work on the back….but I’m very happy that you won’t be able to see the back of the RV after it is turned into a cute banner for their home away from home. Pat in SNJ
I don’t think the bracts need outlining with another color (unless done with Very Thin floss). The stitch ends themselves do a dandy job, especially with that dot of color at the points. Much better than the overlay thread couched down on such a small area.
The lesson to be learned for you – I have no idea. But rest assured your readers appreciate the number of attempts and that you wrote about them. A good reminder the first attempt isn’t always the best one.
Mary, does this embroidery stitching rely on the gradient colors of green? – so that you must take stitches to balance the light/dark pattern?
No. I used three shades of green.
Très belle réussite.
Bravo
I wish we had cornflowers in Florida! But I have lovely hibiscus shrubs in my back yard to make up for it. Thanks for all your hard work, Mary!
Pls keep me on the list for cornflower kit.
Hi, Amy! I don’t have a specific list for the cornflower project because it hasn’t been released yet. I’ll be releasing it week after next. If you keep an eye on the website over the next couple weeks, you’ll find all the details here! Thanks!