A few weeks back, I shared the initial images of this St. Matthew embroidery that I acquired via an eBay auction.
It’s been a long time since I’ve explored a similar piece of embroidery (I wrote about one here). There is so much I enjoy about owning a piece like this – not least of which is the fact that I can handle it and do whatever I want with it.
My first approach to any piece of embroidery like this is to take some initial pictures of it – especially photos that will get me close-up to all the nitty-gritty details you might not see when you step back from it. Then, I just start exploring it from all kinds of angles. Every time I look at it, I generally find something new that interests me or excites me!
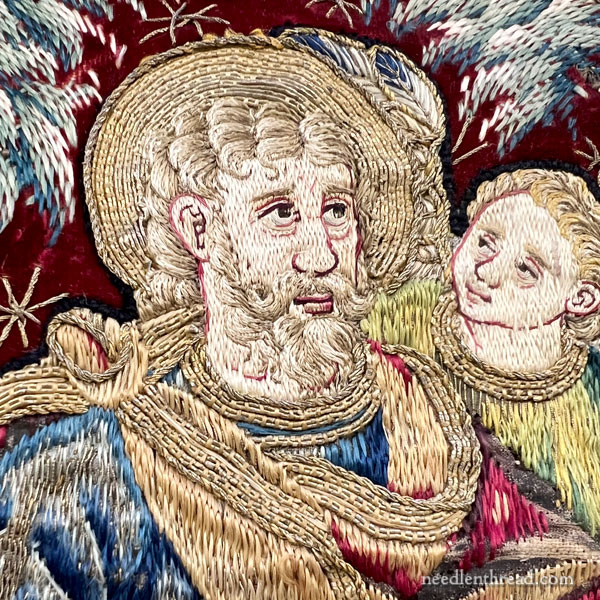
I spend a lot of time ruminating, but not necessarily drawing conclusions. I surmise things based on my own experiences with similar pieces of embroidery. Sometimes, if I really want to know a “firm fact” about a piece or a technique or a material, I will consult an expert. But often, I just take what I can glean by close-up exploration and draw reasonable conclusions about structure, materials, sequence of work, and so forth.
With this piece, I don’t plan to deconstruct it to any great degree (I have done that with lesser embroideries).
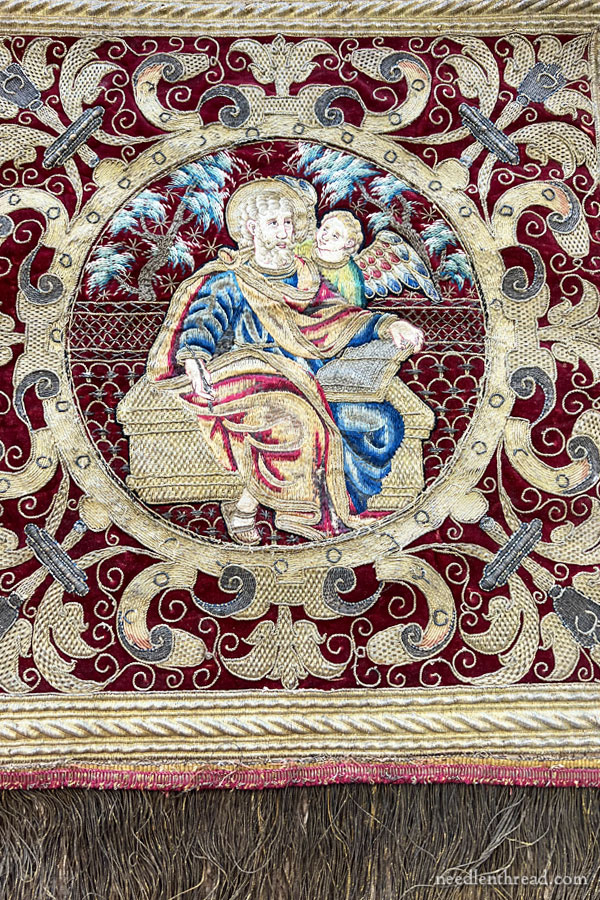
But there is one part that needed to be removed and that the removal of which would not detract from – or violate – the embroidery itself.
The embroidered piece is about 22″ square, with about a 4″ fringe attached to the base.
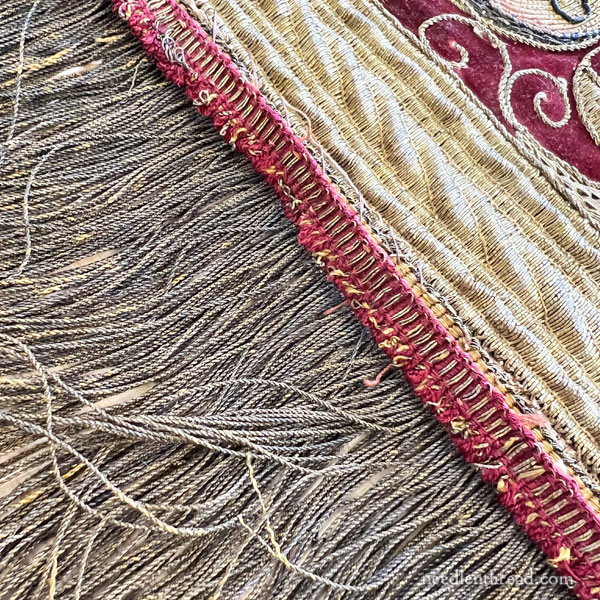
Of course, it’s not unusual that the metal wire threads on this piece are completely tarnished. The piece is likely over 250 years old – probably closer to 300 – and, considering I got if off eBay, it likely hasn’t been “maintained” over the years. Still, overall, it’s not in bad shape, all things considered!
The fringe, though, is in bad shape, and it’s ugly (I’m sure it was beautiful once upon a time, but…).
It’s a twisted fringe, made with a wrapped wire thread (wire wrapped around a silk core). Gold doesn’t oxidize, but when used with an alloy (in this case, silver), the alloy is what oxidizes. And this is completely black, except where the core shows through.
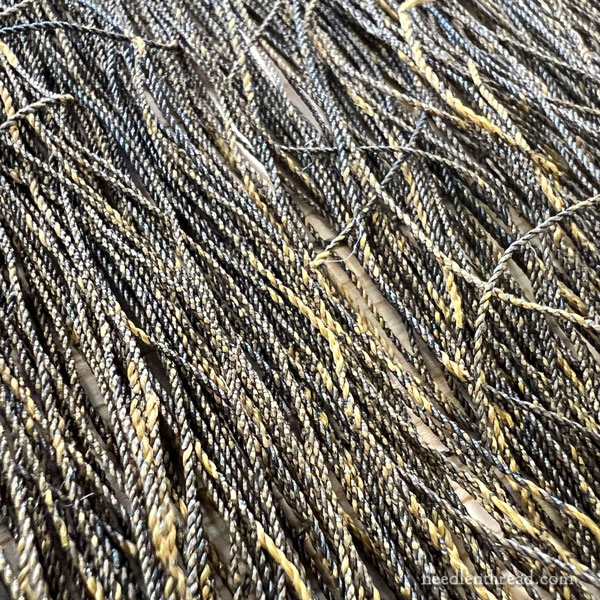
Anywhere the wire is missing or broken, the threads are really weak. It just takes a gentle pull to break the fringe.
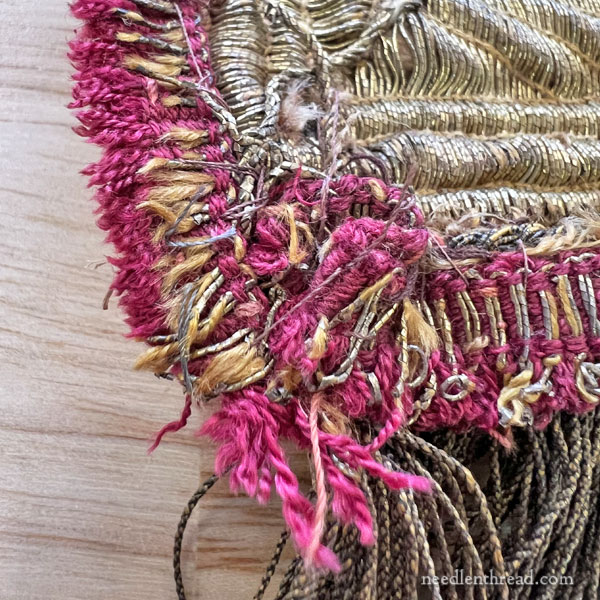
On top of the fringe’s edge where it connects to the main fabric – and in fact, all around the piece – there is this “ribbon” of a sort. I’d probably call it a galloon, although the wide gold band around the whole piece is more galloon-ish, according to the way we think of galloons in the construction of ecclesiastical textiles today.
The ribbon, or very narrow band, is made with gold wire and silk thread. It’s not in the best shape in the world. Its purpose was likely to join or cover joins on the edge.
I absolutely love this messy corner!
Corners are my pitfall on this type of construction – I can’t stand doing them. This one has undergone certain ravages with time and wear and all, of course, but construction-wise, compared to other parts of this piece, the corners look pretty darned awful. They make me chuckle.
One of my ruminations as I was looking at this closely: sometimes, we over-glorify historical needlework. Just because a piece was created a long, long time ago and it employs techniques that we love or are interested in, doesn’t mean that the piece itself was well-made or even a good representation of its class. Sometimes, historical needlework is just average (or even poor) needlework that happened to survive. Just because it’s old doesn’t mean we should elevate it as if it’s the pinnacle of some kind of Standard. Sometimes, even historical pieces aren’t a high standard of work!
I’m not saying this is a poorly made piece – obviously, a lot of skill went into the embroidery. And the finishing of a ribbon around the edges was obviously not the focus. But the corners of the ribbon were pretty sloppily attached.
That realization gave me a lot of weird satisfaction.
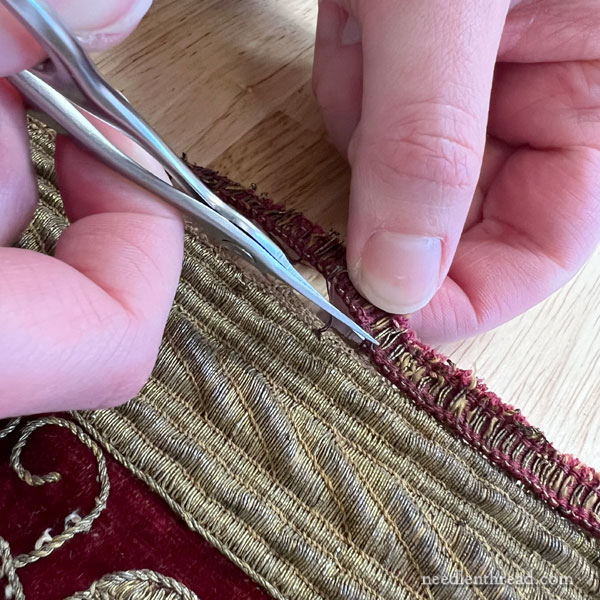
Anyway, that was a lot of words about the one part that is going away on this piece.
The fringe and the ribbon came off, with just a few snips all around.
I know some of you may ask what I did with them.
Well, I binned ’em. Turfed ’em. Pitched ’em. They are, in short, in the trash!
There’s no reason to keep this kind of stuff, under the circumstances. It is not salvageable. It’s not study-able (it’s just typical fringe). And it’s rotten. So farewell, fringe!
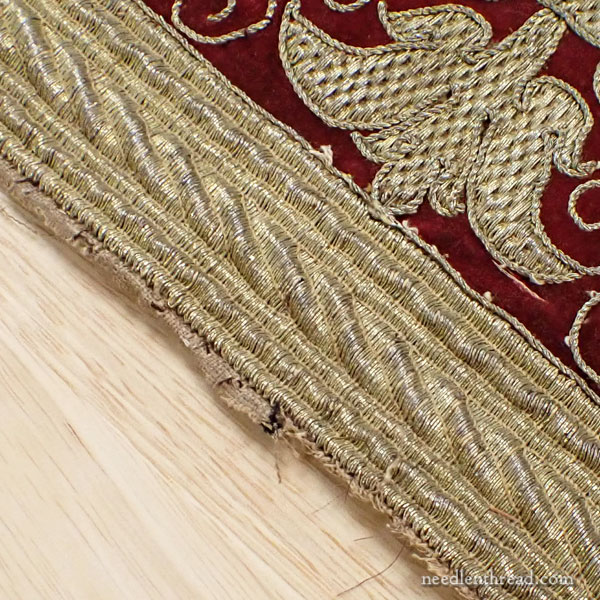
This is the resulting edge with the fringe removed.
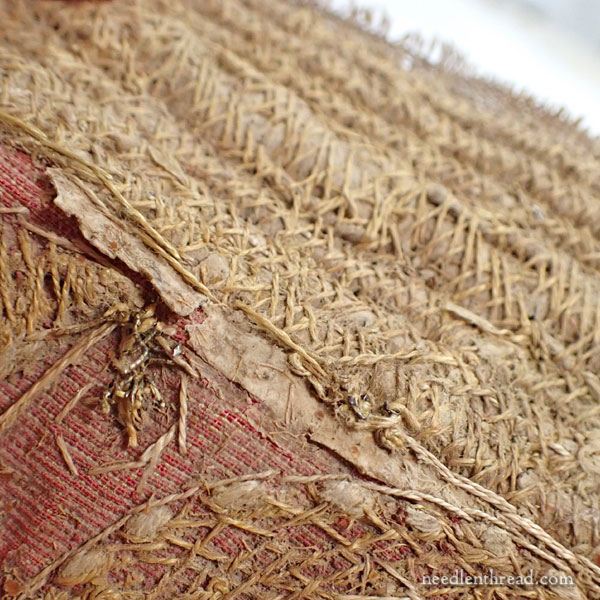
This is the underside of the gold band.
I have lots of thoughts swirling around in my head about this wide gold band that surrounds the piece.
I wonder many things about it.
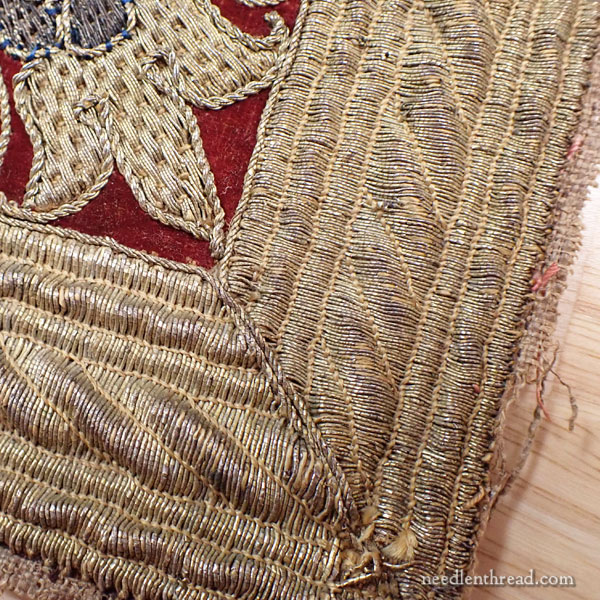
The corners here figure into my wonderings. I like looking at them.
I need to explore this band some more. I have questions!
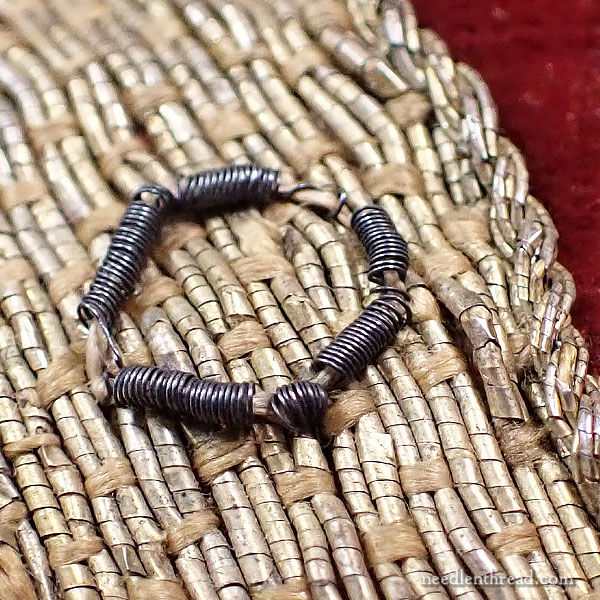
And just another little close-up, unrelated to the edging.
This is another picture I like looking at: the tarnished wire atop the other gold, which I’m wondering about. I may have to take a tiny piece apart. I’m guessing it’s gilded vellum or membrane gold.
So many things to explore! I’ll share things as I go, as usual!
Coming Up!
We will go forward with the stitching on the Stitch Snippet wreath this coming week – look for that!
Many of you have requested some of the Christmas ready-to-stitch sets, so we are working those into the schedule, and I hope to have some stocked by the end of next week. Keep an eye out, if you’ve been waiting for them.
Anna and I will be spending quite a bit of time between now and January 1st working on next year’s project plans and ideas, as well as other aspects of Needle ‘n Thread. We’e got the studio cleaned up, organized, and decorated for Christmas, so it’s a nice place to work quietly right now and get some thinking and planning done!
Have a lovely weekend!


Oooh, I’ve been looking forward to this, and it was worth the wait. Hope to see more of what you might do with this.
Thank you for the photo of the wrong side! We so rarely get to see that angle on historical embroidery. I’ve seen a similar edging somewhere recently, probably on Jessica Grimm’s patreon, with the twisted padding in the center. But I never would have thought of double backstitch! I can see how it would add tension around the padding, giving the gold laid on top a lovely lift and great definition. Thanks again, and please show us more of the wrong side as you explore.
I love following this exploration! Thanks for sharing this.
I love this, Mary! A week or so after you acquired St Martin, I finally got my hands on two late-medieval embroideries. Not pretty and not very well made. But perfect for what I intend to do with them. I am planning to start blogging about them in the New Year. But first, I’ll need to pluck up the courage to open their frames. I have a sneaky suspicion that they are glued to the backboard :(.
How interesting. I followed your link back to the other piece from 2013 and I don’t remember that deconstruction at all! There are parts of this that are truly interesting.
Marvelous! Stupendous piece! The ‘encroaching’ stitches give fluidity to the swathing neckscarf. I agree with taking the fringe off; the silk core is what gives the fringe weakness. I look forward to your input on this piece.
I so enjoy your articles on Historical embroidery. I find your explorations and questions so very interesting, and I learn a lot. When I have the opportunity to observe embroidery, remembering what I have learned from you helps me to look at it more closely and see different aspects of it.
Thanks so much, Karen! I’m glad you enjoy it!
Oh, what a lovely piece! The tapestry shading is just exquisite!