Before I ever launch a Stitch Snippet stitch-along, I have to stitch the thing we’ll be stitching along. Sometimes, as we work through the stitch-along, I’m also stitching the thing. But it’s usually at least the second time, usually involving the improved version from the first prototype.
With the Stitch Snippet that I’m releasing in a couple weeks, something completely different is happening. I’m releasing a new Christmas downloadable PDF with multiple little projects in it this – like Twelve Trees for Christmas or Snowflakes: Twelve Winter Embroidery Projects. For the Stitch Snippet, we’ll actually be working through one of those projects together.
This means that I’ve stitched through at least twelve projects before the Stitch Snippet stitch-along goes live. And actually, I think there are about sixteen samples floating around here right now!
Yep, here at Needle ‘n Thread, the stitching fun never ends! Today, I’ll tell you a little bit about what to expect with the upcoming stitch-along, the kit, and the new downloadable project e-book.

With the last Stitch Snippet of 2023, we will be releasing a kit that will allow you to make at least six of the small projects, including the Snippet. The kit will contain the harder-to-source ingredients: ground fabric, backing fabric, pre-cut foundation shapes, just the right padding, all the beads, silk ribbon, beading thread, beading needles…
With this particular Snippet, my goal was to use some techniques we’ve already learned and to put them together in a pretty little seasonal ornament, so that we can create a quick little project that has a super-satisfying finish.
The downloadable project ebook that will be coming out simultaneously is similar to Twelve Trees and Snowflakes. The stitching is extremely accessible, so the projects are all suited to beginners and beyond. They stitch up quickly! They’re fun and festive, and they include enough variety among the them to entice you to stitch more than one.
The finished results will make great Christmas gifts for friends and family – or for yourself!
In this new project PDF (which is separate from the Snippet – the Snippet is just for the sake of stitching one together), I’ll also be including various sized designs for your convenience, so that the embroidery projects can be easily adapted to other finished goods like stockings, household linens, banners or pennants, tree skirts, and even quilt squares.
It’s been a fun adventure getting this all together!

One of my favorite aspects of the stitch-along Snippet is that it pulls together several techniques we have seen before, so that you can see how you can easily apply any learned technique from one project to any other project you want to undertake. This also ensures that the Snippet will work up quickly. If you’ve followed along with previous Snippets, the learning curve won’t be as great.
Another favorite aspect: You can create, from start to finish, the whole project in a relatively short amount of time – a couple evenings or afternoons on a weekend, for example. If you’re the type of person who allots yourself regular times for creativity, you’ll be able to manage several – or more – before Christmas!
We’ll be releasing the whole kit and caboodle – the e-book, the kits, and the Stitch Snippet – soon! I’m hoping for a pre-Thanksgiving release.
I’ll keep you updated on the release schedule as we finish up the kits and instructional materials.
That’s what’s going on in the studio right now – and more to come!
Hope you had a terrific first-weekend-of-November! I’ll see you later this week with some other embroider tidbits!


Hello, Ms. Corbett. I have learned so much from your blog over the years! Thank you! Forgive me for an off topic comment?
I need to pick your brain about something: I’m making palls for our parish. One of the gentlemen has provided me with plexiglass inserts. They’re almost an eighth of an inch thick.
I’m using handkerchief linen for the fabric, because the old pall I’m copying is in a fabric that looks like handkerchief linen. The threads are fine, the fabric is semitransparent, if you breathe on it funny it wants to go off-square, as fine fabrics tend to do.
I’m worried that the insert will exert too much force on the linen. I have (plenty of) Shape-Flex iron on woven interfacing and I’m wondering if the heavens would fall if I interfaced the linen fabric with it. The fabric wouldn’t be see through any more, but it is white. And it would strengthen the fabric.
Please share your thoughts?
Thanks!
Karen Leonard
I would not use an iron-on interfacing on the pall. But I also would not use a plexiglass insert, unless all corners (and that means the long corners on the cut edges, as well as the corners of the squares) are filled smooth and slightly rounded. Plexiglass that has sharp corners is hard on any fabric, fine or not. I know why people use the plexiglass inserts, but they’re just not the best idea in the world. Everything doesn’t have to be “convenient” and “non-replaceable” – a white mat board insert (get the archival kind and have it cut to the size you need) may have to be replaced in a couple years, but it doesn’t cost much and it is much easier on the linen… and it’s not stiff and plastic and see through. If you buy a small sheet of archival mat board (white on both sides), you can have many squares cut to your specification and you’ll have enough for the palls and enough for replacements. Easy!
Can’t wait 🙂
Mary, you’re a gas! I love your humor and giggle constantly as I read your posts.
Cheers! Jennifer
I so enjoy your newsletters.
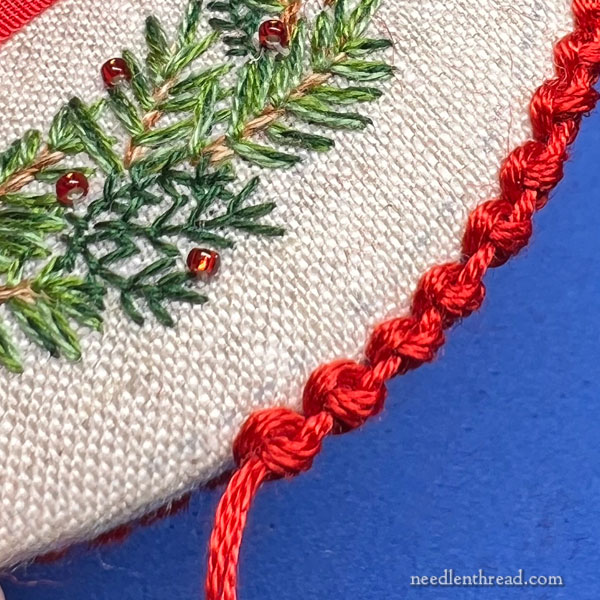
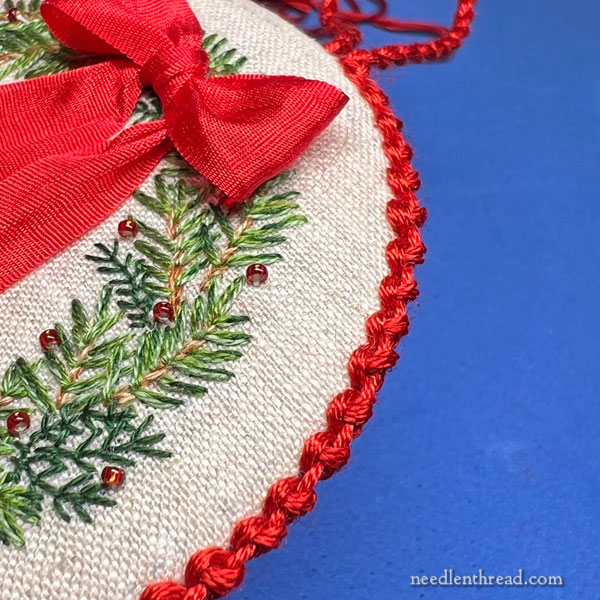
Is the edge stitch the Palestrina Knot? It looks like an alternative to twisted cord and other sew on trims.
Thank you,
Lois
Hi, Lois, yes, it’s a stitched edge, not an applied edging.
That sounds like fun but a huge project! Good luck with final bit putting it all together.
Haven’t embroideried in years. So glad to find you and want some help on how to do different stitches. Would like to start from scratch. Any advice will be welcome.
Hi, Sue – I’d start on the Tips & Techniques index, and look especially in the beginner’s section – and then I’d visit the How To page for videos and step-by-step photo instructions. You can also make use of the “search” feature on the website to look up any embroidery topic that you’re curious about. As far as projects go, I’d start with something simple to get the juices flowing! Maybe a flour sack towel or even just a “doodle cloth” where you try out different stitches – kind of like a random sampler. Or, hunt around and find a kit that really entices you and jump right into it!
Thank you Mary! I can’t wait. My gift recipients from prior years loved their Xmas trees, snowflakes, and mini stockings. One of the funnest things was determining the receiver’s tastes with patterns, colours, and embellishments. :).
Hello Mary. You don’t know how happy I am to find this blog of yours. Only last week I was so desperate to contact you that I commented on a years old YouTube video that you made hoping that you would see it! You taught me to embroider by the way and I’m 70 years old! In the process of making a Ravioli Quilt (Paula Doyle on YouTube), I was attaching small squares of flannel to a denim square using different embroidery stitches that I learned from watching you rather than sew them on as Paula does. The thing is, I can’t seem to form neat corners and was asking for your help with this. I have since got AROUND this problem by just embroidering a circle instead of a square. But if there is a neat process for stitching all of your different stitches around corners I would still like to see it. Thank you in advance. Kerry.
Hi, Kerry! Maybe this is something I can cover in a tutorial on the website. Pretty much any stitch can be worked around a corner – it’s just a matter of spacing the stitches correctly as you come up to the corner.
I’m sorry I didn’t see your YouTube comment. I’ve always kept comments turned off on my videos on YouTube, because I can’t monitor that channel very easily. Always best to reach out here or to contact me via email at mary(at)needlenthread(dot)com. You can also use the “contact Mary” link on the home page of the website. 🙂
I’m trying to remember the name of the stitch around the ornament you show in “finishing” the ornament. Believe you may have shown how to do this at one time.
Thank you!