Last week, after posting the most recent tutorial for Cotton Quartet, I received an influx of communication with questions and commentary on the style of embroidery that I worked on the gingham.
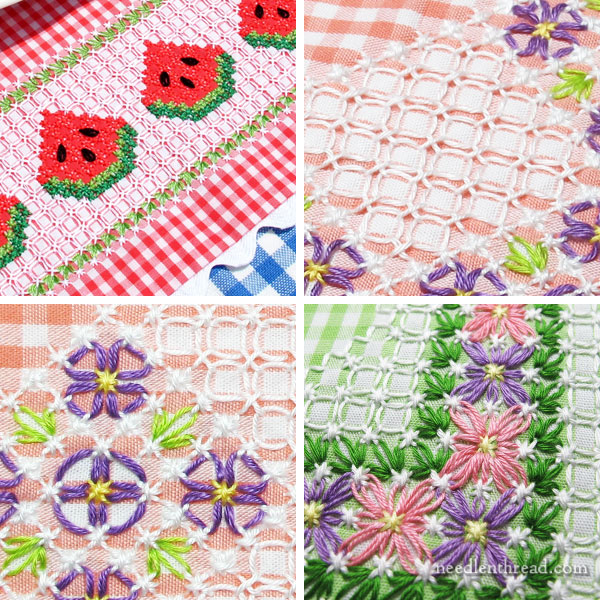
It’s a type of embroidery that, here in the States, is usually referred to as “chicken scratch.” It’s also known by various other names – gingham lace, gingham embroidery, hen scratch, broderie Suisse, depression lace…
Many of you recognized it, asked questions about where to find more information, patterns, and so forth, so I thought I’d just touch on the type of embroidery and re-share my resources on it, since we haven’t talked about it on Needle ‘n Thread in about five years!

With gingham enjoying a bit of a revival – and being widely available these days in a vast array of fibers and fresh new colors that fit with current fabric and color trends – I think it’s worthwhile to revisit chicken scratch.
Chicken scratch and other similar forms of this type of embroidery on gingham is really very basic. It involves mostly cross stitches and variations of cross stitches and laced stitches. Sometimes, you can find elaborate chicken scratch that includes ribbed wheels and woven stitches, too, which adds a bit of variety to the approach.
Chicken scratch can be worked on any size gingham, really, but you have to remember that the larger the gingham check, the heavier your thread should be. Also, the larger you go, the more unstable the stitches become. The ideal gingham embroidery is worked on 1/4″ check and smaller. I prefer 1/8″ check, because you can achieve a much more delicate and lacy look with the smaller check.
Traditionally, chicken scratch was often worked on “homespun” gingham. The check on homespun is not exactly square – it’s more of an elongated rectangle.
I prefer working chicken scratch on yarn-woven ginghams that are more or less absolutely square to the eye. And these are the ginghams that are more readily available today in brighter, trendy colors and in fibers like silk and linen.

If you are interested in exploring gingham embroidery further, you’ll be happy to know that, deep in the archives here on Needle ‘n Thread, I have a whole series of tutorials and free patterns that will teach you the basics of chicken scratch – and beyond! I like to play with color with chicken scratch, and with variations in designs, edges, and so forth.
Even though chicken scratch is confined to a grid, you can explore different ways to soften the grid and expand the possibilities of the lacy look. It’s a fun – and easy – type of embroidery that anyone at any age can enjoy!
You will find all my articles, tutorials, and free patterns for chicken scratch in this index.
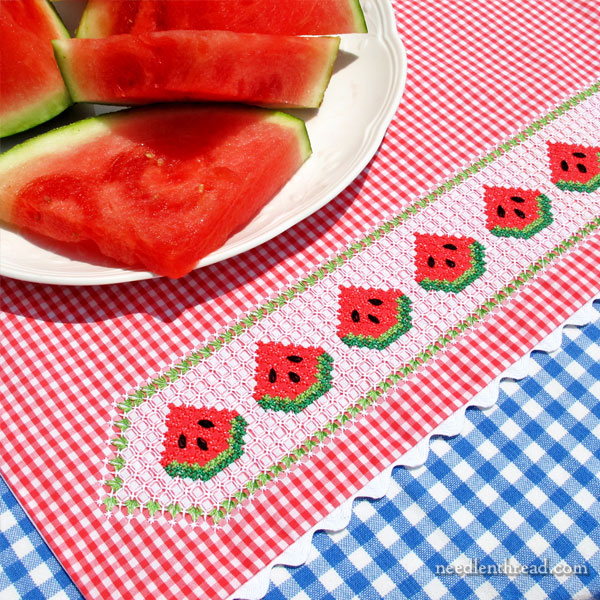
With summer upon us, you might like this free tutorial and pattern for a watermelon border in gingham embroidery – perfect for dressing up your summer picnic table, or for bringing the picnic atmosphere inside when it’s just too darned hot!
Coming Up this Week
Speaking of chicken scratch, on Friday, we’re going to start constructing the tool wallet for Cotton Quartet. Can’t wait!
Wednesday, we’re going to talk about needlework tools. I itch to talk about tools…


Thank you for the follow up. I really like gingham, too. Years ago I made a blouse using 1/4 ginghams of different colors for sleeves, collar, bodice, and placket. It was a favorite with jeans skirt.
Dear Mary
I’m glad that gingham is having a revival as I like gingham as well and I remember when you wrote about chicken scratch very interesting with all those different stitch combinations, lovely. I can’t wait to read your articles on needlework tools like you I find this fascinating. Thank you for sharing with us revisiting gingham and all the articles related to gingham.
Regards Anita Simmance