Good morning, my friends! I missed you on my short hiatus!
As things worked out, I didn’t have the wherewithal to get any blogging done right (or well) while I was away, so I resigned myself to catching up with you once I was home again. And I am home again! There’s loads to catch up on – that’s the huge disadvantage of taking a break – but Anna kept things going well, so the load isn’t as much as usual.
While I was gone, I added about eight hours onto my trip to make a wide detour up north to Dayton, Ohio. I knew I probably wouldn’t get away again this summer, so on a whim, I decided to take advantage of my escape and hightail it northwards to Dayton. Given the extra driving, I only had a short time to spend at the University of Dayton’s Marian Library, to see the Anichini exhibit there that features two of the Loreto Embroidery panels on loan from the Royal School of Needlework.
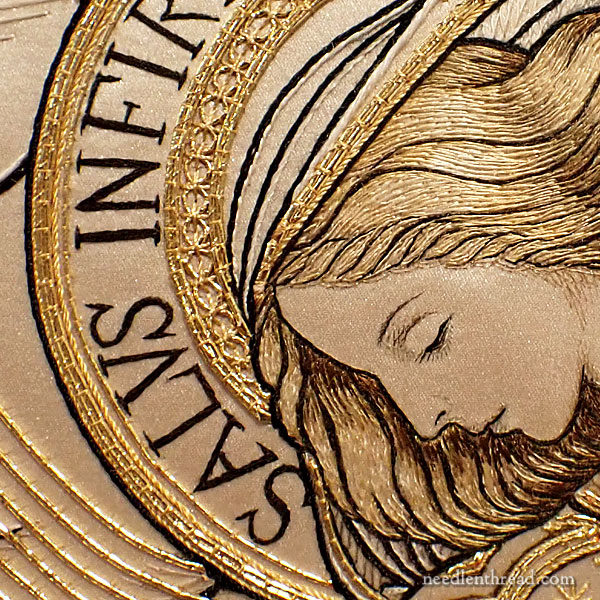
These embroideries have absorbed, fascinated, and infatuated me since I first ever learned about them. I don’t know if I’ll ever make it to the UK to see them there, so I could not let the opportunity pass by to see two of them in Dayton.
My greatest desire was to see them up close – to see the details of the pieces, that you can only see in person. I always wanted to get the full effect of the pieces, seen in person, in context with their size and with the way light plays on them. Unless you see a piece of art in person, it’s difficult to fully “get it.” Light, size, setting, texture, and so forth all come across in person in a way they can’t come across in photos.
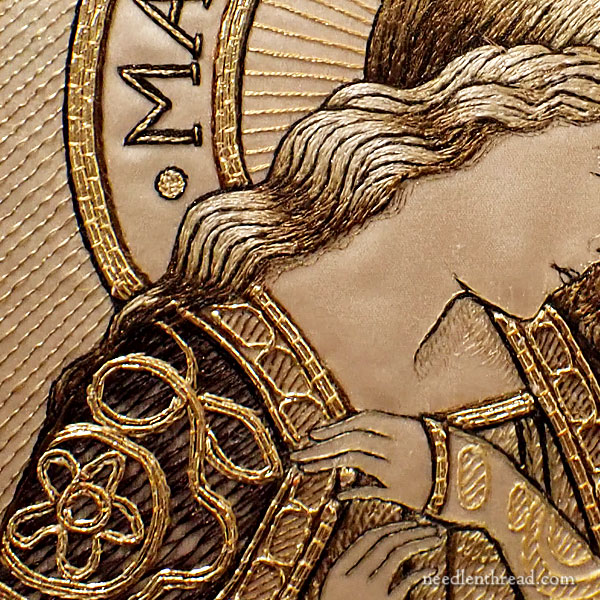
And so, with barely an hour to spare at the exhibit, I was able to partially check off one item on my Bucket List. I still plan to see the embroideries some day in the UK some day, but just in case it never happens, I got to see them in Dayton, and I got to enjoy, albeit briefly, a very fine exhibit honoring an artist whose work I have admired for a long time.
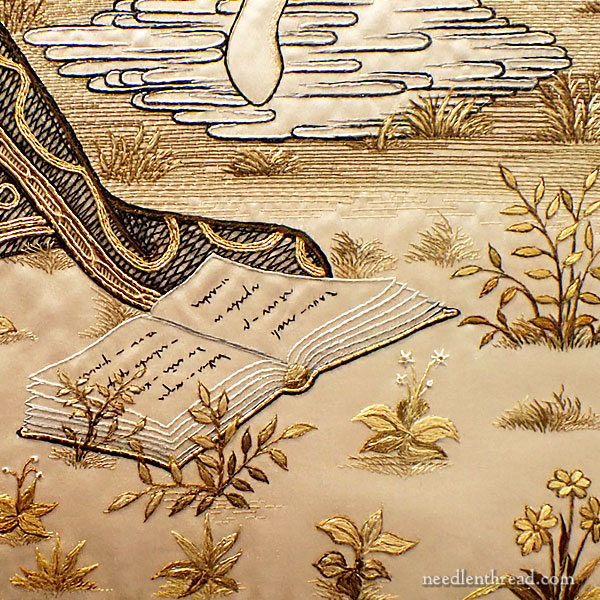
It was so satisfying to get close to the panels and see all the little details that bring these embroideries to life.
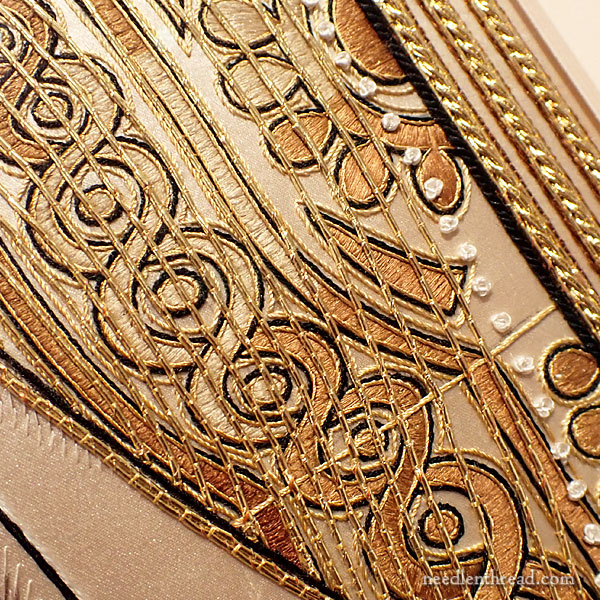
The layering of gold on top of silk embroidery, the use of bright white threads here and there to add a sense of “sparkle” and light to the pieces, the glow of the silk, the gleam of the gold – you just can’t get it all in pictures.
Close up, the photos come across a little warmer in color tones than the pieces are in real life. Part of this has to do with lighting and with the camera I was using. There is a real warmth to the color profiles in the embroideries, though.
The liberal use of rich golds and sepias, bronze, warm wheat hues, dark outlines, and strokes of lighter shades in soft whites and creams that highlight and accentuate the details are artistically, delicately, and sensibly combined in such fascinating ways. I could have spent hours looking over every tiny millimeter of each piece and not grown tired of what I was seeing.
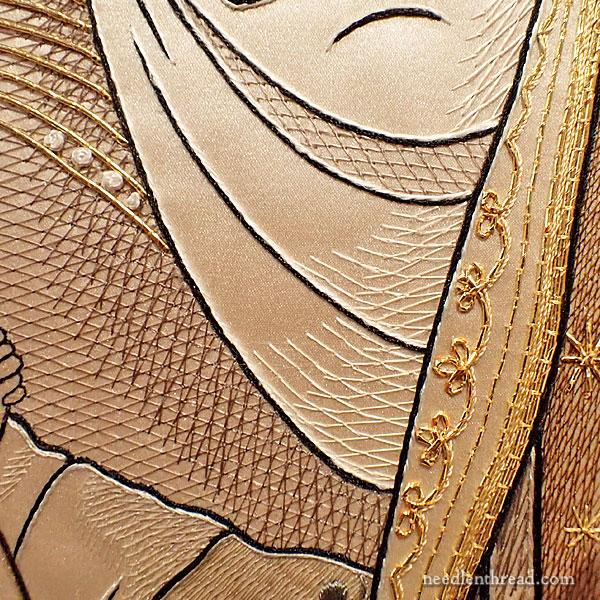
And oh, the cross hatching! All this sketchy cross hatching throughout the embroidery! It’s fabulous! And it’s not all done the same way. There’s a huge variety of approaches!
You can see cross hatching made up of laid threads couched at intervals (like lattice work). You can see cross hatching worked with stem stitched lines. Some of the cross hatching looks like it is made up of self-couched lines, where the same thread makes up the long laid stitch and then returns along the long stitch to couch it at intervals. There’s cross hatching made up of simple straight stitches. And cross hatching with split stitches.
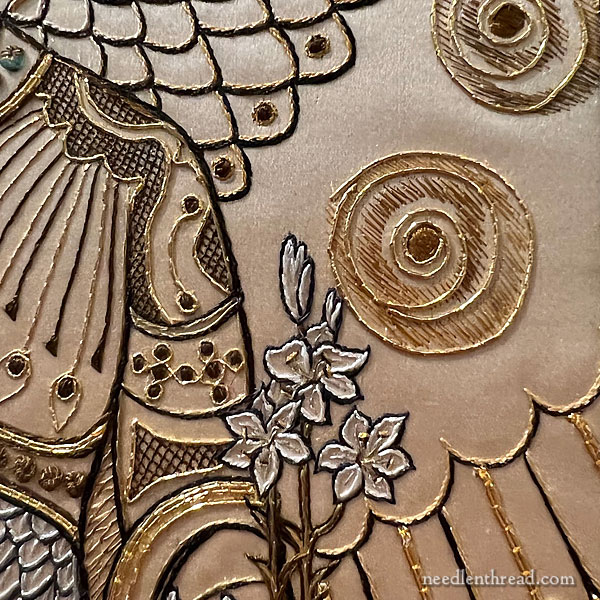
Pattern and details everywhere!
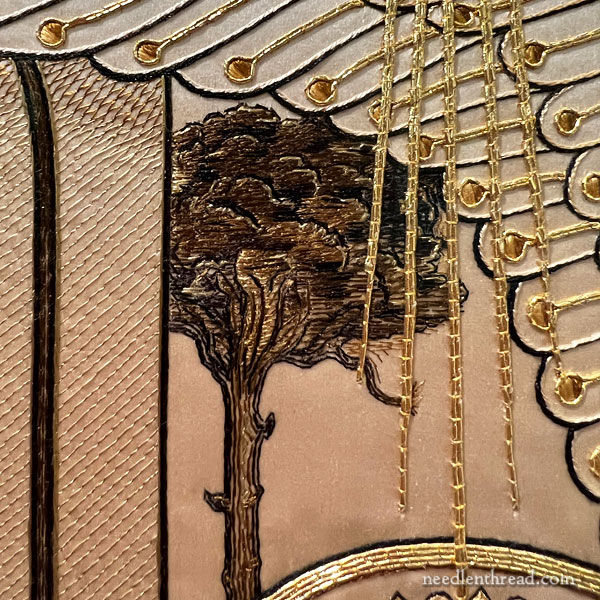
All the times I’ve seen images of these works, I’ve never noticed that tree. It’s a dark tree, but you can see how the silk on it picks up the light in the center of the tree.
The way the light plays on these things is pretty incredible.
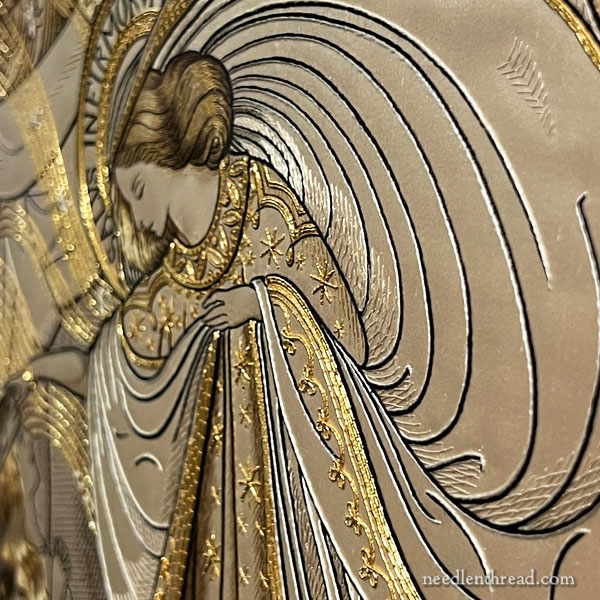
This photo helps to demonstrate the play of light on the silk and the gold. Oh my gosh! I was stunned at what a huge roll the silk plays in the light play on the embroideries. The gold is pretty much a given – you expect it to shine – but wow! The silk is what really makes the panels glow with light!
Ok. You can probably guess that I could go on forever about these embroideries. They are stunning.
And it was well worth an extra eight hours of driving to get to Dayton to see these! I would like to have spent more time with them, but I’m grateful for the time I had. And who knows? Maybe an opportunity will come up before August that will take me in that direction again.
The exhibit is small – it does not take long to see – but it’s quite a nice exhibit of Anichini’s work.
You’ll find the exhibit located at the top floor of the Roesch Library at the University of Dayton. Surprisingly, if you ask for the Marian Library at the information desk when you enter the library, the student-workers who service the desk are likely to have no idea what you’re talking about or where it is. So just go straight to the elevator and choose the 7th floor. As you walk off the elevator, you will be at the beginning of the exhibit.
I talked to several students en route to and on the way from the exhibit, in the elevator and walking on campus. Not one had heard of the exhibit or even knew about the Marian Library, so don’t rely too much on asking your way around. As you drive onto campus, go to the visitor kiosk (it’s on Google maps) and get a visitor parking pass for Lot B. The library is an easy walk from there.
You can find the information about the exhibit here. If you have time and are inclined, there are other holdings at the Marian Library that are worth seeing – you can ask at the office located in the same area as the Anichini exhibit.
I mentioned before that there’s a Zoom conference (it’s tomorrow!) presented by Dr. Susan Kay-Williams about the Loreto embroideries. If you want to sign up for that, you’ll find the information for that here.
I was So Happy and grateful to be able to see those two panels! But I’m also glad to be home and getting back into the Studio Routine.
So now, we’ll get back to our regular programming! Stay tuned – lots of exciting stuff coming up!


How wonderful that you were able to get to the exhibition! It’s a shame it’s not known about by the people on the campus.
Thank you for sharing a look at such marvelous work.
Mary, thank you so much for this glimpse of such great beauty and skill. I am very very happy for you that you were able to fit in this little bucket list moment!
Linda
Thanks for this wonderful look at these awesome works of art.
Signed up for the webinar!❣️
I so enjoyed your unabashed excitement and appreciation for the Anichini embroideries. To drive eight hours for your adventure speaks volumes about your love for the art. Exquisite!!! Thanks so much for sharing!!!
Oh, Mary, I am so happy for you that you were able to see the Anichini exhibit! I had wondered if that were your original reason for being away. No telling what you will be inspired to create, having seen these beautiful embroideries “up close and personal!”
So Beautiful. Thank you for sharing!!!
They are just stunning! The overall design of these panels is wonderful (as we have known before) but the details are even more amazing.
I am wondering however they did the wavy hair (i.e., what kind of stitch(es)) – Couching? Split stitches? Whatever it was, I don’t think I will ever be able to make something like these panels in million years, and thinking about the women (nuns?) who embroidered these panels makes me humble.
Thank you so much for sharing these photos!
In some of the photos, it looks like stem stitch, but I’m guessing it’s split stitch. It was hard to see up close with my own eyes, so I had to rely on the photos.
Absolutely stunning!!!! I am so excited for you!!! The pictures are so clear & the detail & craftsmanship… superb!!
I risked missing my connecting flight in Paris to see the Cluny tapestries. I had a 3 hour lay over that day & just had to. I didn’t know if I would make it back.
I remember the 1st time I went to St Peter’s Basilica in Rome. In the back left corner down a little stairway is a tiny room that costs a bit more to enter… The guide books said you can pass this by, it is just a few minor gifts to various popes. I know that means metal work & maybe needlework… I was right! The lighting was horrible but there were a few lovely old pieces of church gold-work. Lesson learned. I use guidebooks to get me places… but I decide what I think is wonderful!!
The closeup photos are stunning. And your descriptions of the details of the embroideries makes the photos even more interesting.
Thank you so much for your post about the Loreto embroideries. I, too, am enraptured by the beauty of these stunning embroideries. I especially appreciated your close-up photographs. I could see an embroidery design based on just one corner of any one of these. I love the work of Ezio Anichini and have tried to find every resource for his illustrations. You may also be interested to know that a manuscript with 46 plates of Anichini’s illustrations for the Loreto Litany is held by the Marian Library and is free for download courtesy of University Libraries e-Commons.
Again thank you for your post. Kathy Rohr
Yes, that’s a wonderful resource. I’ve linked to it numerous times on the Needle ‘n Thread. They had the original on display. I’m fortunate to have professional prints of all the postcards, thanks to John Schaffer, whose collection of Anichini’s works makes up most of the exhibit.
Mary, welcome back, and *thank you* for these close ups of the Loreto embroideries! It’s wonderful to see the stitches up close — really helpful to see how a particular stitch or thread produces the effect.
The radiating rays outside the halo in the first photo (and also on display in the next-to-last photo): are those done with an extremely pulled-out gold purl or twist, or is that an example of the medieval undercouching technique? Did you notice – is it a gold thread or a silk one? Love the slight wavy movement of those lines.
It’s couched silk.
Do my eyes play tricks on me? Was this worked over a very slight padding/batting so that the embroidered shaded areas pull the silk down ever so slightly? That could allow for such natural highlights and shadows from the silk’s glowing reflective qualities without the use of paint or dyes. Maybe? Like in the photo of the crosshatching – the area to the left of the white crosshatching, and some areas of the face & neck right next to the hair. That wouldn’t explain the the shadow areas not near any stitching like the jawline & neck area in the 2nd photo. Unless they simply smooshed the padding down and hope the silk stuck to it, which seems unlikely in such a well done gorgeous piece.
Or it could all be the camera angle, lighting, and how the camera sees things, making me far off track in my thoughts. I mean, I’ve taken photos of quilts that look nothing like the quilt I’m standing right in front of.
Beautifully complicated and wonderful to be able to appreciate.
I saw the Zoom conference and it was terrific! Your photos – especially the one of cross hatching! – show even more amazing details. Thanks for sharing those. I have spent the past several days happily down the rabbit hole of the Marian Library online.