Last week, I introduced you to some prep work I’m doing for some major embroidery projects.
As is always the case when preparing any embroidery project, the methods and techniques occupy my mind considerably long before the stitching begins.
With these particular cloths – 21 feet of 17″ wide linen – the first option for the cutwork was, of course, Richelieu. The design was made for Richelieu embroidery, and it seems that this would be the direction to go with the embroidery.
But my mind went in a different direction, especially after I started test stitching.
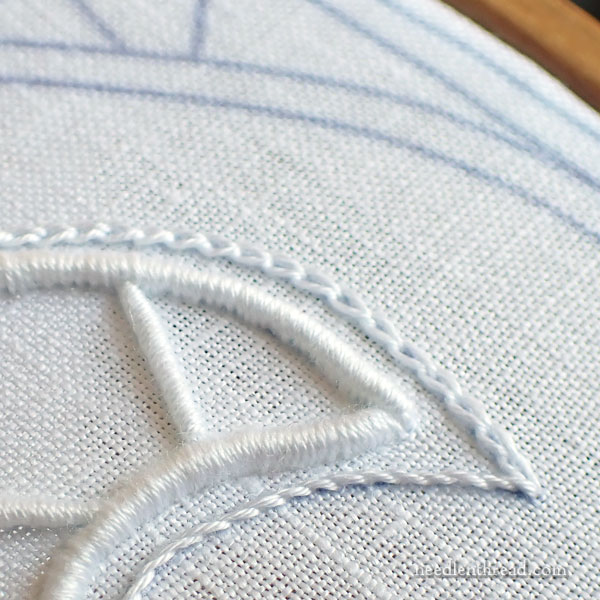
I’m an avid fan of a whitework technique called trailing. It’s basically satin stitch over a bundle of threads used for padding, in order to raise the satin stitch and give the design depth and definition.
With trailing, you can add to the bundle of padding threads to increase the size of your satin stitched area, and you can remove from the bundle to decrease the size of the satin stitched area. You do this addition and removal process while you’re stitching, to subtly increase or decrease the size of the shape. It makes for beautiful, smooth curves, lovely satin stitch joins, and so forth.
Trailing is used frequently in monogramming, but it can also be used very effectively in all kinds of whitework, including cutwork.
There are a couple reasons my mind turned to trailing after I started test stitching on the linen. The main reason is probably a personal preference – I prefer the look of it to the look of buttonhole stitch.
But there are practical reasons that trailing began to occupy my thoughts, too.
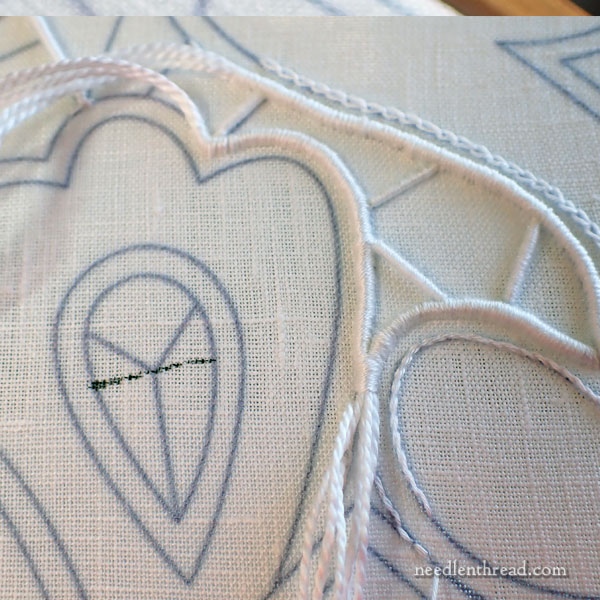
For one thing, the increased size of the design (which is enlarged some 175%) makes the distance between those two double lines in the design, which would normally be the top and lower edge for the buttonhole stitching, quite a distance apart.
In order for the stitching to look full and good, there’s definitely a need for some padding underneath it. With the increased width of the line, more rows of padding stitches would be required.
And working those rows of padding stitches would take time. It’s like having to embroider over an area twice. Ugh.
With trailing, the padding is formed by bundles of thread that you stitch over. You don’t actually stitch the padding. So it’s decidedly faster.
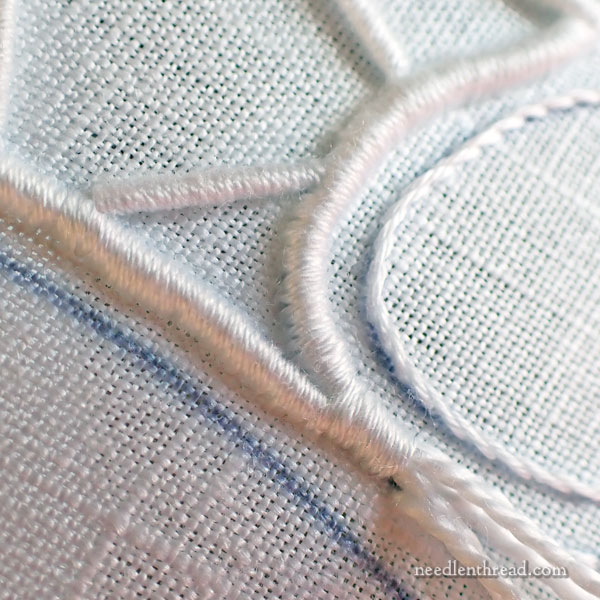
Another advantage to working a heavy line of trailing on the cutting edge of the cloth is that, as the stitching progresses around curves, it’s not as difficult to compensate for the curve.
With the wider buttonhole stitching, you really have to be careful about fanning around curves, about angle of stitching, and so forth. The fanning out around the curves becomes much more exaggerated because of the distance between those double lines.
With trailing, which would be worked along the cutting edge of the design over a fairly wide bundle of threads so that there’s a significant edging to keep things secure, the compensation tends to happen pretty naturally. It doesn’t require as much thinking ahead. You’d really just end up following the curve easily as you cover that bundle of padding threads.
Besides the fact that you’re not stitching the padding stitches, trailing works up faster, anyway. With satin stitch, you’re going up and down into the fabric. You’re not creating a twisted edge. And your thread behaves better the whole time you’re stitching. It doesn’t twist up as much as it does with buttonhole stitch.
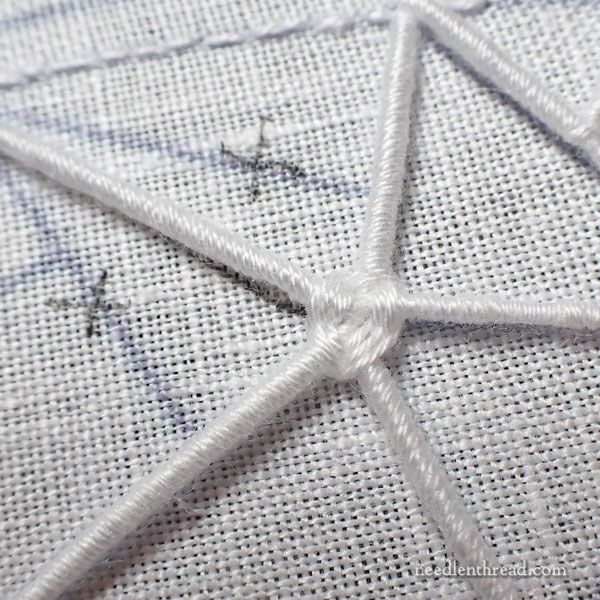
Also, wrapped bars are much faster to work than buttonhole bars! And I like the smooth look to them. Plus, you don’t have to worry about where the edge of the buttonhole stitch is, if you have to digress off a bar. With buttonhole, you’ve got to keep your mind on the edge of the buttonhole, so that you don’t end up twisting your bars at intersections and the like.
You can also fiddle with intersections of wrapped bars, adding some woven wheel coverage very easily to add interest to the design.
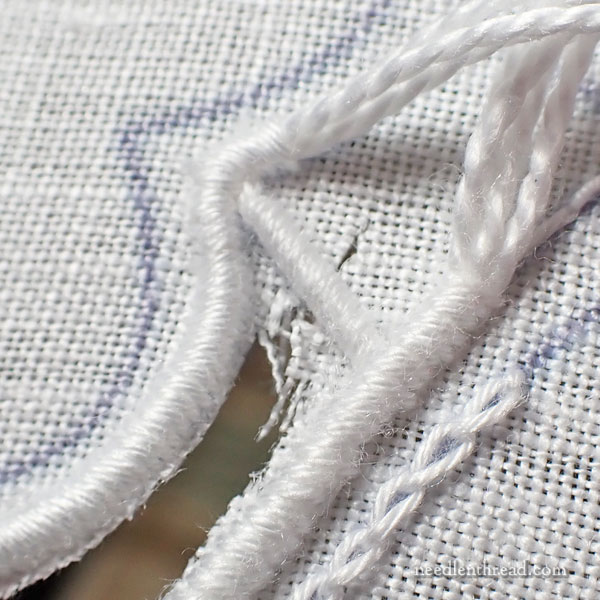
When testing ideas, I always get over-eager. I just had to start snipping away fabric, to see how this will look. The snipping doesn’t look so grand at this point, but I think this is a doable option.
My idea is to work a heavy line of trailing along the cutting edge, and on the inside line of the design, to work a fine chain stitch just to draw that edge out and add a little interest and texture to the embroidery.
Even with that extra line of chain stitch (which works up very quickly), the trailing is faster over all, and I think it looks elegant and pretty.
Now I’m going to have to run this by the folks whose project this actually is. My two-cents’ worth, with the increased size of this design, is to skip the buttonhole and go for trailing and wrapped bars. It just makes more sense to me, especially because it will save time and yet still look really beautiful.
My next step on this project, which will happen today, is to test the design transfer options.
I’ll let you know how that goes. Argh! The transfer has to be right, or naught else will be.


This wrapping and stitching is so much smoother than buttonhole stitch. I’ve wondered why people didn’t do it more. Are their disadvantages that make.people choose buttonhole stitch instead?
I don’t know of one. If your tension is good, it should hold up pretty much the same, though it doesn’t “lock” together like a buttonhole stitch. It’s much faster to work, that’s for sure!
Hi Mary,
Thank you for explaining this technique of which I wasn’t aware. How much fabric is taken up under the padding in order to keep the rounded shape and would you show us the back of the trailing stitching, please?
Thank you so much,
JoyR UK
The trailing looks good but also very heavy. Will the linen support a large cut work piece that is so heavy? Will you need to back it with something to give more support?
Interesting to follow this.
It’s not too heavy. The design is not very dense.
So beautiful. So beautiful! So so so beautiful ❤️
Hi Mary,
I think this looks beautiful. What type of thread do you recommend be used for the trailing?
Coton a broder or floche work beautifully. That said, you can do the technique with any thread.
Morning Mary – That would scare me silly to cut the fabric that close to a stitched line, you even have me holding my breath there. I’d be afraid the fabric would continue to fray under the trailing and eventually the trailing would detach itself, but I can also understand your reasoning for speed and ease, it makes sense in a funny sort of way.
Hopefully, those who’ve commissioned you to make these pieces will see this too. I’ll be following this project with great interest.
Good luck, and successful stitching – Brenda
Hi, Brenda – actually, if you look on the back of trailing and the back of buttonhole stitch, they are exactly the same. So the “holding mechanism“ of the stitch (which is determined by what goes through the fabric and we can see that on the backside of the embroidery) is exactly the same as the buttonhole stitch. There’s really no difference in the two stitches in how the pass through the fabric, so whether you’re using satin stitch (in this case, trailing) or buttonhole stitch, it doesn’t actually make a difference in the security of the cut fabric edge.
What kinds of thread do you use for padding?
Usually the same thread, but with the trailing on this I’d use perle #5 – more padding for the price!
The trailing is so smooth! I had no idea you could use this method on cutwork. I will enjoy following your progress Mary.
Fascinating. I’ve never been inclined to do cutwork, but I really like this technique and would definitely consider doing something like this. What a great alternative you’ve come up with. Thanks for sharing your thought process and sample work. I’m sure the folks who will stitch these altar cloths will feel lucky to have your assistance.
Mary, this was so informative. I really liked how you explained your thoughts on how to handle this. I am sure this will be absolutely beautiful when done.
Thank you for your brilliant post. I always learn something from your posts. When you say the fine chain stitch will draw the cutwork out what do you mean.
I just mean it will make the design extend to that inner line.