If you’re just joining us here on Needle ‘n Thread, we’ve been exploring five different ways to interpret wheat in hand embroidery.
Last Friday, we looked at how to embroider wheat in two quick and simple ways, using daisy stitch and granitos on two different stalks.
Before that, in Part 1, I posted the free design that we’re using here, along with the materials I’m using and any introductory information.
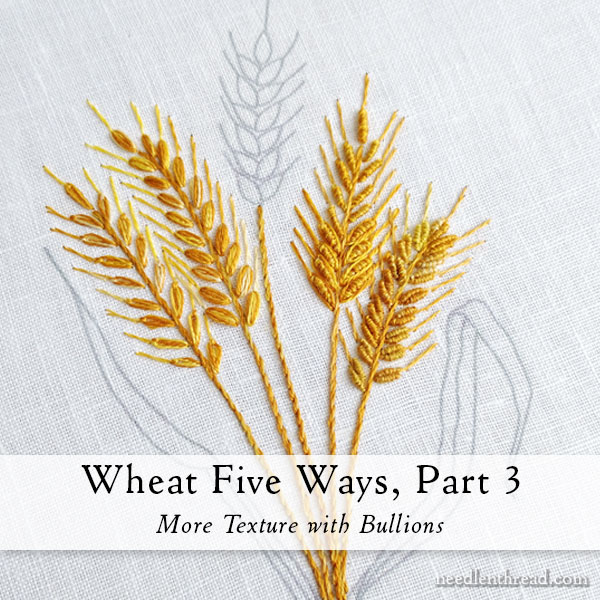
Today in Part 3 of How to Embroider Wheat five different ways, we’ll look at adding a little more texture to the wheat using bullion knots.
We’re actually going to look at 2.5 ways to use bullions, because I wanted to show you a possible variation to bullions that you might like as well.
Ready?
If you’re cringing at the idea of bullion knots, I’m going to encourage the heck out of you at least to try them, using my video for bullion knots as a guide.
Don’t let these little sluggy things intimidate you! If they do, I promise it is just a matter of practice, and you’ll get the hang of them. The more bullions you work, the better they will get. It’s inevitable! They are worth learning how to do!
Aside from the bullions, we’ve already worked all the other techniques we will use today, in the previous lesson.
So, start by stem stitching the stem with two strands of floss, in the same manner we did in part 2 of the series.
Then, switch the colors in your needle. For these wheat berries, I used one strand each of the two Variations listed in Part 1 of the series under materials.
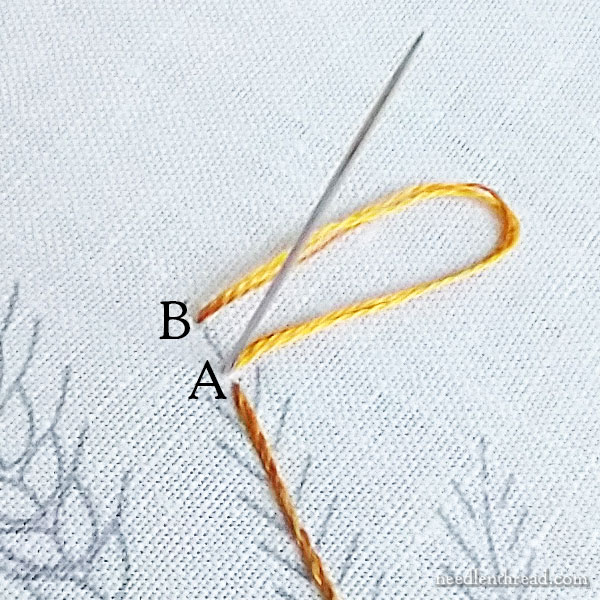
On each line that represents the wheat berry, work a bullion stitch.
I like to work my bullions in the way demonstrated in my video – please watch it! In most books, you’ll find the stitch demonstrated with the needle anchored into the fabric in two places. I find that approach a little more difficult to get consistent and quick results.
Instead, I bring my needle up into the fabric at A (the beginning of the stitch), take it down at B (where I want the stitch to end), and pull through, leaving a good sized loop of working thread on top of the fabric, as shown in the photo above.
Then, I bring my needle up at A again, in the same hole (just nudge the thread aside) or just right next to it (either way works).
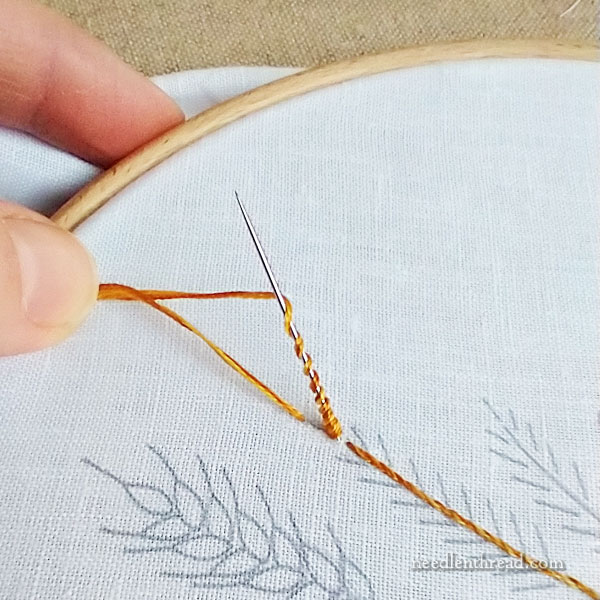
Then, holding onto the eye-end of the needle (behind the fabric) with my right (my dominant) hand, and holding onto the working thread on the front with my left hand, I wrap the thread around the needle.
I usually end up using the needle to wrap into the thread, rather than wrapping the thread around the needle, but either way will work. Again, watch the video! You’ll see what I mean!
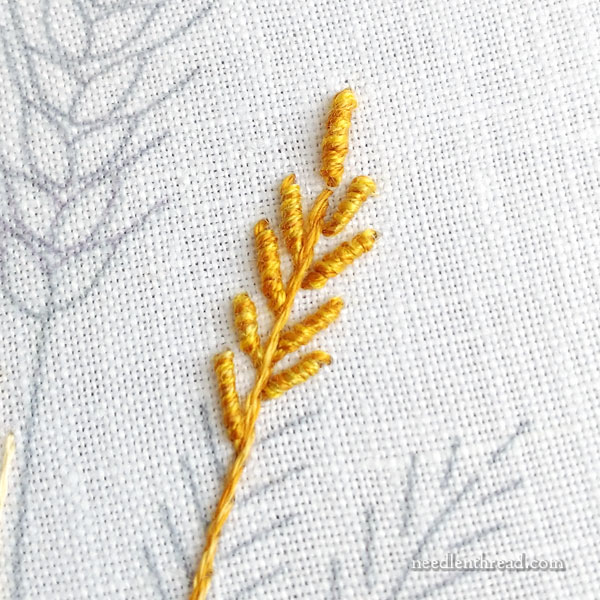
Go ahead and work single bullion stitches on all the berry lines up the stalk.
Now, in this tutorial, I want to show you a different approach, too. The bottom half of the stalk will be devoted to this different approach. You can choose what you want to do for the whole stalk, or you can do as I did, and try both techniques.
With just the single bullion, the beard is stitched in exactly the same method we used in Part 2 for the beards on the first two stalks of wheat.
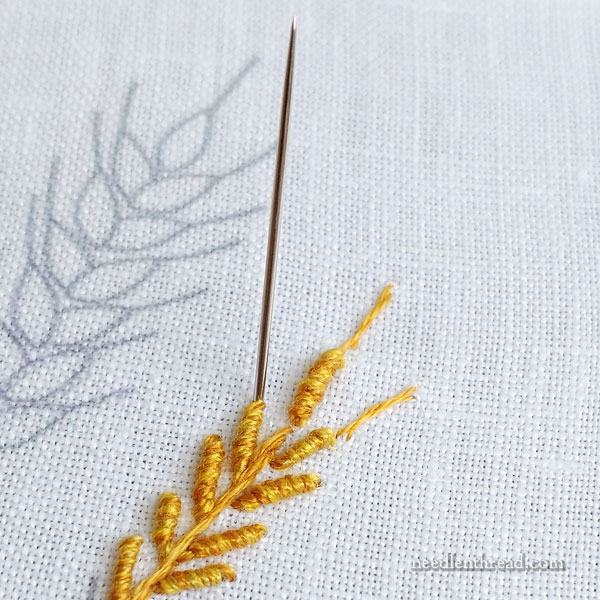
They’re just the long, self-couched stitches in a single strand, using the lightest Variations.
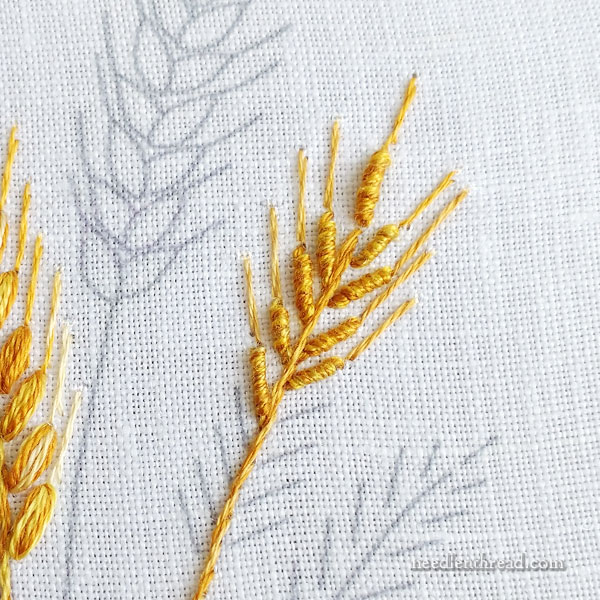
And there they are! You can work the whole stalk that way, and it will be very neat and clean, with a little more texture on this stalk than on the first two stalks of wheat.
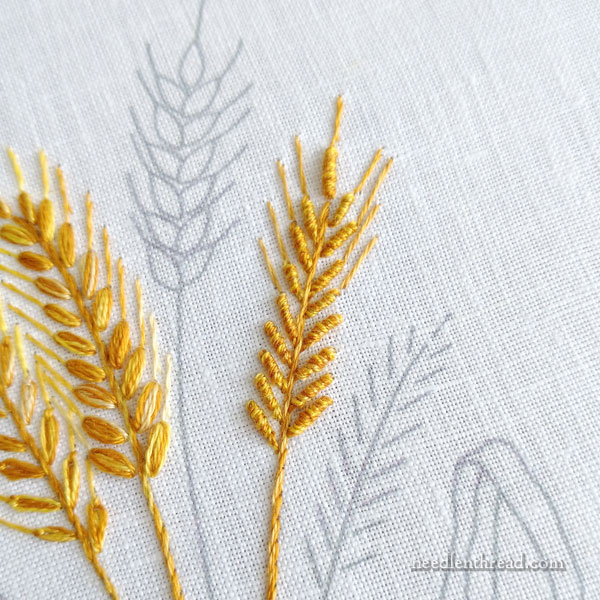
If you want your wheat berries to be a bit plumper, we can do that simply.
To show you how, I finished working single bullions on the base of the wheat stalk, in the same manner as above.
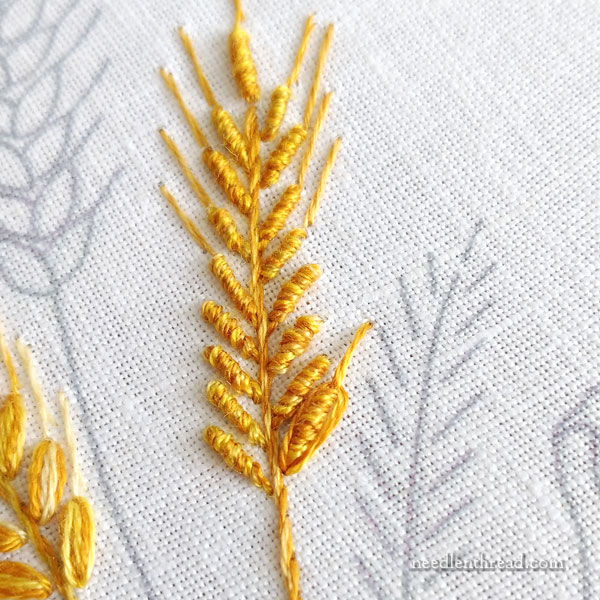
Then, I worked a daisy stitch around the bullion, and I worked a long anchor stitch, for the beard.
This plumps up the wheat berry quite a bit, while still relying on the bullion for texture.
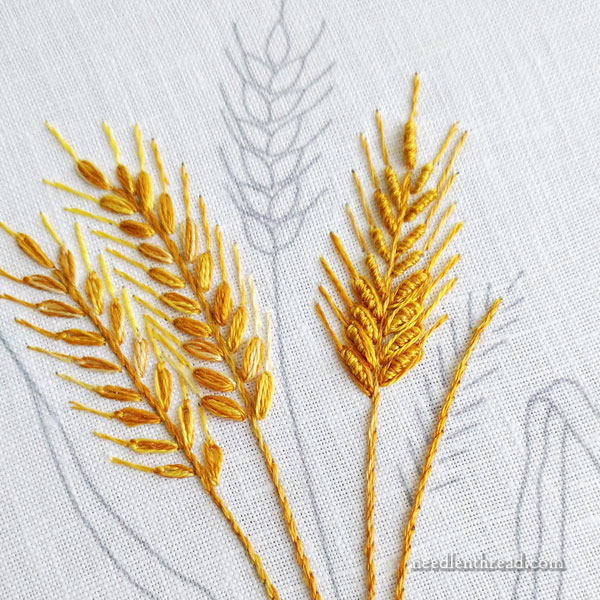
You can see how fat the berries look. They crowd the stalk somewhat. This is ok! It’s a decent look for wheat.
If you want a little more wiggle room between the berries, you’d just need to adjust the design a little bit, rearranging the placement and spacing on the wheat berries.
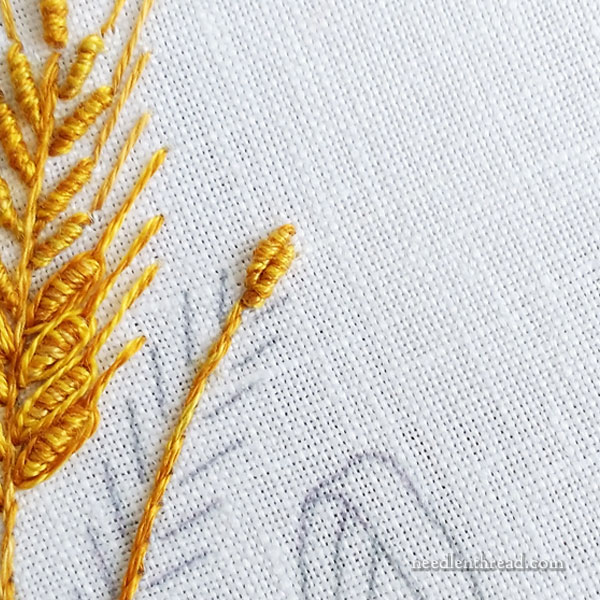
For the fourth stalk of wheat, work the stem stitch as before. Switch to the wheat colors in your needle – I used one strand each of the Variations again.
Instead of one bullion knot on each design line for the individual wheat berries, on this fourth stalk, work two bullion knots close together, one slightly longer than the first.
Work the short one first and the slightly longer one second, so that it hugs the first shorter bullion.
They kind of end up looking like lips.
This double bullion for each wheat berry is the interpretation that Elisabetta Sforza uses in her In a Wheat Field monograms, but her designs are smaller, so the bullions are quite small and worked with only one strand. This larger design will give you a chance to practice the method on a larger scale before going smaller.
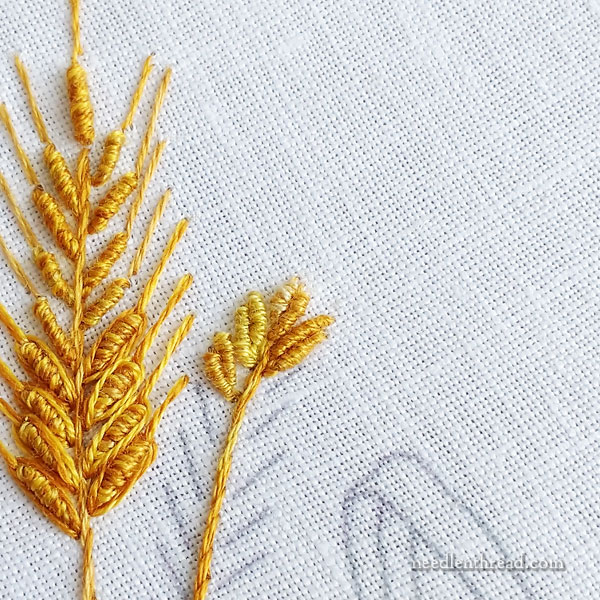
Work the double bullions down the stalk. It’ll be a little more crowded than the previous stalks, but you’ll also see that it finishes as a much more textured stalk of wheat.
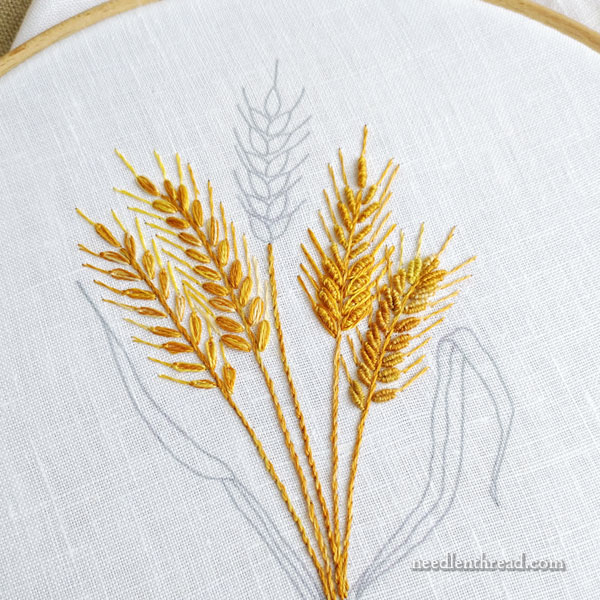
For the beard, you know what to do! Work the long self-couched stitches that we used in Part 2. I used the lighter shade of Variations and just one strand.
And there you have four stalks of wheat – each a little different, but all legit interpretations of wheat in embroidery.
Once you get the hang of bullions, then these last two stalks go fairly quickly, too. They’re much more textured than the first two stalks. They have a certain tightness and bumpiness about them, which I think imparts the graininess of the wheat pretty well.
No Bullions?
The point of these exercises is simply to show you different ways you can interpret wheat in embroidery.
If bullions aren’t your thing, you don’t have to use them! If you want to embroider the design, just pick the style of wheat you like best and go for it!
In part 4 next week, we’ll embroider the final center stalk and the leaves.
This Series so Far
If you would like to visit the previous articles in this series, here they are:
Five Ways to Embroider Wheat, Part 1: Intro, free pattern, materials list
How to Embroider Wheat, Part 2: Two quick and easy stalks, using simple stitches
For Patrons over on my Patreon page, you’ll find the downloadable PDF of this tutorial available for you later today!


I am so glad to have the “five ways” tutorials! I recently purchased Elisabetta Sforza’s In a Wheat Field book (thanks for making that available in your shop) and I find it is maybe a bit overdone on the bullion stitches. It’s nice to have to have ready access to some alternatives. These are fun!
Only slightly related – I was watching an old episode of Barney Miller last night. A man in the witness protection program was being relocated to Kansas. The agent asked him, “Do you know what’s in Kansas?” When the man didn’t reply the agent exclaimed, “Wheat!”
I thought of you immediately.
LOL! Yep. He’s right.
I have always had trouble with bullion knots and now I can see why. I will try them again now.
I was a little perplexed regarding the naming of this piece, and then it occurred to me that in America you might call Barley something else? In England, it’s barley that has the beard – wheat being beardless! What do you call barley?
I was trying to think what grain the double bullion berries looked like – it’s just come to me: Puffed Wheat breakfast cereal. I used to love that when I was a kid.
This project has made me wonder what a bunch of different grain stalks would look like, for instance (in UK English) wheat, barley, oats, rye, millet, buckwheat, quinoa; and what stitches could be used. Add it to my project list!
It does look like puffed wheat!
I’m pretty sure that wheat in America and wheat in the UK refer to the same grain. Awnless wheat does not have a beard, but awned wheat, barley, and a few other grains like triticale and some varieties of rye have beards. The awns (which are the prickly fibers that protect the kernel) vary – some are short and spiky, some are longer and hairier. When you see wheat represented in art, it has a beard more frequently than not, especially the older the art is. These days, strains of wheat tend to be bred without awns, because it’s easier to harvest, it cuts down on dust, cattle feed on it better, and so forth. So it really just depends. But yes, we don’t see a lot of long-bearded wheat crops anymore – much of it is either awnless or very short awns – though they do still exist. Awned wheat is highly favored for decorative wheat! It’s really very pretty!
Dear Mary
The individual wheats look lovely in both styles of bullion stitch. I like the daisy stitch around the bullion stitch on the first wheat stem and I also like the double bullion stitch on the last wheat, I prefer the stitches on the last two wheat stems to the first two wheat berries. I’m really enjoying this series and like all the different ways to embroider the wheat and I also like the colour thread you are using, great tutorial. Thank you for sharing with us the tutorial on 5 different ways to embroider, I can’t wait for number 5 and have enjoyed the different stitches you have used.
Regards Anita Simmance
I am really enjoying the wheat tutorial and look forward to each new lesson! The relatively simple stitches sewn with the variegated threads look amazing with the wheat design. I’m also using this tutorial to try Sticky Fabric-Solvy fabric adhesive. So far I’m pleased! Thank you Mary Corbet for all you teach and share.
I absolutely love this series on different ways to embroider wheat! I hope you do more series like this as it really helps me to interpret what type of stitch to use in different pieces of embroidery. I’ve always wanted to learn how to do the bullion stitch. After some frustrating moments I FINALLY figured out how to work this stitch and I have to say I’m quite proud of myself. I have to agree with an Ann who mentioned earlier that it reminded her of puffed wheat. I remember eating them for breakfast as a kid. Thank you Mary for taking the time to make this series and like I said earlier I hope you do more! I think I will start a sampler to practice new stitches on.