Good morning, and Happy Wednesday! I hope last weekend was marvelous for you, and that you were able to get in some good bonding time with your needle and thread!
Today, we’re going to continue my mini series of embroidery hoop-related product reviews that I’ve shared with your recently.
Back in May, we looked at this Nurge hoop-holding floor stand, and then a couple weeks ago, we looked at this Morgan double hoop combo lap stand.
Now let’s look at the Stitch-Ezi Embroidery Frame Hoop, a hoop lap stand that I had heard about a while ago, so I purchased it to check it out. It’s another one of those needlework products that has definite pros and cons. In my book, it leans more towards cons (I’ll tell you why), though it does have a couple notable pros that many needleworkers would appreciate.
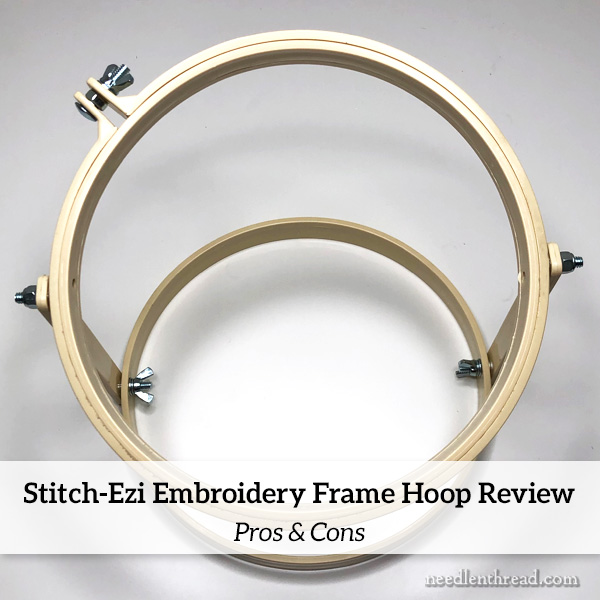
You can see by the photo above that the Stitch-Ezi Frame-Hoop is similar in some regards to the Morgan hoop stand I showed you a couple weeks ago.
There’s a bottom ring onto which risers in the form of slats or sticks are attached to hold the working hoop elevated, so you get a double ring configuration.
The Stitch-Ezi is also made out of molded plastic.
That’s pretty much where the similarities end, though.
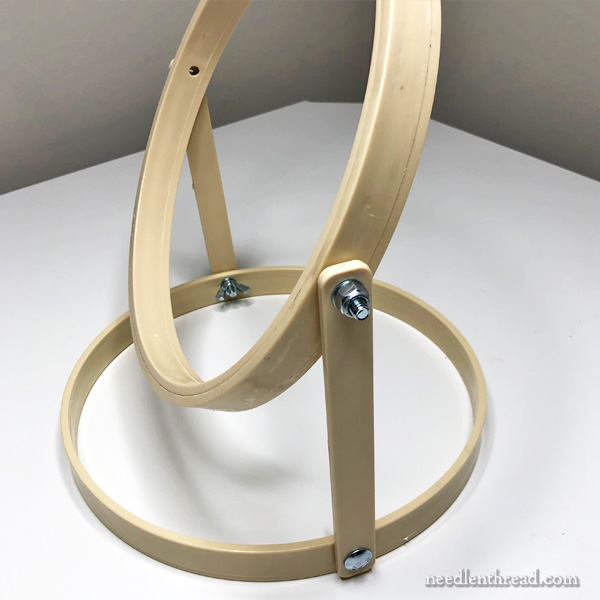
Unlike the Morgan hoop-stand, the Stitch-Ezi offers rotation of the working hoop. This is the main pro of the contraption. I always appreciate the ability to rotate my hoop or frame to access the back of my work.
The rotation in the hoop on this particular set-up also allows the embroiderer to stitch with the hoop at an angle, rather than flat.
So, while the Morgan hoop stand is rigid, this one has movement to it. And that’s a good feature!
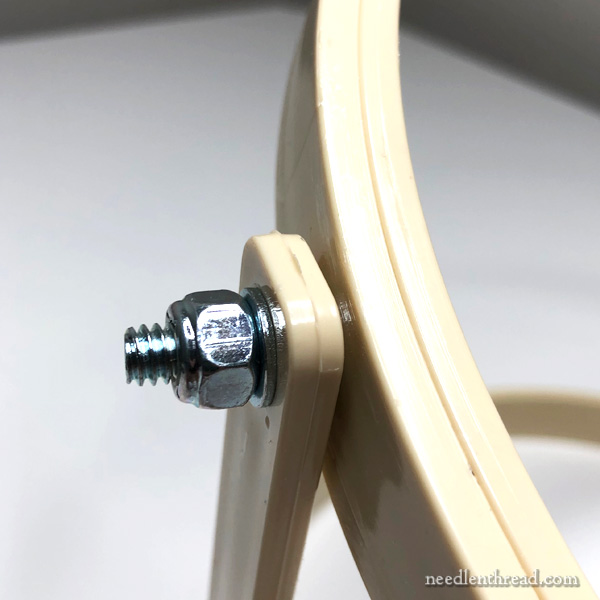
That said, the rotation and tilt-ability of the top hoop is constant. If you wanted to fix the top hoop at a particular slant so that it won’t move, you can’t actually do that.
The hardware on the side of the hoop has no adjustment option. You could, feasibly, go find a wrench and try to tighten the hardware here by hand, but it’s actually not meant to be tightened. It is meant to hang loose.
It’s not so loose that it flops about, but it is loose enough that you have to control the position of the hoop while you are stitching.
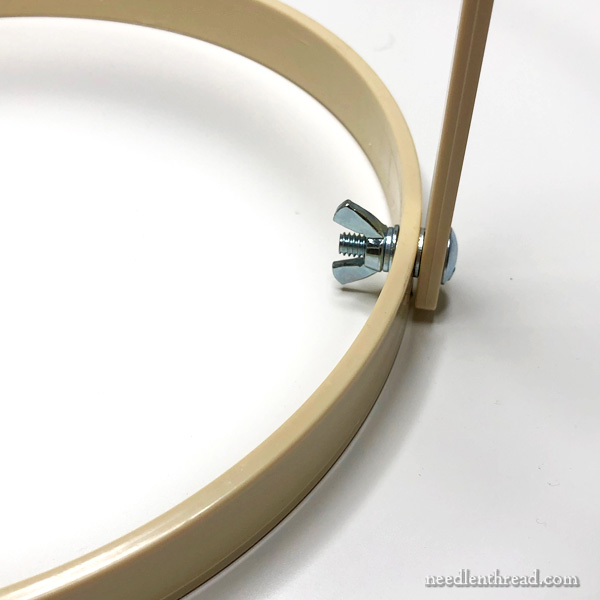
At the base of the whole contraption, you can see that there are wing nuts on the inside of the base ring (which, incidentally, is not another hoop like it is on the Morgan stand – it is just a simple plastic ring). The wing nuts attach the side sticks to the rings, and these can be tightened or loosened in order to put some tilt on your stand.
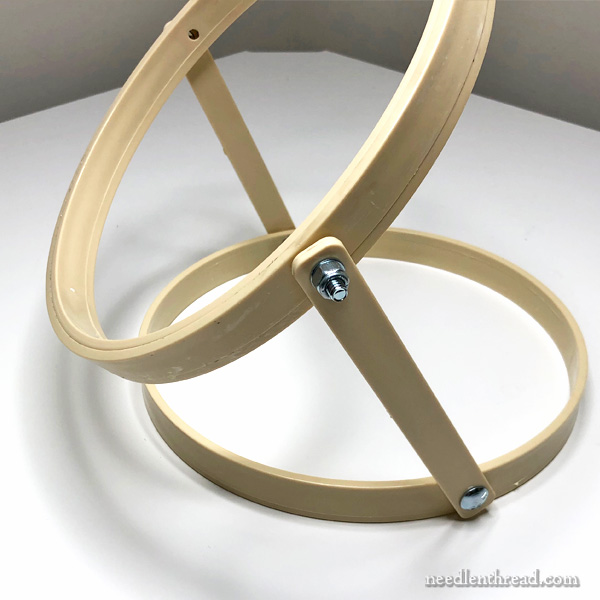
So, you can adjust the stand to sit at different angles if you want it to do so.
When working with it as a lap stand or as a table stand, this is a good feature. It allows the top hoop to be closer to you, if there’s a need.
However, that said, the wing nuts don’t stay as tight as they should, and to get them as tight as they need to be, you’re working with metal wing nuts. They can be a pain.
What I noticed when I used this frame-hoop is that, when working at an angle like this, if those wing nuts weren’t super-duper tight, the angle slipped and I had to readjust it.
It was less of a hassle to work with it upright and just tilt the hoop. But there were times when I felt like I needed to draw my work closer to me by angling the side sticks – at which point, I ended up having to fiddle too frequently with readjusting and tightening the wing nuts.
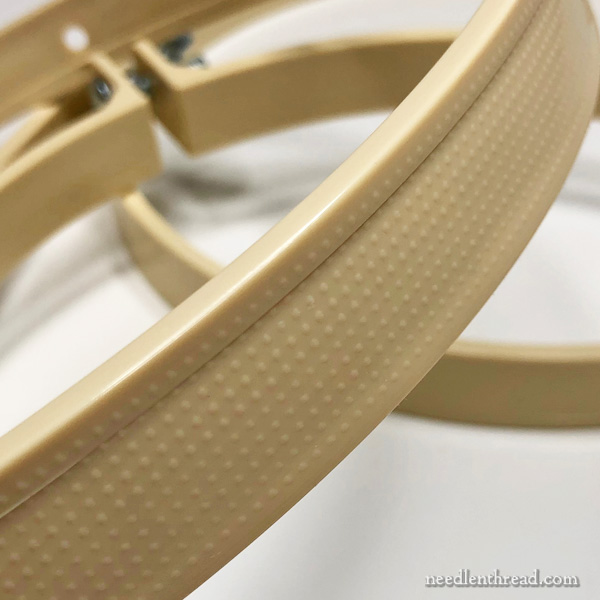
The hoop ring is just shy of an inch deep.
Smooth molded plastic would not go very far to keeping your fabric taut in the hoop. “Traction” is added on the rings of the hoop with some tiny raised bumps.
With heavier fabrics, this seems to work ok. But with a lighter and smoother fabric, the hoop doesn’t maintain the drum-tautness that I prefer when I’m stitching.
I found myself thinking that this particular frame-hoop might work better as a quilting hoop or for embroidering blankets, rather than a general embroidery hoop.
I personally don’t like having to readjust my fabric in a hoop during a stitching session. I prefer that my fabric remains taut and that I don’t even have to think about the hoop while I’m stitching.
I’m afraid I didn’t find this to be the case with the Stitch Ezi Frame Hoop when working with regular fabric.
When it boils down to it, this is the most important aspect of a hoop: how well does it hold your fabric?
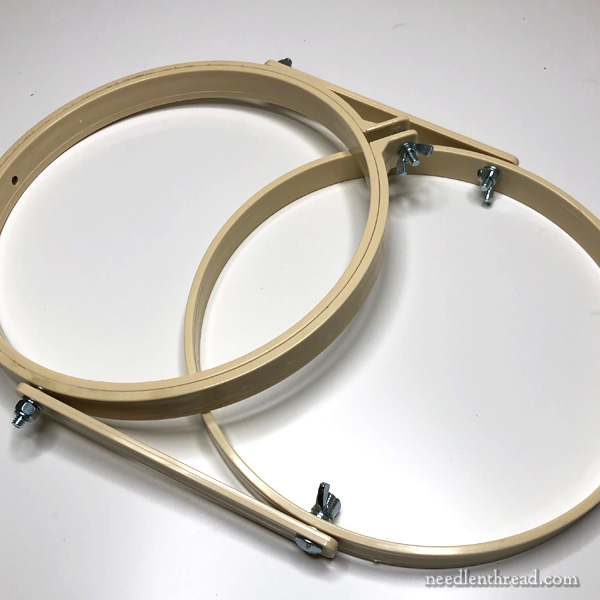
Unlike the Morgan, which requires you to take the two hoops off the sticks in order to store it flat (resulting in loose sticks that can get lost), the Stitch Ezi Frame-Hoop folds mostly flat, as you can see above, thanks to the adjustable wing nuts in the base ring of the stand.
In a Nutshell
This is not really my favorite hoop stand contraption. It has some good points – the tilt-ability of the hoop, the ability to adjust the angle of the sides – but they don’t outweigh the cons quite enough for me. The top hoop can’t be fixed in position, the angle on the sides tends to slip over time unless the wing nuts are super tight, and finally, the working hoop doesn’t hold regular fabric as taut as I like through the whole stitching session.
The hardware is metal wing nuts, which can be hard on the hands.
One other negative: for what it is, it’s expensive. Here in the States, it costs around $66 to acquire the Stitch Ezi Frame-Hoop.
In the future, I will try it as a hand quilting hoop, and if I ever have a blanket on hand to embroider, I might use it for that, too.
Where to Find It
I found this particular frame-hoop on Amazon. It ships from Australia. If you’re in the US and you think this hoop will serve you well, then you can find it listed on my Amazon Recommendations page here, under Embroidery Tools & Accessories.
If you’re in Australia, I think it’s available through Rajmahal needlework. I can’t seem to retrieve the link for Rajmahal from here in the US – the website won’t come up. I’ll check it again later, and add the link on the blog article if I can get through to the actual website.
This article includes an affiliate link to my Amazon Recommendations page, which means any purchases made through that link result in a small commission for Needle ‘n Thread. Every little bit helps, so thanks!


Oof! Have had it for a couple years …entirely frustrating for all the reasons you mention; lives quietly in a drawer! Perhaps I should feed it a few orts from time to time to console it…
Now curious about the Morgan, but will just happily stay with my trieds and trues!
Always love your reviews…
Linda
Linda we are very sorry to hear this. The instruction booklet, textual and with diagrams, show exactly how to adjust the tension and the hoops for fabric tension. if you need a copy of how to do this simply and easily, please contact me and I will send it. Thank you, Louise Alternatively, Gina B has done a brilliant youtube video on how to adjust simply and effectively. I have posted the link below.
It’s a pity that it is made in plastic…
Hi Sophie,
If this is for concern for the planet, please know that the StitchEzi is made from recycled plastics. The plastic is clean and durable and produced at a carbon conscious carbon-neutral factory in Victoria. In fact, every component is engineered and produced in Australia. If you are interested in the specifics I know that Jim our engineer will be happy to provide. We share your concern for our planet.
I think I’d be changing out the top nuts for wing nuts and adding some lock washers. And maybe putting the bottom wing nuts on the outside. But at that price, I shouldn’t have to re-engineer their product. Thanks for another nice review!
Gail exactly right! You shouldn’t have to reengineer the frame and the instructions, written and diagrams, show exactly how to adjust the tension and the hoops for fabric tension. if you need a copy of how to do this simply and easily, please contact me and I will send it. Thank you, Louise
To keep the hoop tighter get a lock washer that looks like a skinny washer with a slit in it. It’s not a complete circle. Anyway placing between the wing nut and the hoop will allow you to keep everything tighter.
Engineering of the StitchEzi frame to adjust for fabric thickness. This review video of the StitchEzi shows how to very simply adjust the rings so that the fabric doesn’t slip and various fabric thicknesses can be held very firmly. Also shows how the angle can be adjusted to suit, etc.It is a very comprehensive demonstration of the StitchEzi for those that may not have written instructions or who would prefer a video demo. Non-slipping of the fabric was a key priority of the engineering, including the non-slip nodules and the adjustment.
https://www.youtube.com/watch?v=KPAl3hBktDE&t=339s