If you’ve been embroidering for a long time, or if you’ve been following along with me on Needle ‘n Thread for years, you know what a slate frame is.
But if you’re new to embroidery and new to Needle ‘n Thread, there is a chance you’ve never come across the slate frame.
The slate frame is a very simple but effective tool for embroiderers. It’s been used for centuries in its most basic form, and in recent years, it’s enjoyed a renaissance of popularity.
I like to hunt down slate frame makers. Most of them are individual woodworkers who have found a niche in the needlework market with wooden tools. There’s nothing quite like a good wooden tool made by someone who knows wood and knows how to bring out the beauty and functionality in a good piece of wood!
TFWoodcraft has been around for a while, making wooden tools and other products for the historical reenactment camp and for other enthusiasts. I’d heard of them from several readers who recommended their products, so I thought I’d take a look.
For those of you looking for slate frame options in the US, then, here’s one to put on your list. Their frames are slightly different from the traditional slate frame, and they are beautifully made.
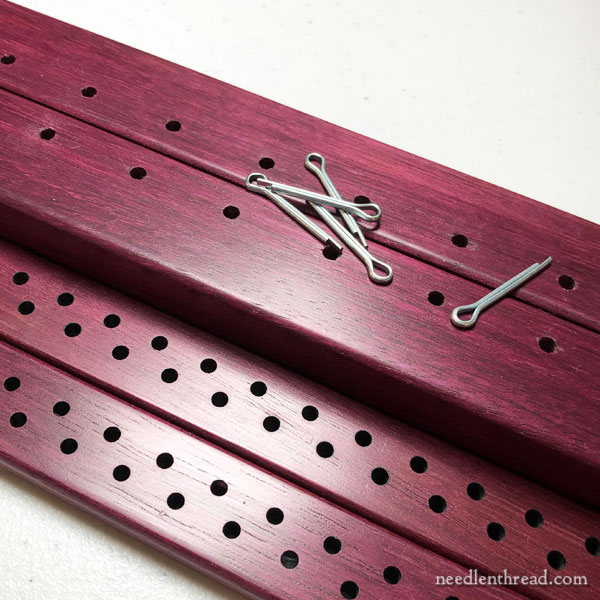
There’s just something about gorgeous pieces of wood that makes my heart go all a-flutter. And I’m not even a woodworker!
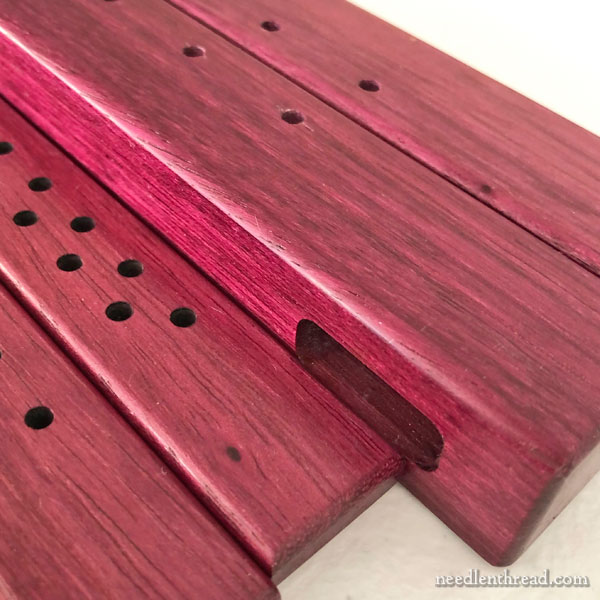
The wood on my frame is beautifully finished to a smooth, glass-like hand. There are no shards on the holes, nothing that catches or scratches. The finish on this frame is lovely!
The components to a slate frame are four: 2 top bars and 2 side bars, to make a square frame between which you stretch your fabric.
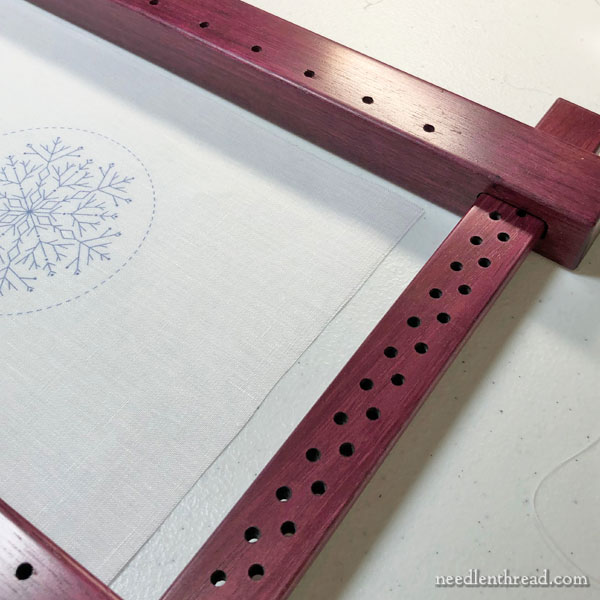
For most slate frames, the top & bottom (or “roller”) bars are situated horizontally, with the “slats” on the sides.
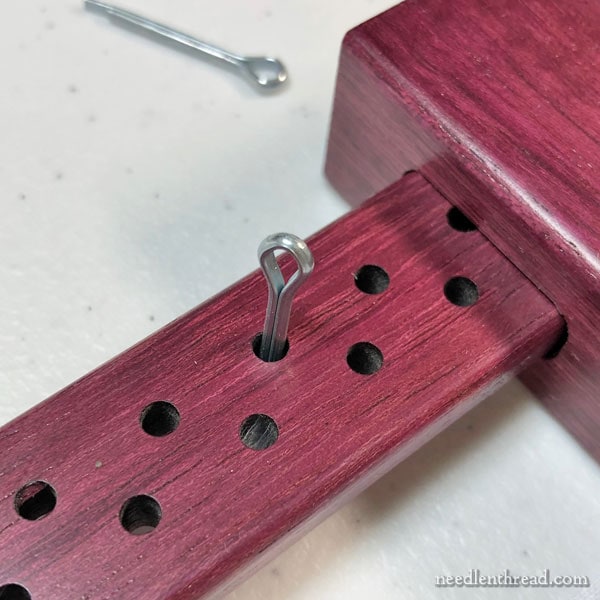
The slats feature a series of closely and evenly spaced holes into which some kind of pin or peg is inserted, to push the roller bars away from each other, stretching the fabric vertically between them.
The TFWoodCraft frames come with cotter pins that fit the holes in the slats. The pins are somewhat loose until you have your frame fully stretched. Then the pressure of the frame also serves to hold the pins securely in place.
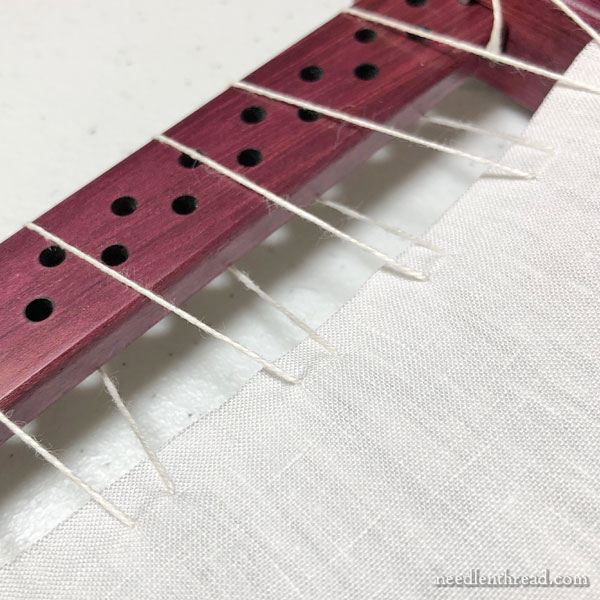
The sides of the fabric are then laced around the side slats, using string or twine (I use linen thread, because it doesn’t stretch).
There’s no high science to using a slate frame, really. Different people set up their frames different ways, depending on what the person’s used to, or how the frame is made The whole point of them is simply to achieve a firm tension on all four sides of your fabric. How you go about doing that depends on your preferences for setting up a frame.
You can read about setting up (or “dressing”) a slate frame here.
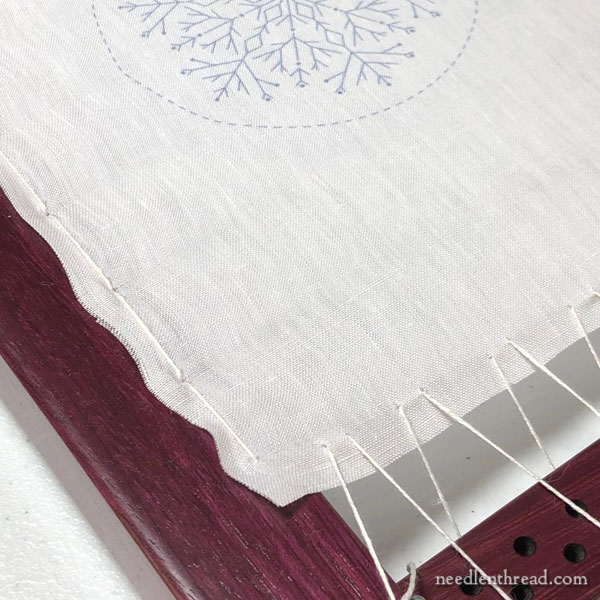
On the TFWoodCraft frames, the rollers (or the heavier bars that are usually seen in the horizontal position on the frame) are shown in their listing as the sides of the frame.
This configuration is fine – it works great if you’re stitching a long, narrow, horizontal piece. Just don’t let it throw you off! In fact, it doesn’t matter which direction the rollers are situated. If you want your rollers on the top and bottom of your work, horizontally, just remember to order the rollers according to the width you want your frame. You can configure the frame however you need to.
What’s different about the TFWoodCraft frames is that the rollers don’t feature any kind of tape. Some slate frames have a twill-type tape attached to them already (usually stapled) that you attach the horizontal ends of your fabric to.
The problem with stapled tape is that, if the twill tape needs replacing, you’ve got to pry the heck out of the staples that are fixed in that beautiful wood, and then you have to re-staple new tape.
Instead, on these frames, you’ll find evenly spaced holes about an inch apart on the rollers.
You lace your fabric to the rollers directly, so that you’re actually lacing on four sides using the holes to lace through, rather than sewing the top and bottom of the fabric to tape on the rollers.
I took a shortcut. I just sewed my fabric onto the rollers through the holes, so that the fabric sat up on top of the frame.
Retrospectively, this wasn’t the best way to mount fabric on this frame, although it worked ok on this small piece. The problem with doing it this way is that you get definite tension points on your fabric. It’s better to just follow the lacing instructions that come with the frame!
My plan, though, with these rollers, is to use those holes to attach a heavy twill tape to the frame. I like the fact that I don’t have to staple the tape. It won’t be the easiest sewing job, perhaps, but I’m pretty sure I can get several uses out of a good tape or other heavy-duty fabric.
Then, I’ll sew the top and bottom ends of my fabric to the strips attached to the frame, which will provide a much more even vertical tension on the fabric. Then I’ll lace the sides, like I normally do.
So there you have it!
If you are looking for well-constructed, strong, beautiful slate frames from a reputable company that’s been around for a while – or if you’re looking for hand-crafted Japanese embroidery frames, lucets, drop spindles, wooden needles, beautiful charcuterie boards, gorgeous dove-tailed decorative yarn boxes, and more! – visit TFWoodCraft’s shop on Etsy, or visit their website here.
Their service and communication is excellent and they make exceptional hand-crafted products – definitely worth adding them to your list!


Is this better than an embroidery hoop? When do you recommend using a slate frame? I am new to embroidery.
I recommend slate frames for longer-term embroidery projects, usually larger in size, that will be on the frame for a while – or for techniques such as goldwork, where a hoop is not desirable. Slate frames are quite a bit more intensive to set up. If you’re just doing casual embroidery, or embroidery that can be damp stretched or laundered, rinsed, and ironed and whatnot – then a hoop is fine. But if you’re going in for more intensive, long term projects that are a little larger, that you don’t want hoop rings on, that can’t be washed, that require a certain level of tension maintained on them – that’s when I’d use a slate frame. I use slate frames for goldwork, for larger long-term embroidery pieces, for ecclesiastical embroidery, and the like.
I never heard of a slate frame until I started getting your newsletter. But I still don’t know–why are they called slate frames? Were they originally made of slate and not wood? They would have been very heavy!
There’s lots of speculation on that question. One sensible surmise is that the sides of the frames were called “slats” before the regulation of spelling in English, and with the “e” added, we say “slate” today. Some people say it’s because they resembled the schoolhouse framed slates that children used to use – but I’m not so sure about that conjecture, mainly because the frames have been around for so long – long before most average children were trotting off to school with their respective slates. But no, they were never made of slate.
It’s due to their shape.
The oblong shape of a slate similar to those used at school in the early days to write on.
Hi, Grace – history doesn’t quite bear out that theory, as slate frames were around before the days of slate and chalk for school rooms. It is more likely that it is from “slat” – as in the wooden slats that made up the frame.
Slats do not make up the frame, though. It’s trestle, bars and pins.
The frame is only widely called a ‘slate frame’ in the States where it got its name and was so called when such a frame grew in popularity there in the 19th century.
Elsewhere it is called the tambour where they have been in existence since the 12th century.
Thanks, Grace!
Trestles don’t make up the frame, really. Trestles are what the frame sits on. It’s usually rollers, bars (the side slats) and pegs.
Can you point me to primary (as opposed to second hand or theory) sources for your info? I’d appreciate it! Especially when it comes to the term tambour frame in use, for example, in medieval Britain, I’m very curious. Thanks!
They’re called slate frames in the UK, too. So if the term originates in the US, the name would have had to have changed in British English in response.
However, OED says ‘slate-frame’ means the narrow wooden bit around a writing slate and cites an 1858 source.
But the use of ‘slate’ for a slate to write on goes back much earlier than c19. OED has a source composed around 1397, though the date is uncertain and the documentation is from about 1500.
OED doesn’t seem to have heard of the connection with needlework, however ….
They have heard of tambouring and a tambour-frame. Their earliest quotations are from late c18, which doesn’t rule out earlier usage but makes it less likely.
So that might support a more recent change of term to ‘slate frame’, except that it isn’t obvious what they were originally called in that case – a third term?
Thanks for this detailed description of what a slate frame is and how to set it up.
I recently went looking for heavy twill tape for an embroidery frame I made for myself at my local Joann’s and could not find it. I’d had some wide, heavy tape but ran out but don’t know where to resupply.Thanks for any suggestions.
Dear Mary
The TFWoodcraft slate frames from the photos look lovely and beautifully crafted can you can see the smoothness and shine of the wood and I should imagine they are lovely to hold and feel. I have never used a slate frame, I have the millennium frame but that does not require tying up. Thank you for reviewing the TFWoodcraft slate frames and sharing your thoughts with us and for the photos and link, great product.
Regards Anita Simmance
I have been waiting for the evertite frame since March. Traditional Stitches says they dont know when they will shop and I dont think they get answers from the supplier. So I was fascinated to see this article in my inbox this morning. I think they offer the complete set if I understand the description correctly. In your article you say you took a short cut and sewed the frabric to the holes. According to the text in their description this is how it should be done. Am I interpreting it correctly? “The straight sides allow you to tighten the fabric in both directions without distortion. The tighter the fabric the better the resulting piece of embroidery. Both the warp and the weft direction of the ground fabric can be sewn onto the frame before the pins are added to the stretcher bars. A small set of holes have been added to the main rails to allow you to sew the fabric on without the threads wrapping around the outside of the frame.” I just completed a small goldwork project and want to do others. I really wanted the evertite frame because I don’t particularly look forward to leaving slate frame. But cutting corners may not be best. So if these frames will we work and it is the complete set, I am going to order a set.
Hi, Elizabeth – they’re talking about lacing the frame – you’re lacing through the holes rather than around the frame. On most slate frames, there’s webbing on those roller bars, so that you’re sewing the fabric to the webbing first, and just lacing the sides. But this particular frame requires you to lace the sides all around. The pins added to the stretcher bars are the cotter pins that go in the sides, to hold the roller bars apart and apply tension to them. You can use a slate frame more effectively than most other frames, if you’re trying to maintain good tension over a long period of time, because you can adjust the tension with the lacing on the sides, etc. However, it’s a lot of work – more so than Evertite stretcher bars. Yes, I’d heard that there was a hiccup in the Evertite chain. I don’t know if Evan Burroughs – the guy who invented them and holds the patten – is still making them or not. :-/ They’re such an excellent stretcher bar frame. It would be a shame to see them disappear from the market!
Hi, Mary
Thanks for the interesting article about the slate frame, I now have one on the way, I’ve a couple of questions though. I’ve never used a slate frame as they seemed a bit complicated but I’m going to take the plunge. How wide should the twill tape be? I asked TF Woodcraft and Tania said I didn’t need it but from your comment about tension I think I would like to try with it. My second question is about the linen thread to ‘sew’ the fabric to the frame. I’ve looked at Etsy, such a useful place, and there are zillions of different thicknesses and qualities, could you give me a few tips please about how to find my way through the linen forest to the right thread tree please. It will be your leafy tree that will be strung up as the first sacrificial victim on my first slate frame, but I will be very gentle to it.
You really don’t need the twill tape. If you want to ensure even tension, add a strip of cotton (I use wide bias tape, folded in half) to your fabric, and follow the lacing instructions that come with the frame.
I’m just toying with the idea of the twill tape – I haven’t done it yet, so I don’t know how wide I would go. It’s something I’ll have to experiment with.
Well, if you’re going to offer up a victim to your slate frame, I suppose the Leafy Tree is a good one! LOL!
The design of this slate frame reminds me of a Japanese embroidery frame without the roller bars.
That’s what it is, essentially. Really, all frames are the same in concept – four sides and some way to adjust tension. TFWoodCraft makes beautiful Japanese embroidery frames as well… I might have to invest in one —- some day! LOL!
I love my slate frames but lately I have fallen head over heels for a new type of frame. A shop called Needle Needs in England, has a frame called the Millennium Frame, it costs a bit more than a standard slate frame BUT it is so well worth it! No more lacing!!! and holds a very tight hold on the fabric and is much more easier to use. With different size frame bars it will become the only frame you will need it is that good. Mary you should review this frame.
Yes, I reviewed the Millennium frame ages ago here on Needle ‘n Thread. I like mine, too! The company has gone through some difficult times keeping up with business, but they’re getting back on track. But, yes – I reviewed the frame a long time ago. In fact, they used to link to the review on their home page, but it looks like they’ve removed it. You can read my review here: https://needlenthread.wpengine.com/2011/11/millenium-embroidery-frame.html I think they probably removed the link to the review because the comments below include many negative comments from folks who were upset about the long delivery time. I think their delivery times have improved, though, but still – they are handmade items, by one person, so if people reading this decide to order one, be prepared for a wait!
I’ve been wondering the difference between a slate frame vs. a Japanese embroidery frame. I’ve been wanting to upgrade from a embroidery hoop for bigger projects and beaded tambour embroidery and wasn’t sure which would be a better option.
Either one will work. A Japanese frame has more components (there are rollers set within the sides). The slate frame is simpler. Both will provide you with excellent tension, when set up correctly.
Help Mary, I have a question about setting up an Access Commodities slate frame and your instructions on ‘dressing a slate frame’. I am trying to dress the A.C. frame for the first time. I have turned over the edge of linen 1/4” on all sides and sewn tape to these sides. Now I am not sure how I attach the fabric to the the canvas tape on the frame. You have used herringbone stitch but I cannot work out how you do this with the two edges held together as you show in your photos. I feel quite confused about doing this and not sure where to start or should I just whip stitch them together?
Well, I would probably just lay one layer on top of the other – i.e. lay your fabric on top of the tape – and pin it to make sure it stays straight, then work a herringbone stitch across the top of the linen, into the tape for the top part of the herringbone and into the linen for the bottom part. Alternately, I know people who use their sewing machine to sew the linen onto the tape. Just lay the linen on top of the tape, pin it to make sure it stays straight, and then run it through a zig-zag stitch on your machine, right along the edge of the linen, into both the linen and the tape.
Thanks Mary
I have seen the two with herringbone on top of the tape. The material is not sitting on grain so I’ve unlaced and will try again or give up and use a hoop. One of the problems is the embroidery is longer than side bars but I was told by a member of EGV Australia you could roll onto the top and bottom bars. I always appreciate your advice. Jude
I own that same color slate frame. Excellent quality.
Mary. . . This was the best info for me. Was trying to dress my first slate frame and it had no webbing! You helped me figure it out. Can not believe i just dressed my own first slate frame! Thank you!!!!
Mary,
I’m considering purchasing a TFWoodcraft slate frame. All of the traditional hoops and frames I see are typically made of birch (or beech?) Is there a reason for this? I know it is a strong and flexible wood, but the exotic woods and colors on the TFWoodcraft website are just so tempting! My dream is to go study at the Royal School of Needlework someday (before my arthritis gets too bad!), and I know they are very particular, so I wouldn’t want to invest in equipment they wouldn’t approve of. What do you think?Can I order the gorgeous Padauk one without fear? 🙂
Maureen
If the frame does the job it’s supposed to do, it really shouldn’t matter what it is made from. Be aware that the TF Woodcraft frames are not quite the same configuration, though. You end up sewing your fabric on through the rollers, which is somewhat different. I prefer tape across the rollers to sew the fabric to. The rollers, too, are very square and thick, which is nice – you know they’re sturdy, and they work fine for projects that fit within the scope of of their size, but if you actually had to roll extra fabric on them, it’s a little more bulky and awkward, I think. Still, they are beautiful frames, and they are perfectly functional. I have a small one. Next time I use it, I play to sew a wide piece of twill tape to the rollers, and then sew my fabric to the twill tape. I think I’ll be happier with that configuration.
Anyway, if you’re concerned about the RSN not allowing the frame for their classes, you should probably contact them to double check. I really can’t imagine that they would have a problem with it, though, if it is as functional as any other slate frame. Slate frames are not rocket science, after all! And you can’t really say that one particular configuration is the “right-and-only configuration” of a slate frame, if it does its job. But you should double check if you are concerned about it.
I’m just wanting to know where someone can purchase a true slate frame for embroidery?
Thank you very much.
I get mine from Carrie at http://www.ecclesiasticalsewing.com – they are good, solid frames.
Wanted to leave a comment saying “THANK YOU!!” – I am going to be doing a series of projects that are all their own unusual size and was having the hardest time finding a slate frame I could afford that’d work for them. I chatted with the maker at T.F. Woodcraft and they’re making me up a custom frame for a very reasonable price. I’m so glad I found this post that lead me to them!
Dear Mary, I just received my TJ WoodCraft snakewood slate frame—stunning! Have you sewn the twill onto the roller bars? Is so, I’d love to see a picture. Thanks!
Hi, Jennifer – I’m a little baffled… what do you mean about sewing the twill onto the roller bars? Do you mean twill tape? Twill fabric? I think you would just lace through the holes on the rollers – that’s what they intend, anyway, with their style of slate frame. But you wouldn’t lace twill tape onto the rollers. You’d just lace your fabric directly on them. That’s probably clear as mud…! :-/
I’m curious to know if you ever added the twill tape and if it worked well. I just purchased the slate frame from TFWoodcraft and haven’t dressed it yet.
Happy stitching!
Deb Bomstad
Minnesota
Yes, I did, and it did work. I used a heavy cotton twill tape – wide – and sewed it on through the holes in two passes. I used a thicker linen thread to sew it on, and a longer milliner needle.
I purchased a small slate frames from TFWoodcraft earlier this year. They are beautiful pieces of woodworking, so glad I ordered from him.
When I did my first project I was yet new to slate frames and was expecting the twill tape already attached, and was not up for the task of lacing the entire frame, mostly as I was not sure what I was doing and if I would get a good tension, so in my ignorant state I attached the twill take with tacks, knowing I would be making holes in my beautiful woodwork (I did cringe with every tack I put in).
I do however like your idea of sewing the twill tape on which I have now done but have not attached my embroidery yet. It looks like it will work well, I lave left the tacks in place as well so I should have good sturdy tension. I will eventually have to replace the tape and so will then remove the tacks, and hide the holes on the bottom so I won’t have to look at my shameful mistake when I am working on my project. I hope it will be less hideous as I expect it will look when I remove them.
I have recently ordered a second set of Side Rails/Spreader bars as he calls them, as I needed a wider frame for my trestle (which my husband made for me, I know I am lucky.
I have enjoyed your website which has wonderful info on all kinds of embroidery. I have fallen in love with goldwork embroidery and have done several small projects. I am hooked.
Angelika