


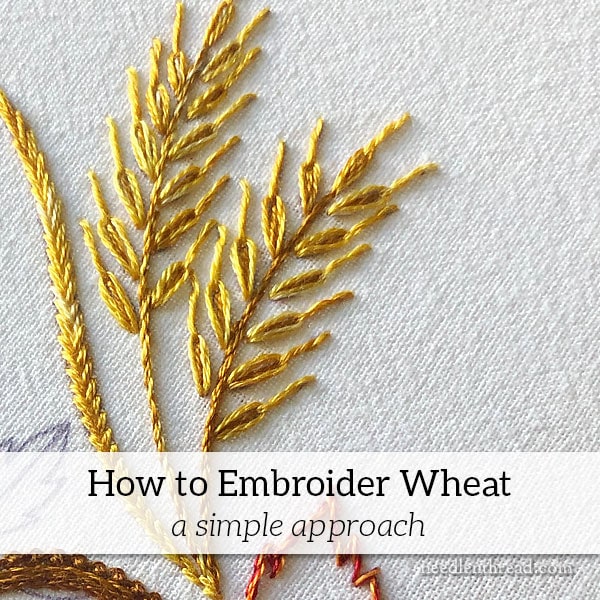
Today, I thought I’d share a quick overview of a very simple method for embroidering wheat motifs.
I’ve received several questions about the wheat on this autumn design I’ve been exploring, so I thought I’d share a quick look at how I’m embroidering the wheat on my pumpkin design.
Incidentally, I think I’m going to call the pumpkin design Festive Fall – Decorative Autumn Corners for Hand Embroidery. So if you’re looking for it when I finally get it out on the website, that’s how it will show up! A stitch & color guide will be available, as well as some ready-to-stitch pieces with the designs already transferred for you. Look for them in September!
So here’s a brief overview of a simple approach for stitching wheat elements on hand embroidered items. Feel free to give it a try!
When it comes to the type of stitching I’m doing on Festive Fall – with the pumpkins, the autumn leaves, the wheat, and the swirls all working together to present a homey, warm autumn scene – I like to keep the stitching relatively simple and quick. After all, this type of design is meant for household goods that will be used and most likely laundered – it’s not exactly framed Art.
With this type of stitching, you want it to be relaxing, and you don’t want it to take ten years to finish… or even ten weeks, for that matter!
Come to think of it, you probably don’t even want it to take ten days! These are designs that you should be able to stitch up relatively quickly, spending a few hours over a few weeknights or a couple weekends stitching.
So the wheat motifs on the design need to work up pretty quickly, because on the larger of the designs, there’s quite a bit of wheat!
At the same time, the wheat has to be worked in stitches that will hold up to laundering and use.
So this is how I do it – and trust me, it takes longer to explain than it takes to get it done!
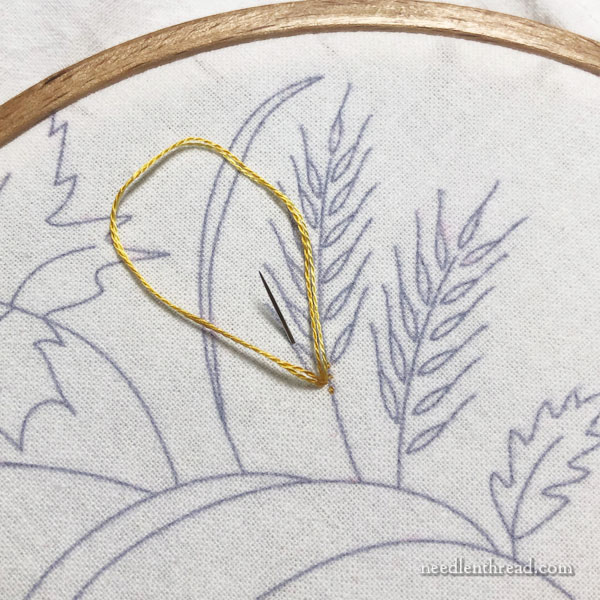
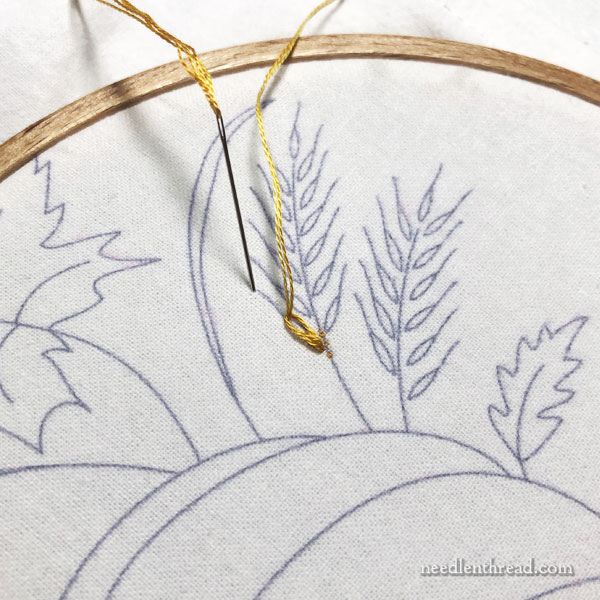
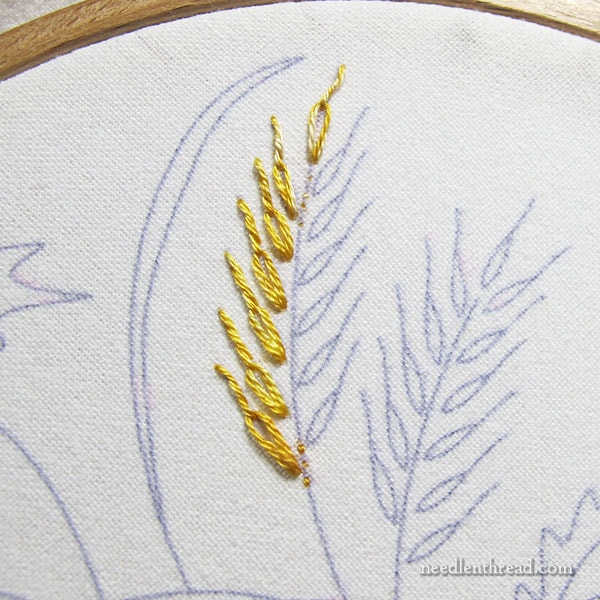
For the wheat kernel, I start with a daisy stitch. Pretty simple stuff!
When I’m working in a hoop, I always use the stab method of embroidery. That is, I don’t “scoop” the fabric to make the daisy stitch. I take the needle all the way to the back of the fabric, leaving a small loop of working thread on the top of the fabric, as shown above, and I bring my needle up from the back into that loop.
My reason for not using the sewing method is that it tends to distort fabric that is held drum taut in a hoop. I like my embroidery to be as free from puckers as possible, and I find that the stab method of stitching helps achieve this.
For the “beard” – or the hairy part of the wheat – I end the daisy stitch with a long stitch to cover the individual hair line coming off the kernel.
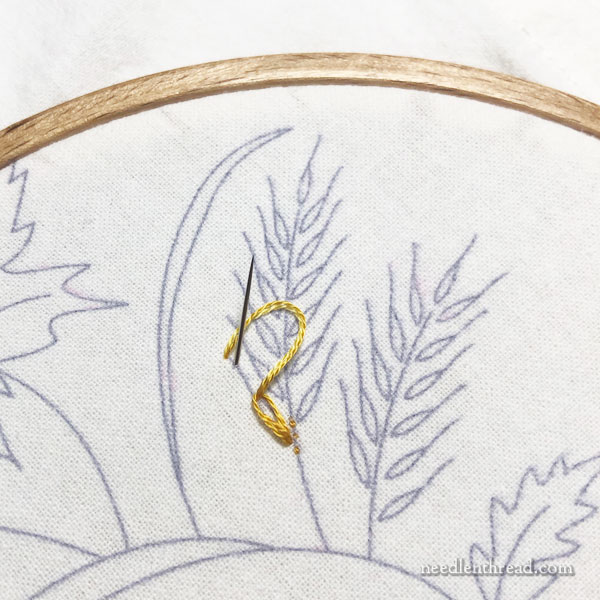
But I don’t want that long stitch to sit on top of the fabric without being somehow anchored down. Especially with embroidery that’s going to be used or laundered, long stitches are never a great idea!
So, I bring my needle up just on the line, a little below where I took it to the back to end the long hair …
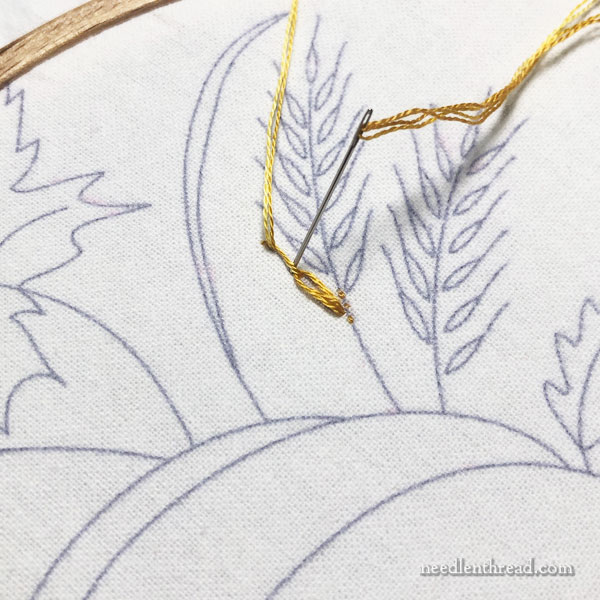
… pulling through to tighten the long stitch. Then I take the needle and working thread over the long stitch and to the back of the fabric on the “hair” line, right near the end of the daisy stitch, as shown above.
This self-couches the long stitch in place and helps to keep it secure, while blending both the long stitch and the couching stitch together.
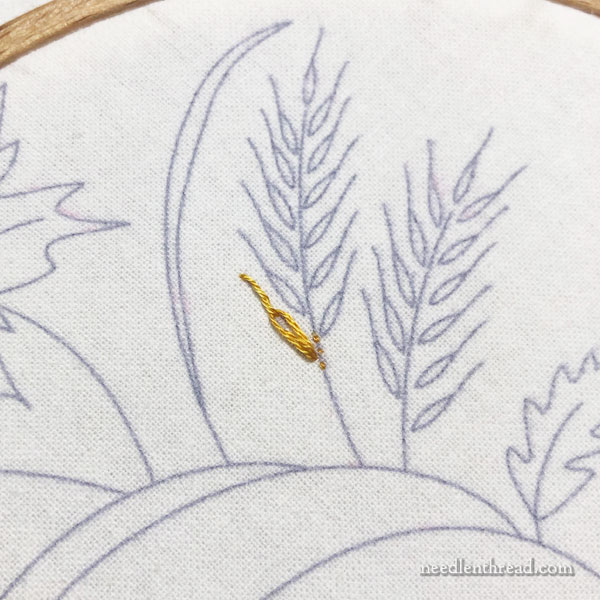
Here’s one finished little kernel and hair.
It’s a very quick trip up one side of the seed head!
At this point, if I have a lot of thread left, I make tiny tacking stitches down the stem line so that I’m at the base of the seed head and can work up the other side of it in the same method.
Because of the orientation of the design and of the stitches, working up the side of the seed head (rather than down from the top) keeps the stitches on the back of the work shorter and under control.
When stitching on household goods that will have an accessible back, it’s helpful to always consider the journey that the threads will take on the back of the work, too. You don’t want long stitches and long stretches of thread on the back of your work. (I cover this concept of keeping the back neat and of traveling threads and so forth in my Floral Corners e-book.)
In short, being mindful of the back of the work helps keep it neat.
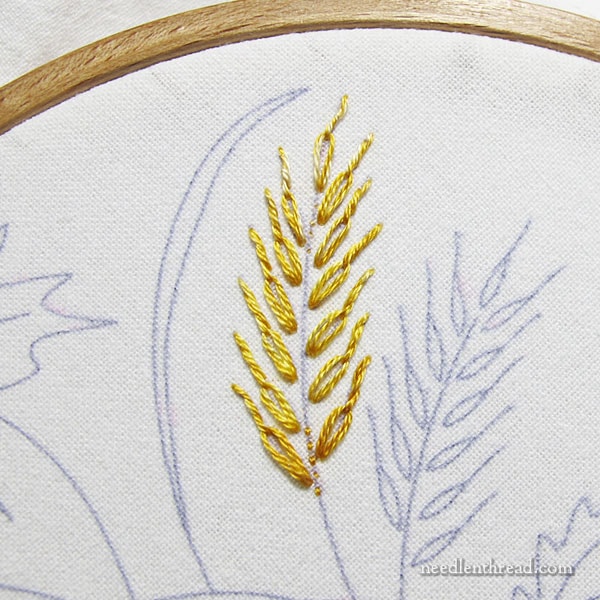
The kernels and their little hairs are finished.
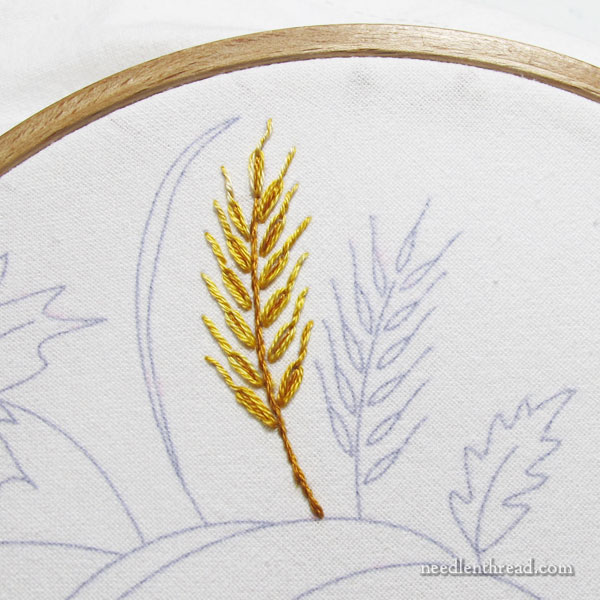
To finish off the wheat, I used a slightly darker golden brown to stem stitch up the stem. Then I worked a straight stitch in the same darker color inside each daisy stitch.
And that, my friends, is a very simple, quick approach to embroidering wheat on household goods.
A Little More In-Depth
I’m sharing this tutorial as a PDF, in a little more depth with a few more tips – along with photos of the what should be happening on the back of the work – for my patrons over on my Patreon page. If you’re a patron over there, hop on over later today to pick it up!
Dear Mary,
How lovely (as usual..!)! I just want to do a bunch of these now
I was wondering, are you using a variegated thread to achieve the multicolor heads?
While keeping the stem just one color? Sorry I couldn’t tell if that was the case or not, of if the light is what gives this wheat such beautiful hues!
I’m using a combination of solid and variegated in the needle at one time.
Dear Mary thanks for clarifying! Your work is so inspiring it is making me want to try out this wheat motif!!! So life-like with a shine! Beautiful!
Love it!
Dear Mary
Great tutorial and advice on how to stitch the wheat motifs and your advice is helpful on using the stab method of stitching when using a hoop and I like your advice on how to stitch long single stitches on household goods. A lovely piece of stitching and the colour of the wheat is very authentic. Thanks you for sharing with us the tutorial on the wheat motif and for the photos very helpful.
Regards Anita Simmance
Thanks, Anita! I’m glad you like it!
A lovely seed-head of wheat… I can almost smell the field! Thanks for the great tip on “self-couching” the long straight stitch. I often want the look of a straight stitch but use a different stitch because I fear a long straight stitch will snag with use or laundering. Another “Why didn’t I think of that?” solution I’ve come to expect from you.
Mary,
I love your site. I am trying to subscribe to your Patreon page, but all I get when I click on the “Join” button is the ever-circling circle. Am I doing something wrong? You have taken beyond “Aunt Martha’s Transfers” ( I always felt there had to be more to embroidery than that, and somehow I found your site years ago!) and I don’t want to miss something. Thank You!
Mary Tart
Hi, Mary – Thanks for your comment! I’m not quite sure what the Patreon problem is. Maybe it was just a glitch at the time – you might try it again. I haven’t had any problems with the site, but I’m not in control of it, so I can’t help on technical problems with it. It’s coming up ok from my end. :-/ Wish I could help further!
Hello-
This explanation may sound too technical – I so, please skip the next two paragraphs.
The problem may be your security settings. I’m using Firefox and NoScript which checks the permissions for each Web-page I open. As I notice the annoying circle I realise I’ve not set the permissions for the page so it’s into NoScript to allow accesses. A number of times I’ve blamed the Web-page and/or the Web-page designer until I realised it was my fault.
Opera does a different set of checks however and is much stricter on https. To reach Patreon I got the address from Mary’s post, tried it in Opera which failed it and copied it into Firefox which gave me the circle until I remembered to adjust my permissions. (I run almost everything under temporarily trusted.) Rather a bodge.
Anyhow, I hope this may help.
Regards,
Helen Hicks
Thanks for the lovely videos and tutorial.
Love your work would love updates via email thankyou
Hi, Denny – if you go to my home page in your browser (www.needlenthread.com), in the left column you’ll find an option to subscribe to the email list. If you’re on a mobile device, use the main drop down menu (the “hamburger”) in the upper right corner and scroll down. You’ll find the email subscription form just a little ways down the menu.
Thanks for the tutorial. I love how the wheat looks! I live in the Wheat City!
I love this pattern! Just what I’m looking for. Do you by chance have a printable pdf of the drawn pattern?
I enjoyed the wheat tutorial. It is very clear.
I am wondering how you transferred the wheat designs to your fabric. Many thanks, Janet Paine
Hi, Janet – I put a link in the blog post to another post about design transfer. Everyone is going to transfer their designs differently, based on their preferences, materials, etc. There’s no one way. I make my own transfer with special commercial equipment, so it wouldn’t really work in home environments. But there are plenty of good transfer methods out there, and I’d suggest, for starters, an easy approach like tracing with a pencil, or using a fine-tipped iron-on transfer pen, like the one available through Sublime Stitching.
Hello Mary, can you tell us how you stitched the curving leaf/stalk to the left of the 2 wheat stalks? It’s a lovely stitch but am not sure how it is is done. Thank you and Kind Regards, Jane
That’s fishbone stitch. There’s a tutorial for it here: https://needlenthread.wpengine.com/2006/11/fishbone-stitch-video-tutorial.html
Actually a question. When making a table runner do you put some sort of backing on it. Thank you
Not usually, with embroidered household linens. Quilted table runners and the like have multiple layers of fabric, but traditional household embroidered table linens don’t. You just have to be mindful of your stitching paths and the starts and finishes of your threads, to keep the back of the embroidery as neat as possible. I covered a lot of tips for that in my e-book “Floral Corners” – how to start and end threads in the least visible ways, how to “travel” threads on the back of embroidery so that they aren’t easily seen, etc. You can find that e-book here: https://shop.needlenthread.com/product/floral-corners
Hi!
Was actually googling how to draw a stalk of wheat, and ran across this. So glad I did! This is really, really cool. (Sorry, I’m 63, and still using the colloquial sayings of the 70’s). I used to embroider a little when I was a teenager, and this looks intriguing. Might be fun to play with when I’m not doing another project.
Thanks for the clear instructions and great graphics!
Kate
Thanks, Kate – I hope you enjoy it!