Remember the finish on this embroidered kaleidoscope project, Party in Provence, that I shared with you last week?
Well, I’ve been working my way through a variation on the theme, which is supposed to end up as a pocket on a tote bag. If you’ve been hanging out with me a bit on Needle ‘n Thread, you’ll probably recall this discussion on twill and duck for embroidery, following this discussion on some preliminary explorations of poor choices in linen.
The last time I showed you progress on this project was here, where I was just beginningto sample the embroidery on the cotton twill.
As I’ve worked my way through this little design excerpt on the cotton twill, I’ve discovered a few things – some likes and dislikes, some things I’d probably do differently if I were to start over, and the recurring joy I find in stitching certain stitches!
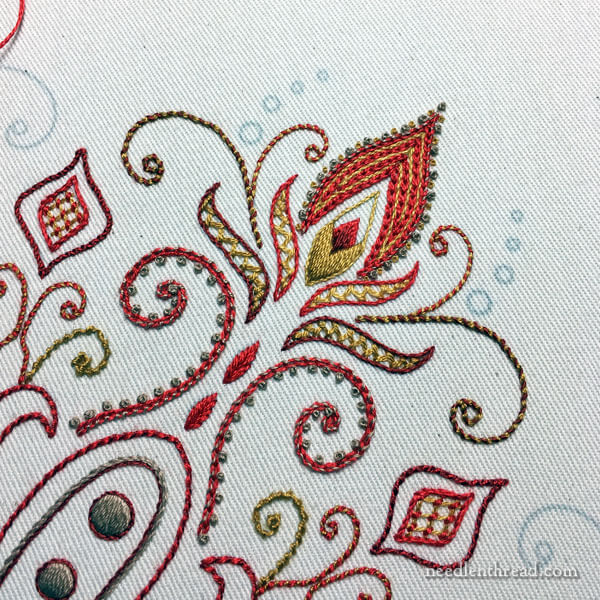
One thing I’ve discovered about stitching on medium weight cotton twill is that the fabric can feel quickly spongy in the hoop, especially if you’re undergoing any drastic changes in weather. For example, on humid days, I notice a lot more sponginess, bounce, or give in the fabric in the hoop. And while that happens with other fabrics as well (I’ve noticed it with linen, too, to be fair!), on this particular fabric, it’s much more noticeable. What makes it more noticeable – could it be the weave? The softness of the cotton fibers? The quality of the fabric overall? I really can’t tell!
While habitually, I’ll tighten up the fabric in the hoop when it seems to be getting less taut, this isn’t always a sure-fire answer to a smooth finish. In fact, the re-stretching of the fabric when it’s somewhat spongy can warp things a bit, in relation to previously stitched areas. Puckers won’t surprise me, though I’ve been pretty vigilant about keeping tension in check.
I’m not sure things will go amuck upon finishing and blocking, but in the scheme of things, I won’t be surprised. We shall see!
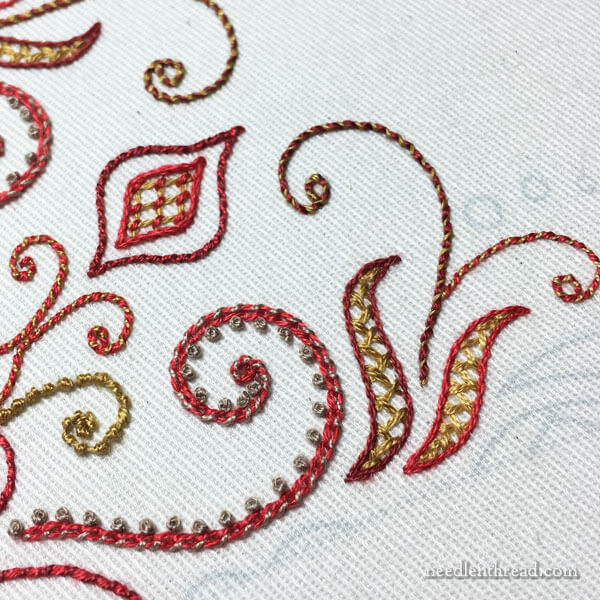
Where the design is truncated on the sides – this is a quarter excerpt from a symmetrical design drawn in a radiating 8-spoke grid – I definitely didn’t think out the truncation of the design for the pocket. If I had thought about it more carefully, I would have extended the design beyond the seam of the pocket.
Embroidering beyond the seam or edge of the pocket would allow, I think, for a more “natural” truncation of the design in the finishing, by working the seam over the extended embroidery.
Live and learn! We’ll see how it turns out!
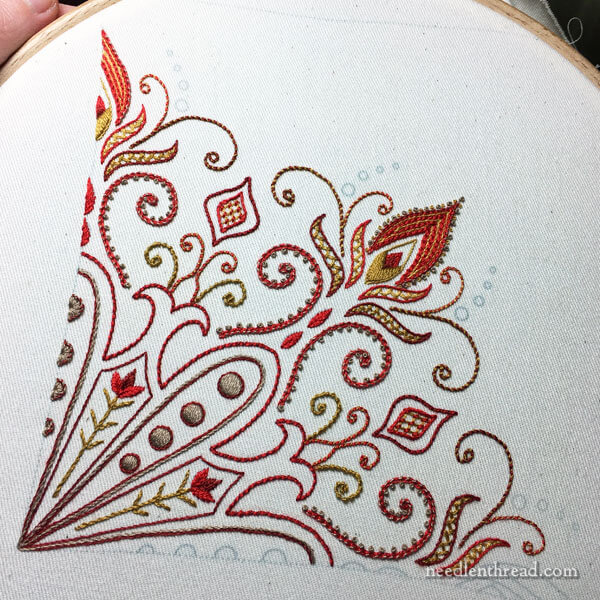
I think I may have mentioned a bit earlier that there was no real formal planning on this particular piece. I’m just winging it as I go, simply to experiment for the tote I want to make.
While I’d probably make some changes in stitch choices if I were to work this particular piece for this particular purpose again (for example, I’d forego the satin stitched dots in the middle), I’ve really enjoyed the whole approach of making spontaneous stitch decisions as I go. When it comes to fun embroidery, to me, this is it! I love playing with different stitches and combinations, without feeling constrained to a pre-conceived idea.
The stitches need to work together, though, and sometimes, an approach like this can end up a little too busy! There are some areas of stitching that could be toned down a bit.
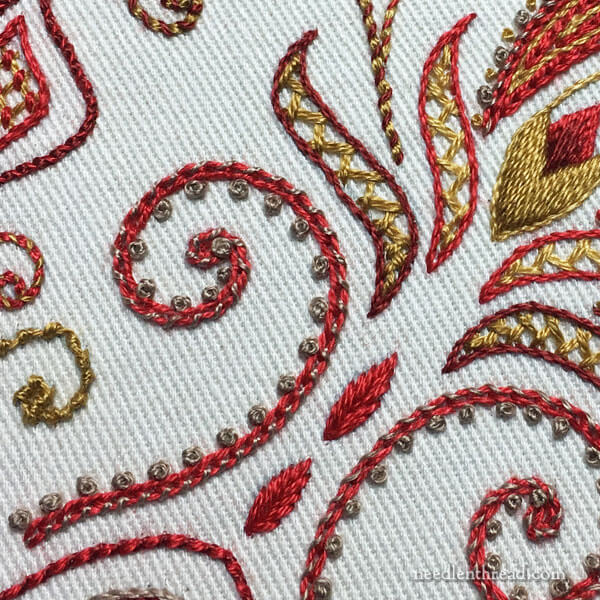
On the other hand, I got to incorporate many of my favorite stitches and stitch combinations in the piece – funny how you naturally gravitate towards the stitches you like, isn’t it?
The photo includes most of them: there’s chain stitch, whipped chain stitch, French knots, whipped backstitch, stem stitch, lattice work, fishbone stitch, coral stitch, satin stitch, herringbone stitch, and long and short stitch.
Sure, it might be overkill. But, you know, that’s what I love about hand embroidery – the Massive Variety of embroidery stitches… and all the stuff you can do with them!
So that’s where I am on this particular needle-and-thread excursion. I’m going to do my best to get this finished and blocked in the next two days – before “eclipse company” arrives this weekend.
And then my plan is to sew the tote next week – well, if I can get over my sewing-machine inhibitions! Gaaaaaaah!
Favorite Kaleidoscopes Pattern Collection
If you’d like to stitch up your own version of Party in Provence, you’ll find the pattern available in my Favorite Kaleidoscopes collection – over 30 kaleidoscope designs for hand embroidery and other crafts.
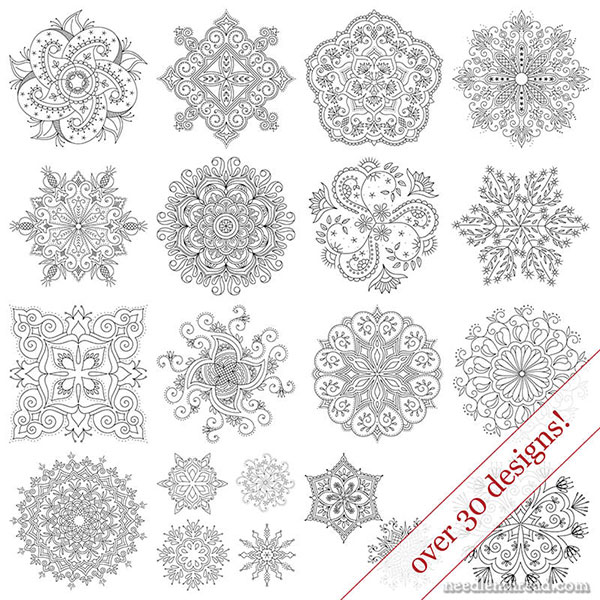
You’ll also find the pattern for Birthday Bash and Tulip Festival in the same collection!
The kaleidoscope designs range from small 4″ designs to large 8″ designs, from simple to complex. You can read about the collection in detail here, or jump straight over to my shop to grab your own copy!


Marie, I’ve been enjoying your newsletter immensely. It’s inspiring and informative. Regarding the stretching that you’ve noticed with your twill fabric, please note that it’s the weave structure at work. A twill fabric is not symmetrical in its interlacements; there’s a diagonal leaning as the weft threads shift one or more threads to the left or right with each succeeding “pick”. A pick is one weft thread. If you hold a piece of twill fabric and shift it right or left, you can feel how it moves more easily side to side than a “plain weave” fabric, which is quite symmetrical in its structure. Blue jeans are a classic example of twill. Perhaps you’ve noticed how they stretch and soften a bit after you’ve worn them for a while.
I hope this is helpful. Thanks again for your newsletter.
Best regards,
Gika
Dear Mary
I think this is a lovely piece of embroidery and I don’t think its to busy I like all the different stitch combinations and colours you have chosen they really stand out and will look really striking on your tote bag, I can’t wait to see the finished project and I can’t see any puckers. Thanks for sharing with us your progress on the kaleidoscope project and for the photos.
Regards Anita Simmance
Thanks, Anita!! 🙂
You’re going to see the eclipse? Is it total where you live? I’m headed up to Idaho to my brother’s place. He’s the one in the family who gets eclipse company. 🙂
Have fun!
It’s about 95% where I live, but just north of us a short drive, we can get dead center for totality. So yes, we’ll be driving north! Great excuse for a picnic! And I suppose I can tolerate the heat and humidity in exchange for an eclipse. 🙂
Lovely, Mary! Looking forward to seeing the tote, and I’m so glad I’m not the only one who’s machine shy!
Sorry if you’ve already answered this, but I couldn’t find it..are you using soie d’alger? Or just DMC?
And I got a chuckle out of your reference to eclipse company
Hi, Genevieve – I’m using DMC on this particular piece. I don’t think I could bring myself to use silk on cotton twill! :-/
Hi Mary-
I love your blog, and look forward to reading every update. Your comment about running the embroidery into the seam allowances raises red flags to me. In my work in the garment industry, I’ve seen many embroideries “chopped” to fit a particular shape.
In the case of pockets, if the pocket is applied on top of the surface and not into seams, I would never extend the embroidery into the seam allowance. The topstitch that applies the pocket would stitch through the embroidery, and that never looks nice. If the pocket is “set in”, then there is the uneven surface the machine foot has to travel over to close the seam. Often resulting in wobbly seams or skipped stitches (uneven stitch lengths)
The very best solution is to find a way to end the embroidery at least 1/8″ (1/4″ is better) away from the finish edge, allowing room for the machine foot / topstitching / seams to safely pass by the embroidery. If your embroidery is already “hugging” the stitch line, then use a zipper foot to let the seam snug right up against the embroidery w/o danger of skipped stitches.
Thanks, Ann! I think I’ll be sewing the seam of the pocket – which I’ll make with the backing fabric first – about an 1/8″ out. Then the handle will overlap the edge of the pocket, sewing through that and the bag fabric, over that 1/8″ seam up to the embroidery area. I think. Not sure yet, but that’s halfway the plan.
Hi Mary, I don’t think it looks “too busy” at all; in fact, personally I would love to see a little *more* stitching on it, with the middle peaks of the two fleur-de-lis filled in either with latticework or with chain stitch stripeyness echoing the center top bit. But don’t mind me, I just enjoy a little back-seat needleworking! 🙂
And while I’m back-seat needleworking, Ann’s remark about the seaming issues is why I personally would hand-sew an embroidered detail such as this pocket onto the main body of a bag. We sometimes tend to forget that handsewn seams/applique can be just as sturdy as machine-stitched ones, as well as permitting much finer control (which is the deal-sealer for me) and not really taking much more time if the item’s not too big.
Happy eclipsing, and at least it will be less hot for part of the time while the sun is dark!
Kim
Mary, where the first one reflected France, this one for the picket on your tote bag makes me think of India. Both the color selection and execution. It is still a lovely piece of embroidery.
I like the satin stitch circles, though. I think they anchor the piece and give the eye a resting place.
The whipped chain and French knots are probably my favorite things about it so far.
Which reminds me that I have some French knot hydrangeas waiting to be stitched!
Hi Mary, Can you expand on the secrets for avoiding puckers? Even when I think I’m keeping the hoop tension tight and even, I seem to end up with some (especially on fabric other than linen). Any hints? Thanks! Karen