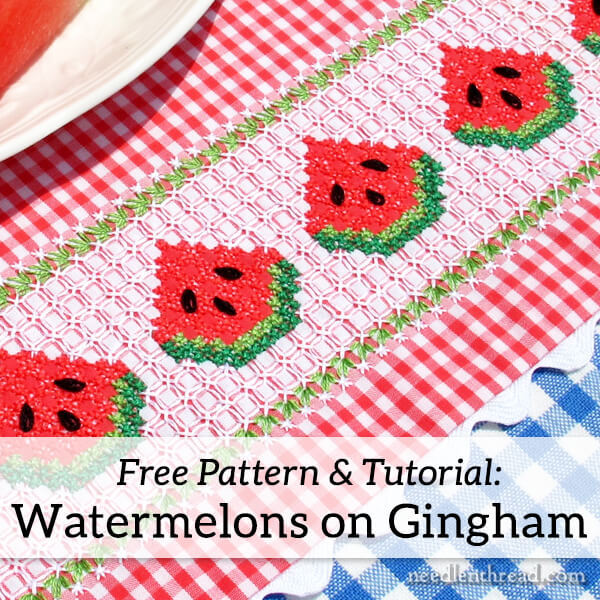
A few years ago, I wrote a tutorial for Commonthread by DMC, for working this watermelon design in gingham embroidery.
Since then, the article has been archived so it’s hard to find over there. To help out those who are looking for the pattern and instructions and who have requested it recently for this summer, I’m condensing the instructions and offering the pattern below.

To get started with this project, you’ll need to know how to work the foundation stitches for gingham embroidery (demonstrated week before last in this tutorial) and how to work the leafy clusters, also demonstrated in the same tutorial.
Materials
For the gingham watermelon, you’ll need the following materials:
1/8″ cotton gingham checked fabric
DMC floss in white, dark green, light green, black, and red or pink or coral, depending on what color you want to make your watermelon! In this sample, I used the these color numbers of DMC: 310 (black), B5200 (bright white), 910 (dark green), 703 (bright green), and 892 (bright reddish-pink).
Hoop
#7, 8 or 9 crewel (embroidery) needle
#24 or 26 tapestry needle
Scissors
Free Watermelon Pattern
Here’s the watermelon pattern for you. It’s a PDF, so you can download it to your computer and print it for your personal use. It’s a chart, and the background layout looks like gingham, so you can see which colored squares on the gingham get embroidered:
Watermelons in Gingham Embroidery (PDF)
Stitching Order
With this pattern, I embroidered the edge of a gingham table runner. You can use the design to embroider placemats, a table cloth, a child’s dress – whatever you want to stitch – but just make sure that the placement of your stitches corresponds to the correct squares on the gingham, to get the lacy look.
I started about five inches in from the edge of my fabric, with the center watermelon on the chart. Using a water soluble pen, I placed a mark on the gingham square closest to center, to mark where to start the first (center) watermelon.

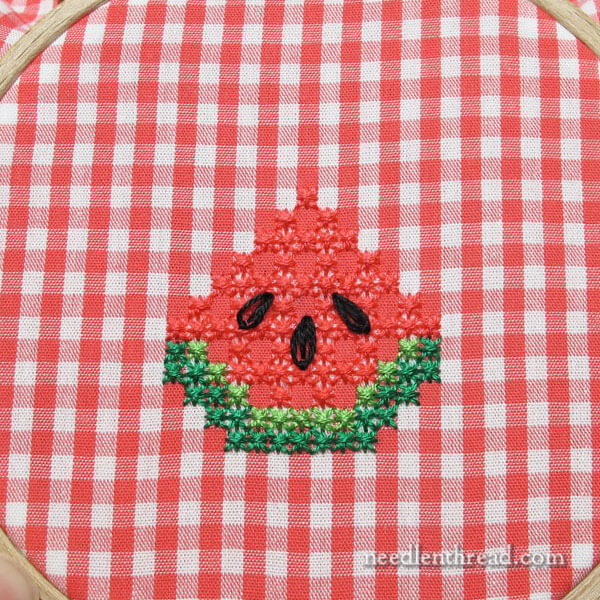
Following the chart, and using two strands of floss in a crewel needle, stitch the watermelon, using double cross stitch (you’ll find the tutorial for chicken scratch foundation stitches in this article).
Add three daisy stitches in black (video tutorial here) for the seeds, following the chart for placement. In the middle of each daisy stitch, work one long straight stitch in black.

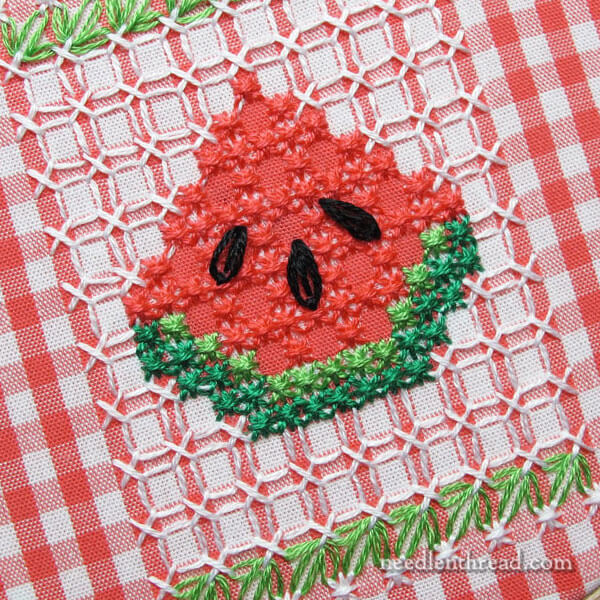
Follow the chart for the placement of the white foundation cross stitches and double cross stitches around the watermelons.
You’ll find a tutorial for working the square white lacing stitches in the background here.
This tutorial for leafy clusters will show you how to embroider the leaf edging around the design.
You can work as many repeat watermelons as you need to edge your fabric. The repeats are marked on the pattern. Leave space at the edges to work the triangular ends of the design.
Hope you enjoy it!


Great design Mary! I will put my stitched version on the table to add some summer flair to go with the high temperatures.
Dear Mary
I remember you doing this project and what a great idea, really nice of you to make the Gingham pattern free and available for us with the instructions included. The Gingham would make a lovely summer tablecloth or runner for a summer BBQ. Thanks for sharing the Gingham pattern with us and for the free template.
Regards Anita Simmance
The article is available at
https://dmc-usa.com/discover/free-patterns/cross-stitch-diy-projects/diy-watermelon-embroidery/
This is the description of making a table runner with the watermelon design and describing the embroidery of the design.. The JPEG pictures are not accessible and are mostly labelled Gingham-Watermelon-nn where nn is a number. I have saved the description as a Word file if anyone is interested.
Regards,
Helen Hicks
Gosh you put a lot of work in for us Mary, we do appreciate it and I have learned so much from you over the 5 or 6 years I have been getting your emails.
Thank you so much
🙂 Glad you enjoy it, Trish!!
Thanks Mary!
I love that you cover all aspects of embroidery– from the historical to the whimsical!
Love this watermelon! Thank you for the explicit instructions!
I’ve been intrigued by this whole depression lace/chicken scratch series of yours (I Love gingham!) but This is the one that made me go out and find an old tablecloth to try it out on. I cut it into placemats before I realized this is more of a table runner sized pattern! So I have some logisticaling to work on, but adventures are fun 🙂 thanks for the pattern!!
Thank you and Happy 4th of July!
i absolutely love doin chicken scratch. would be nice if you could do another tutorial on flowers. i loved the pink and purple cloth made several of them for family and friends. thank you.
Would love to have a pattern for strawberries on gingham. Thanks so much!