Earlier this year, I had the pleasant opportunity to examine, up close, a really unique embroidery sampler worked by Sheila Iskin, who lives in Sunny California.
Now, this isn’t just any sampler. It’s not a band sampler. It’s not an alphabet sampler. It’s not a spot sampler.
It might not even be recognizable at first as a sampler, but that is indeed what it is – and I think it’s a very clever idea!
This sampler goes way beyond the standard approach to sampling stitches and techniques. It will open up a whole world of ideas for you!
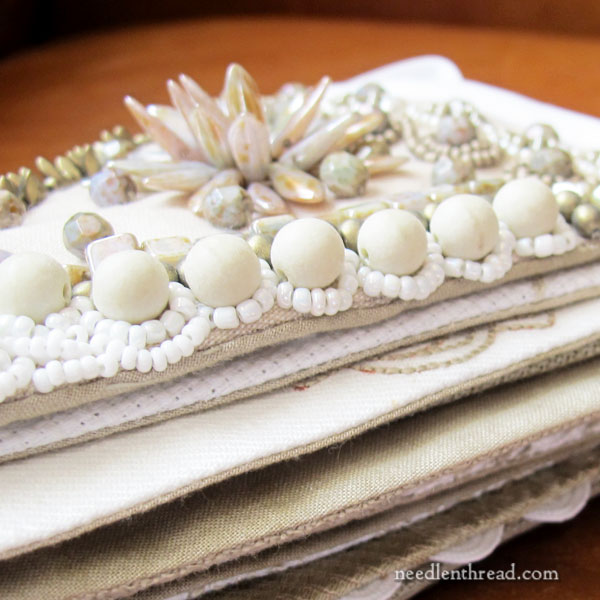
Sheila’s technique sampler is in the form of a decorative bunting.
A bunting is a festive decoration made to be hung. Buntings were often made up of cloth or paper, usually into wide gathered streamers or even drapes.
Sometimes, you’ll see buntings in the colors of one’s national flag, for example, and hung out on buildings during patriotic festivities.
And then there are flag buntings, made up of multicolored triangular cuts of fabric. You might see these strung around a fairground, or maybe highlighting the edges of a car lot during a sale.
Today’s trendy buntings are often made in small triangular flag shapes and hung during all kinds of parties, from birthdays to home comings to holiday celebrations.
Any time you want to get across the idea of a celebration, a bunting is a great way to do it!
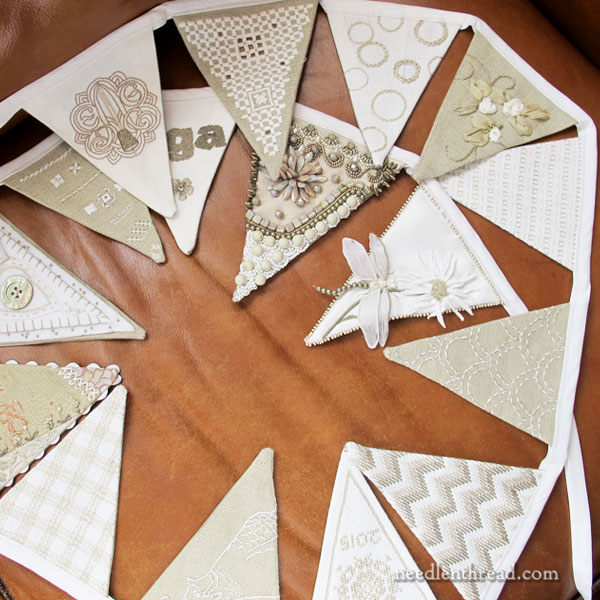
I sorely regret not having a place I could hang the bunting and photograph it! But you get the idea: each flag is adorned with a technique of some sort, finished into a triangle (backed with other fabric), and joined together neatly using bias tape across the top of the flags.
As a member of her local EGA chapter, Sheila’s bunting sports a few nods to the EGA…
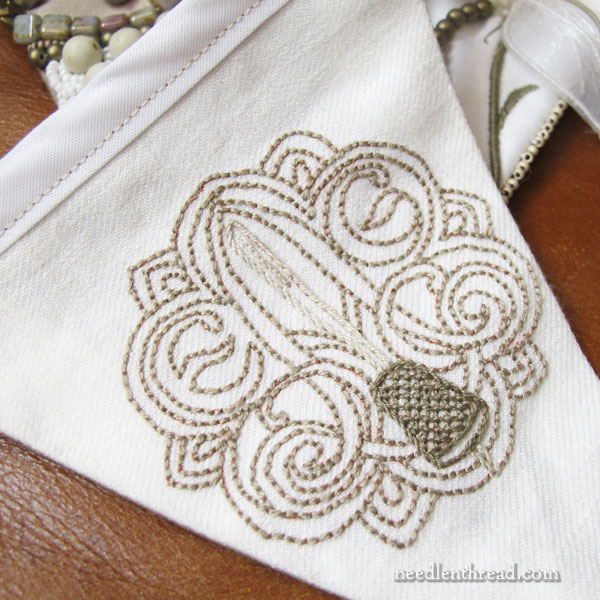
…like the logo above, worked in backstitch and trellis work.
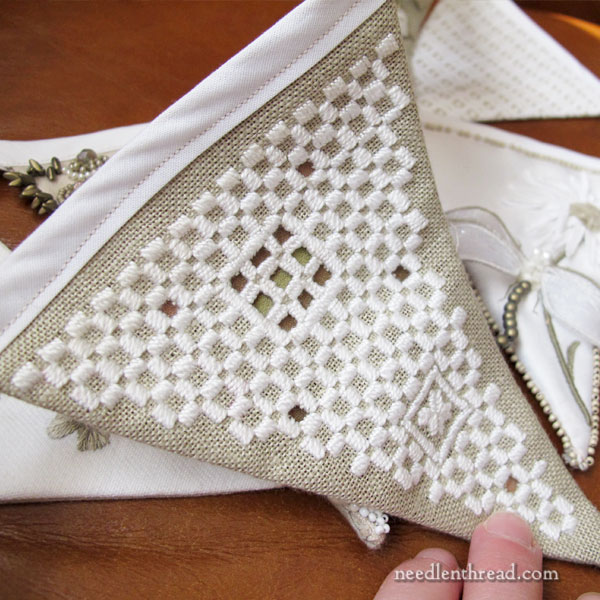
You’ll see a wide array of embroidery techniques over the whole bunting, with the color scheme of whites and naturals binding the project together visually.
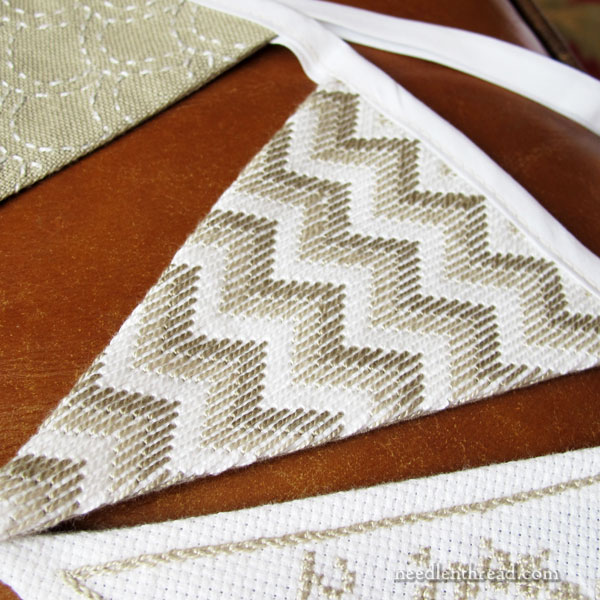
The designs covering the flags range from the geometric precision of counted work…
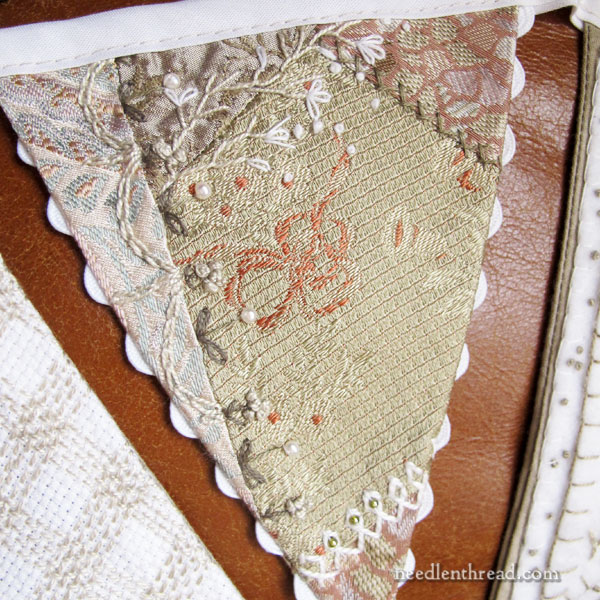
…to the free style, more spontaneous approach of crazy quilting!
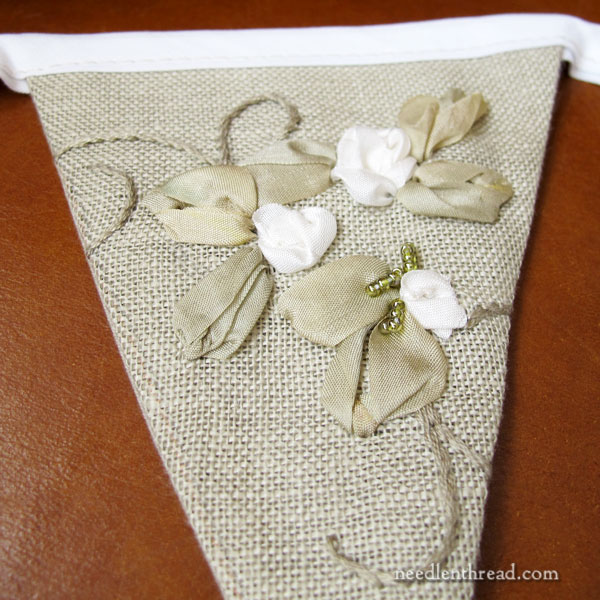
On Sheila’s sampler, you’ll find touches of ribbon embroidery…
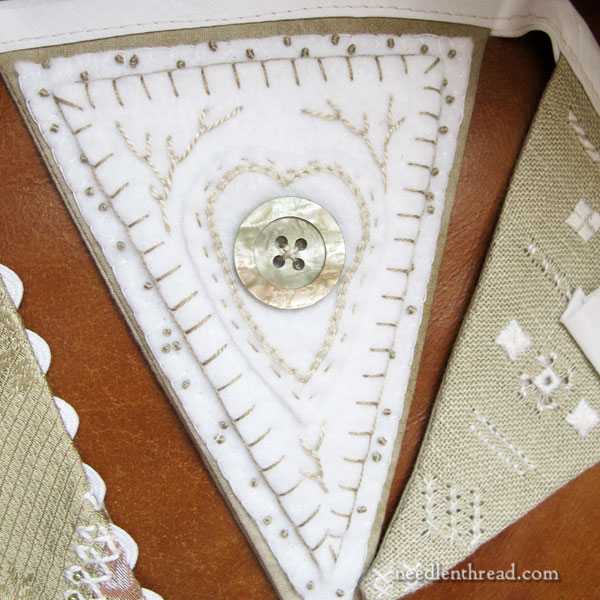
…and rustic feltwork applique.
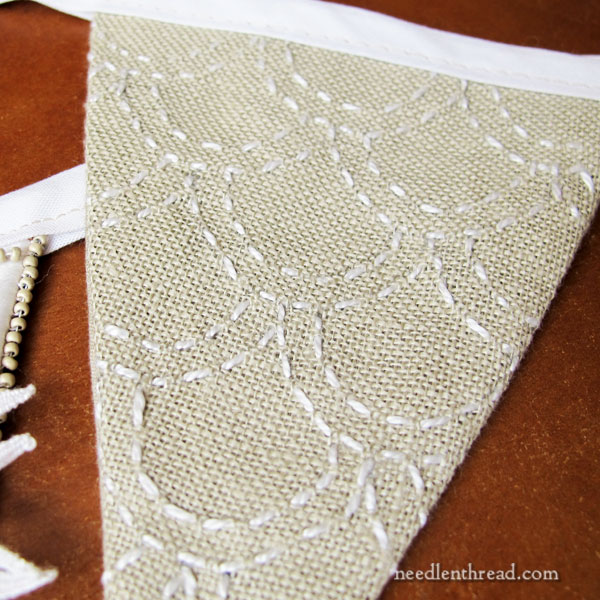
There’s some simple, clean Sashiko embroidery…
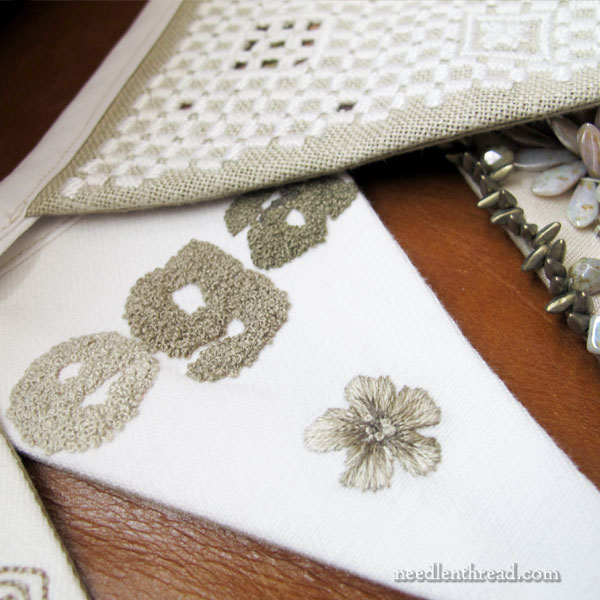
…and some clustered French knot work.
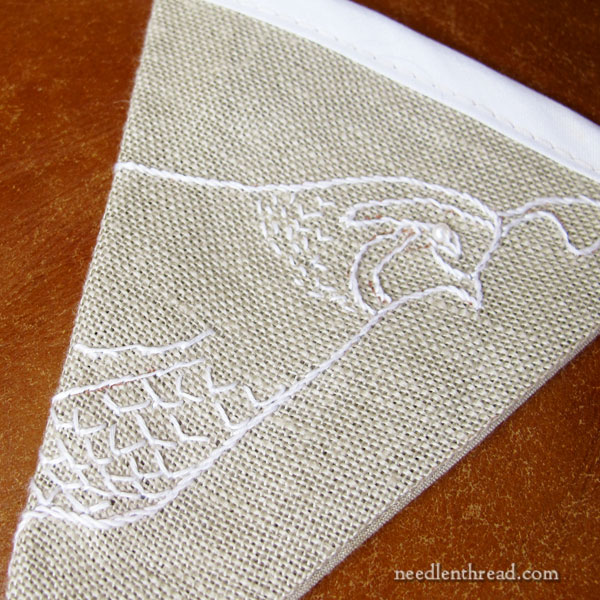
From the delicate quail in white surface stitches…
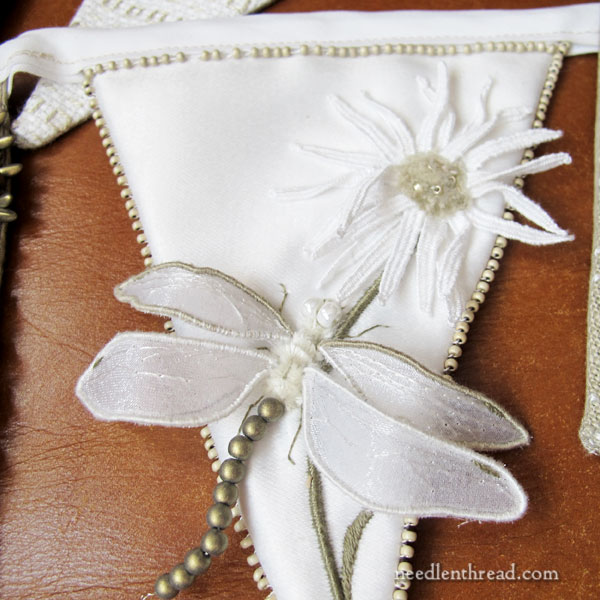
…to the exuberant dragonfly in stumpwork and beads…
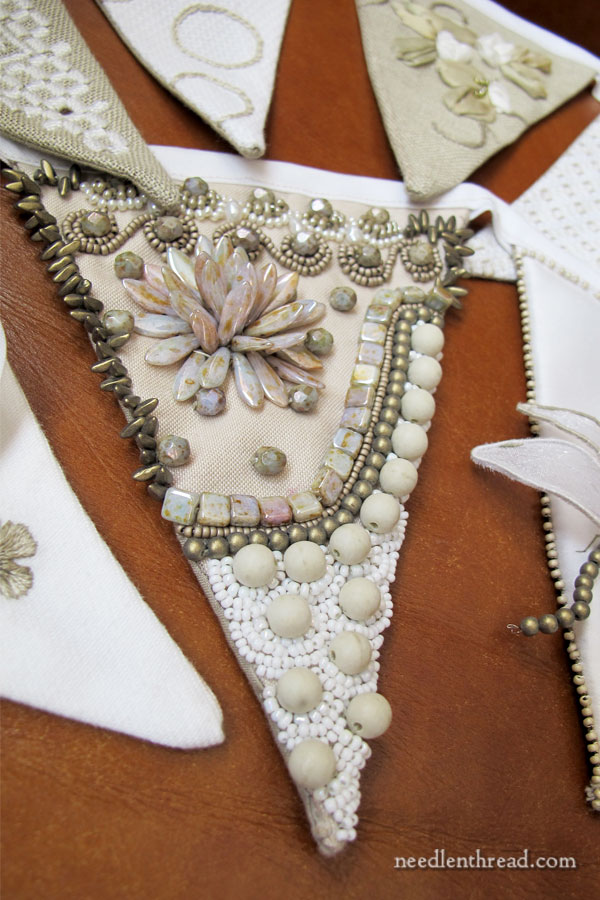
…to the heavily encrusted beadwork flag, Sheila’s sampler offers a huge variety of embroidery techniques to explore and a fun way to celebrate the art of hand embroidery!
Some of the other techniques decorating the flags on the bunting include pulled thread work, counted cross stitch, pattern darning, chain stitch circles – just a terrific exploration of embroidery techniques all around!
Don’t you think it’s an absolutely brilliant idea?
I think it’s time bump the whole bunting trend up a notch, don’t you? No more cut out paper or plain old fabric flags, no sirree, Bob! It’s time to embroider our buntings!
I’ll tell you this much: ever since I first smacked eyes on it, my mind has been whirring with the possibilities!
Thanks so much, Sheila!
Explore More
Why not enjoy a good browse and explore more embroidery projects from Needle ‘n Thread readers? It’s a great way to get inspired!


WOW! How beautiful
Beautiful idea and so easy to expand as you learn new techniques.
That’s just it – you could add to it indefinitely! The infinity bunting! 🙂
This is just fabulous! Sheila has done a wonderful job on such a creative way to practice your stitches. I am on a 5 month countdown to retirement and this idea is one that needs to be added to my list of “things I want to do when I retire”!
WOW what a beautiful way to showcase her work and she has done it without the huge expense of putting the various pieces in frames. I love her out of the box thinking. Way to go Sheila!
This is just brilliant with the plain colour scheme. Thank you so much for sharing!
Dear Mary
What a great idea and how clever, these buntings are absolutely beautiful and so inspiring all sorts of ideas spring to mind with these beautifully embroidered buntings. What a great way to create a samplar and try all different types of embroidery and a great way to decorate different spaces. Well done Sheila a beautiful idea. Thanks Mary for sharing these lovely and different forms of embroidery with us and for the lovely photos.
Regards Anita Simmance
Yay! Sheila is one of my BFF’s! I’m so excited that you shared some of her work on your blog. She’s incredibly talented, so very creative and just a really wonderful friend. And the really amazing thing is that she hasn’t been embroidering that long either!
I rarely, if ever, have commented on this site, but this is just so inspiring to me! A perfect way to present one’s skills. It makes me happy to think of someone displaying this for whatever event or just for fun, and even happier to think of the heirloom that someone will be handed one day- priceless. Well done!
What a wonderful idea!
Aw, Mary!
Your photographs are GORGEOUS! You know, it’s all thanks to you that this ever got made. It was SO MUCH fun to make. I went from knowing how to sew on a button in 2009 to this!
Thank you for *everything* I’ve learned from you. This was a fun way to try out some of your Stitch Fun lessons! (And your two online classes…) And some of the techniques from your Little Things e-book.
Thanks for the nice compliments, all! 🙂 A holiday banner would be really fun to make! A Halloween banner, or a Christmas one would be really cute…. Just saying…. ; )
In case anyone wants to try – the triangles are no bigger than 4 1/4″ wide by 5 1/2″ long. (8 1/2″ x 11 sheet of paper folded in half, and half again.)
Shelia, beautiful work! One question: are the dimensions you gave the finished size, or the cut size?
Hi PJ,
Thank you! The 4 1/4″ wide by 5 1/2″ long are the dimensions of the finished size. Leave a 3/8″ to a 1/2″ seam allowance around the edge when you cut the triangle out for finishing. Trim the seam allowance around the pointy edge to 1/8″ or 1/4″ before you turn the work right side out, and it will have a better chance of laying flat.
Shelia, thank you so much for the clarification of the cut size!
I love the simple color pallet. This would be a great idea for a swap too.
“Stunning” doesn’t being to describe this. WOW! Such beautiful work, and I love how she used bunting as her canvas for the stitch sampler. Thank you so much for sharing that Mary. Now I’m going to go look up pattern darning.
I love, love, love this! I wonder if something similar could be used as a window valance? Because I need another project…
Unique and beautiful.
Stunning!
Beautiful! What a great idea.
What a brilliant and unique way to show of ones talents and all the embroidery techniques.
Congratulations Sheila.
Ann B.
I LOVE this! Such a great idea and so beautifully worked. It’s practical too – so much easier to take individual triangles around to stitch than a huge great sampler.
I am as enamoured by this bunting as you are. I’ve been wanting to make a bunting for a while, but just haven’t gotten around to it. This is the perfect way to make one that you will never tire of.
WOW! Thank you for sharing this!
waouh ! I love this bunting, gorgeous
That is a fantastic piece of work. Congratulations.
Thank you Mary for the recognition of Sheila’s wonderful bunting project. SO! Proud to be her Mother!
This is a beautiful piece of art work, thanks for sharing.
It is brilliant and awesome and amazing!
What a great idea! I’m thinking a Christmas themed bunting would look nice hung from the mantel.
that is pretty darned amazing!
-Monika in Mobile
What an over-the-top combo of skill and imagination! Lovely…
I’ve seen this piece and it’s really cool. Pretty sure that is a California quail & not a partridge.
Of course you’re right! It’s a quail!
Magnificent! Oh this is just fabulous!
I can only hope to hone my skills to stitch anything close to this! I’m working on it but I’m so dyslexic. Do you have any articles on dyslexia get arounds? Are there others with this problem? I turn around my stitches constantly pulling them out, although sometimes they are a bit of a surprise in they look different and not what the stitch was suppose to be but acceptable but mostly I mutilate them so I do the stitch over and over and over until it sticks. Thank you for your videos, they are so helpful but I admit I do slow them down because it takes a lot longer for me to rearrange my mind to execute the stitch properly.
That’s a really cool idea ! I just love it .. imaginating immediatly the possibility of a Christmas one, before reading Sheila’s answer spotting this idea too … That’s just so clever to do to master a bit better some techniques you hardly use on any project. there you can go also endlessly 😉
Dare I declare that Sheila just might be a trend setter. What a beautiful idea – Thank you Mary, for showing us this splendid work – Sometimes, there really is something new under the sun!
Wow! THIS is absolutely the most beautiful and interesting bunting I have ever seen! This is definitely very inspiring. Thank you for sharing this!
What an incredibly clever idea! You could make as many as you want and just keep adding to the chain. I’m going to remember this one!
And you could do one for every single holiday, and not get bored embroidering the same thing over and over to complete one! That’s brilliant!
Sheila’s work is absolutely lovely! Edrie loves “seeing” this! 😉
Sheila- What a wonderful and fun idea!! Beautiful beautiful work! Thank you sooo much for sharing and sending out a noggin full of inspiration!
Lovely lovely bunting!!! Love this work of art.
Mary, I love the banner concept for learning stitching techniques and as Program Coordinator in my East Texas EGA Chapter, I would love to learn a bit more of the dimensions and planning for this project. Is there a way you could contact Sheila and let her know I would like to ask her some questions? Thanks for any help you can give me.
Carol Duvall Vice President of Programs
East Texas EGA Chapter
Tyler, Texas