


The last time we visited Late Harvest, an embroidery kit that I’m working on that was designed by Hazel Blompkamp and featured in her book, Crewel Intentions, we discussed different approaches to the long & short stitch when filling a leaf.
I’m still struggling with those differences. But I keep trying! You know how they say it’s hard to teach an old dog new tricks? Well, the same concept applies for stitchers.
Not that we’re dogs, mind you!
I did make some progress on the project last weekend – not a lot, but if you’ve been reading Needle ‘n Thread for a while, you know one of my recurring themes: some progress is always better than no progress!
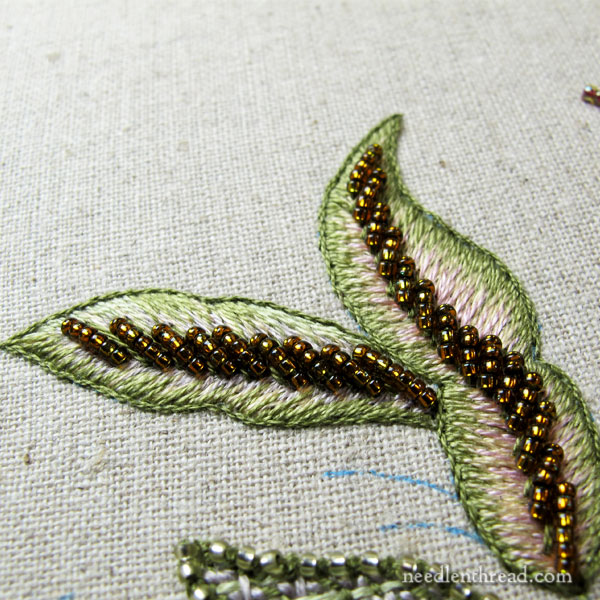
These are two leaves located at the top of the pomegranate in Late Harvest. They’re worked in long & short stitch, and they feature a thick spine worked with tiny beads and a very fine stem stitch outline.
You know, there’s a lot to be said for outlining a leaf like this with stem stitch! Outlines hide a multitude of sins.
The edges on the second leaf I worked, which is the one on the left in the photo above, were not as smooth as the edges on the first leaf (the one on the right). The other difference? The center colors of the one on the right are more pronounced.
The leaf on the right was worked from the outside outline of the leaf, inwards, with the beaded spine added after all the long and short stitch was finished. The leaf on the left was worked just the opposite: the beaded spine was worked first followed by the long and short stitch, from the center of the leaf (along the beaded spine) out to the edge. The last element on both leaves was the outline.
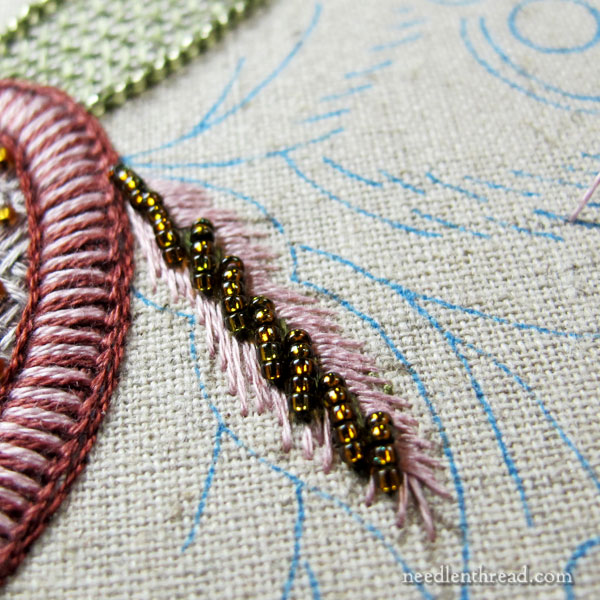
This weekend, I managed the third leaf in this trio. It pops out of the right side of the pomegranate, which you can see on the left in the photo above.
Determined to follow Hazel’s directions to the letter, I decided to work this leaf just as it was written (like I did with the second leaf in the first photo).
But golly! Keep in mind, I haven’t touched this project for a while – well over a month – and I found it really difficult to work backwards (from the inside to the outer edge, rather than from the outer edge to the inside). I almost quit and picked it all out at this point.
But then…. two things prevented me: my absolutely laziness when it comes to picking things out lately, and my curiosity. I wanted to know if I could pull off a decent looking leaf, even though I felt as if I were off to a really bad start with it.
This is The Thing about long and short stitch, though. It comes across, at first glance, as a very advanced technique, difficult to master. After all, you can achieve some pretty intricate shading and realistic stitching with long and short stitch!
But in fact, long and short stitch is a Super Forgiving technique. You can mess it up a little bit here and there, and still pull off a pretty good finish. You can hide errors in it fairly easily. If you’ve ever been intimidated by long and short stitch, don’t be! It’s your friend. If you haven’t done so yet, give it a try!
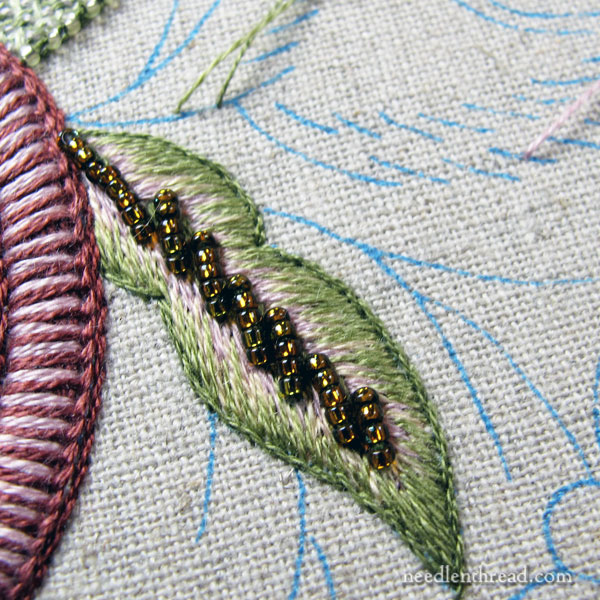
The leaf came out pretty well! In fact, I think it stitched up a lot faster in this inside-out method of working from the center to the outside edge than it would have, if I had worked from the outside in. I’m not sure why I think this. It just seemed to be finished before I realized it, and long before I got tired of stitching it.
I’m not exactly pleased as punch with my beady vein down the middle. It looks a bit haggard, but I didn’t do any poking and prodding before snapping photos. I suspect I can play with it a bit to neaten up the beads.
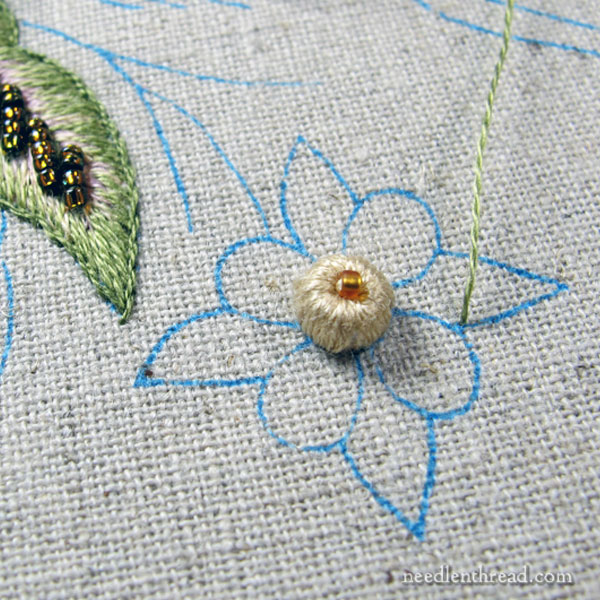
The next element to stitch in the piece is this little flower, and here again, I was surprised by the order of stitching! Normally, I’d add the center of the flower – which is a large bead wrapped with thread – last. But it was the first element to put in.
And you know, it was such fun to place and cover that bead. I like its chubbiness.
Unfortunately, that’s as far as I got in my last stitching session – one large leaf, and one bead flower center.
How much time did these two elements take? Two hours and twenty-five minutes! Remember: the Most Valuable Thing that you put into your needlework is your time. Hand embroidery is not a fast process!
I took out some of the stumpwork supplies for this kit and started fiddling with them. It would be totally out of the order of work to start any of the stumpwork elements now – they go onto the piece at the very end – but I just can’t help myself. I may have to jump out of sequence and play!
And that’s just it: I think we learn valuable lessons when we try different approaches to embroidery. There is never “Only One Way” with needlework. It’s nice to broaden the horizons. I think it gives a much more rounded approach to learning embroidery if you experiment with different approaches, with other people’s methods and order of work.
Heck, that’s half the fun of embroidery!
I’ll be putting in more quality time with Late Harvest over the next few weeks when I have the opportunity and wherewithal to make some progress. I’ll keep you posted on how it goes!
Hi Mary, If you are in the mood to work on the stump work, go for it even if it is “out of order.” I find it is best to work on what you are in the mood for especially since you might not be feeling 100%. You will do a good job on something you are mentally ready to tackle. You do not have to attach the stump work pieces until the end.
Thank you for writing your emails. I enjoy getting them and seeing what you are up to. I am going to take on my first crewel piece from the Shining Needle Society later this month so this piece or another of Hazel’s pieces is something to strive towards.
All the best!
Thanks for sharing that, Mary! Love the stitching and this looks like a fun kit for me to try. It has elements to it I’ve never done before, and that is always fun to stretch myself and learn new things.
L&S has become one of my favorite stitches. I actually find it easier to do than satin stitch. (I almost always mess up somewhere in satin stitch and have to go back. Grr…) And I first learned L&S inside-out, or “center-out,” as my great-aunt called it! I never knew there was a preferred method and have stitched L&S both ways for a long time.
Which means that I am either a brilliant rebel or blissfully ignorant. 😀
Mary, you have so many creative gifts. Thank you for starting my day with beauty, and great instructions. I so look forward to your blog. Best to you, Sue
Hi
It’s interesting to see two methods side by side. I have to say I prefer the leaf on the left in the top picture but it seems as though it would be difficult putting the beading in first.
What kind of threads are used in the project?
Speaking of technique, I’m using stem stitch to fill in an area in rows. When going from left to right I have the thread below and when going right to left I have the thread above. Is this the best way do you think?
Enjoy your blog. Thanks
Dear Mary
I know what you mean about trying different techniques when you are used to doing something a certain way, it’s difficult, but as you say it’s good to try to learn new ways. I think the leaves look lovely and can’t see anything wrong with them. The large bead wrapped in thread looks interesting I can’t wait to see the flower stitched and the stumpwork. Look forward to more progress on this project. Thanks for sharing your views on trying different techniques in needlework and for the progress on the Late Harvest Project.
Regards Anita Simmance
One of the things I love about long and short stitch is that if you make a mistake, you can stitch right over it and fix it. No need to rip out any stitching!
Glad to have the blog back on a regular basis. I hope you are feeling better!
Mary, I have tried different avenues of following patterns, but always find I learn something new each time. I am sure Hazel, knowing you, would not expect you to follow her designs to the letter but would want you to enjoy yourself.
I own both books and want to start working on a simple pattern first.
I learned crewel, stump work and dimensional embroidery from Crative Circle home patterns.
Sure is nice when I can pick up the iPad andthe best instructor ever is still in the room
Linda
I admit to being intimidated by the long & short stitch and now I have it on good authority (yours!) that it isn’t all that difficult. I will have to try it now.
Love watching your progress on Late Harvest. One way to straighten a line of wiggly beads: after stitching them all in place, run a single thread all the way through the line of beads and pull it taut. Will help those little devils to line up the way they are supposed to. Another way to make them go where you want – especially if it’s a long line – is to couch them down about every third bead. Have done both. Have also ripped them out and started all over again. (Grin)
Thanks Mary, I have to admit I never would have thought about doing long and short stitch in reverse, but I’m intrigued now and might have to try it out! It’s so good to see the stitching of the two methods side by side and to know I’m not the only one who manipulates the shading instead of starting again!
Dear Mary. Embroidery demands attention and time in order to achieve desired results. Patience is needed also. I stumble across these needs every time I try to prepare projects. My mind wanders “how does Mary do all this preparation”? Hole punching, tracing, linen prep, blocking. Oh my, I forgot about blocking. Then I starting thinking, what does Mary do with her finished projects. This year I will embroider along with Stitch Play and start and finish Lattice Jumble. Thank you Mary for your inspiration. I look for your blog daily and miss it when a blog is not written. It motivates me, inspires me. Thanks again. Judy
Hi Mary,
I am amazed that in your third leaf, you haven’t put in nearly as many long and short stitches around the beads as I would have thought you would need. Doing it this way, makes it very easy to follow how and what you’ve done. Also Mary, what thread are you using?
I will follow your project with interest as always, but don’t push yourself. 🙂
Trish
Hi, Trish – it’s all regular stranded cotton floss – DMC or anchor. There’s a conversion chart in the kit, so you can use either. I think I’m going to use magnification for the next section, to see if there’s a difference in my long and short stitching. :-\
Hi Mary,
I found this very interesting! I recently struggled with a long and short stitch flower which I showed on my blog. I wasn’t really happy with the finish but it was my first attempt at long and short stitch!
Thank you for showing us this new method! I must try this and see if my stitching will be improved using it! Looking forward to trying it out!
Barbara xx
I just finished my first Trish Burr design. (It was the free Blue Tit and Pansies.) Whatever anxiety about the L&S stitch I had at the start was long gone by the end of the project. If you haven’t tried a Trish Burr design (I know Mary has.), then give one a try. Your technique will definitely improve.
Hi Mary and Happy New Year. Love your blog!
I’ve just finished Late Harvest, which is pretty exciting as it’s always so great to get a complex piece finally finished. Haven’t had it framed yet but my framer tells me she will be able to source some kind of breakfast tray similar to Hazel’s finished one – makes a change from yet another framed piece for the wall! I did a 4 day workshop on Late Harvest, with Hazel at Koala Conventions last July. Her workshops are always a LOT of fun!! The original piece is stunning and I am very happy with how my own has turned out. Hazel suggests doing the leaves with the insides stitched first and then putting the wire around the edges later – I did one that way then went back to the more conventional way (ie wire on first), which suited me better. Hazel is very much one for doing “what works best for you”. I hope you are enjoying working your piece as much as I did – aren’t the colours and beads amazing. I’ve put some pics of my finished piece on my Pinterest page if you’re interested. http://bit.ly/1ZOudQx
Cheers from down under!
Absolutely Gorgeous, Michelle!
well, i bought the book and actaully broke down and bought the slate frame you recomended as well….i may just have to go astep further and get the kit! With all your insturction and the ones with the kit…i am sure that it will be much more of a success than if i were doing it on my own from the book…it’s really sucha beautiful piece!!
Glad to hear your voice!
As others have said; it is so interesting to see your work and have you explain it. Thanks so much for all that you do for us – I have both books and will definitely tackle one of the projects when our weather cools down (38C is not the weather to tackle threads and needles) Stay Strong 🙂
Hi Mary,
Thanks for sharing your thinking and pictures of your work on the Late Harvest project. The project itself is light-years ahead of my current embroidery skills, but your grappling with challenges always encourages me. Importantly, too, learning more each time about how you think about embroidery, types of stitches, threads, etc., etc., gives me more context for my very simple projects and encourages me to use a touch here and there of a more complicated stitch.
I always look forward to hearing from you and deeply appreciate your willingness to honestly share your challenges. I also greatly enjoy your sense of humor and your sense of adventure!
You are in my thoughts and prayers…. I really mean that; it’s not just an empty phrase.
Liz
Northwest Illinois
Hi Mary, Thanks for this today, I have been procrastinating doing the long and short stitch for quite awhile and been afraid to try it. I think after reading about your experience I may have a little more courage to try it. Thanks
This project is breathtaking. Thank you for showing us the progress you’ve made and sharing your thoughts. I love Hazel’s designs! I don’t feel ambitious enough or confident enough to try something like Late Harvest. At least not yet. But I did go to Hazel’s website and purchased one of her pattern downloads for a small project. It will be a great way to ‘get my feet wet’ so to speak before tackling something bigger – like Bountiful Season, or Jacobean Trellis!
Hi Mary,
On what kind of fabric are you doing the stumpwork?
Not clear in pix.
Thanks as usual for the interesting report!
Anne