There are times when I think I really should rouse myself from my photo-taking lethargy and aspire to be of those Really Awesome Bloggers who knows how to stage every photo perfectly, with the embroidery perfectly situated in a perfect setting, perfectly finished and perfectly perfect.
Instead, I usually grab my needlework finishes in pictures at about the moment of finishing. It’s the excitement, the relief of reaching the end of a project, I suppose.
With the Hungarian Redwork Runner, I had dreams of setting a beautiful table, replete with flower arrangements, candles, good dishes, and – down the middle in all its redwork glory – the Hungarian Redwork Runner, starched and pressed and pristine.
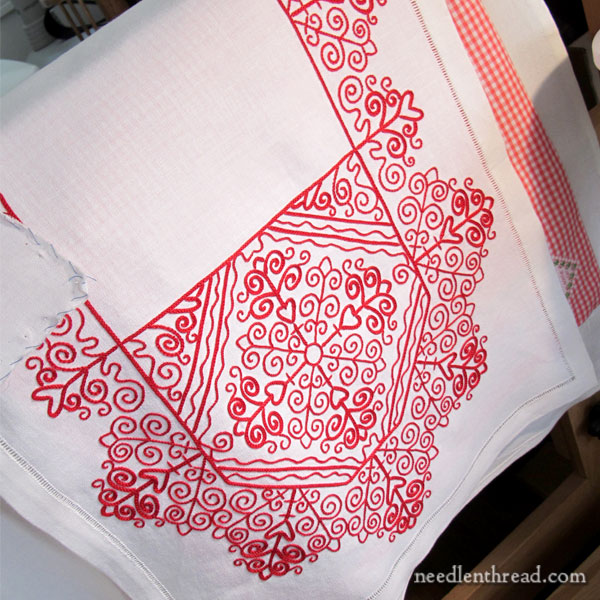
Instead, I draped the piece over my trestles with a bunch of other projects and snapped some shots. Then I flung it on a piece of furniture and snapped some shots.
And that’s what you get today!

I started this particular piece back in the fall of 2012. I called it the Hungarian Redwork Runner, although it isn’t properly Hungarian redwork. The design is Hungarian in origin and the Hungarian braided chain stitch is heavily featured in it.
From the beginning, it was a grab-and-go project, the kind of needlework project I could take with me if I were going anywhere, and that I could grab and add a few stitches to here and there, whenever time allowed or the inclination struck.
The project began with this embroidery pattern, which I altered into this embroidery pattern, which I further altered into this embroidery pattern, which is the one I used.
You can find all the details about the supplies and stitches used in the Hungarian Redwork Runner Project Index.
It’s really a pretty “basic” project as far as stitches are concerned – there are only two in the embroidery part of the project – and there are only two types of thread used.
The whole thing was worked in hand, without a hoop or frame, which made it easier for transporting about hither and yon.

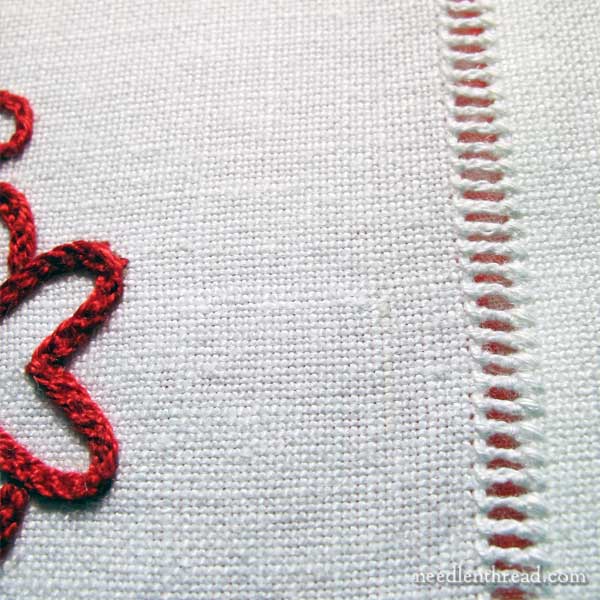
The runner is finished with a regular hemstitched hem worked on an area of five threads withdrawn from the fabric and hemstitched on both sides of the withdrawn threads. There’s only an inch wide hem around the whole piece.

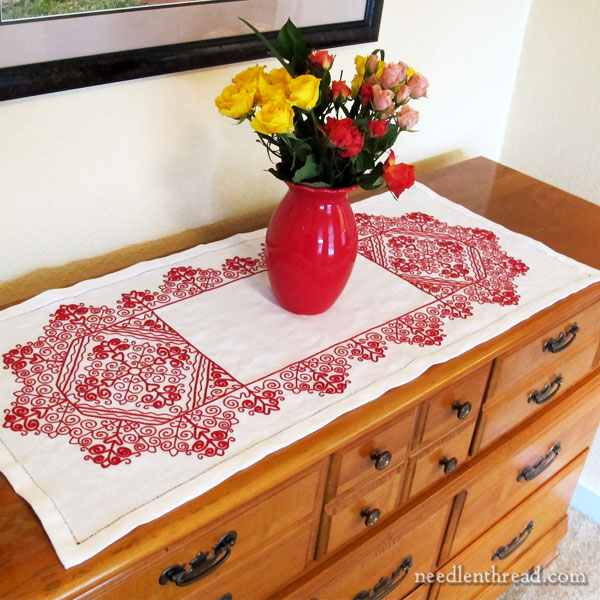
Here it is, laid out on a chest of drawers so you can at least see it all in one shot (more or less).
Before it’s used, it’ll benefit from a good pressing to eliminate the ripples and wrinkles from holding it while stitching the hem.
It will not benefit from further association with that cheesy red vase…(sorry, Mom!)
Some time, in the future, when the occasion demands, it’ll end up on a decked-out table, and I will take some pretty pictures of it. Christmas sounds pretty good!
In the meantime, though, you know it’s finished. The shirking is over. The deed is done.
A special thanks – very much! – to Mike Parr, who provided the original designs from Lilly’s Legacy, which you can read all about here. You can find the rest of the Hungarian designs in this series available here.
Like what you see?
If you enjoyed this article and you’re looking for more inspiration, information, and instruction on hand embroidery, why not sign up for my daily newsletter?
There are all kinds of reasons to have Needle ’n Thread delivered to your inbox – check them out and sign up today!


Dear Mary
Hooray at last it’s finished I bet you are delighted I was wondering a while ago whether you had finished the Hungarian Redwork table cloth it looks lovely on your chest of draws and it is perfectly finished and perfectly, perfectly beautiful. I can’t wait to see the photos of your Christmas table setting with the Redrunner adorned with Christmas table decorations. Thanks for sharing the photos of the completed Redwork runner now you can tick this of your list of projects completed great news.
Regards Anita Simmance
Extraordinary! Very inspiring! Truly beautiful.
Oh wow, it’s glorious!
Congratulations – this is wonderful!
Congratulations! However, I can see the de-frosting of the fridge comming up next :).
Not a chance!
Mary, it is beautiful whether your photos are staged or not! Red being your favorite color, I hope that you don’t wait until Christmas to use it. Glad that this particular monkey is off your back. Even when we love what our projects, they sometimes seem to hang over our heads and become a stress. The delight and relief of a finish make us want to shout that “It’s done!” No wonder you want to post your photos immediately.
It’s pretty, Mary, but it appears that part of it has been hacked with scissors. Is that just an optical illusion?
That’s another project lying over the edge of the runner, both of which are hanging on my trestles. If you scroll down in the post, you’ll see the whole runner, laid out. Sorry! :-/
SO worth the wait!! Gorgeous, beautiful, oooh and aaah!! This one is absolutely destined to become a family heirloom! I hope you are very proud of this runner; you did a beautiful job.
Dear Mary:
First of all, I think your photos are as close to perfect as they could possibly be. Again, don’t beat yourself up! The reason I look forward to seeing your posts every day is the beauty and dedication you give to your art. I have looked at many embroidery sites and yours is by far the best. My ‘go to’ website for all things hand embroidery wise. The Redwork Runner is a project I have followed and wondered many times how on earth you managed to finish it with all the other projects you do, as well as the technical side and blog. I am working on the Lattice Jumble Sampler and the new alphabet letters for future gifts. Thank you Mary for being the best.
Oh, that DID turn out lovely! Thank you for sharing that. Job well done, Mary!
Mary,
I am delighted to see this beautiful project completed! It is by far, my favorite project you have shared. Thank you for persevering… It is a beautiful piece that will be treasured for years to come!
Warm regards,
Ruth L
Congratulations, Mary! Wonderful accomplishment! Thank you for sharing your incredible journey with this piece. Good to see what a tremendous amount of work can be accomplished, even if you just put in small chunks of stitching over a long period of time.
Congratulations again!
And doesn’t it look grand! The hem looks perfect, and the whole piece will be a beautiful thing to have on a table at Christmas. (And not just at Christmas.)
If you are not a Really Awesome Blogger, then no one is. You’re the best!
Congratulations on finishing this beautiful project. That Hungarian braided stitch of yours is gorgeous.
Mary, that is lovely, and will look fabulous decked out on special occasions. It will make a super heirloom for someone in the family!
WooHoo WooHoo. It is so nice to have a project entirely finished! Congrats on another job well done. It is beautiful. Now if I could only get some of my projects finished I would be shouting from the rooftop, well maybe just the back yard 🙂
Dara in WV
It’s so beautiful!!! One of my favorite projects on this site! Congratulations!
Gorgeous! It’s very lovely 🙂
Congratulations on a lovely finish!
I have been looking forward to seeing this finished! Well done, it’s absolutely beautiful.
The runner turned out beautifully! Congrats on finally finishing! Thanks for sharing with us.
It is lovely, so detailed and pretty. x
Congratulations Mary!! Well done. You could use the centre to display a collection of stitching items, which would be a ploy to set people to think about how you’ve met the challenge of conceiving, developing, working and finishing this particular embroidery. Quite an achievement!!
It looks lovely (but then all your projects do, so it’s no surprise).
Congratulations on finishing it and don’t worry about not being a dedicated fancy photographer. We can’t all be everything and you do just fine.
I’m like you when it comes to the photo taking, but it looks gorgeous! Great work.
Whoo hoo hoo! It’s stunning!
Absolutely stunning!
Congratulations! It is truly beautiful. And it took you less than three years, too!
Mary your redwork runner is stunning. Love the hemstitching too.
WOW how beautiful is the redwork runner,,,Congratulations on the finished project,,, and I like the red cheesy vase on it,,,,
Your runner is beautiful as always. The one thing I would change is the color of the vase. I think a yellow , black , or blue would set off your red work better. I always love to see you embroidery. I also appreciate your post that teach us so much. You give of your time and talent and teach us without charging us. I do donate once in a while when I can. I just want to thank you.
Karol Beaufore
Mary, I LOVE it! It will look stunning at Christmas!
Jesteś niesamowita, to jest coś wspaniałego!!!
Pozdrawiam
Lorena
The runner is beautiful. Thanks for sharing it with us.
oh, what good news!
and yes, the excitement and sudden rush of happiness reign over my attitude towards pictures as well. who cares if we don’t stage practically perfect shots (I usually have MY BED as location for showcasing, imagine that!), what matters is that the light is decent, the focus is good, the colours turn out about right, and most importantly THE PROJECT IS DONE! 😀
for the love of precision: I use my bed because it’s right next to the windows with the best light, on a fair day, from morning till sunset – no intention to overshare my sleeping locus. 😉
and in the rush I pressed “comment” too soon: I meant to add that the runner is looking so so so pretty! you did a great job, what a wonderful piece to have out during summer and Christmastime! congratulazioni!
Mary,
Break out the champagne and celebrate or if you want to do it in the hungarian style go with a fine Tokay wine. In any case it is a tremendous achievement and I am most proud to have had a small part in making it happen.
Regards from us both
🙂 Tokay, Mike – I think that’s a great idea!
Mary,
It’s beautiful!!!! Congratulations on finishing a perfectly gorgeous piece. I am in awe.
This looks fabulous Mary! How nice to see your runner completed. I think it will be a beautiful table centrepiece when you entertain guests. 🙂
Thanks, Kathryn!
Hi Mary,
I was wondering how did you decide on the size? I’m planning on making a runner for a friend of mines dining room table and I was curious about how to determine a good proportion.
Hi, Erin – for this project, I just went with the design size, and added an inch all around for the finished size (plus three inches all around for the finish work – hemming and whatnot). If you have a table in mind, you could always measure out a piece of butcher paper or something to find the proportions you want for that particular table, I guess, or just estimate what you think would look good on that table. Three times the width usually works out to a pretty good length with a runner, so that might be somewhere to start.