Couching goldwork threads can feel a bit therapeutic. It’s a slow process – not a technique that you rush – but it’s very repetitive. And it’s not difficult!
The only time it gets a bit hairy is when you suddenly realize things aren’t fitting together quite as well as you hoped. I had a little panic moment when couching the gold threads around the inner frame of the Mission Rose.

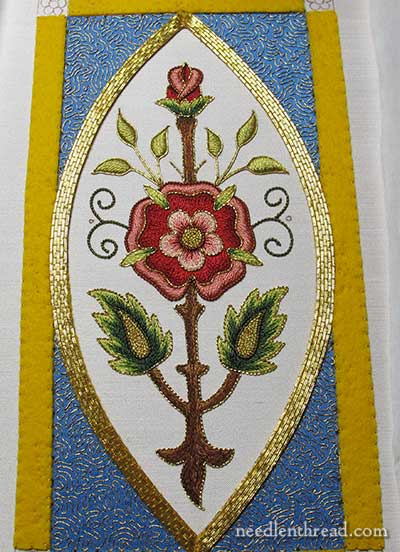
Here’s both sides of the inner frame, covered with gold passing thread.

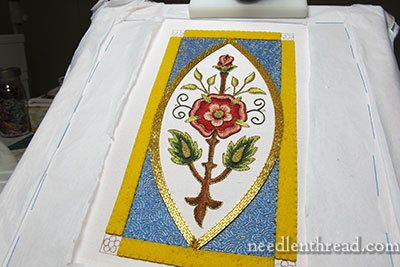
And, stepping back a little bit from it, here it is again.
The very tips of the “marquis” shape around the rose join together in a definite line – almost a deep cut – where the goldwork threads come together. That’s part of the plan.
I wanted a noticeable “cut” where the tips meet, because I want the inner frame to appear beveled, as if it bows outwards and upwards from the two tips. Once the outer and inner edge treatments are on, I’m hoping a slightly beveled look is the result – we shall see!

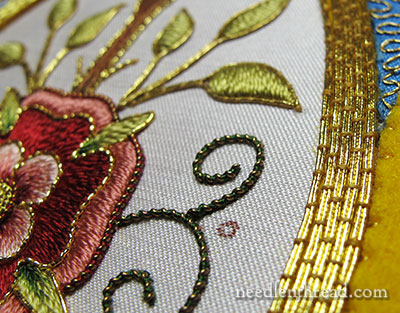
There are exactly five couched pairs of gold passing thread around the whole frame. They’re couched in a bricking pattern, with the stitches alternating placement from row to row.
For the most part, the gold fit over the felt outline perfectly….

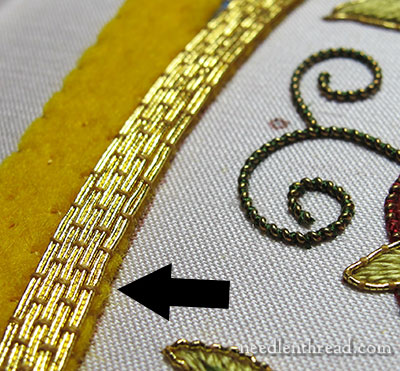
…although there were a couple places where the felt is not absolutely covered, and a few places where I felt as if I were squeezing the goldwork onto the felt.
This whole situation made me pause. It almost made me remove several lines of the gold and re-do them. I had to step back from the project for a day and think about that.
But, in the end, I left it.
That little rim of visible felt there? It will be covered once the inside treatment of the frame is couched in place. For that, I’m going to use a very heavy pearl purl, to create a gold bead-like edge just along the inside of the frame.
Can’t wait to do it! And can’t wait to show you the results! Couching by itself is pretty enough, but a cleanly finished edge treatment always makes it look so much better!
You can follow the progress on the Mission Rose project from start to finish by visiting the Mission Rose Project Index.


It’s funny, but that last stitch of an edge treatment can make all the difference. I was struggling with a monogram I was working and considering ripping out the whole thing, but when the edges were finally done, it just sort of ‘popped’ into focus.
Thanks for this WIP peek…it’s looking better and better each time now. You had me going there for while, thinking – ‘What on Earth???!!! – but now, my faith in the clarity of your vision has been restored. I’m really looking forward to the finish on this one.
Just beautiful Mary,your work is such an inspiration!
Very beautiful! Wish I could take a class from you. Ever thought of teaching on Craftsy? I would sign up in a heartbeat!
Dear Mary,
It’s lovely absolutely beautiful and I can’t wait to see it finished. I’m curious to see how you’ll do the little flowers at the corners of the frame as I don’t think they look to well with the rest of it. But I thought that before about the leaves and now I think they’re adorable. Keep up the good work Mary!
I thought the gold was gorgeous just as it was. But from a distance I couldn’t see that bit of felt peeking out. I suppose the extra gold (purl) will make a difference. I’m just so happy with what you’ve done already.
I’m also wondering how difficult it will be to stitch those tiny corner flowers with the felt in place. I like to stitch on an open smooth surface which is why I leave beads and metallics till last. And I want to see what goes on those little marked dots just at the intersection of the green/gold tendrils. So many mysteries here.
The corners are not actually going to be embroidered….must wait to see!
Looks wonderful!
The gold frame is stunning!!! I love the whole project and that you are sharing the step by step with us.
Dear Mary
The Mission Rose is looking lovely. I shouldn’t worry about the felt showing if it’s going to be covered you won’t notice it. I can’t wait to see what you will do with the square corners if they are not going to be embroidered. I love the way you brick couch the gold I always mess that bit up but on a big project like this I’m sure it’s easier to space the couching stitches. I can’t wait to see further progress on this, thanks for sharing this with us.
Regards Anita Simmance
I love the effect of the gold brick couching. Beautiful, Mary!
Mary I am so loving the progress reports on this fabulous project. It’s a sight to see.
Absolutely stunning!
This is looking beautiful, Mary. I love the gold frame, now that it is in place the blue silk looks even better. I only have a little goldwork experience so I have really enjoyed watching your progress with this design. I particularly appreciate it when you share the unexpected challenges and show us how you have overcome them. I look forward to the next instalment. 🙂
I gasped in horror when I noticed on the tiny dot on the 4th picture! Until I saw the same dot in the picture above it.
This piece almost makes me cry, it’s so gorgeous.
Hi Mary,
Your project is turning out so very nice! I’m now rethinking a set of advent paraments that I hope to be starting for my church. With some slight modification, your Mission Rose might work well as a Jesse Tree design that I’ve been kicking around. The Rose colors are perfect for advent against a blue background color (my church uses blue for the season of advent).
Thanks for always doing such detailed posts and for inspiring us!
Wow, Mary, this is looking spectacular. I love the way the couched gold frame brings out the vermicelli in the blue next to it. What a gorgeous piece this is going to be (it is already!)
Your work is visible PERFECTION!
I think this is absolutely beautiful.
Mary, you are such a gifted needle artist and instructor. I admire your work and wanted to let you know that you have inspired me to take up handwork once again. I’ve revisited books and tutorials (especially yours, which are the best I’ve ever seen)and feel I can do almost anything if I persevere. Thank you, and I’m also sure my grandmother in heaven thanks you!! She is the initial inspiration in my life and the person who started me on my handwork journey many years ago.
Hello again Mary: You just made my day, especially as it is Monday! After some medical testing this morning and a long drive home, I made a cup of tea and logged on to your blog immediately. This did more to lift my spirits than anything else could have. I am following Mission Rose like a good book or a soap opera, can’t wait for the next chapter! The goldwork couching is absolutely stunning and makes a huge difference to the project. Thank you Mary for all your hard work.
Susan
Dear Mary, I’ve become a firm believer over the years that embroidery zings with each additional border. Couching around the bricked gold work will do just that.
Stunning.
Breathtaking and exquisite.
Mary, congratulations on being the Craftsy Winner for Embroidery Best Tutorial. You need to go here to grab the code to put the badge for your site.
http://www.craftsy.com/blog/2013/10/winners-craftsy-blogger-awards/#nice-identifier
Hi Mary, I have to tell you I am not a big fan of Gold, but this is really beautiful. I have enjoyed watching the progress of this piece. Can’t wait to see it finished.