Satin stitch is one of my favorite stitches. Silk is one of my favorite embroidery fibers. Add the two together, and I’m in embroidery heaven. (I’m sure there is such a place…)

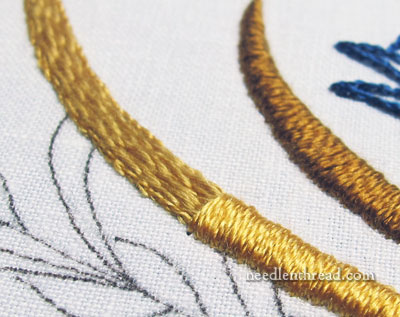
In most circumstances, I pad my satin stitches. This can be done a number of ways. In the type of embroidery I’m doing on this particular project, I use thread to pad the stitches. First, using split stitch, I outline the element that is going to be satin stitched. Then, inside the split stitch outline, I work long split stitches to fill up the whole area.

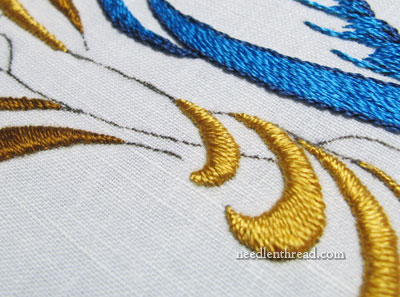
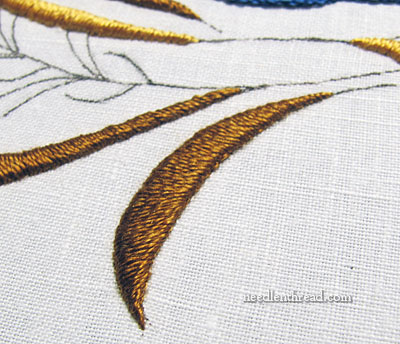
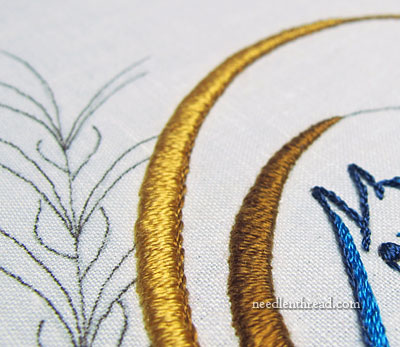
Then, once the shape is filled, I work satin stitch over the padding, on the outside of the split stitch outline. This lifts the satin stitching, creating a kind of relief area that adds a bit of shadow to the element or the fabric, depending on the location of the light source.

One disadvantage of padding satin stitches like this is that it takes up quite a bit of thread. After all, you’re essentially working two solid layers of stitching.

With silk, this can be especially problematic because silk is expensive. The solution? Match, as closely as possible, a soft cotton thread (like floche or cotton a broder – or even regular floss, though I think the softer twisted threads work better) with the color of your silk. Do the padding with the cotton, and the satin stitching with the silk.
If you can’t find a perfect match in cotton with your silk, that’s ok! Find as close a match as you can. It’s always preferable to go slightly lighter than the color of your silk, than darker, but just get as close as you can.
And that’s how you can save some silk when working padded satin stitch!


Another sneaky preview of the bird embroidery 😀 Looking fabulous.
It’s a great tip as well – I just wish I was brave enough to play with proper silk!
B.
Hi Mary, thank you for the tutuorial on padded satin stitch. If only mine could look like your’s. Your work is beautiful. Sometimes I enjoy just looking and not doing. 🙂
Great tip!! Thank you, Mary.
Would you also work the split stitch outline in the floche or cotton a broder? I’d think yes, because it’ll be covered by the silk satin stitches, but thought I’d check.
Actually, I worked it in the silk, because it keeps the outline very tiny and compact, assuring the size of the design element doesn’t change much. With a thicker outline, if you stitch it right on the design line, the element would end up a bit larger. So, the silk works fine for the split stitch outline and keeps the outline nice and tiny. – MC
Hi Mary, I have just finished the padding layer on something I am stitching. In my case I am stitching a white motif on a black background and I don’t want the black to show through but I don’t want to raise the stitching too much. I have done a laid layer of flat white silk. I think that it will work the way I want it too but I found it much more difficult to keep the silk smooth laying it that when I do satin stitch!
Your project is looking lovely. I hope that we are going to get to see it soon 🙂
Hi Mary,
Why do you use split stitch as padding? It makes sense on the edge of the padding where a consistent line is necessary but is that so important in the interior of the padding? How would straight stitch, stem stitch or even a wide chain or herringbone stitch change the final look of the satin stitch?
Inquiring minds,
Alex
Long split stitches or just straight stitches are quick to work and fill up the area quickly. Herringbone stitch would not give a very thorough covering, and stem stitch has a bit of a bump to it, and would take much longer to work in compact rows to provide the coverage.
I like splitting the long stitches where they will overlap with each other, because it keeps the surface area smoother, since the split stitch “pulls up” into the previous stitch.
You don’t have to be super accurate about this filling – you just want a filled area with a relatively smooth surface.
MC
Perfect satin stitch Mary you are a master!
love Trish
You mention saving by padding silk with cotton floche or coton a broder. Those are not easily accessible for most of us. You must have a remarkable needlework shop near you. It isn’t economical to mail-order those things either because of S&H costs. The DMC floss might be the only option. However, if you’ve ever studied traditional Japanese embroidery you’d notice that the Japanese always use WHITE cotton for padding every color. They always seem to do things the most difficult way possible! When asked why, my teacher Mary-Dick Digges said they responded, “1600 years tradition teach us….!!!” That, MDD said, is Japanese for “because I said so”!!!
Hedgehog Handworks sells DMC Floche (888-670-6040). I can’t remember how much the large hank costs, but I don’t think it’s that expense. Hope it helps.
Hi Mary, Lovely stitching as usual. My question is do you split stitch exactly on the outline or just inside it then do the satin stitch on the outline?
Do you put your needle in just under the split stitch at an angle or strictly vertical ?
Thanks ji
Yes, I’m sure there is an embroidery heaven! I, too, almost always use DMC floss as the padding instead of silk. I just hate to use the silk underneath the satin stitch where it doesn’t show. Now if I could just get my satin stitch to look as good as yours!
Great comment from Cecelia about the white padding for Japanese embroidery!
beautiful gold stitches and just a sneak peak for us…..
Hi Mary – what is the material you are stitching on with this project? I have found a perfect design that begs for this stitch and want to work it up as a surprise birthday present for my duck hunting sweetie.
Thanks!
Doreen from Maine
Hi, Doreen – it’s linen. Specifically, it’s ecclesiastical linen by Legacy. You can find it at Hedgehog Handworks, if you’re looking for it. – MC
Thanks for that tip Mary. I’ve done goldwork and used the felt padding and the cord for padding. Would you ever use either of these for something like this rather than the split stitch filler?
Always look forward to your tips and projects!
Hi, Liz – yes, for certain types of satin stitch – trailing, for example – string padding works great. It gives a much higher lift to the satin stitching. – MC
There *is* a technique to save thread when doing satin stitch – I’ve not done much padded stitching, or stitching with silk (I’ve only ever bought three skeins of silk thread), but I like to try different stitches with my regular DMC- & when I was younger, embroidery was an expensive hobby.
But I digress; it’s a bit like combining running stitch, with long-&-short- except the ‘short’ stitch is to the back of the piece — you have to remember to leave the little space, or the previous stitch will pop out- & then, when you get to the end- you go back the same way, to cover the little spaces you left with the first part & give it a bit more ‘body’. Hope that helps!
Yes, this is surface satin stitch, and it’s used especially for laid work. It’s not usually used on small spaces and elements filled with satin stitch, because it can affect the way the thread lies on the front of the fabric. Most satin stitched elements are not going to be “large” – they’re normally relatively small. For example, a span of an inch would normally be too large for regular satin stitch. Covering large spans of space with long satin stitches can cause problems in the future of the embroidery, because the thread over time relaxes and long stitches are prone to shift. So normally, regular satin stitch is used just over smaller spans, to fill small elements or narrow lengths. For larger spans, surface satin stitch works well, as long as there are holding stitches of some sort (usually via laid work – couched threads over the satin stitched ground) to keep the threads from shifting.