I don’t know why I did it. Perhaps it’s because I couldn’t get over the orange kick, after playing with orange Trebizond silk and plaited braid stitch. (Remember that? I’m not really an orange person!)
More likely, though, it’s because everywhere I look right now, someone is proffering the latest Pumpkin-Something, and I am beginning to feel Oddly Short of Mainstream. To solve the problem, yesterday I took five minutes out of my already off-course day and fiddled with orange thread to create a pumpkin.
If you want to add a of Petite Pinch of Popular Pumpkin to your embroidery, here’s an easy and quick way to do that!
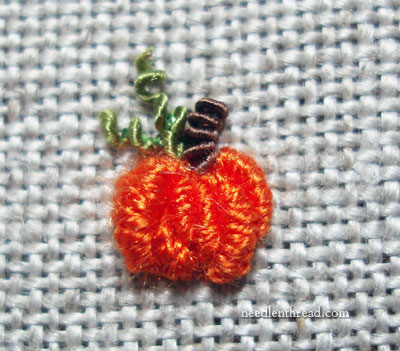
This is the pumpkin. It is made from bullion knots, with tiny bits of silk wrapped purl for the stem and curly vines. Please note that it is not a Perfectly Symmetrical Pumpkin. It isn’t supposed to be! And this makes creating these little guys that much easier.
I used 3 strands of Soie d’Alger silk, color #633. You can really use any kind of embroidery thread for this – if you have some orange DMC stranded cotton on hand, use that! If you have perle cotton, floche – whatever! – use it. Heavier threads work well for the more Ponderous Pumpkin; a few strands of finer threads work well for the Petite Pumpkin.
You can substitute brown and green floss for the stem and vines, too.
Concerning needles, a milliner needle (also called a “straw” needle) makes bullions a breeze. If you don’t have a milliner needle, that’s ok – you can still make bullion knots with a regular embroidery needle. The difference is that the milliner needle has a long shaft the same thickness as the eye, so it’s easy to pull the needle through the wraps of thread. If you plan to use bullion knots regularly in your embroidery, it would be helpful to invest in a package of milliner needles in various sizes.
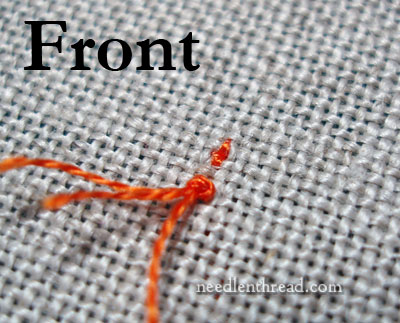
Start with a knot in the end of your thread, and go down into your fabric, leaving the knot on top. Make three tiny stab stitches in the area of your pumpkin’s body, so that the pumpkin, once stitched, will cover the stab stitches.
This is one of the easiest ways to start an embroidery thread. If you’re unsure of how to start a thread this way (or you want to try the same concept with line stitches), you can check out this tutorial on using a waste knot and anchor stitches on a line of embroidery.
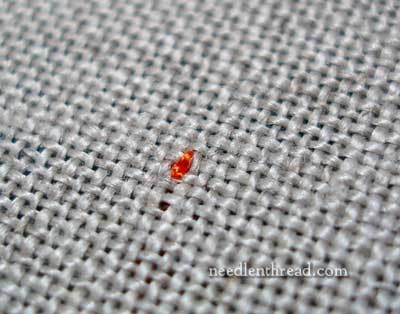
After you made your little stab stitches, cut away the knot from the front of the fabric. Now, you’re ready to start.
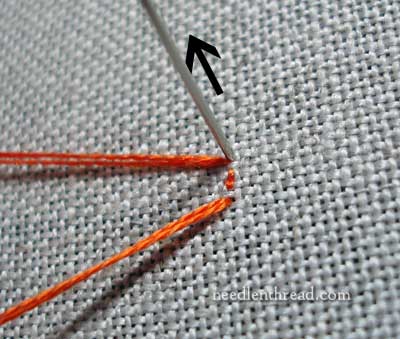
Make a bullion knot right over the anchor stitches. If you’re not sure how to make a bullion knot, you can check out my how-to video for bullions. I updated it this past summer, so it’s a lot clearer than the old one.
This first bullion knot will be the center of your pumpkin.
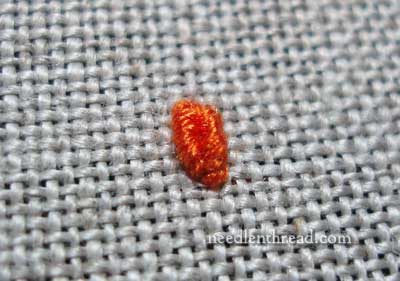
Now, move off to the side of the first bullion (doesn’t matter which side), and make another bullion. With subsequent bullions after the first one, start and end the bullion right next to where the first bullion began and ended (even in the same hole, if you want to, for the second and third bullions), and add a few more wraps on your needle, so that the subsequent bullion knots “hug” the center bullions.
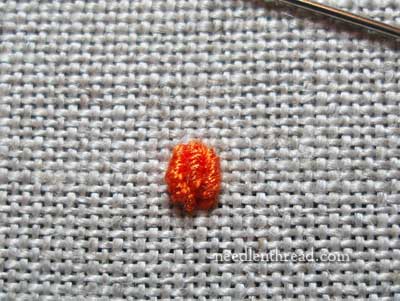
You can see here how the second and third bullions (one to the right and one to the left of the first center bullion) start and end in the same area as the first bullion, and how they hug around it. That’s what you want to happen.
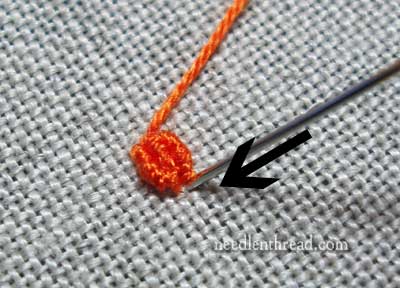
Now I’m going to build the pumpkin out a little farther, by working to the right, but notice that my stitch is beginning and ending right above and below that bullion stitch to the right of center.
For this fourth bullion, I’ll add even more wraps – maybe two or three more – than I used on the second and third stitch, so that this stitch hugs all the way around the stitch next to it.
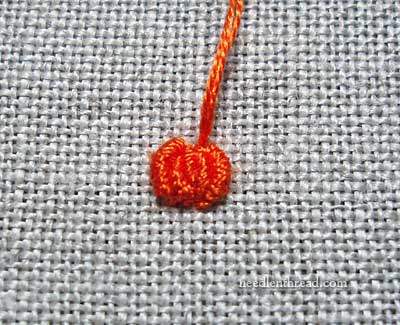
You can see that I have a little overlap going on in some of the center bullions, and that is fine. You don’t want the pumpkin to be perfectly, absolutely symmetrical. Show me a pumpkin that is, and I’ll change my mind! Normally, pumpkins are a bit irregular (at best!).
Now, you could stop at this point, and you’d have a recognizable pumpkin, right? Still, I’m going to add one more stitch on each side – but not a whole stitch.
To the right of the outermost bullion on the right, I’m going to add a smaller bullion. This smaller stitch starts up at the top of the pumpkin – you can see where the thread is coming up for the start of the stitch in the photo above.
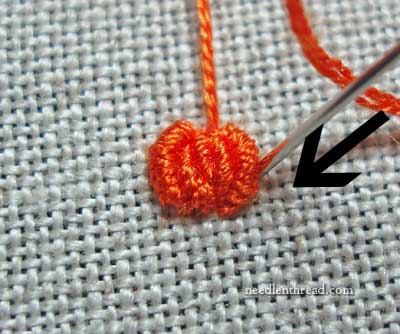
But instead of wrapping this outermost stitch all the way down and around the previous bullion, I’m only going about half-way down the pumpkin, and I’m angling my needle underneath the other bullion there, so that this last stitch on the right really hugs in and under it. This is going to give some lift and a sense of dimension to the pumpkin.
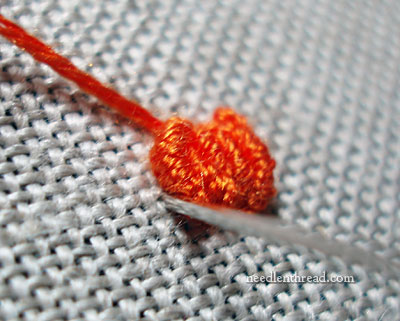
Now I’m doing the same thing on the left side, and you can really see in the photo above how the needle is angled in and underneath the last large bullion on the left.

For the stem, I took a little snippet of brown silk wrapped purl (it’s the same stuff I used to make the leaves for my autumn tree) and sewed it in place, bending it slightly, and then two little green bits of stretched silk wrapped purl served as the curly vines.
If you don’t have silk wrapped purl on hand, no worries! Stitch a small brown, tan, or pale green bullion for the stem, and couch down a couple little loops of floss for the curly vine bits.
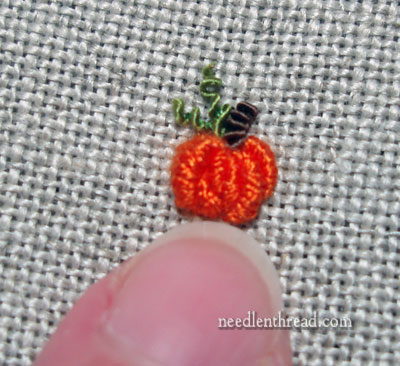
My imperfect pumpkin is rather small. That’s the tip of my index finger there, right below it. Of course, I could have Huge Fingers, so here’s the pumpkin next to a ruler:
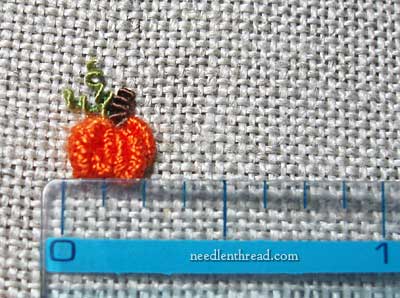
It’s about 1/4″ across, and just about that high to the top of the stem.
You can make your pumpkin a lot bigger by using a heavier thread. My plan was originally to try this with the orange Trebizond, but then I remembered that the plaited braid stitch ate it all. You can also use perle cotton in various weights, if you want. Whatever thread you have on hand that’s orange, or some similar color that would mimic a pumpkin, will do the trick!
You can also pad the pumpkin to make it really stand out, if you’re stitching a larger pumpkin. Take a look at this tutorial on padding a satin stitched dot. If you build up your padding the same way, you can then stitch your bullions over it.
However, if you’re stitching a tiny pumpkin like mine, there’s really not room for padding!
I suppose you know what happened next, after I stitched the first wee pumpkin?
No, I didn’t add a face (I thought about it!)…
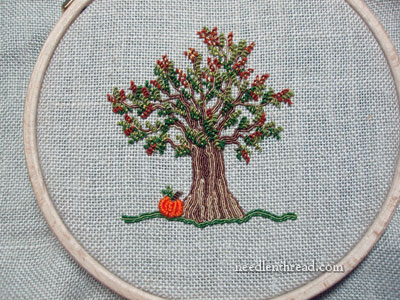
Instead, I decided to plant one under the tree!
Go play with bullions and stitch yourself up a pumpkin patch! It takes less than 5 minutes to stitch one pumpkin, so you can whip up at least a dozen in less than an hour.
And when you’re finished, you’ll be ready to pour yourself a pumpkin latté, slice yourself some pumpkin bread, slather it with pumpkin butter, dip out some pumpkin ice cream, serve up some pumpkin scones, pop some pumpkin popcorn, ladle out some pumpkin polenta as a side with pumpkin stew, fry some pumpkin pancakes, roast some pumpkin seeds, dollop some pumpkin whipped cream onto your pumpkin pie, munch some pumpkin brownies, crunch some pumpkin cookies, slurp up some pumpkin punch…
… or just wait patiently for Spring, when we begin to ween ourselves once more from our Preoccupation with Pumpkin!


that pumpkin location… aww.
really…awww
too cute! Your creativity in embroidery and writing is a gift. You made my day brighter with inspiration and fun.
I agree with Natasha! The pumpkin looks particularly cute under the tree there. I think it must be because they seem to be leaning toward each other.
Great post!
Thanks for the pumpkin tutorial. It doesn’t look difficult at all & I’m going to give it a try. Yours looks terrific under the tree!
Great lesson! Thank you so much. Your website is much better than other needlework sites. I think you must put a super lot of thought and effort into it. I always learn something. And now I’m craving pumpkin bread. Thanks again,
Shelia in Oklahoma
As my design teacher used to tell us, FINIS! Well done. The tree did look a little lonely before.
Hummm…perhaps that little pumpkin might next go in a Cornucopia ….. with a few other fallish looking things.
Great idea!
Love the pumpkin. How did you move it from your hoop to its spot under the tree?
Hi, Nancy – I stitched a second one under the tree – it’s not the same one in the step-by-step. 🙂 MC
Not just pumpkins, I imagine depending on color, you would whip up a quick basket of apples (back to school)in several yummy colors. A bunch of grapes in two or three colors? Some of the Jacobean pomagranate graphics have that “open” look, do the bullion knots lighter and darker for that. Fruit and berries and cherries of many types could be made teeny that way. Even raspberries and blackberries etc could be managed that way, each of the little knobbly bits could be a bullion knot quartet. How about a graphic of a gumball machine or jar of marbles? Acorns? for a banana the right size to go with those apples, just one slightly bent bullion knot in an appropriate color. I am sure every season could find some (not orange) cousin of Punkinhead.
It sounds as though you could benefit from a look at the A-Z of Bullions published by Country Bumpkin. They have managed to create almost everything you can think of with bullion knots.
I do not buy books/magazines about embroidery. The only handful I have are either pattern books that my granma gave me years ago, and 2 large embroidery stitch encyclopedias so that I can figure out how to do the stitches. I tend do things my way and not how other people tell me to. Sorry that my suggestions have offended anyone.
Mary this is beautiful! I can’t believe the details in such a tiny thing! You are GOOD!
Love the tree with the wee pumpkin next to it. I am forwarding this to my neice as she makes wire trees…she’ll love this. So, I just might make something like this for her.
Ficou lindo!
Parabéns Mary!
Your wee pumpkin is adorable, as is the tree. I got a kick out of your observations on the current pumpkin trend, which I noticed in a food store circular and numerous crafting sites. It is pleasant to return to a simple, straightforward pumpkin design rather than the tricked out ones I see everywhere.
G’day Mary,
What a delightful surprise to see the little pumpkin under the little tree, on the little grass. Spot on!
The tutorial is wonderful, and it wouldn’t surprise me if your fingers where huge and your whole self in proportion to them. Might explain how your able to spread yourself around all you do, so successfully.
The little pumpkin is a real treat. Thank you.
Cheers, Kath
Mary, you’re such a hoot! I do like your wee pumpkin and wonder what else will grow beneath your tree? BTW, have you seen this?
http://vimeo.com/15598167
It’s a thoroughly delightful illustration using the Bayeux Tapestry. I have a friend visiting overseas in France and she’s just visited Bayeux and the tapestry. She found this video while researching for her trip.
Hi, Chrissie – Isn’t that a great video? “Delightful” is a good word for it! I actually wrote about it when the older version came out (in 2007) and then updated that post when the newer one showed up: https://needlenthread.wpengine.com/2007/10/historical-needlework-animated-bayeux.html Thanks for reminding me about it! ~MC
I love this video too. I have long had a fascination for the BT although I will never get to see it up close and personal, I have read heaps about it but this little video is so clever and very amusing.
Dear Mary
Thanks for your beautiful pumpkin tutorial, I like the buillion stitch and the pumpkin next to the tree is lovely. I love what you created wth the silk wrapped purl.
Today I visited the knitting and stitching show at Alexandra Palace North London where I bought lots of silk wrapped purl different colours and soie d’Algar silk thread and lots of other stuff, so I will have try the tree unfortunately I couldn’t find gimp thread but hopefully when you have tried the gimp thread from Pipers in the UK and it is the same thread as you used I can stock up. Thanks for your post Mary very informative.
Regards Anita Simmance
How cute!
Oh that’s so precious! Now I want to play too. Thank you so much!
What about the pumpkin soup? And since I am Australian, where are the pumpkin scones? Any Australian of a certain age will recall the wife of the Queensland Premier (top politician) and Federal Senator in her own right, Flo Bjelke-Petersen and her famous (or infamous) pumpkin scones. I quite like pumpkin, and it is fantastically versatile for a spinach-detesting vegetarian like me, but like you I find it gets waaay too much attention at this time of year.
Still and all, I do love your li’l bitty pumpkin. Verrry cute.
Yes, you’re right there. Dad & I make a huge batch of pumpkin soup every so often and he freezes meal portions of it. Love it myself too, especially with bacon in it but you wouldn’t include that eh.
I’m not much of a cook, although my pumpkin scones are edible, but my son’s pumpkin scones are are almost as delish as Mary’s little pumpkin.
Kath (from Oz).
Nice work !
And Mary, could you help us giving instruction on how to use silk wrapped purl. I always wonder how the silk did not un-wrap…
Mary, this is adorable, they would make the cutest ear rings, brooch or buttons on a special outfit. Perfect stitch for a pumpkin.
Great pumpkin. Would love to make this a pin for my vests and jackets. May try but I am a beginner. Ant hits or tips. I can do bullions. Thx.
I saw this wee little pumpkin referenced on the DMC website and knew it had to be your. I’ve never seen the silk wrapped purl anywhere else. It is just the cutest thing!
Too cute ! Gotta try this as soon as I can !
Thanks very much
I love your site very much. Being a very beginner I get a little lost though. I bought some hand towels preprinted at the store and couldn’t even begin doing them and they were only sun flowers. Just retiring at a ripe old age I decided to take up embroidery as it is so beautiful. Maybe I should stick to knitting though But so glad I found your site.
Mary, this little pumpkin is adorable! And so easy to make!!
Thank you for all of your wonderful newsletters,
Charlene
What very informative videos you’ve provided for us to learn by! Thank you! Do you think it would be possible to embroider a bullion knot heart along the same lines as this adorable pumpkin? I’m looking for a way to embroider small hearts very quickly. Thank you!
Sure! It’ll look a little different for a heart, though – the texture might make it look kind of funny? But, yes, I think it would work! Maybe I will play with that and post something, if I have a chance!