Today’s video tutorial is on the Pekinese stitch. This is a composite stitch that starts with a backstitch line. A second thread is then looped behind the backstitches.

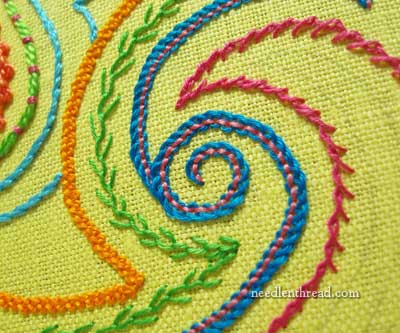
In the sample above, the bright blue line with the pink dashes through it is worked in the Pekinese stitch. The stitch takes curves well. It can also be used as a filling, by working rows close together.

In yesterday’s Stitch Play article, Pekinese stitch was featured as one of those line stitches that you can “mirror” effectively.

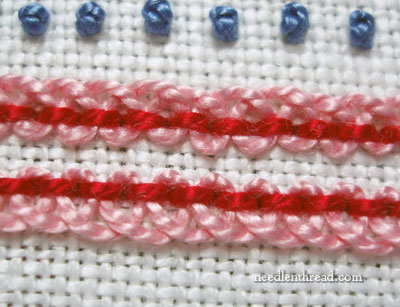
Pretty much any type of thread works with the Pekinese stitch. In the photo above, the backstitch is worked with a wool thread, and the loops of the stitch are worked in perle cotton.

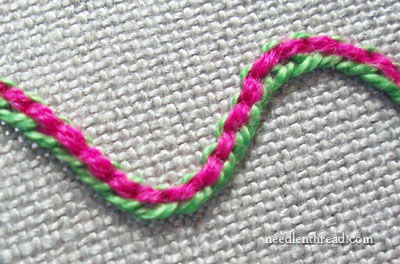
And in this sample, the backstitch is worked with perle cotton, and the loops are worked with wool. So you can mix and match the threads used in the two parts of the stitch.
Here’s the video for the Pekinese stitch. I hope you enjoy it and find it useful in your embroidery endeavors!
Do you want more inspiration & information on hand embroidery?
There are all kinds of reasons to sign up for the Needle ‘n Thread daily newsletter! Check them out and sign up today!
If you’re looking for other stitch instruction, feel free to check out my other embroidery stitch videos here on Needle ‘n Thread! The collection is growing, and many of the videos have been updated and replaced with newer, clearer editions.
If you like what you see on Needle ’n Thread, if you want to be a part of keeping the website thriving (and free of annoying network advertising), why not become a patron on Patreon? Check out my Patreon page here, where I’ll occasionally add special needlework bonuses for patrons.
If you shop on Amazon, you can support Needle ’n Thread without any extra expense to you by visiting my Amazon Recommendations page here, where you’ll find books and sundries for the needleworker available on Amazon.


Mary, I know it’s probably just a fun piece to you but to me it looks like art. Would you consider letting us see how the whole thing looks? Is it gloriously random? How do you do that?
Hi, Heather – Sure, I’ll show you a whole shot eventually! I’ve got several of these pieces that I use for stitch sample photos, or to work out little elements for Stitch Play. As soon as I’m ready to categorize them and file them away, I’ll take whole photos and show them to you! ~MC
G’day Mary, Have been following these along and all is really beaut. This video, as others, is excellent and I’ve picked up some good working tips. Thanks again. Cheers, Kath
Thanks, Kath!!
Dear Mary
Just looked at the blog on the Pekinese stitch, it looks great I might use this on a project I’m currently starting. Great job you do Mary can’t wait for more and like Heather would love to see the whole project your stitching is perfect!
Regards Anita Simmance
Thanks, Anita! I hope you do find a good use for it! ~MC
Mary,
The Pekinese stitch is much like the finishing stitch used along the sides of a needlepoint belt. Thanks for taking time to create the video for us.
Deb
Such a lovely art. You made it finish so easily. Thank You so much for all your techniques with needle & thread.
I think that the two stitches are the whipped back stitch and the Pekingese stitch.
Very beautiful and easy explained. I appreciate your sharing. Thanks, I love embroidering.
Hi Mary,
Great video as usual, but how do you add a thread when you run out? I have a long line to do.
Thanks!
I would take it to the back behind one of the backstitches, being very careful of the tension on that last stitch as you finish the thread, and then bring the new thread up in the same spot behind the backstitch and continue forward.