A plunging lasso is a little get-up involving a piece of string and a needle, and it’s used to plunge couched embroidery threads – and most often, goldwork threads – to the back of the fabric.
I prefer using a plunging lasso to using a larger needle to plunge threads, although I use both methods. The plunging lasso is more convenient – it’s easier to thread the loop of string than it is to thread a needle eye. The lasso also works easily with short lengths of gold thread, so in the event that you accidentally cut your couched metal thread shorter than you intended and aren’t sure how to get the short end to the back of the fabric, the plunging lasso will save you!
Incidentally, the lasso can be used to plunge other threads in addition to metal threads – whenever you’re couching threads and need to pull your laid thread to the back and are having trouble getting it there with a needle, this little home-made devise works great.
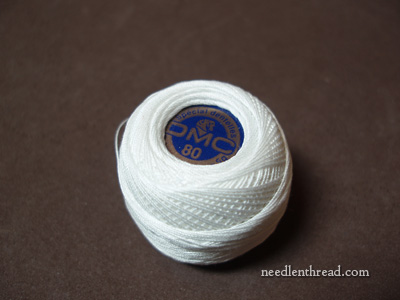
You don’t have to be super-specific about the type of string you use for this! I’m using this #80 lace cotton from DMC because I had it on hand and it is fine enough for the small threads I’m working with. I find that this type of string and linen thread work really well for plunging lassos, but in a pinch, I have even been known to use a piece of silk floss, when I didn’t have anything else available. Stranded cottons and wools don’t work that great for this – cotton isn’t quite strong enough and wool? Well – fuzzy!! (I haven’t tried it with wool, just in case you’re wondering!)
Really, all you need is a standard little piece of string – like crochet cotton.
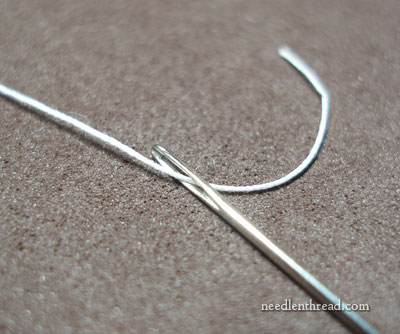
I’m threading a #7 crewel needle with about a 4″ piece of the above-mentioned string. You can see that one end of the string is going into the needle from left to right.
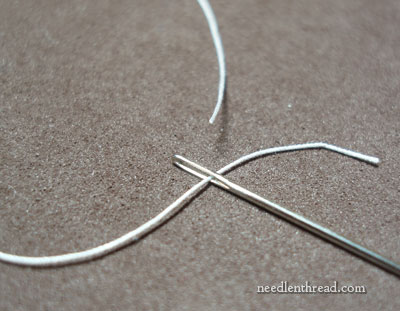
Then I brought the other end of the same string around to the back of the needle, from the opposite direction in which I threaded the first end…
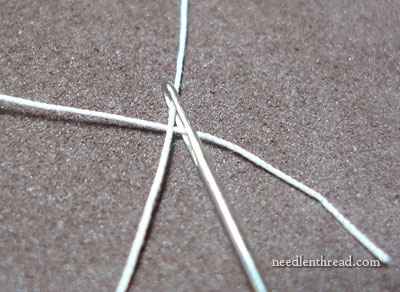
… and I threaded the second end of the string into the needle from that direction. In a nutshell, you’re threading both ends of the same piece of string into a needle from opposite directions. That’s it!
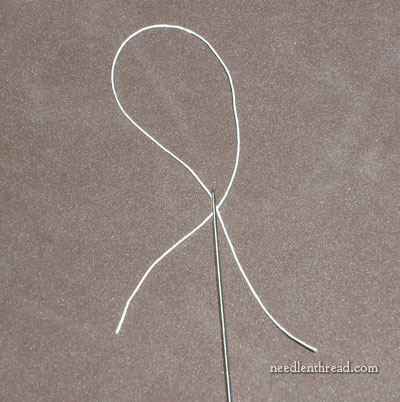
And this is what you end up with.
How does it work? Well, you sink that needle into your fabric at the point where you want to plunge your thread, you pull the needle through until just the “lasso” or loop of string is on top of the fabric, you feed the end of the thread you want to plunge into the loop, and you give a quick little tug. Voilá! Your thread pops to the back.
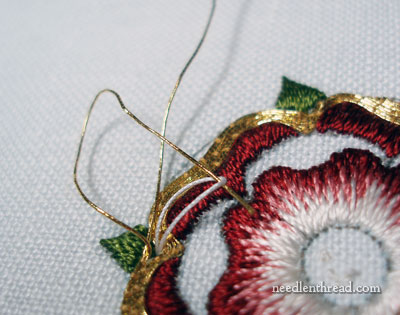
You can see the plunging lasso in use here. The end of the gold thread was plenty long enough to use a larger needle to plunge the ends to the back, but I had a lasso on hand, so why thread a needle when you don’t have to?!
Enjoy your day!


What a neat trick, and one I hadn’t seen before. Thanks very much, Mary. I can see that this is going to be very useful.
HEY ! ! This is a really neat trick ! ! This one I”ll use…….thanks again Marymentor ! Judy in Pittsburgh.
PS> Hope you’re “weathering” the heat…
(no pun intended 🙂
I used to make a lasso out of thread, but about 10 years ago I was introduced to dental floss threaders. They’re made of a very thin, flexible plastic and are even easier to use than the lasso. (They’re also very useful for beading.) First I make a hole with a needle, then I stick in the floss threader and place the threads to be plunged through the loop, and then I yank the whole thing down to the backside. You can see pictures of the threaders here: http://www.nextag.com/floss-threader/shop-html
Eventually the ends of the threader will separate, but I’m not even halfway through the box that I bought 10 years ago.
Thank you Mary for sharing this interesting tip.
Happy Stitching!
What a great idea. I’ve never done gold work, but there are some threads I use in CQ that I’ve really damaged by trying to get them through a needle.
Tell me, how do you anchor them in the back once you get them through?
Dear Mary
Thanks so much for showing us how to plunge gold into the back of fabric. You are so helpful and knowledgeable.
I’m awaiting some gold/check gold/Elizabethan thread which I’ve ordered from Tanja Berlin & hedgehog handworks. So I will follow your instructions and try this method when I receive the thread.
Regards Anita
What do you do with the ends once they are on the backside of the piece? Do you try to tuck them under some other threads as you would other kinds of thread? Do you just leave them because the couching is enough?
I’ve never called it a plunging lasso, but I’ve used a similar technique whenever I was THIS close to running out of thread or when my thread frayed or knotted about an inch from the needle. You can use the plunging loop to pull the working thread through to the back, then, after burying all but the eye of your working needle into stitches on the back (as though you were finishing off normally, thread the eye with a loop of fine thread like silk sewing thread. Use this loop to catch the short end, then pull the needle through.
Voila! A neat finish to what could have been a big problem!
I am a great fan of plunging lassos. In a class I took with the RSN a few years ago they used some sort of nice soft string. They didn’t know what kind of string it was, but it wasn’t a needlecraft ‘thread’, more like some sort of general purpose string. I started looking for something comparable. I finally settled on kite string. I’ve tried and broken just about every type of string I can get my hands on for lassos, but I have not managed to break the kite string version yet (and I have one that’s been going for several projects).:-)
Kite string is also inexpensive. I bought a spool of it at Ace Hardware a few years ago and still have lots left even after putting many goldwork kits together.
I had another teacher who used kite string to lace our crewel projects (on linen twill) to stretcher bars. Although I finished the stitching many years ago I left the piece laced up for storage. It’s still as tight as a drum. I now use kite string for lacing on my slate frames and it works beautifully.
Why thread the needle in two directions?
It seems that all you would need is the loop, so a needle with a loop of thread through the eye (I often do this to take a stitch through the loop to secure the thread) should do just fine. Poking the needle through, leaving the loop on top of the fabric, would seem to accomplish the same thing.
Great trick – surprised some enterprising needle company hasn’t come up with a fixed version.
Dear Mary
What a fantastic idea I tried it yesterday and it was so easy using the lasso technique. I was kindly given a gold needle with a large eye from Stitchers Paradise so I used that with dmc 3 strands of cotton and it was so easy to pull through. Thanks for the idea. I would send photos but when I try to a command comes up to say that my photos are to large.
Regards Anita
Dear Mary,
The lasso and dental floss are good techniques.
Here’s another one. The no-thread needle you just pop the thread into the top and it stays threaded. If I have a thread too short to pull to the back of my work, I stick the no-thread needle into the fabric all the way down to the top of the needle, pop the short thread into the needle top and then pull it through. The technique works for machine quilting too.
This is brilliant!! Thanks so much for your tip.
Was given your site to help with problem in needlepoint. You explain so well and your pictures are great in showing what to do! Thank you so much.
Thanks, Carolee! I’m glad you’re finding Needle ‘n Thread helpful!