After we added a bit of blackwork to our spot samplers, the next step for the Needle Arts class was to look at some other stitches – aside from cross stitch, backstitch, running stitch, and Holbein stitch – that could be used in counted techniques.
There are LOTS of stitches that can be used in counted thread embroidery, but what I wanted to accomplish with my students was to get them comfortable with working more complex stitches, following stitch diagrams, and working out variations. For this exercise, we focused on the herringbone stitch, which can be worked effectively on either even-weave or plain-weave fabric.
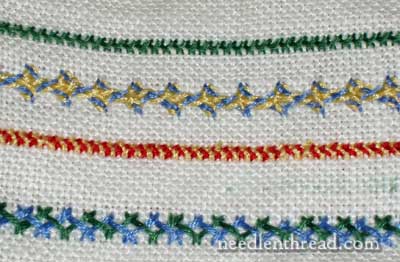
We began this lesson by getting the hang of herringbone stitch. When learning a new stitch, the key is to practice it, and practice some more, until the movements of the stitch are familiar so that a diagram or instructional video is no longer necessary, and until the stitch looks nice. So the students worked the basic herringbone stitch on practice fabric, until they had it down pat.
Then, we moved on to the double herringbone stitch, making sure that the weaving of the two layers was done correctly. Once you’ve got the hang of the herringbone stitch and the double herringbone stitch, then it’s easy to move on to other variations – decorating the herringbone stitch with backstitch or running stitch, lacing the herringbone stitch in a number of different ways, and pretty much letting the imagination (and some diagrams, if necessary) guide you in drumming up some interesting effects with the stitch.
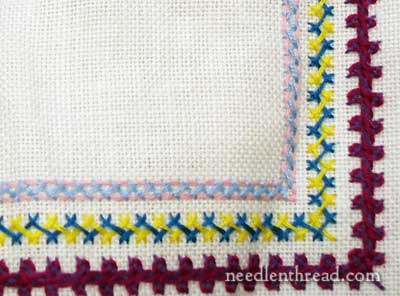
Once the students had worked their sample pieces and put them in their stitch journals, they moved on to decorating their spot samplers with the herringbone stitch. They had to work three lines of herringbone – one simple herringbone stitch, one double herringbone stitch, and one that could be any variation they wanted. They could further “decorate” the plain herringbone or the double herringbone with lacing, backstitch, running stitch, or whatever they wished.
Some students chose to work their stitches in rows, like those found on band samplers, while others used the herringbone stitch to set off a corner or to frame their Quaker motifs. The placement of the stitching on their samplers is entirely up to them.
If you’re developing your own spot sampler and following along with this series in the order it’s presented, then your next task is to learn the herringbone stitch and double herringbone stitch, and apply it somewhere on your spot sampler! You’ll find some good sources of inspiration online. For example, Sharon Boggan’s stitch dictionary is replete with ideas for herringbone stitch – just look up herringbone stitch and double herringbone stitch (there are a couple versions on there).
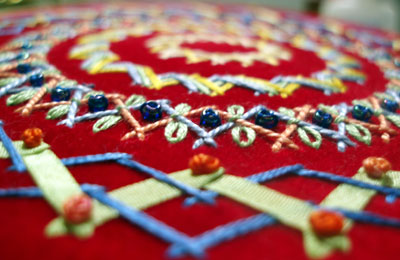
You can also take a look at the above herringbone piece that I worked a while ago, which is actually stitched on plain-weave velvet. It might give you some ideas on how to play with the stitch.
On an earlier post about my spot sampler, there are a few shots of herringbone stitch:
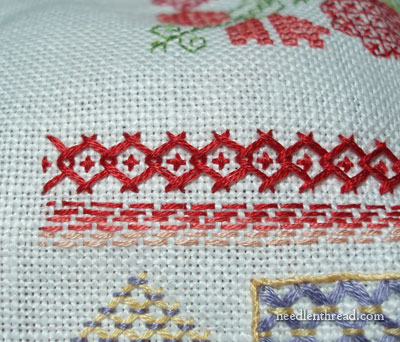
I worked two rows of herringbone, one on top of the other, mirrored.
And here are a few other ways I added herringbone stitch to my sampler:
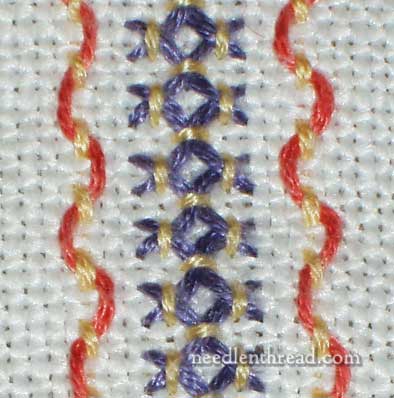
This is another two rows of herringbone stitch, mirrored, over which I worked straight stitches (in yellow) at all the intersections.
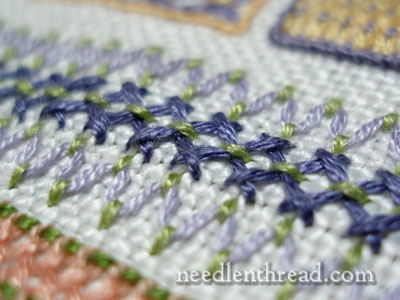
This is simply two rows of herringbone, one worked on top of the other, with the second row offset between the first. It’s not quite double herringbone stitch, because I didn’t pay attention to any weaving pattern. After stitching the herringbone stitches, I worked a line of running stitch over the center intersections. On each side of the row, I laced some straight stitches, to add a bit of decoration to the band.
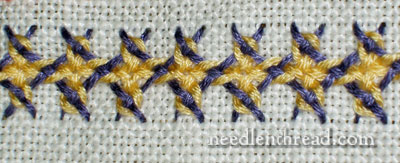
Finally, a more complex approach – this is an interlaced band of double herringbone. To interlace the band like this, it’s essential to get the weaving pattern on the double herringbone just right (otherwise, the lacing slips through the stitches).
So, the herringbone stitch, worked as a counted technique on even-weave fabric, can generate a lot of possibilities. You’re not limited to the ones you see here! Play with it, and see what you can come up with on your own sampler!
If you’re interested in working your own spot sampler from beginning to end, check out the other posts in this series on Developing a Spot Sampler.
Next up in the series, we’ll play with a couple filling patterns, and then on to surface embroidery stitches!


Herringbone is a beautiful stitch. In India the double laced Herringbone is referred to as Kutchwork named after the region where it is practiced. It is also called Sindhi embroidery as it was also practiced in the Sindh region of Pakistan.
Hi, Mary! I think you’re doing a great job with this series on the spot sampler and I really appreciate it. It doesn’t seem like that many are following along with the series because there aren’t very many comments, but I just wanted to let you know that I am and I’m learning a lot along the way. I have just finished a Quaker design and I’m starting one of the blackwork designs you recommended. I might add another Quaker design to balance with the other one. The initials were fun to do. I chose a simpler style than yours but wish I had done some that were more complex. I’m looking forward to trying herringbone in bands on mine and I think I will follow your student’s way of doing it and work them in the corners as decoration. Thank you so much for doing these lessons. You’re the best! Karla
Thanks, Karla! I’m glad you’re enjoying the series! ~MC
Very nice variations. I can’t believe I never stitched a single row of even single,simple herringbone stitch. Time to try! Thanks for the inspiration!