The challenge of preparing for a needlework class that meets every day for only 45 minutes at a time can be rather daunting. But I have to admit, teaching Needle Arts at the high school level is FUN! Despite the prep work, despite the glorious mess taking over my studio, I find that I’m enjoying the heck out of teaching the class. It almost seems… well… mercenary that I actually get paid for it!
When I bring up the Needle Arts class here on Needle ‘n Thread (which I promise won’t be every day!), I hope to make whatever I write about useful for you, too. Rather than just a journal of what I’m up to with the class, I’d like to share with you what I’m learning along the way. That’s the funny thing about teaching: it’s a learning experience for all parties concerned, not just the students.

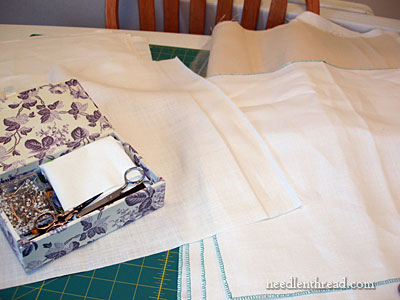
One thing I learned last week: flexibility in planning is essential. This is true in any classroom, of course, but after eighteen years of teaching academic subjects, I’m learning that, with hands-on work, it is even more pertinent. For example, my plan was initially to have every project we do worked from start to finish completely by the student, including all prep work and all finish work. Yet, as you can see above, I’ve been cutting out pieces of linen myself…

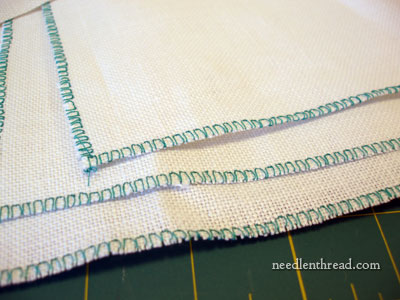
… and neatening all the edges (very un-neatly!) on the sewing machine.
The students are geared up and ready to stitch on something “real.” They’ve been working on samples last week for their stitch journals, and they’re already itching to begin their spot samplers. I decided to take advantage of the momentum and excitement of the first week and put them to work as soon as possible on their spot samplers. We could slow down and use class time to cut out the fabric, whip stitch the edges by hand, and so forth, but I’d rather get them stitching right away on the sampler. I want them to have the excitement of seeing something develop on that piece of blank cloth!
It’s alway important to catch that “learning window” with youth – when they’re really excited about something, take advantage of their excitement. They learn best when their attention is focused and their motivation is high.

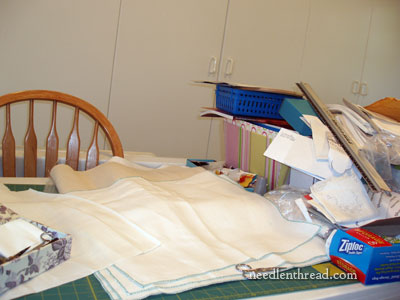
So, each evening I’ve been cutting out linen and sewing edges, so that I can hand out the linen to the students today. Did I mention that I also soaked and ironed the linen, to remove any sizing? Yes. Well. Ok. The truth is, I’m not a lover of ironing! Especially en masse! And in my haste to get everything together for today, I did not follow that Wise Universal Axiom: Clean as You Go. My studio is a wreck. As soon as I have a chance this week, I’ll put it all back in order and forever follow my new resolution, to clean as I go. It is so inefficient to let a mess like this build up!

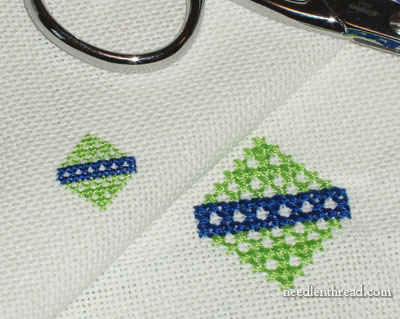
The first quarter of the year is devoted to counted thread techniques. The first technique the students conquered was cross stitch over one and over two. Here’s one of the samples. They are stitching their samples on 25 count Lugana because I had it on hand and because the count corresponds to the count of the linen for their samplers, which is Legacy Round Yarn Linen. It’s an even weave linen, suitable not just for counted work, but for surface stitches as well.
While it may seem easy enough to teach the basic cross stitch, the concepts of centering, counting, graphing, and stitch direction all had to be covered as well. Not as easy as I thought it would be! After instruction, the students work the sample for the lesson, and I go around and see how they’re doing… and re-instruct one-on-one several times over! But their samples look good, and they’ve got the hang of it, and they’re excited to get going on the real sampler. So…. I prepped the fabric myself.
They’ll have the opportunity to cut their own fabric a bit later. During the first semester, besides learning stitches and working the spot sampler, I want them to make a small finished something-or-other, so they’ll be making a little needlebook from start to finish. That’s doesn’t come until a bit later, though (thank goodness!).
It’s fun keeping up. I’m looking forward to Labor Day weekend, when I can actually “get ahead”!
I’m open for tips and suggestions, ideas, and so forth! Feel free to leave a comment and ask any questions or leave your suggestions or ideas.


I hope you keep us informed of your class teaching Mary. I am enjoying it. I don’t have any ideas to share but I hope you don’t stop posting about what you are teaching your students.
Good thinking starting with the “good stuff” right away: when they are used to embroidering, and know the fun that is in store, the ‘preparing stitching’ will seem much easier and less daunting, and it will not be so discouraging.Plus, and I know I will get scolded for saying this, but I will say it anyway, plus, you don’t necessarily need to neaten out edges professionally, center designs exactly etc (although it is obviously better to do it!) in order to embroider a piece, but you do need to know how to embroider, so if there is a chance to set priorities I would rather teach the embroidery first.
I remember my mom trying to teach me to center a design when I was perhaps 13 ys old, counting the threads in each direction and basting etc, I decided there and then that I wouold never ever embroider anything,lol.
Thanks, Thelma!
Katy – you’re right! I agree about the centering and so forth, for beginning. That’s the thing about spot samplers – things don’t have to be perfectly centered up and counted exactly. I did, however, want to give them some background on how that works, because they’ll need it for future reference, and it will make it easier to broach the subject again when we need to. For the spot sampler, though, they are going to have to do some basting – just to make sure they end up with enough of an edge to finish or frame the piece if they like, and to section of some pieces of the fabric, so they can “budget” their fabric for stitches. It won’t take long to do that part of the set up in class today. Exact counting and placement aren’t necessary, really. You’re right – just getting the hang of the stitches is the plan!
Thanks heaps again for your comments!
I have loved following your entries! What exactly is a stitch journal? I have been doing embroidery for years (being taught by my mother and my aunt), but haven’t come across a stitch journal!
Sounds like a good plan! Some centering teaching along the way will certainly be very useful as centering disasters can be really hard to solve, although they can also become, in the right circumstances, creative challenges. My current ‘big project’ is a peacock that I drew myself: when I say drew, I mean it literally. I didn’t even do it on paper first, one evening I took a piece of fabric and a pencil and I sketched the thing directly! Then I got carried away with the sweeping tail and ended up hard in a corner of the fabric! But I liked it, so, did I cancel everything and start again? Nope. I decide that I will cut the excess from the opposite corner and sew a border of contrasting fabric all around to expand the shape as necessary. I will be a “surface-embroidery-meets-crazy-quilting” kind of stuff. I am now looking forward to this developement, honestly, but the whole thing did give me a headache to begin with.
Speaking of cross stitch, and beginner embroidery, the reason I loathed it is in part that having something of ADD in my genetic set up I find it very hard to keep count of stitches. After three stitches I will invariably get distracted and miscount, and then spend ages unstitching things when I find the mistake (usually several lines later). I found this very frustrating, and gave up (for 20 years). Surface embroidery was a kind of epiphany to me. But to this day counting wraps for a bullion know is the limit of my counting, lol. So if some of your students seem to have the same problem do be kind to them, and let them know that there is light at the end of the tunnel! 🙂
I know it’s early days but you know you are going to have a few students who will rush ahead of the others, only because they are so keen. With teenagers I always had extension activities for these students so that the whole class was able to keep to the task, which is your spot sampler, while these keen students were still challenged.
As to pre-preparing materials, it is something you just have to do with todays teenagers. They like quick results but once they have seen this they become more prepared to put off the instant gratification.
Another tip I found useful in my classroom was to have music. Not fast rock but something to set a steady pace. I found that this engendered a calming atmosphere and lots of productivity. After a few lessons students walked into the room expecting this calm.
As you can tell, I’m missing teaching after being away from it for only 4 weeks!
How fortunate your students are!!! And isn’t it wonderful to know you are inspiring these kids with a fiber art that shouldn’t be lost! Who knows! One of these students could be the next MARY CORBET!
Hi Mary,hope you had a productive, yet enjoyable day in your class today. I am a very “newbie” to this world of embroidery..I have cross stitched quite a bit, but am just beginning to branch out. My sister & I both love your posts and really hope you will kinda “teach us along with your class”. There is not a good needlework shop in our area that sells or teaches classes..(she & I live an hour apart so there would be plenty of room for one!) Thanks again for you taking the time with all of us! (^_^)
We can learn as the students do. Thank you for sharing and teaching someone that never ever thought they would embroidery, me . I love it.
Pleas keep sharing what you are teaching your class.
Jersey
Hi, all! Thanks so much for your comments – they are always so encouraging!!
Let’s see if I can answer some questions:
Carol – cross stitch over one is cross stitch over only one thread in the fabric, while cross stitch over 2 is over two diagonal threads (which means the cross stitch actually covers four fabric squares).
Sivani – ah, the demographics. That’s question keeps coming up. Actually, to keep things from crossing that “professional information” barrier, I have purposely omitted that information. I’m excited to write about the class and share things that we do and learn, but I don’t want to write anything “personal” about the class at all, just so that there is never any question of a breach of professionalism. I was going to actually mention that in this post… Anyway, to give the absolute most general info, the class is at a private school, the grade levels in the class are 10 – 12, and the cap on the class for this year is 15 students. Thanks for understanding!
Jayashree – best of luck with your class!!
Sandi – I will probably post some (anonymous) student work!
Elizabeth – The stitching journal is something we’re putting together. It has individual pages for each stitch, with instructions and a photo or diagram of the stitch, space for notes, tips, fabric / threads, and so forth, and space to fix the small samples of the worked stitch on the page. I’ll show pictures of those later on!
Off to class! Thanks again for all your encouragement! ~MC
what is one on one and 2 on 2 cross stitch?
carol gross
Hi, Mary. I hope that you will continue to write about your class activities. I think that we will be able to learn along with your students. I am glad that you are making it easy for them to get right into the project. At one point I wanted to teach Home Ec., but chose not to become a teacher because I couldn’t stand the way the subject was taught! I am glad that you are helping to keep the needlearts alive.
I would like to see photos of your students work as they progress. It might be fun, and motivational, for them to know that they could get their work posted on your blog.
Thanks for all you do. Sandi
Good morning, Mary!
Thank you again for this inspirational site. Do you have a pattern for a needle book on your site?
Thank you,
Maria
Your enthusiasm for this class is coming across so well on your posts. I am beginning a class for a new batch of students from this Friday. These are kids who are 9+ and have never sewed before. So I am also doing a lot of preliminary work… Your posts are a source of inspiration for me. Thanks Mary.
Dear Mary,
Your posts are a highlight of my day, and I’m sure your class is quickly becoming a highlight of you students’ day as well; please post about it as often as you’d like, as we can all learn alongside the students.
I think you are so right to follow, guide and lead your students’ initial excitement with real stitches, form and COLOR, and let that momentum carry the important, but more tedious foundations of grids, centering, etc. along.
Thanks, and please do continue to share what YOU are learning 🙂 from the students with us!
I’ve been enjoying the posts on the class. Artists express themselves through various media, but they need to learn the technique behind that form of expression, be it brushstrokes, carving or stitches. Teaching needle arts in the fine arts curriculum is empowering young artists to have more possibilities for creativity and expression, and we may hopefully see the fruition of the effort in many more fine art embroidery pieces and mixed media pieces incorporating embroidery techniques.
I wonder what the gender demographic of the class is – have any boys enrolled? If so, how do they compare in terms of enthusiasm and engagement in the class?
I have never heard about washing your fabric before doing an embroidery project; I do it in sewing, but never transferred the practice to embroidery. Thanks for the advice.
Love reading of all your needlework pursuits and especially now your challenges with teens. I have a question regarding cross-stitching on fabric other than aida. Do you begin with needle up at a vertical or diagonal thread when stitching over two? Some say it doesn’t matter but I feel that the thread is less likely to be buried if you come up at a vertical thread. Of course over one it doesn’t matter but I would still come up at a vertical thread first. How about you?
I like your info. about your class. I wish I could take lessons from you!!
Sounds good. Most students want “to get on with it” …. so if the first lesson is all fiddling with preparation, it can be off putting. However, it is SO IMPORTANT that they do realize that preparing the fabric and sorting the threads is essential BEFORE starting.
By the way, thank you for your daily email!!!!
I am glad to see I am not the only one not following the “Clean as you go” rule, LOL
I read your posts – your suggestions and advice are greatly appreciated.Thank you
Hello
i am very happy that i found your website.i would like to have some help about the aubusson.I have the material ,and i wanted to do the work on it,but there is nothing on it,it is just empty…Can you tell me please if i can work it by counting or it is easier to have a sketch put on it.
Thank you
Sonia
I am also envious, I would have loved to have something like this in school.
I also just have to say I actually like prep work, and I love ironing in general. I’m not really that domestic but I just find it relaxing to iron something.
Different strokes I guess 🙂
I really like that you’re sharing your new teaching experiences. I love your enthusiasm! How about some photos of your students’ samples and stitch journals? I’d like to hear more about what the stitch journals are.
I think this is really cool and it would be good if you did a small lesson similar to the one your doing in your class, it would help those of us who are truly beginners, then we could follow along almost like a class.
Thanks for the great site.
Betty
hello madam,
i like this box, please give the instruction how to make this box
Glad you are doing this. I am on my first Sampler and am having some difficulty. What to do with the ends… Okay a waste knot in beginning, and what do you do with it once you get going? How do you know it? What do you do with the other end of same thread to knot it off? Also, changing colors where only one stitch is a different color in a flower! What do you do with tieing off the the threads…?
Dear Mary, I read your site with great interest and am wondering if you could include somewhere the lessons and projects that you give as assignments for you H.S. students.
Thank you. Dorothy Kiebler
As a beginner stitcher, these postings are useful to me. Please keep sharing the ‘goings on’ with the classes. I glean nuggets of information.
Hope to stay in touch Mary. I am enjoying it and its helping me prep for my first lesson on Monday. Been thrown in the deep end at my job. Not all clued up with needlework especially the different stitchings. Looking forward to your next lesson with your students.