Kathy Andrews continues today with her final guest post on Needle ‘n Thread. This is the fourth post in a series on her Spring in Italy Sampler, where she’s been exploring embroidery motifs inspired by Italian pottery. So far, Kathy has shown us how she came up with her embroidery designs, and then she’s stitched one embroidery design in wool threads and one embroidery design in cotton floche. Today, she’s working with Pearsalls silk. Enjoy!
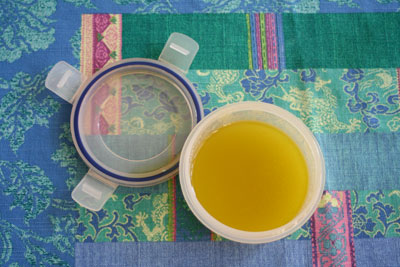
The first thing I did before stitching the third design was to scrub my hands with olive oil and sugar. Sounds gooey and sticky, right? Not something you’d want on your embroidery. When working with silk, it’s important that your hands are smooth or the silk will snag and tangle and generally be a mess. I didn’t know that the first time I stitched with silk: I thought it was just difficult thread and decided it wasn’t for me. Then I read Mary’s post on the olive oil and sugar hand smoothing scrub, and now silk has become a joy to stitch with! Thank you, Mary!
I’m stitching this design with Pearsall’s silk which comes from Pearsall’s Embroidery in Wales. The firm was established in 1795 and is still going strong today. I telephoned them when I wanted to order the silk and spoke with Carol who is delightful! One of the best things about being an embroiderer are all the generous, friendly people one meets via the internet, telephone and even face to face!
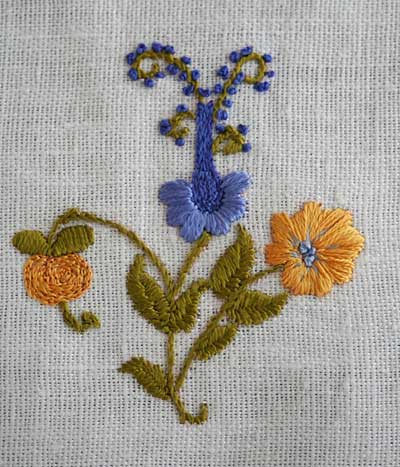
Pearsall’s Filoselle is a 6 strand silk that’s lovely to stitch with. I started with the stems and leaves, using two stands of silk to work stem stitch. As I was stitching, the sun was setting and shone on to the hoop, highlighting the shimmer of the silk. Embroiderers are so very lucky to work with materials that have such beauty.
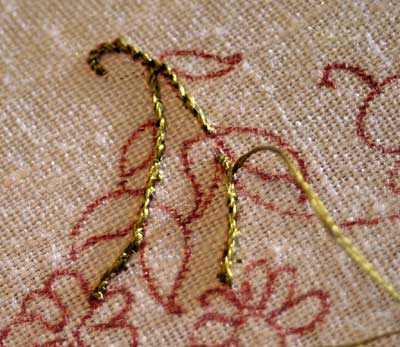
For this design I stitched the leaves in fishbone stitch. It’s a fun stitch to work because the backbone – or vein in the leaf in this case – appears as you stitch. It’s like magic! Although these leaves are as small or smaller than the ones on the plum design, the silk is fine enough that fishbone stitched worked.
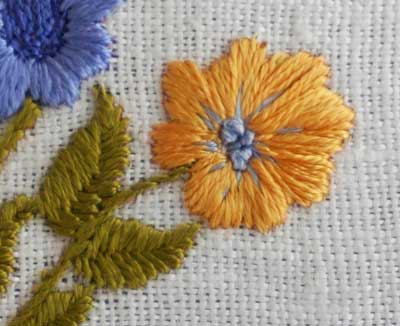
The little flower is worked in padded satin stitch, with a few straight stitches at the base of each petal. This gold color just glows on the fabric! The center is done in French knots. I worked the knots after I’d stitched all the rest of the flower so I had quite a bit of thread to push the needle through and I ended up having to do a few of the knots more than once.
The last thing I worked was the blue flower. The petals at the base of the flower are padded satin stitch and they worked up pretty quickly compared to the long, thin center of the flower. The center is worked in chain stitch using one stand of silk. Because the design is so narrow, I knew that two strands would be too bulky. What I didn’t know was how long it would take and how fiddly it would be to stitch with one thread! And I needed “magnifying eyes” to see! The buds stitched with French knots worked up easily. I used the same technique of putting a single, short straight stitch in underneath each French knot to keep the knots from being pulled through to the back side of the fabric.
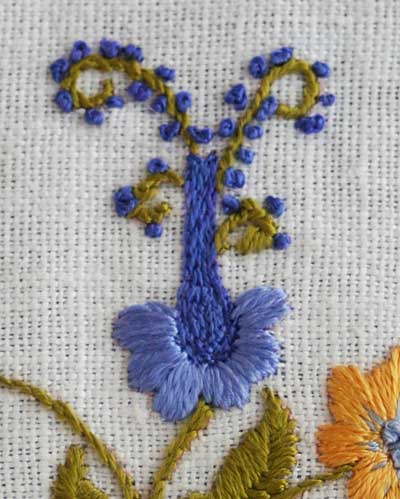
I haven’t decided if it has a counterpart in nature: I’m a gardener and I’ve never seen a flower that looks like this! It’s a fantasy flower. Can’t you imagine a hummingbird coming to it for the nectar?
It has been so much fun to stich these three designs and write about them as a guest blogger for Mary! From the moment of inspiration after my morning cappuccino to the rainy Berlin afternoon when I finished photographing, it has been an engrossing project. I woke up and took photographs of my progress on every sunny morning we had in Berlin. I came home from work excited to start stitching and fell asleep thinking about what was next.
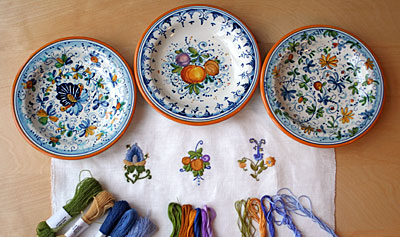
It has been a joy to work with Mary on this. She has been my long distance teacher and inspiration for the past year and I feel privileged to have been asked to blog on her web site. Mary, you’re a star!
Aw, shucks! Thanks, Kathy! I hope you have all enjoyed this series on Embroidery Inspiration from Italian Pottery and the beginnings of Kathy’s Spring in Italy Sampler! I think the motifs, colors, thread choices, stitch choices, and everything have all worked together so well – it’s really beautiful, and it’s been great fun to see the sampler unfold!


Thanks, Kathy for showing your sampler! It’s been fun to watch you work through the design, and use the different types of threads.
G’day there Mary and Kathy,
Well, this has been most interesting. The 3 motifs look so well beside each other. It’s very helpful to have the different threads compared like this with beaut photos and the explainations. Thank you.
If I had to choose a favourite maybe the plums for personal visual appeal but the silk has a preciousness about it that is well…precious. It’s so lovely. The wool? It complements the others beautifuly with it’s attractive softness. A favourite? Ha!
While we are waiting for those flowers to humour the hummingbirds Kathy, lets invite the fairies. I reckon they’d think your wonderful 2D flower worth investigating and probably leave their babies there to play. So, if you find any stitches misplaced you’ll know what happened!!
Just trickin’. I’ve learnt to tell kids that so I don’t get into strife for filling the kid’s heads with nonsense. I can’t look into the heart of a rose though without imagining that a fairy might have quickly slipped out of sight behind a petal. Surely if fairies were anyway they would be in the heart of a rose. Just trickin’.
Oh boy! How I do go on. Phew!
Thank you both, Cheers, Kath.
What beautiful work, Kathy. I really like your ideas of trying out the different threads in a sampler that coordinates with your wonderful dishes. I bet this is a project you’ll enjoy for years to come.
Hi!
It’s been great for me to have the chance to share with all of Mary’s readers. You are a creative and supportive group! Love the fairies image…I think you could be right, Kath!