After setting up the goldwork iris, I began embroidering it in one 15-minute needle and thread session. The first embroidery session was, admittedly, a wash…
When beginning a needlework project – and this is true of any type of needlework for me, whether surface embroidery, counted cross stitch, goldwork, drawn thread work, crochet, even sewing – I find that my initial moments with the project are always the most important. In the first minutes of actually working with needle and thread, I get a real sense of what the project is going to be about. No more theory, no more vague picture in my head – now I know what must be done to make the project develop toward the picture which I imagined for it.
It’s also in the first session of stitching that I tend to make mistakes while I feel the project out.
With the goldwork iris, I realized a few things right off the bat.
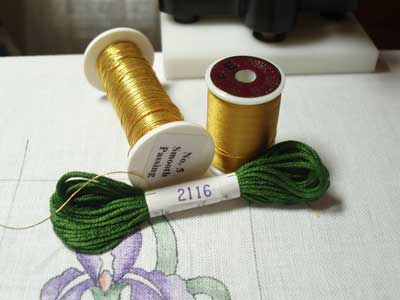
Here are the supplies I initially wanted to start with: #5 smooth passing thread (2% gold), Tire silk for couching the gold areas, and the darkest green soie d’alger, which would make up the first colored stitches.
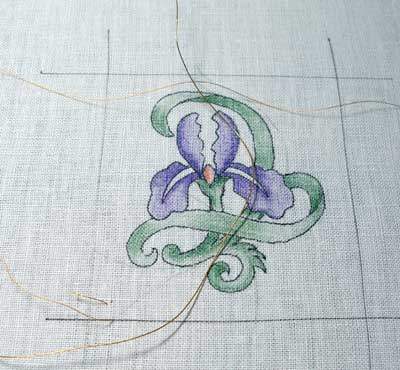
Because this was a 15-minute session, I set the timer before cutting threads and threading needles.
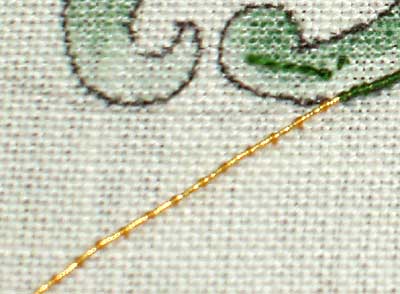
I began couching the gold in the lower left corner, working up toward the swirly base of the iris. This looks positively terrible! Anyway, Tire silk is extremely fine thread. I do like it for couching the gold, but…
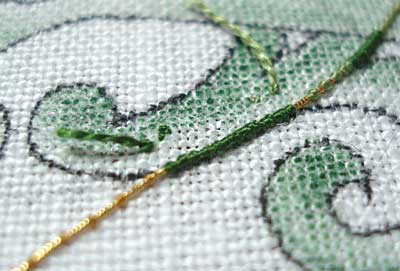
… compared to the soie d’alger, it is really too fine. I think I’d rather use a thread closer to the size of the soie d’alger. Otherwise, I’m afraid that, down the road, I’ll have a warping problem with the piece – the colored threads will take up more space over the gold and push the design out.
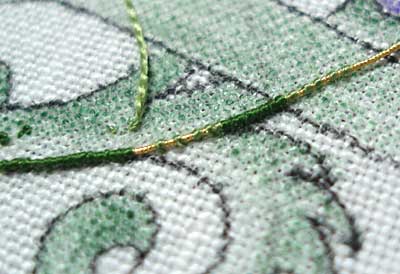
Another thing I didn’t like: in my first section of dark green over the outline, the green silk is bulging here and there. Soie d’alger is a 2-ply twisted thread, much like DMC cotton. As the thread works in and out of the fabric, the twist can become tighter or looser, and the plies can lay on top of each other (twisting over each other) just as the stitch is settled into its place. In most surface embroidery techniques, this isn’t really a problem. It’s the natural way the thread works. But in this technique, I don’t want any extra bulges! I’ll need to pay closer attention to that. A laying tool will help, but… I don’t really want to use one!
I’m thinking about going back through my threads to see if I might have some flat silk that I can use instead. I do have a collection of Helen Stevens’s TESS, but I don’t know if it includes any purples.
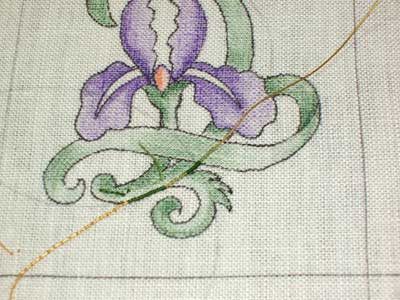
In any case, this is the 15 minute session! Whoo-hoo! Doesn’t seem like much, does it? I don’t like the “angular” look of the gold, and I don’t like the stitching.
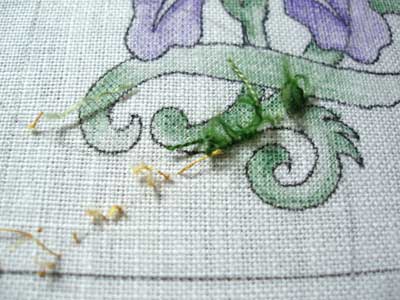
So guess what I did the next time I had 15 minutes? Right! I’m starting again, with some wiser (hopefully!) decisions. If I can switch to flat silk, I’ll continue to work with the Tire thread for couching the gold. If I don’t have suitable colors in the flat silks, I’ll probably switch my gold couching thread to something thicker – maybe soie 100/3.
I’m pretty sure, so far, that Or Nué is something you have to give a chance. One gold thread couched isn’t going to reveal impressive results. Still. I want to make some changes before going any further!
Any advice or suggestions?
For more information on different silk threads, you’ll find a few articles that compare different types of silks under Tips and Tricks for Hand Embroidery.


Hang in there – but you really need to use the mellore, no matter how much you resist the idea. I’m trying a circular Or Nue design and had the same bunching, clumping problem with the silk thread, no matter how careful I was. (I spent so much time being “careful” that this fun experiment was threatening to take years!) Then, in desperation, I just started pushing and poking with the mellore and everything looked a LOT better. And, you’re quite correct – it’s necessary to just soldier on for a while, because it takes quite a while to build up enough area to give you a real feel for the image you’re creating.
Lauren
Today I’ve posted something like this! Not in the start – a satin stitch in a flower that was the wrong direction! (do you see what I mean?)
When I did that blue flower or nue thingy I decided that I didn’t like the solid areas and that next time I tried this I would have no areas that are totally solid. It looks to me like you have some bits where the green is (or rather was, eh?) very dense and the stitches look like they are possibly overlapping. Perhaps you can try to ensure that you have no overlapping stitches and let just the tiniest sliver of gold show through even in the areas where you want the most coverage.
Also, I thought you were going to couch in circles. Is that correct or did I just imagine it? 🙂
So are you going to use gold-colored d’Alger for the gold areas? It would be the same thickness as the rest of the design. . .
I agree with Margaret, leave a little tiny gap between stitches. It should make the whole piece shinier and prevent such drastic build-up of thread.
I love this design so much!!! It is going to be fabulous!
-Christiana
Well, it looks like I’ll continue with the soie d’alger. I’ll follow your suggestions and leave some space between all the threads, even where I want a heavier line. This means (aaargh!!) I have to do a little more picking, as now I have two strands of gold down…
But rather get it right now, then be irritated with it as it progresses!
Thanks!
MC
What about trying the stained glass look on all the black outline?