A few months ago, Pamela Alley e-mailed me a kind of photo tutorial on how she organizes her cotton floss, and in Inspirations #61, there’s a little blurb on how to set up a skein of coton a broder for use. Pamela’s method (which is for stranded cotton) and the method in Inspirations #61 are similar, despite the difference in thread types, and they are both the way I’ve normally organized my coton a broder (but not my floss), so I thought I’d show you here…
Coton a broder is a specialty DMC thread, used for whitework, cutwork, etc. It’s perfect for use in monogramming. It makes beautiful satin stitches. Coton a broder isn’t widely available. Even most specialty needlework shops don’t carry it, or if they do, it’s in the larger sizes (#12 or #16) only. You can purchase coton a broder in size 12 (largest) through size 40 (smallest), in strange increments that make little sense to me. They go 12, 16, 20, then by 5’s. #16 coton a broder is about the same size as floche, but they have a different number of plies that make up the thread – coton a broder is a 4-ply thread, floche is a 5-ply thread. I order my coton a broder from Lacis. Sold as “cutwork thread” or coton a broder (you’ll find it called both on the Lacis website), it comes in white and ecru in most sizes, and in size 25, it comes in a variety of other colors, too. I just buy white. If I want this type of thread in color, I go with floche, as it has a wider range of colors and shades.
Ok, so that’s the thread.
The thread comes in a skein, but it isn’t a pull skein, like the kind regular stranded floss comes in. It’s a loop that is looped again back on itself.
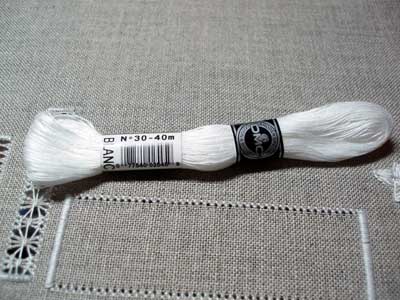
The higher count threads make up shorter, fatter skeins, while the lower count (larger threads) make up longer, skinnier skeins.
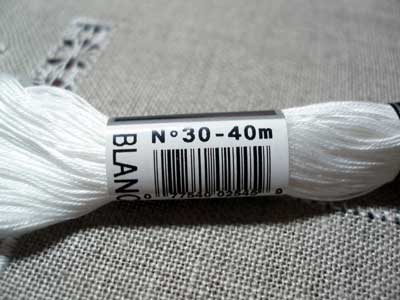
On the label, you’ll see the size of the thread marked, as well as the length of thread in the skein.
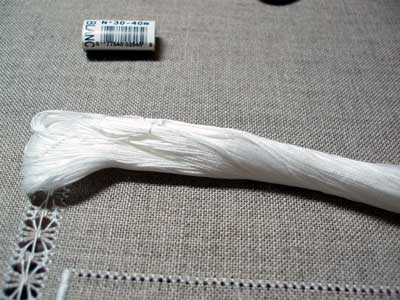
To prepare the skein for working with, slide both labels off (there’s a small “DMC” label on there, which I don’t find necessary to keep). Save the label with the thread number on it, because you’ll use that for identification of the thread.
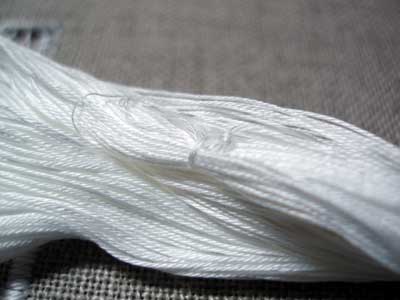
When the labels are off, look for the little tied-up area, where part of the bundle is tied perpendicular to the rest of the skein.
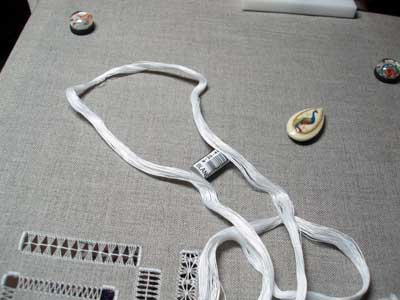
Hold the skein at the little tied area (just holding the bunch that is tied), and give the skein a gentle shake. It will fall out into a long loop.
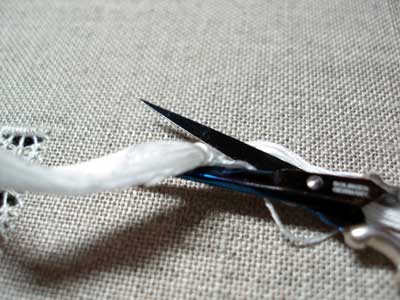
Cut the skein where it is tied, and remove the little tying thread. I also cut the skein a second time, just opposite of the first cut, so that I have perfect lengths of threads for working with. Now, you don’t have to do this – some people like working with longer lengths of thread. I personally can never stand working with a thread more than 16″ – 18″ long, and 20″ is pushing it for me! Why? Well, for one thing, I can stitch faster with shorter lengths of thread. For another, after a while of stitching, threads start to fuzz up. Using shorter lengths ensures that I don’t get fuzzy threads. I’d rather go through the rigmarole of starting and stopping a thread than put up with fuzzy threads!
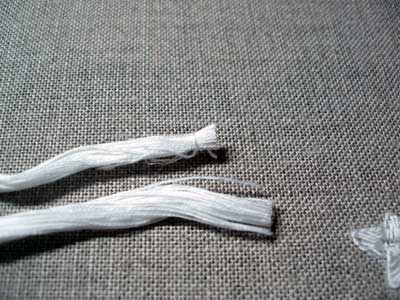
There’s the nice clean cut. Use sharp scissors, by the way! Using dull ones to cut this bunch of threads will make it harder for you to thread your needle later on – or at least, will require you to trim up before you do.
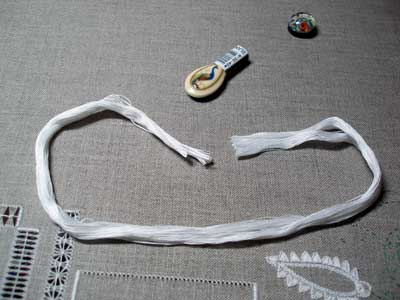
Now you have the long label with the thread size on it, and your skein, cut to working-sized threads.
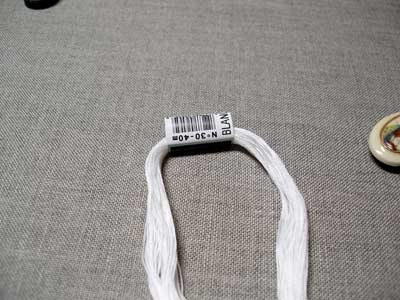
Thread the skein back into the label.
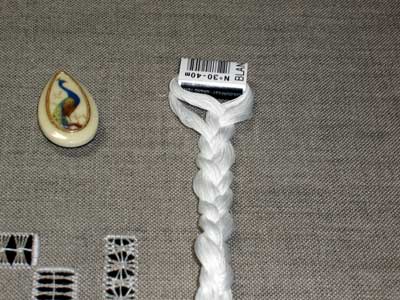
Then separate three sections of thread and work a soft braid with the three sections, so that the label is at the top.
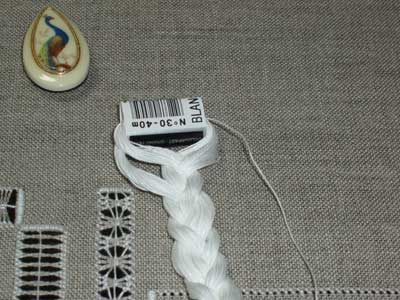
Selecting a thread from the top near the label, pull one side out of the braid, then pull the other side out, and you’re ready to stitch.
This is a nice way to organize threads, especially threads that come on looped skeins, like coton a broder and perle cotton.
Incidentally, I have another way I’m organizing my whitework threads right now, too – it is a combination of this method and another, and was the result of stopping in at an office supply store the other day. I’ll have to show you my weird set-up one of these days!
Do you have any thread organization tips? Feel free to let the rest of us know how you prepare your thread and organize it for a project!


Thank you for this very informative post re: coton a broder — I’ve been wanting to do a monogram and I think this is probably the best choice, don’t you think? What size do you use most frequently?
I’m ashamed to say that my threads (and labels!) are in a real mess … so good that I read this easy yet great tip!Francesca
Hi, Susan! Thanks for your comment. For white monograms, I love this thread! If it’s a satin stitched monogram, I’d go with a #25, unless you’re using a really really fine fabric, then I’d go with a #40. But 25 is nice for medium fabrics.
Thanks, Mary! This is a fabulous tip!
In my town I can’t find that coton a broder DMC…
I have looked on the DMC website, and can find nothing about Coton a Broder. Traditional stitches here in Canada carries a thread called Broder Special, which I also can`t find on the DMC site. Is Broder Special another name for Coton a Broder? I would love to find a tight twist cotton thread for pulled and drawn work other than size 12 pearl cotton. I don`t use linen thread much beacause it fuzzes easily and really needs to be waxed to be strong. Help?
I am looking for an iron on transfer of a Giesha Girl for a tablecloth I wish to stitch for my daughter. Can you help me with this.
Hope you can help!! I have looked most everywhere.
Many thanks
Marvene
Hi, Marvene – I not familiar with one, but maybe another reader here on Needle ‘n Thread will see your question and be able to help. An alternative is to look up coloring book images of Giesha girls and use an iron on pen and make your own transfer. Sublime Stitching has a very good iron on pen available.
Brilliant! I’m off to fix my threads!
-Christiana
mj – yes! It is Broder Special. Same thing!!!
You won’t find it on the DMC USA website, methinks. I think it comes from DMC France.
Hope that helps!
MC
Yes, it does…thanks so much Mary!
I needed this! I use a lot of perle cotton and I had been winding them on wooden clothespins, which sort of works but they can get messy if they start to unwind. I love your method of pre-cutting and then braiding them together.
Coton a Broder in several sizes – as fine as 40 – is available from Chadwick Heirlooms in Richmond, Virginia. It may not show on the website, but I know they have it in stock.
How clever! Thank you; I’m going to keep this in mind for my floss, actually, as I never can manage to do the pull without producing a dreadful tangle.
I like this way to cut the pearl cotton, maybe I won’t loose the number label.
How do you store the threads? There has to be a better way than using snack size ziploc bags.
Sure wish I had watched this before I spent an hour untangling my skein of perle cotton last night. 🙂 I definitely needed this! 😉
Love this. I often buy tangled embroidery thread very inexpensively at thrift shops or garage sales. I sort the threads, cut them to 18-20 inch lengths, sort them into color groups (reds, yellow/golds, etc.), then braid them loosely as you have done, all the colors together. I can select the color I want. I can feel the smooth and rough directions of the thread by running it between my fingers.
Many times the thread has already been cut to length for the popular friendship bracelets before it is donated. I hate to see good thread be wasted.
Hi Mary;
I like this way of organizing skeins. However, I am writing you because I love the drawn thread motif thats looks a bit like a flower in the fabric you are using as the background for the above photos. Where can I find the directions for this drawn thread pattern? And, are you using the DMC coton a broder for the stitching? Thank you, Joy
I use this very method for all my DMC threads. The only difference is I use both of the labels at the top and then hang the whole thing from an average sized safety pin. I actually unwind the skein of thread and rewind it about around an 18 inch length of cardboard. Then I cut one end loose and thread on both labels. All then braid them together and then I then fasten them in numerical order to Loran boards with the holes punched in them and put them all in a three ring Loran binder that folds over and around the boards and threads. I’ve done this for about 25 years and the safety pins are still very shiny. No rust!