After I dressed my slate frame last weekend, I transferred the design onto the fabric in a kind of —- well, for lack of a better word, roundabout way.
with the piece of linen that’s stretched on my frame, I’m making a kind of bag – it’s more of a pouch, I suppose – kind of like a large, lined fabric envelope (only the back of the “envelope” is the front of the pouch). On the front cover, I’m embroidering a design, and on the inside of the front of the pouch (after you lift up the flap), I’m embroidering a sentence.
The first thing I did was draw out the whole pattern for the pouch itself onto graph paper, so I could test its size and how well it would fold up. Then I drew the design for the front flap and the letters for the sentence on the inside.
Have you ever used Swedish tracing paper? It’s a sewable, sturdy fabric / paper that feels a bit like interfacing, but softer. It’s drapable and sewable, so you can make master patterns out of it, or trial pieces (which you can then sew up and adjust). I drew out my pouch pattern on the Swedish tracing paper first.
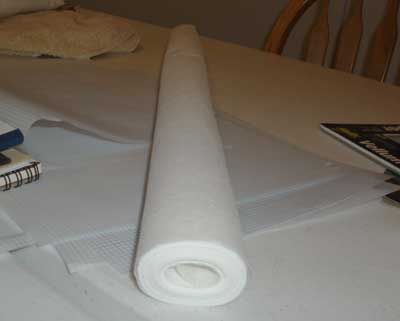
That’s what a roll of it looks like.
There are a couple reasons I wanted to use this stuff in particular on this project, the foremost being that it is nice to baste on and use as a fabric protector while you’re stitching, cutting away the areas that require stitching as you get to them. I’ve used regular tissue paper for this before, but I don’t really like tissue paper.
Anyway, I basted the Swedish tracing paper on, basting around the actual seam line (I’ll cut further out when I’m finished with the stitching), and basting a half an inch in, where I intend to stitch a decorative line.
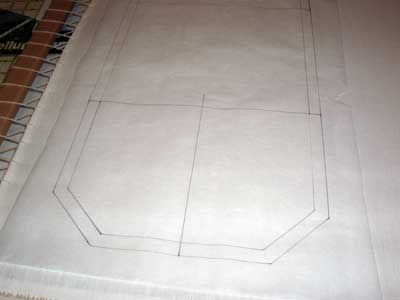
That’s the pattern for the pouch, traced onto the tracing paper and laid on top of the linen on the slate frame.
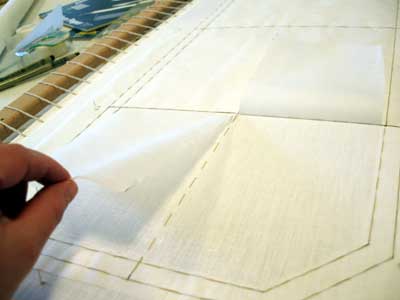
I basted the tracing paper on, and also basted down the middle of the front flap of the pouch, so I could center my design with ease. Then I cut out the tracing paper on three sides of the pouch and on each side of the middle basting line, so I could lift up two flaps on the front.
I can lift the flaps up and down and lay them on the fabric when I want it covered, so I can work on the linen without getting it dirty when I rest hands or arms on it.
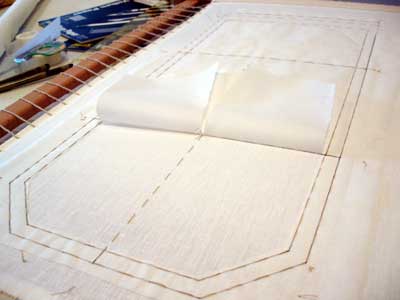
You can see both sides of the flaps lifted back.
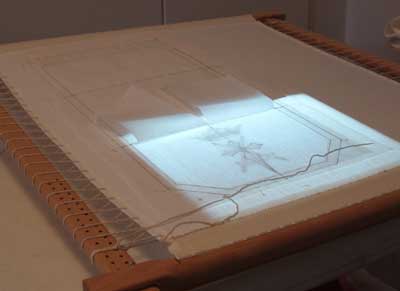
Then, propping the frame on a couple stacks of books in the back (level with my light table), I traced my design onto the middle of the front flap, using a hard pencil and a relatively light touch.
The design, you can see, is towards the front edge of the frame. The sentence that’ll be embroidered on the inside front of the pouch is traced on the back edge of the frame. All of this works out well, because I don’t have to stretch to reach the inside of the frame, as there’s no embroidery there.
And then I set the frame up on my handy-dandy slate frame stand – an amazing apparatus that does the job quite well!
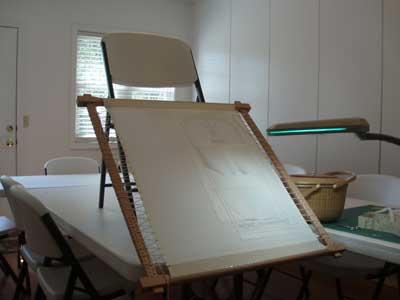
Yep, it’s chair on top of a table. The frame hangs perfectly on the edge of the chair. I can rest the front edge of the frame on a small stack of books to lift it up, or I can just rest it on my arm – either work just fine!
A couple points: you can transfer your design on your fabric before you mount it on the frame, but I like the taut fabric for drawing on. You can also transfer the design a bunch of different ways, without having to use a light table – you can use dressmaker’s carbon, prick and pounce, etc. I did it this way because it seemed to be the easiest approach at the time!
And now I need to get the stitching done. It was supposed to be finished by July 20th. Think I can manage? It’s mostly simple whitework, though a lot of it is satin stitch, which seems to take longer!
I better get to it!


Hey,
I just wanted to let you know that I nominated you as one of my favorite blogs on my blog. I am so grateful to you for the monograms.
Wendy
Thanks, Wendy!! I’m glad you like the monograms. They’re fun, aren’t they?
MC
I love the frame, looks so easy to stich on. And the frame stand is magnificent-look forward to seeing the embroidery
Hi, Mary-
Who needs embroidery frame trestles?! Your gizmo seems to do the job just as well!!
🙂
Christiana
Mary,
I know you have mentioned frames and hoops many times, and I have been putting it off for having relied on someone that was offering me embroidery hoops/frames.
I have been given 5 hoops, but these are for hand quilting no frames!!! ARG…
Would you please tell me where I can purchase a frame like the one you have pictured here?
I know you are very busy, so I’ll wait until you have time to reply.
Many thanks.
Hi, Velia – you might try Tristan Brooks Designs. They may have some slate frames in stock. Hope that helps! -MC