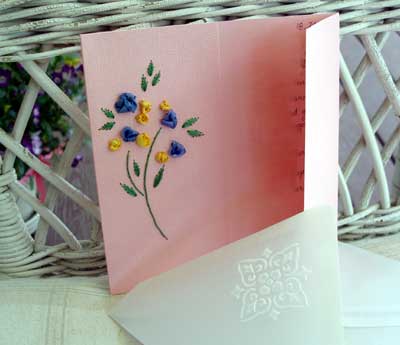
This afternoon, I remembered one of the reasons why silk ribbon embroidery can be so appealing: it can cover space and add color faster than thread can! Today’s my mom’s birthday. I intended to embroider for her a Very Nice Birthday Card – but time slipped away. This afternoon, in a pinch, using a bit of a shortcut or two, I managed to squeak one out before the Birthday Gathering.
And this is where silk ribbon embroidery came in handy! When you’re embroidering a flower with embroidery floss, and you want the flower to be the focus, it can take some time to execute a decent representation of a flower. But if you use silk ribbon, you can manage an ok flower in one stitch – a flower that’s colorful, big enough to be noticed, and, best of all, very quickly managed!
There are tons of ways to make silk ribbon flowers or roses, but I stuck with something really simple. In fact, I just did whatever I had to do to get an ok-looking blob (I admit it) where a flower should be.
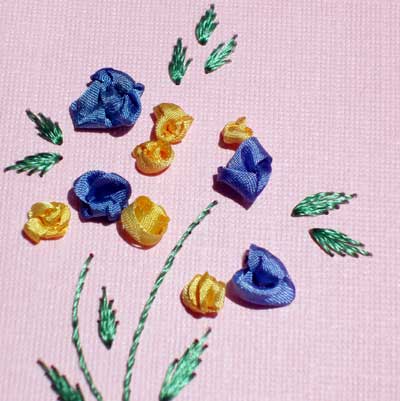
On paper, when using ribbon to make flowers, you need to pierce two medium-to-large sized holes in close proximity. You come up through the first hole, tie a loose knot in your ribbon right next to the paper, then go down in the second hole. You can also make a French knot with the ribbon, keeping the wraps loose, and, depending on the size of the flower, wrapping the ribbon around the needle three or four times, even. Then you take the ribbon to the back through the second hole.

So, my first shortcut was to use ribbon to make the flowers. My second shortcut was to use a “gate-fold” card – that is, a card folded in two places, so that, when standing up, normally it would open like double doors. Why is this a shortcut?
Instead of embroidering on a separate piece of paper and having to size it and line things up, I embroidered on one half of the front gate. If I left the card so that the left-hand door still could swing open, you’d be able to see the threads on the back of that part of the card (not too attractive). I didn’t want to spend time sizing paper and cutting and so forth, so I just glued that side of the card down. This left me a narrow space for writing on the inside of the card – perfect for a short birthday message.

These are the flowers up close. Admittedly, they aren’t so realistic looking, but I was happy enough with the results! Some of them are single knots tied in the ribbon before passing it through the second hole; some of them are French knots, wrapped four or more times; some of them are a combination of both!

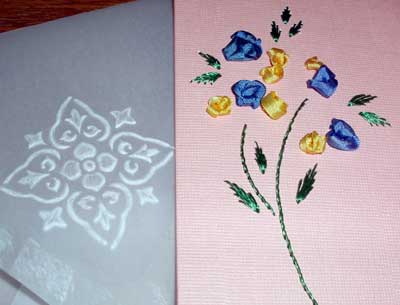
In retrospect, if I had a little extra time, I would have filled in with some quick white French knots out of a couple strands of floss. Or some lazy daisies. But I didn’t have time! So this sufficed. I used a vellum envelope and embossed the tip of the flap – a quick way to dress up an envelope and make the whole thing into a decent enough presentation!
From start to finish, including getting out the supplies and cleaning up, the card took me a little over 30 minutes… and I’d rather spend 30 minutes making my own card out of my own needle ‘n thread than spend $4 or more at the local drugstore for a Hallmark card that wouldn’t quite say the right thing!
I’d like to say I’m going back to my handwork right now (*sigh*), but now it’s time to get back to Real Work!
Don’t forget the embroidery stash give-away for this month! I’ll select a winner (by drawing a name) tomorrow morning, so get your comment in on that post while you still have time!
Enjoy the rest of the weekend!


I’ve been stitching my own cards, for all occasions, for a few years. The recipients are always thrilled to receive them because it shows you cared enough to add your personal touch.