This “linen pouch” (a bag used by a priest to store small altar linens in) was made four years ago as a gift. The pouch is constructed from upholstery fabrics – the outside, a burgandy moire with a small fleur de lys pattern, and the inside, a gold moire. I used silks (soie d’alger and Caron Collection waterlilies) with a tiny gold blending filament here and there.
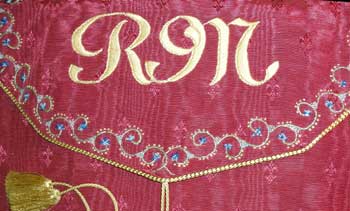
This is a front view of the linen pouch. In retrospect, I’m thinking of everything else I could have or should have done – and certainly, the fact that the initials are just way too big. The initials serve a purpose – the priest keeps his own personal altar linens in this bag. But my goodness! They’re large! Not only that, but they look like “R 9N” instead of “RM.”
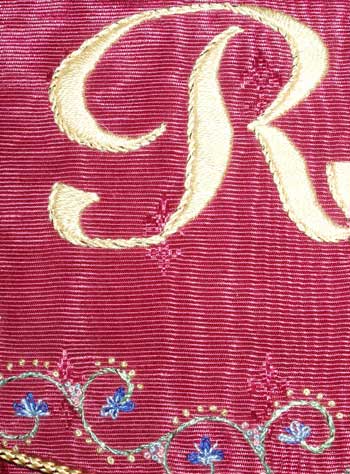
The initials are mostly satin stitched, with padding underneath. I padded them using one strand of soie d’alger, and stitched them with one strand. On the edges of the initials, I used stem stitch, and followed this by running a fine gold blending filament through the stem stitch. I added the blending filament after, instead of threading it with the thread in the needle, because passing through the fabric takes a toll on metallics like this.
The decorative boarder is worked in stem stitch (Caron waterlilies – a greenish overdyed) and lazy daisy. The french knot clusters are also Caron waterlilies. There’s a bit of gold blending filament worked in with the green stem stitch as well.
The pouch is edged with a gold braid, and finished at the tip of the flap with gold tassles, which wrap around an embroidered covered button on the front (detail below).
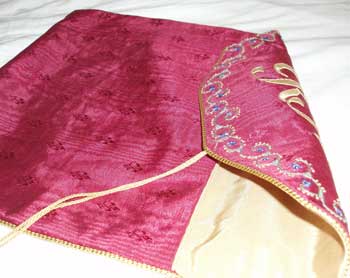
The inside of the pouch is gold moire something-or-other (it’s an upholstery fabric – nothing super-fancy!). The whole item is rather limp, to give it room to expand when linens are added – the same reason the closure for it is cording wrapped around a button. When the pouch is full, the cording wraps fewer times around the button. I did line the pouch with a lightweight interfacing. In fact, I used the interfacing as my embroidery pattern transfer. I drew the design on the interfacing, and basted it onto the wrong side of the fabric. I stitched over a light, backlighting the dark fabric, and in this way, I could see the design without having to mark on the front of the fabric.
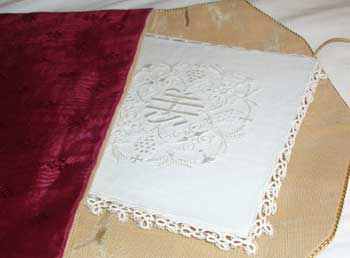
The pouch holds various altar linens – here, you see a pall, which is a small square piece of linen. I used legacy linen on the pall, and stitched the design in one strand of YLI white silk. For four years of use, it doesn’t look too bad! The edges are hand-tatted in white.
I designed the front of the pall on graph paper, traced it onto tracing paper, then used blue dressmaker’s carbon to transfer the design onto the linen. The stitches I used were satin stitch, wheat stitch, stem stitch, and whipped backstitch.
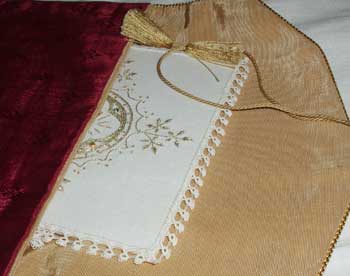
Peeking out of the pouch here is another pall made, again, of white linen, the embroidery done in metallic gold. I did not emboirder this one. I like the filigree on the outside of the design, but I’m not too keen on the overall design, although the embroidery is done well.

And here’s a close-up of the button, worked in whipped backstitch with one strand of soie d’alger. The button is the reason I have the whole thing back in my possession after four years. It fell off, so it was sent home for repairs. Initially, I merely pinned the button on with a button pin (safety pin with a bump in it). Over time, this has worn away a little hole, so now I have to think of some ingenious way to fix it and to anchor the button permanently.
Any suggestions??
This pattern for the pouch could really be used for a number of things. I made up the pattern myself, and will eventually post a step-by-step for construction. Looking back on this project (which was the first of its kind for me, but not the last), I can think of a hundred ways to improve it, some of which I plan to employ on my next similar project.


I would suggest that you attach the button with thread as usual but use a plain button on the underside to reinforce the fabric. In other words, sew two buttons back-to-back.
Your work is amazing!
Perhaps you could patch the hole from the front (or back) using a similar fabric, or if you have the same fabric. Then embroider over the patch to conceal it, also could make the button look a little more special. Then do as Cheryl Anderson said and re-enforce the back with another button or some other stiff … something.
Lovely work!
Thanks, Logan! I’ve since taken care of the button problem, much as you and Cheryl recommended, and now the bag has a tassle problem, so I need to replace one of the tassles… I’d like to do it without having to replace the whole cord. Another dilemma!
Thank you!!
I would like to get the pattern for this beautiful bag as my brother is a priest. It would make a wonderful Christmas gift.
Hi, Jennifer! I don’t have a specific pattern for the pouch. I’ve made several of these over the years. This article explains better how it is constructed: https://needlenthread.wpengine.com/2008/08/finishing-linen-pouch-what-joy-what.html You can alter the size, but the construction is the same, regardless of size. Hope that helps!
Hello Mary,
I’ve been making chalice veils for a newly ordained priest. He has a Very Tall chalice, so standard size doesn’t work (or it looks ridiculous when draped on the chalice). I stumbled upon your pouch description and love the idea! It would make a perfect gift for a special priest, and that would be the same one. You mentioned you were going to create a pattern. Is that available? I couldn’t find it anywhere.
Your posts have been invaluable in choosing the right materials/threads, etc for my ecclesiastical projects (which will also include some special palls). It’s nice to know that the creation of such work by hand is still being kept alive, that the centuries-old tradition is still here.
God bless! and thanks again.
Shannon
Oh, I did find the pattern. Thank you!
What is the dimension of the pouch?