When considering hand embroidery techniques, stitches, and whatnot, I think it’s difficult to decide how to categorize some stitches. For example, stem stitch can be a line stitch, but it can also be a filling stitch. Same with outline, chain, split, etc. So sometimes categorizing stitches too particularly can be deceiving and restrictive.
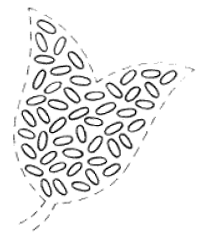
Continuing on with filling stitches, though, I’ll give you a few more to add to your repertoire. I’m trying to stick with the “simple” filling stitches, and work up to the ones that take a bit more practice to get “just right” (like satin stitch)…. Seed Stitch: Given the fact that seed stitch is merely the filling of a space with random straight stitches, it would seem as if it were one of the easiest stitches to execute. But there’s a hitch to the seed stitch: for a really good-looking effect, you have to keep your stitches uniform in size. Random seed stitches that vary in size end up looking a bit juvenile. Try to make all your straight stitches (seeding) small, uniform in size, and evenly spaced across the area you are filling.
Direction: Make tiny straight stitches within the area to be filled, keeping your stitches uniform in size and the spaces between your stitches as uniform as possible. You can create a “shaded” effect by working stitches closer together in one part of the fill area, and then farther apart in other parts of the area. But the key to really nice-looking seeding is uniformity!
Note: Some stitchers will make two tiny parallel straight stitches right next to each other – sometimes even beginning both stitches at the same point in the fabric, and ending both stitches at the same point. This creates a “fat” little seed stitch, and it can look very nice. Some stitchers also work their seeding in parallel lines, alternating the placement of the stitches to form a “brick” pattern. This can create a very stylized and formal-looking filling.
 Stem Stitch Filling or Stem Stitch Shading: if you’ve already worked the stem stitch, you’ll find this filling technique easier. Stem stitch can be used to fill up a space by working rows of stem stitches right next to each other – packing them neatly to cover all the fabric within the fill area. To add shading to your filled area, change the color of your floss in gradual increments of shading.
Direction: remember that, in stem stitch, the thread always lies below (or to the right) of the needle. Work the outside rows along the shape of the pattern first. To see detailed instruction on stem stitch, go here.
Other stitches:
- Basic Filling Stitches, Part I – Fishbone & Flat Stitch
- Line Stitches
- Chain Stitches
- Detached Stitches & Knots


Hi Mary, I’m looking for your fishbone instructions. I got to this page via the Embroidered Flower Gardens Hollyhocks page.
Trouble is, I clicked on a link saying “fishbone” and the fishbone link on this page simply leads to itself (i.e. refreshes this page).
Thought you might want to know.
(BTW this is the first problem I’ve had with your site after a Very Long Time subscribed. Thank you for such clear, informative and entertaining posts – and for the time you’ve invested in doing them!)
Hi, Tessa – Here’s the link to the fishbone stitch tutorial: https://needlenthread.wpengine.com/2006/11/fishbone-stitch-video-tutorial.html Thanks for letting me know about the “bum” link there – I’ll see if I can fix it! ~MC
Thank you, Mary – I did find it (after commenting I used the search function) and am thinking up some way to use it in my next design. Your work on this site is really helping me learn how to think about the stitches and designs I’m using!
Ms Mary,
I’m trying to find the instructions for the flat stitch, I saw Tessa’s comment and that helped me find the fishbone instructions, but I tried searching flat stitch and all I could find was this page. Any suggestions?
Hi, Emmy – you can find a diagram for it here: https://needlenthread.wpengine.com/2006/07/basic-embroidery-stitches-filling-stitches-i.html
I do not find the video seed stitch.
Un saludo,
Carmen