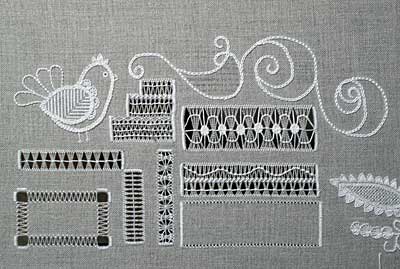
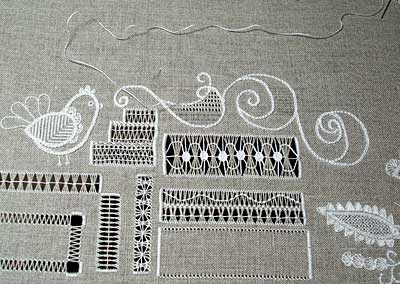
Not a whole lot to show you on the whitework and drawn thread sampler, but at least I did manage a wee bit of stitching. This is the progress so far…
As a short background, my purpose in this project is to explore a variety of whitework and whitework-related techniques. I’m working on a 36 count natural colored linen. It’s an even-weave linen, meaning that the warp and weft threads are approximately the same size, so that one can count horizontally or vertically approximately 36 threads in an inch. It’s not the ideal ground for some whitework techniques, but it works great for drawn thread, pulled thread, and Schwalm embroidery.
Normally, whitework is worked white-on-white, but I chose a darker background fabric for the sake of the photos.
As I’ve been working on the sampler – which is totally random, just doing “whatever” whenever and wherever (this is probably going to be a bit of a mistake!), I keep thinking ahead to the next thing I want to do on it. I’m contemplating the difficulties of good satin stitching on this fabric. I generally like working satin stitch on a higher count fabric that isn’t necessarily even-weave (though it can be). Anyway, I think I can manage it on this fabric, as long as I use a crewel needle or similar, with a sharp point. With tapestry needles that have a blunt point, it is difficult to stitch into the fabric threads, but with satin stitching, to get a smooth edge, I know I’m going to have to split fabric threads.
Looking ahead to some satin stitching, I’m trying to decide precisely what I want to satin stitch. The logical choice would be a monogram, since they are very often the subject of whitework. I want to demonstrate a technique called trailing, though, so if I select a monogram, it will probably be the best letter to demonstrate the technique of trailing. It will need to be flowy, with narrower and wider parts. I’m thinking an “S”. But why would I want something embroidered with an “S” on it??! So we’ll see about that!
In the meantime, this is what I’ve been doing on the sampler. Now, I know it’s kinda weird-looking! But let me tell you how it developed before you chalk it up as too bizarre and unfitting for the rest of the sampler so far!!

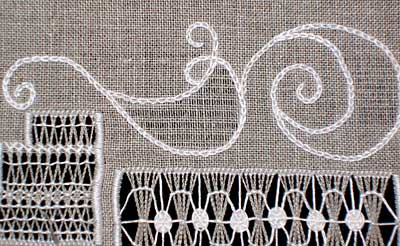
See those big curls. Weird. But back to that in a bit… The last time we visited the whitework sampler, I had not yet worked the motif directly below the insanely large curly things. In that drawn thread patch, I attempted to mimic a variation that I saw in Therese Dillmont’s book, Drawn Thread Work, which I reviewed a few weeks ago. I’m not satisfied with the results. I think it looks bizarre. But, it was interesting, and at least it was something to learn. The wheels in the middle (the big white dots) are made by weaving the thread around the intersections of the the coral knot threads traveling up and down from one bunch of threads to the next. In Dillmont’s illustration, she doesn’t have the vertical white threads working up to the wheels, but I put them in there because I didn’t do the wheels as I went, while working the coral knot “waves.” Those vertical lines make the whole thing look kind of strange!

Now, about these chunky curly things. They were completely spontaneous. I wanted to work a variety of drawn thread and pulled thread fillings, but I didn’t want to keep working in squares. I thought about circles (and I still might do some!) but I ended up doing these scrolly things instead. They’re worked in chain stitch, using a #16 coton a broder.
Inside the curlies, I withdrew some threads so that I could work some filling techniques.

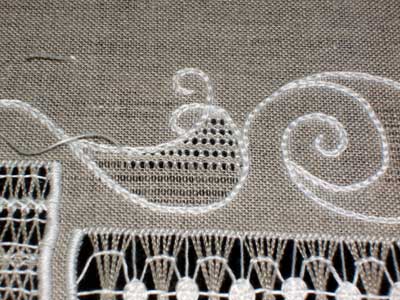
And here’s the first attempt. Hilariously enough (I’m not really laughing! Ok, actually, now I am!), my first filling was going to be a reverse wave stitch, which I was going to photograph upclose for tutorial. (You can see the reverse wave stitch in the crown on top of the Schwalm pomogranate.) Oh, golly! I started going, and realized I was not really doing the reverse wave stitch. I had run amuck somehow. But since it was working out (more or less), I left it.
Notice that in this particular curl, the drawn thread areas get closer together towards the top. You see, originally I was taking out two threads from the fabric and leaving three in. As I worked higher on the curl, I took out two threads and left only two in between the drawn thread areas. I thought that this would help give a “shaded” look (just an experiment!) to the curl, because the white stitches would be closer together. But once I got going, I realized it isn’t the white stitches that show – it’s the gaping holes. They get closer together, but it isn’t that noticeable!

So, this is where I am, working out the fillings in the big fat curls. I’m planning on working some more decorative stitching outside the curls – different sized scallops or something. We’ll see how that develops!
And then, once I finish these elements, I’ll move on to… well, something else in the sampler. I was thinking of going straight into satin stitch at first, but the more I look at the sampler right now, the more I think I’ll add some filling. But then on the other hand, if I don’t break away from this drawn thread stuff soon, I fear the whole sampler will end up dedicated to drawn thread, with a bit o’ Schwalm thrown in!
What think you? Any ideas for future elements of the sampler? I’m all ears!
More Drawn Thread and Whitework Embroidery
Drawn Thread – Securing Edges with Re-Weaving
Drawn Thread – Securing Edges with Satin Stitch
Drawn Thread – Hemstitch Tutorial
Drawn Thread – Chain Loop Bunches
Sampler Update with Schwalm Embroidery
Online Book on Drawn Thread Techniques
Diamond Stitch in Drawn Thread Work
Coral Knot Bunches in Drawn Thread Embroidery
Zig-Zags in Drawn Thread Embroidery
All Whitework Articles on Needle ‘n Thread
You can find more tips and tricks for hand embroidery – including all the above tutorials – indexed o
n my Tips and Tricks for Hand Embroidery page.


Precioso tienes una manos maravillosas. Besitos.