Last year, I shared with you some gorgeous needlepainted pictures in a type of embroidery called “Su Embroidery” – it is a Chinese style of embroidery from Suzhou, China, and it is amazing embroidery!
Now, thanks to Margaret Lee of Adelaide, South Australia, and Country Bumpkin you can learn Su Embroidery techniques via the handy “mechanism” of a kit.
One of the best ways to learn a technique (if you can’t attend a class) is to invest in a kit produced by a master in that technique. Find a technique that entices you, then find a designer who produces kits and books focusing on that technique, and use the kit as a learning tool. It works! If you treat the kit as a learning exercise and work your way through the designer’s steps to complete the kit, you’ll learn much about the embroidery technique. The experience may not always be roses and sunshine and perfect embroidery stitches, but you will definitely progress (and usually by leaps and bounds rather than baby steps) towards a better understanding and ability in that particular technique.
So, if Su Embroidery interests you, you might want to take a look at these complete, inclusive kits by Margaret Lee. I’ll show you one…
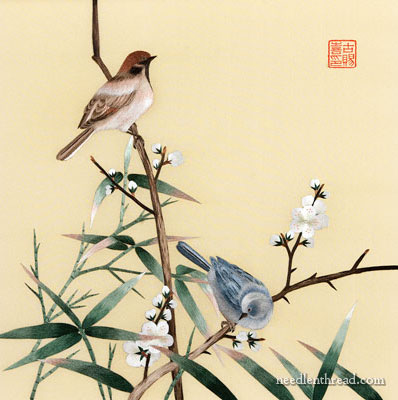
The kit that I have is called Heralding Spring. It features two little birds perched on flowering twigs, surrounded by a bit of green bamboo foliage, and all on a golden background.
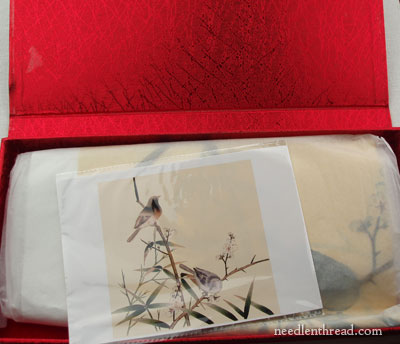
The kit came packaged very neatly in a sturdy decorative red box, with a lid that folds back to reveal the contents within. Love the box!!
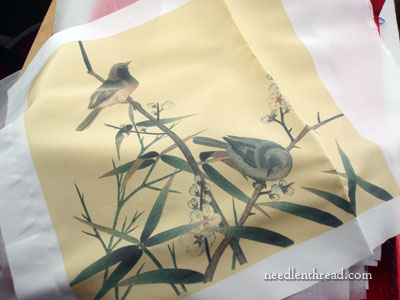
In most Su Embroidery, the picture to be embroidered is actually printed on the silk ground fabric. You can see clear examples of how the Su embroiderer works in Glenn Ketchum’s book, Threads of Light, which I reviewed a while ago. The embroiderer works on the printed fabric, with a large photo or painting of the image being stitched close at hand, to refer to while choosing colors of silk and stitching. Some pieces of Su Embroidery have, literally, hundreds of colors in them.
Margaret Lee’s kits include this pre-printed ground fabric, and you’ll notice that the image of the actual printing on the silk is not as clear or vivid as the photograph. But with your embroidery, you will make the piece that clear and vivid – the embroidery over the printed image is what brings the whole image to life.
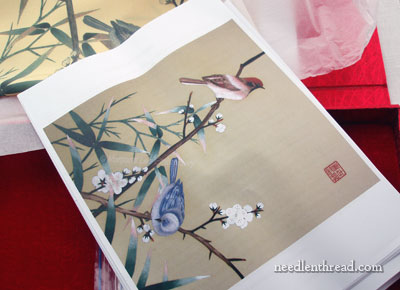
Also included in the kit, of course, is an instructional packet, beginning with a clear, larger image of the completed embroidery.
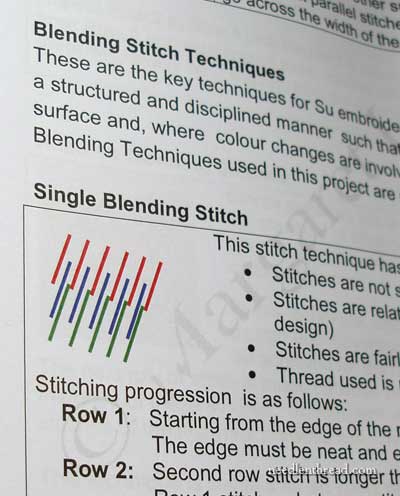
The instructions for completing the embroidery are well written and clear. They’re presented in text and diagram form, in the manner pictured above. After reading through the instructions, I’d say the techniques presented in these kitted projects are not for the beginning stitcher who has never held a needle before. But, for the determined beginner or the budding intermediate stitcher who has at least a basic working knowledge of embroidery, it’s feasible to work the kits. The instructions are clear and they lead you through the whole process.
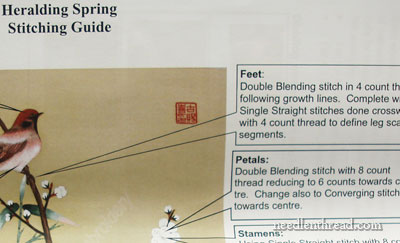
Included in the instructions is also this handy stitching guide, with indications of what type of embroidery goes where on the overall design. I do like it when a clear stitching guide is included in any stitching instructions, so I was happy to see this!
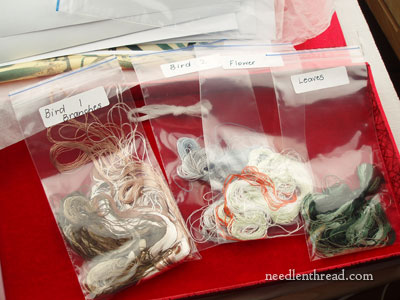
And then, of course, there’s the thread! The silk is separated according to the elements of the design. Now, this is the thing about this type of Chinese filament silk: getting used to the thread may, in fact, be the most difficult part of the project. If you are drawn to Chinese or Japanese embroidery, though, you will eventually have to conquer the fear of filament silk. So don’t intimidated by the thread. Just make sure you’ve scoured your hands and smoothed ’em up a bit before grabbing a hank of this thread!
The kit also includes the needles necessary to complete the project, in a handy little needle case.
If you have a hankering to learn techniques of Chinese embroidery, these kits strike me as a good way to do that. They’re much more economical than traveling to find an instructor in the techniques, and there are very few instructional books written on Su Embroidery. This is the first time I’ve seen kits this thorough for Su Embroidery, too. When you do find kits for this technique, they generally include the printed fabric, the thread, a picture, and maybe (but not always) a paragraph of how-to explanation. They don’t offer much to go on! So it’s very nice to see the thorough instruction in Margaret Lee’s kits, along with all the necessaries to complete the project.
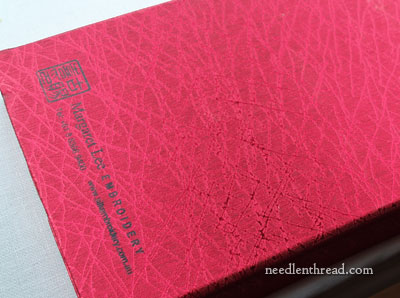
And did I mention I like the red box?!
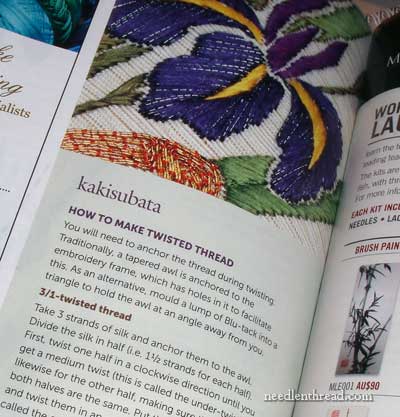
Margaret Lee is also featured in the current issue (#74) of Inspirations. She has a nice little section on how to twist flat silks, to go along with her project in the magazine, which is a Japanese embroidery piece featuring irises.
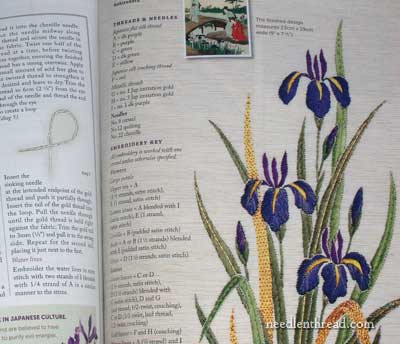
I like this project very much! Often, Japanese embroidery strikes me as somewhat flat and cold, but this project, while adhering to the delicate and sophisticated beauty of Japanese embroidery, also has a certain depth and warmth to it that I like a lot! And I love the way she interspersed the goldwork leaves with the silk leaves – so beautiful!
You can find Margaret Lee’s embroidery kits available through her website, here.
Wishing you a splendiferous weekend – with at least a wee bit of time with your needle and thread!


Hi Mary
What nice news.
Have you ever read “Chinese Embroidery” by Josiane Bertin-Guest? Besides having gorgous pictures of chinese embroidery, it contains an overview of the regional differences, chinese symbolism and 16 different projects.
Tania
Mary–
Thanks for the review of Margaret’s kits. I saw them in the last issue of Inspirations and was going to order some.
But then I had the even better thought of emailing her to see if she is going to be at the Koala Convention needlework workshop in Brisbane this summer, which I will be attending. Turns out that yes, she will be there and says she will be sure to bring each of the kits I want.
Now I’m even more excited to get her kits. I’ve bought several Chinese embroidery kits off ebay, and your assessment of what it included is spot on. It will be nice to see her wares in comparison.
I hope you blog your progress on this kit. Can’t wait to see it!
Carol S.
Thank you!! I do believe I’d like to try this. After I get done with my current project. And I really should finish the one after THAT. lol — thanks for sharing, Mary.
This is how I feel about the wonderful Reticello classes I have taken from expert Diane Clements from Walnut Creek, California. She does all but hold your hand and thread your needle for you, the instructions are that good. Sadly, no red box though.
Thanks for alerting me to this–I saw her in Inspirations but hadn’t looked further. I love the Su embroidery designs. I’m studying Japanese embroidery so I’m experienced with the challenges of flat silk (aided by a fine pumice for my finger tips, a good nailfile, and drier fabric softner sheets). I’m quite taken by the dragonfly design.
Thanks for this! The designs are gorgeous and the prices are very reasonable considering the silks involved.
Thanks for sharing the info on Su embroidery. The kit looks wonderful. I love when things come in pretty boxes. I’m not ready to work with silk filament thread yet, but it’s nice to have a kit source for when I am.
Alas, only in my dreams! But I do love to dream! lol
This, to me, is as stupefyingly boring as paint by numbers.
Thanks Mary but no thanks.
I am now embarking on finishing my Jacobeans and starting Mountmellick. All your fault I might say. You write interesting little articles.
Mary I would like to add a little something here re the your product sellers that you deal with. A lot of the ones you have mentioned I was already dealing with. I have found them on the whole all very good and easy to communicate with.
I do though have to particularly mention who does go that little bit further as her love for her craft is evident in how she not only sells fine items but offers her buyers follow ups with her kits(especially)if you get stuck or don’t quite understand, she will give advice and ideas. This is very good for a begginer or even old coots like me. I recently bought fabric from her and when I opened the fabric out, I found a little note pinned to the selvege saying that this is the inside of the fabric. A printed leaflet advising in how to wash the fabric. I have to say that you don’t get that in a regular shop unless you ask.
I am one who will look for bargains and sales as I too have a budget. I think it very foolish not to. We can look and hunt out the best price but be sorry we did when we get the product. What buyers have to realise that items through chain stores can be cheaper as their buying power is greater. The small businesses have no such power. The difference with the small business is service. How often have you been in a chain and had to wait and wait and wait. Then after that when it is your turn be told they don’t carry that product or the sales person only sells and doesn’t know how it works or anything about it?
Well, when I get good service I am prepared to pay the price. I have found Tanja Berlin is too be known as an ethical and excellent web trader. I hope that she has many more years of good business. She deserves every success.
Thank you Mary for you on going blog. I enjoy it greatly and really like the stitch section. I especially like the Casalguidi stitch. I use it for grubs but slightly different. I will use this stitch in the Mountmellick. Might not be quite Koscher but if you can use butterflies then why not the caterpiller.
MM
Australia
I bought two kits like this from ebay. They took about 2 1/2 months to come from China. Unfortunately, they did not come with directions, and I didn’t know what exactly I was supposed to be doing with the silk thread (although I could kind of surmise the intent). Now, though, I have a better idea of what to do (or maybe, I’ll buy a complete kit, and then I’ll have the instructions )
Thank you for your comprehensive review of these kits. I have used filament silk before and nearly went mad with my hands snagging the thread. I am a gardener so my hands are often less than perfectly smooth hence the problem. So if you are keen on trying embroidery that uses filament silk give some thought to the condition of your hands. Regards Andrea
Nice, useful article. I am just starting to learn Japanese embroidery but also have Margaret Lee’s book The Art of Chinese Embroidery, Foundation Level.
I might try one of the Su embroidery kits mentioned, via Country Bumpkin.
Thank you.
I am looking for a Chinese embroidery instructor. Can you assist me. I live in Leland, North Carolina, USA. That is near Wilmington, NC. I have Margaret Lee’s book and a couple of kits. I believe I need some kind of assistance with learning the various stitches.
Love,
Margaret Baily
Hi, Margaret – I don’t know of any off the top of my head in your area, but in Texas, there’s Blue Bonnet Studios. They have classes and workshops. You might contact them and ask if they know of tutors in your area. Although Japanese embroidery is not exactly the same thing, the aesthetic is similar, and in Atlanta, you’ll find the Japanese Embroidery Center. They also have classes.
Thank you for sharing this! I’m interested in purchasing one of these kits and getting into silk embroidery, but I’m not sure if purchase a supporting frame is required to create the work, or if the kit alone is enough to create the whole piece.
You can set this type of project up on any large embroidery frame, so if you already have a frame, you should be ok.
Did you get a chance to try this out?
Just wondering, do you think it’s possible to do this on a roller frame?
I accidently bought a roller instead of a slate frame… (at the op shop so it doesn’t matter too much)
It should work fine on a roller bar frame. You might have to tension the sides, to get even tension on the whole piece, but in that case, you’re just lacing the sides like you would with a slate frame, and then you can loosen the lacing if you need to roll, and then tighten it up again.